Would it be physically possible to get an ethernet cable directly from the Ruida to a spare LAN port on your network router? (Bypassing the bridge for now)
Then you could temporarily manually configure the Ruida with an available fixed IP address that should work on your LAN e.g. 192.168.0.50 and then test if you can successfully ping the Ruida from any other computer on that network, test with it not plugged in and then plugged in just to make sure you are not pinging something else on the network.
My network router, (the box the internet cable plugs into from the street and it sends out a WiFi signal to my laptop) is right beside my laptop in the office in my house.
My laser machine is in the garage.
To get a WiFi signal for my laptop when I’m in the garage, I have a WiFi booster device plugged in to the wall near my back door of my house, which is halfway between the garage and the office (where the router is).
Thats my ‘network’.
I dont have a range of computers or 20 meters of LAN cable to plug in to my router back at the house.
I moved the booster from the back of the house to the garage (which sort of defies it’s purpose because now its too far away from the router) but when I did that I was able to open the 192.168.42.1 page right away. This worked a few times until it didn’t. I still couldn’t finish the setup though.
At the end of the day, I just want to send a file from my laptop to my laser via the Lightburn Bridge instead of a USB cable while I’m standing right beside my laser machine with my laptop. Is this possible without a university degree?
Do I have to potentially buy a router to create a new network in the garage just to get my computer to connect to the Raspberry? Can it be done via a phone’s personal hotspot? This has been a nightmare experience, with so much time wasted.
If your laser is in an attached garage something like this might be just the ticket. It provides ethernet over the electric lines in your home. It’s only $40. I personally have not used such a device but the technology has been around for a while. Connect your laser direct to the downstream device and set it’s IP adress to one outside the DHCP range of your network.
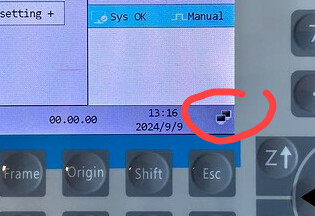
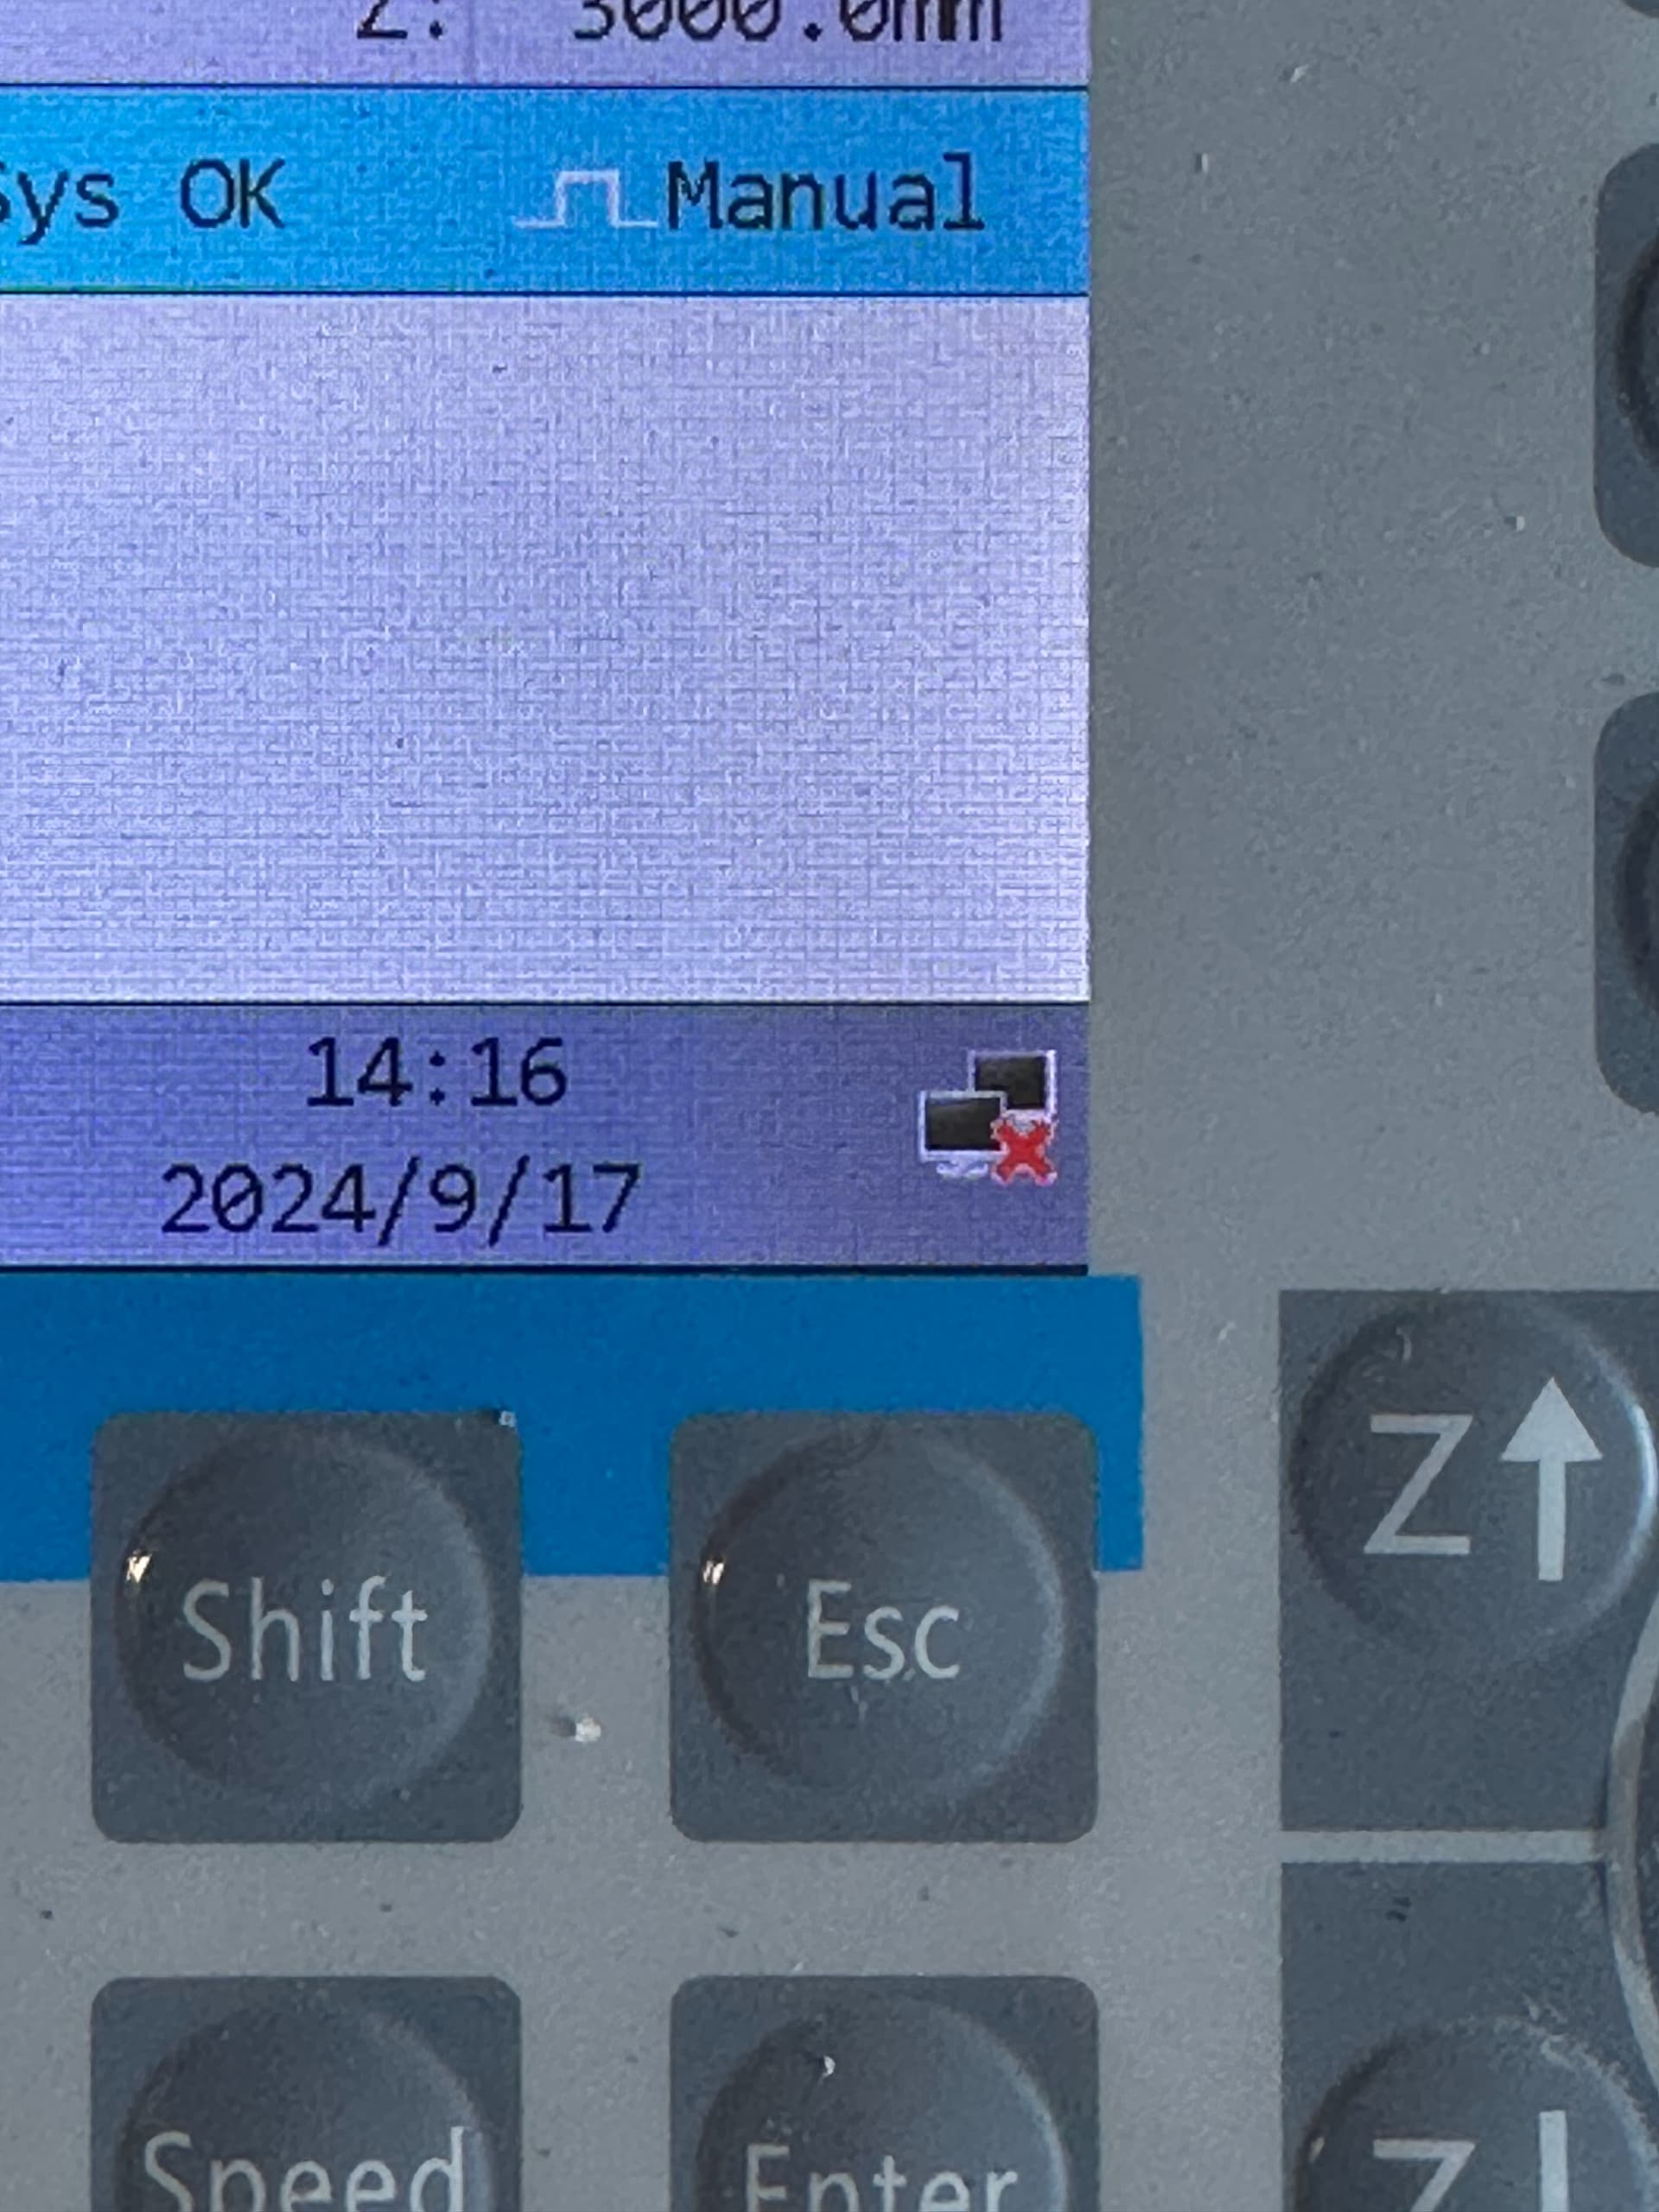
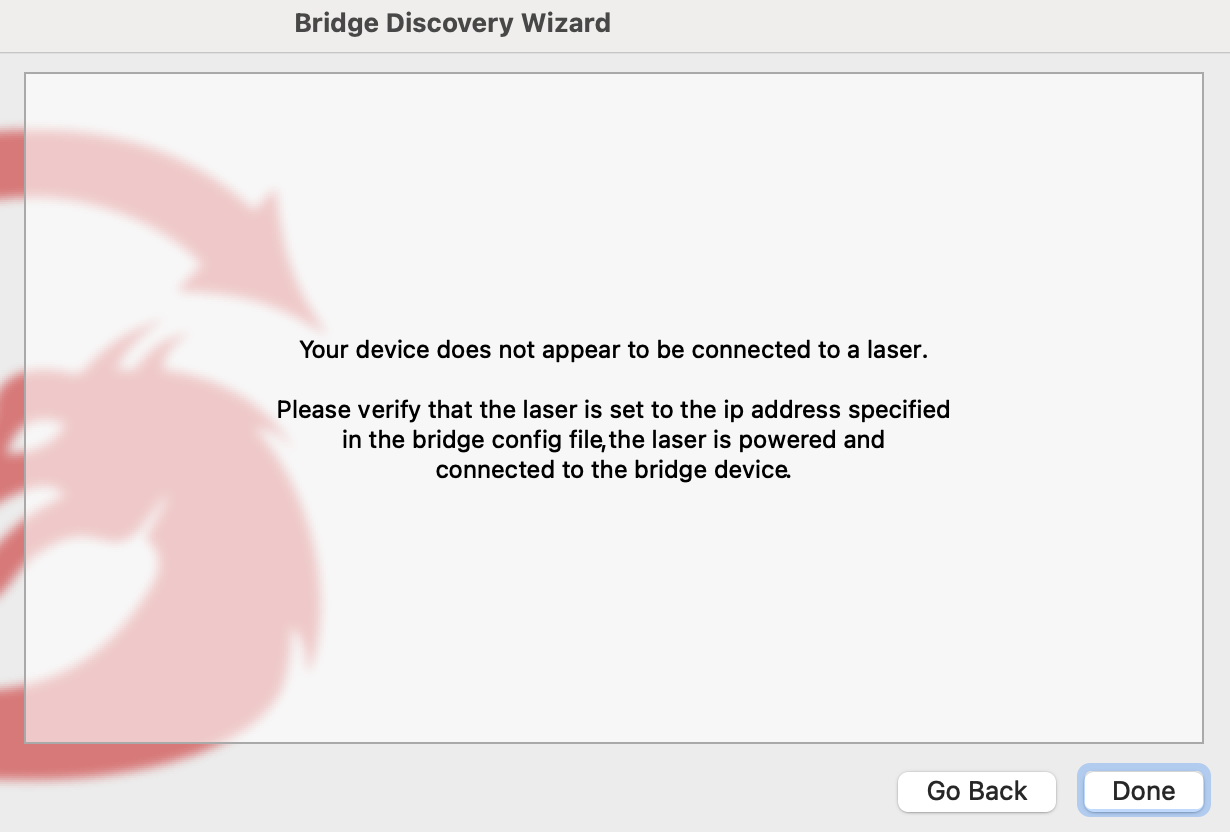
Well, right now it seems the bridge successfully connects to your network but does not connect to Ruida, which could be a fault with the bridge or with the ruida controller or the connection between them.
If you disconnect the lan cable from the bridge does this icon change or disappear?
Please try these steps again:
Ensure the laser machine IP is still set to 10.0.3.3
Turn the off the laser machine and the bridge
Connect the bridge directly to the ethernet port of the Ruida controller rather than to the jack on the machine chassis (Not sure if you already did this or not?)
Power on the laser machine, and once it has fully started and finished homing, then power on the bridge.
Wait a couple of minutes for the bridge to fully start, then in LightBurn, rescan and try connecting again.
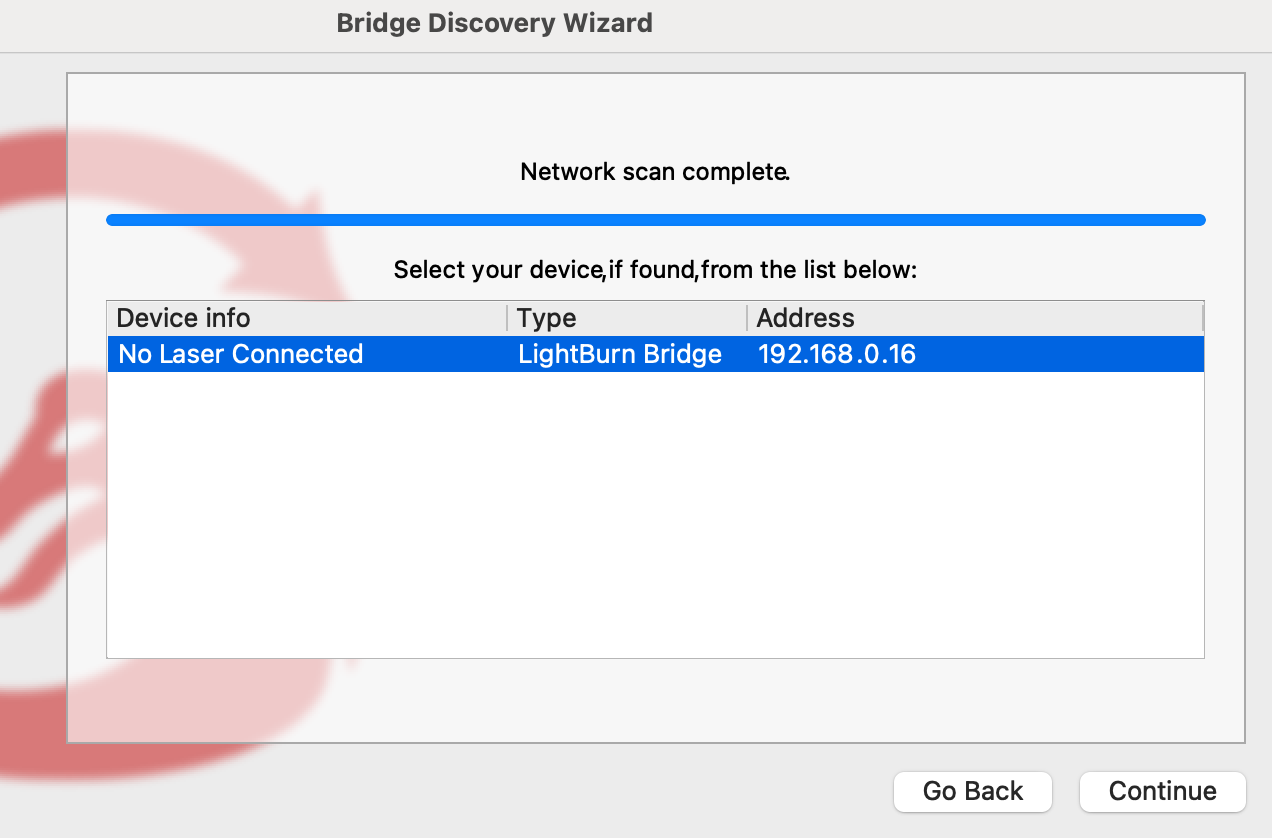
If any issues, find the bridge’s IP address, and go to that in your web browser or try (http://lightburnbridge.local/) , then copy/paste back here the most recent information from the network and relay logs.
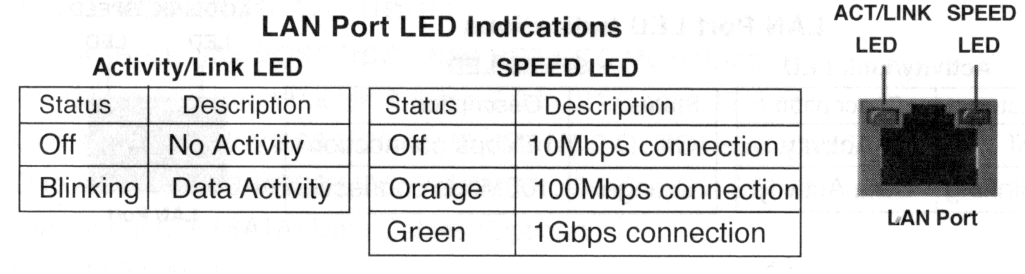
It’s likely saying that the hardware (green) is connected at 100mbps (yellow/orange)
The Ruida Ethernet is limited to 100mbs I believe.
The green led should flash if there is traffic on the network. You’d only see it if you are there when you command something or uploading data/jobs.
I don’t know these well enough to help diagnose it, but might hope @adammhaile catches this… he’s pretty good on these… I thought he developed the software for them.
Find the bridge’s IP address, and go to that in your web browser - looks like it currently is http://192.168.0.16:80 or (if no longer there) try http://lightburnbridge.local/ , then attach here both the network and relay logs.
Have a look at this topic from last year which may also include troubleshooting steps not discussed here that could be worth trying (like deleting all old job files from the controller). Interestingly, in that case the logs were similar to yours and it turned out that the controller was the problem. That may not be the case here but is one possibility.
Thanks, it looks like you have configured everything correctly but the “ERROR - Laser timeout error” in the relay log means the laser is not responding to the bridge.
Did you delete all old job files from the controller? as shown in this guide by Thunder, and then reset the controller (yellow button on the control panel). Once the ruida has fully rebooted - try again to communicate with the laser - I like to use the ‘Move’ window in LightBurn and send a small movement or use ‘Get position’.
Check the relay logs again (http://lightburnbridge.local/service_log/lbrelay) which can take a moment to refresh, and if you continue to see the same timeout error repeating in the relay log then it looks like your controller is the problem.
You should talk to Koenig about troubleshooting the controller further.
If I was the Koenig technician the first thing I would want to do would be to try connecting to the controller by ethernet with my laptop. That would confirm if the network functionality at the controller was working or not.
Or…does the wifi booster you mentioned have an ethernet port? if so you could connect that directly to your laser, and setup a new device type in LightBurn that uses “Ethernet/UDP” instead of “LightBurn Bridge”. You would have to set a suitable IP address at the laser as discussed in our guide here.
I did all the steps you mentioned, formatted the controller’s memory (not that there was much in there as I never send files there, I work from Lightburn on the laptop) but anyway, thats formatted and it didn’t fix the issue.
Then I did as you suggested and plugged the ethernet cable directly into the Netgear WiFi booster (bypassing the Lightburn Bridge which is not connected in this scenario) and set it up manually.
It worked! I was able for the first time to send a file wirelessly to my laser machine! Finally.
So now what does that mean with the Bridge?
Why can I send files wirelessly via my Netgear WiFi booster, but I can’t send files wirelessly with the Lightburn Bridge?
You can download a fresh copy of the software and put it on an SD card. Are you sure you’re using the proper procedure to write the sd card with an image?
It’s dynamic, so it gets it’s IP from your router and bridges to the 10.0.3.x domain. This is why you need to set your router to issue the same address to the PI based on the PI Mac address. This prevents you from having to change the IP configuration stored in Lightburn.
Don’t even think about it, you’re more than welcome. We fix this stuff by people doing just that. Worst case is you learn something new…
Only because you don’t know the bridge has a software layer written by Lightburn to handle the issues of how the Ruida communicates. It uses UDP, which is a pretty low level communication mode on a network.
My PI got wet and failed (thunderstorm), I’m back to running my, then, $12 bridge, but I plan on going back to the PI when I find one cheap enough. The PI is better, less transmission failures, but the regular wifi also works and the failure rate isn’t really a problem with my lan. Either is much better than usb.
The problem was between the pi and the controller, so a router would not change anything.
The way you have your machine setup now is absolutely fine. The bridge is a nice-to-have but unnecessary in your situation since you have that ethernet port at your wifi repeater. Wifi repeaters can be a bit flaky in my experience so one less wifi device for it to have to talk to over the air aside from your laptop and the master wifi router can only be a good thing.
I’m not really sure why the bridge<–>controller connection was timing out, if you really want to have another go with the bridge, maybe try a different IP address like 172.100.100.100 (less chance of ambiguity with empty spaces in the input just in case the HMI panel logic is flawed at writing the correct info to the controller) you will also have to edit the corresponding bridge.json file at the SD card at the pi with the same number.
If that makes no difference you could also try re-flashing the SDcard at the pi, so it starts again “like new”.
But again there really is no need, maybe 1 in every ten jobs with your setup you might get a “file transfer failed” message and have to “send” again, not a big deal.
Thanks, I’ve got the $200 LightBurn Bridge PI, I just can’t get it to work.
I’ve tried everything that everyone has graciously suggested in this forum thus far.
Not sure what my next steps are. Do I return it or is there still something I can possibly do on my end to get it to work. I can’t believe how hard it’s been up to this point.
The IP 192.168.42.1 is only temporary and is used to open a web access point where you can connect to the bridge and configure its access to the local Wi-Fi network (SSID and password). Once the Wi-Fi access is configured, if it works correctly, the bridge will no longer activate this IP. However, if the Wi-Fi connection fails, the bridge will reactivate it so you can try the setup again.