I’m afraid of getting over my head here. Currently using LaserPecker to burn letters on a once inch cube of wood. Each cube takes about 25 minutes to burn. At my age (70), I feel like I’ll be 80 before I can see my idea come alive (which I won’t be anymore!)
So… I’m considering the purchase of a diode laser (Emblaser 2) with the hope to be able to lay about ten of these one inch wooden cubes side by side and burning in ten letters in about 2 minutes. The hope is that I can use LightBurn and be able to adjust the kerning and spacing to where each letter is centered on each square.
Can anyone advise me as to whether I’m getting over my head here or perhaps expecting something from LightBurn that won’t work, therefore making me have to create individual png files for each desired letter and placing them for each square?
Thanks
Hallo
Das müsste gehen. Mach einen Versuch auf einem Holzbrett, wo du dir die Würfelgröße aufzeichnet in der Zahl die du brauchst.
Grüße
Here is what I suggest:
- Secure a scrap piece (spoil board) on to your laser bed
- Set up a job in LightBurn representing ten 1" x 1" blocks
- Run this job to mark the placement of each block (by either vector engraving the line or actually cutting out the block area)
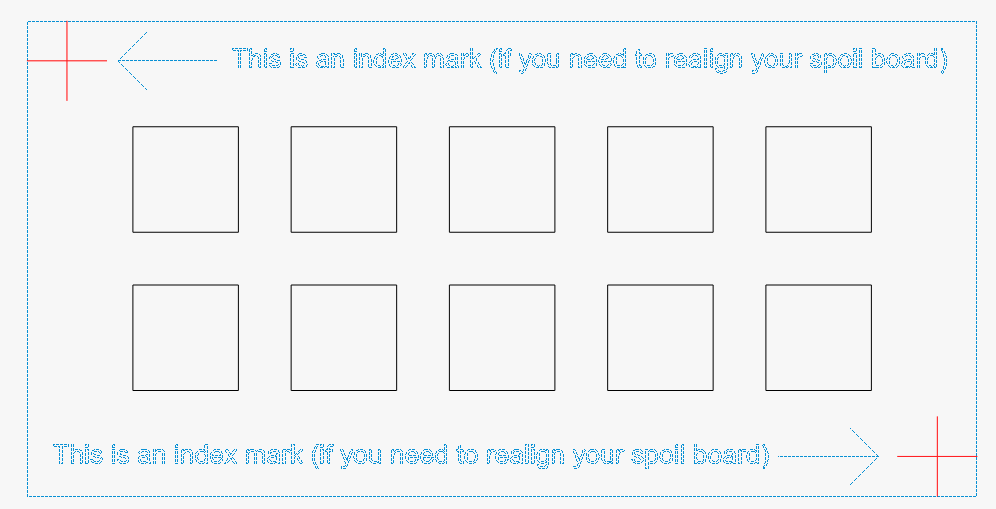
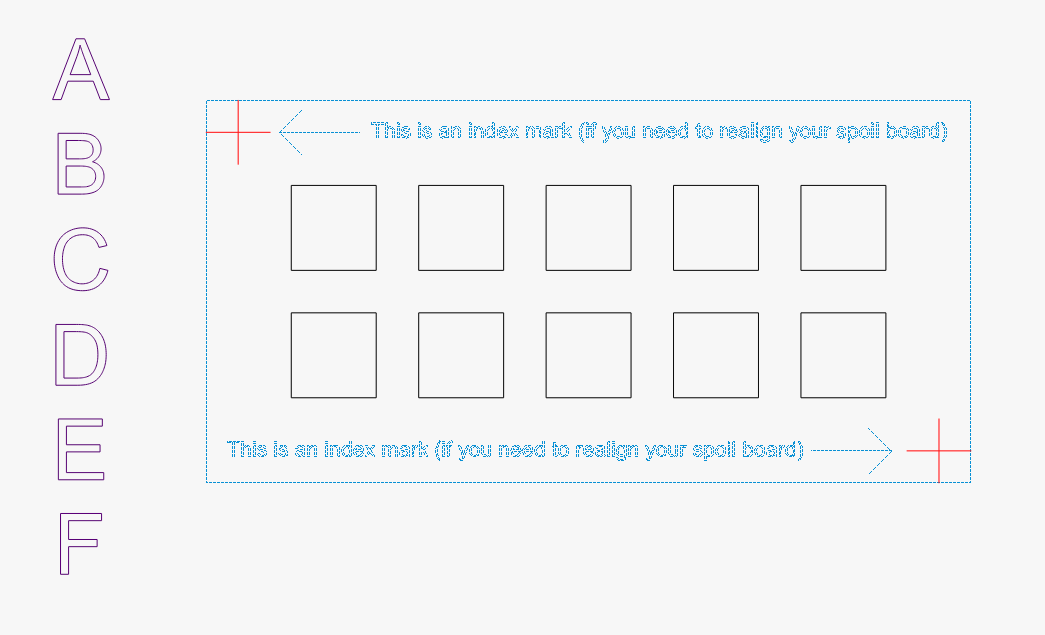
- Create / place your 6 letters on to the work area
- In this example, starting with letter A, 9 copies are made with CTRL+D, each copy snapped to center in one of the 10 template boxes
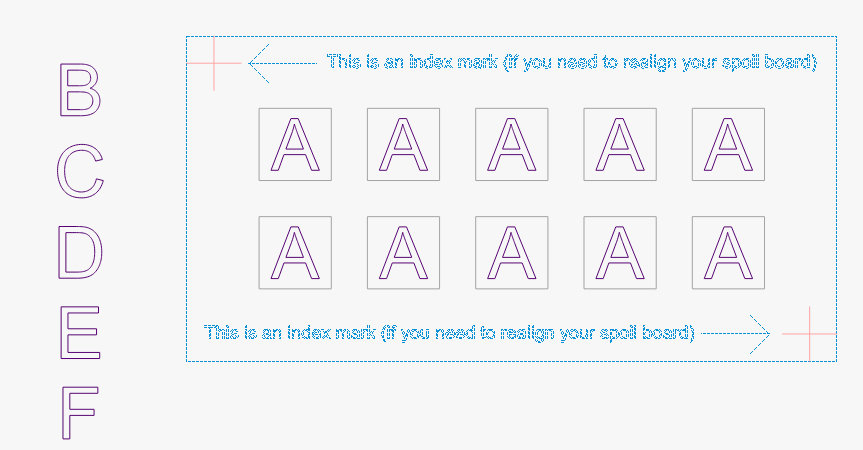
-
Place your 10 wooden blocks on or in to the spoil board template
-
Adjust your Z accordingly so the laser is focused on the top of the blocks
-
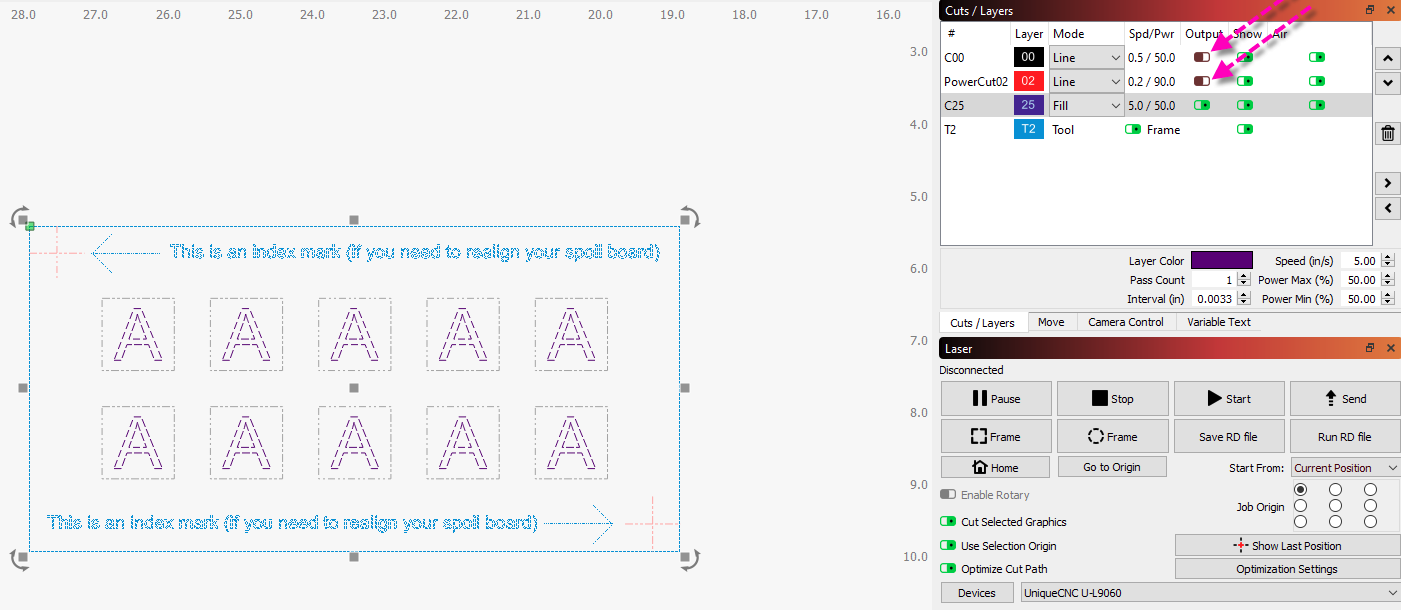
Turn off the output for the two layers representing the the individual block outlines and the index crosses
-
Run the job
-
when job completes, repeat with letter B (making 9 copies, snapping each copy to center in one of the 10 template boxes); Flip blocks; Run Job
Demo file attached:
BlockDemo.lbrn2 (27.9 KB)
I would think what you are tryign to do is very easy, and once setup you could run as many as you want. 10 or 100 at a time.
for example,
Make a jig template for the laser bed so the cubes always sit in the same place. then setup the letters in Lightburn to fit, save a start position co ordinates then you can always reset it up in the same place…something like that
Thank you for helping head me in the right direction. Perhaps I should clarify something. What I will basically be doing is creating six sentences of equal amount of letters also using a different font for each sentence. That’s why I was trying to see if LaserBurn offers the opportunity for me to basically type in a sentence and then lay out the cubes side by side in a way to burn each letter of the sentence in the same font. Next I would turn all the cubes, change fonts, and input the second sentence, and so on. Hope that makes sense. This is why I was wondering if I could go that route using LaserBurn (which I haven’t even downloaded yet) rather than having to create a vector of each individual letter for each individual sentence. Upon completion of the first cube of six sentences I will then create a second set of cubes using six totally different sentences. You can see why it would really be great if I could possibly type a sentence into LaserBurn and with proper spacing create a new set of sentences. Thanks again for any advice. I may be asking too much. Tried to price this out and it was crazy high so I’m considering purchasing a laser and doing it myself.
Please show what the final result should look like. That might help us visualize what you are after. 
You can produce what you show here, but not as a sentence. The spacing of each individual letter will adjust with font change and the placement will be off, trying to hit the center of each block. I would use a jig setup as @Stroonzo suggested for this type of job.
Ok. Thanks. Are there companies that make these jigs and should I have them made out of a specific material (plastic, metal, wood)? Again… thank you for your help. I might just go out and purchase a diode laser next. Very scary.
You will have a laser that can make a jig and you should be the one to make the jig as it will need to be custom fit. @Stroonzo did a great job of laying it out for you and to be honest, this is the best and easiest way to get what you want to achieve.
Once the first letters are burned in, you flip the dice and burn the next row and so on. His technical language sounds a bit scary to a novice, but LightBurn makes it incredible easy.
LightBurn will automatically center the lettering on each dice for you. Once you have everything aligned you just hit run and wait until the job is finished. It will take a bit of trial and error, but this is a great community and people are very helpful. Good luck!
You make the jig, any jig you might need for your material. You have a very accurate tool for cutting the jig out. ![]()
I would suggest you step through our ‘Beginner Walkthrough’ Redirecting..., continuing until you complete the Simple Project to become more familiar with how to use LightBurn. Should provide you a good overview. ![]()
If you don’t have a machine that can cut wood, you can easily make a jig for squares in another way. Just make a lattice from strips of any material that’s thick enough to lock in your cubes. Cardboard, rulers, whatever. The important part is that the distances between your cubes are all the same. You can then use the Array function to duplicate any object onto that grid.
e.g. let’s say I have 1" cubes and strips of cardboard that are .75" wide.
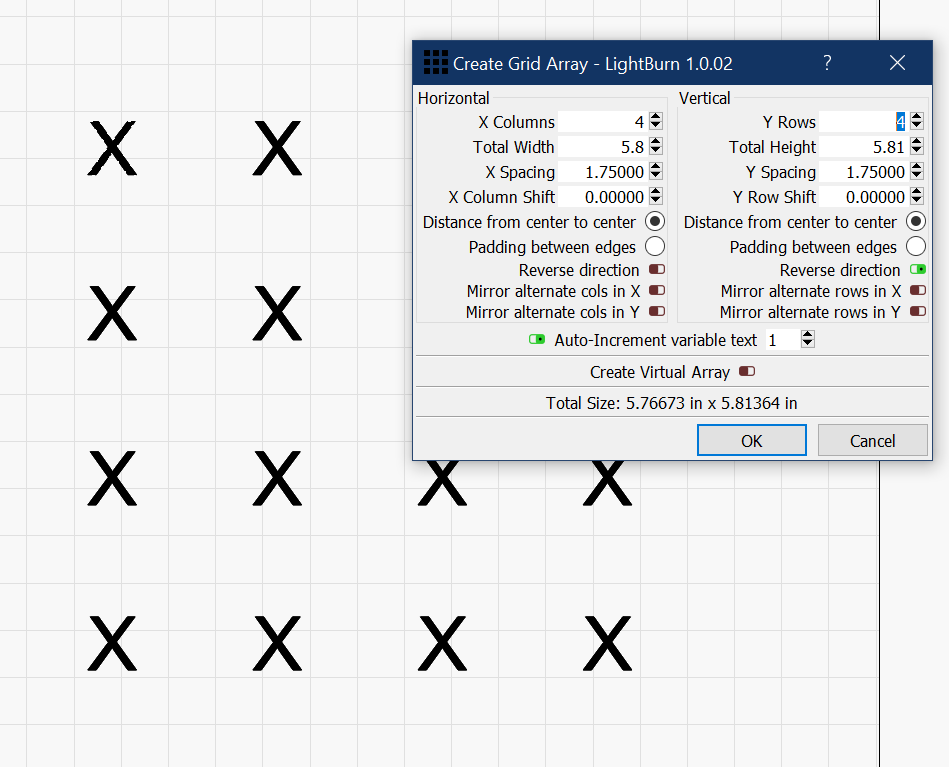
Setting the counts to 4 now gives me 16 text objects. Now I can edit those to say whatever I want:
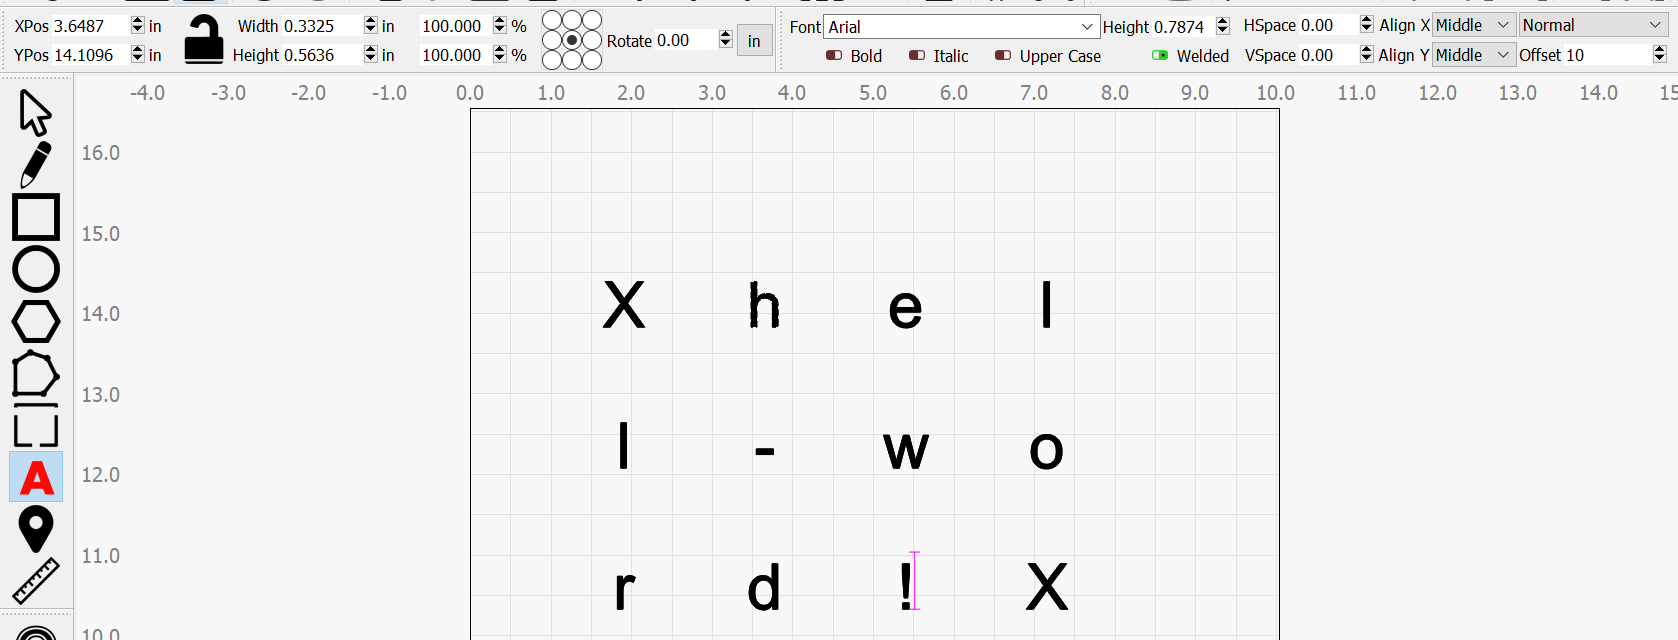
Note that I have set the text alignment to “Middle” (top right of the picture), that way the letters stay centered where they are when I edit them. And editing is easy, I can use the text tool and just click on the text to edit it (in other programs this would create a new text object overlapping the existing one).
PS: Welcome to lasering dice…:
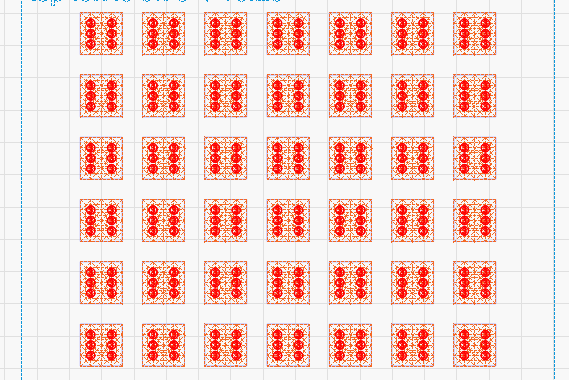
Here, btw, you can see how many lines on the “frame” layer I used to get a nice grid for positioning the pips. You probably don’t need that for what you’re doing now, but using the frame layer to align stuff is an important technique.
If you make your jig for 6 units at a time (or 12, 18, etc…) you can have one of each style of letter in each of the 6 engraving locations, then just move the cubes one spot to the right (and the last one back to the first position) each time you need to change faces.
You can then just run the same job 6 times, and not need to send a new file each time.
So nice of you to help me. I’ll slowly trudge forward.
Hey! We’re all here to learn, you’ll have some very cool dice soon.
Your ‘trial and error’ point is true. I’m slowly getting there. I did see from one user that because I’m using LightBurn from my macbook air, it won’t be as simple. But I can’t change that. I’m somehow stuck with the area around each letter being engraved instead of the font itself. Cannot seem to fine the way to change this. I am getting pretty good at centering each letter in a box but the engraving isn’t right. Your thoughts?