I’m both new here and to burning, so I’m hoping what I’m looking for is possible. I’ve looked through the forums and tried multiple online searches, but can’t seem to find my particular issue. I just learned some of the boolean tricks, but I can only seem to get them to work with created shapes or items created within LightBurn and not imported images
I’m trying to burn a background image behind my main image, but despite the background being on a separate layer and being pushed to the back, it still tries to burn over my main image. Is there some setting that I’m missing or is there another trick to getting this to work?
Sorry if this has been a common question, but I really appreciate any and all help. Thanks.
My problem isn’t a masking issue as I’m using a mask for the project I’m on. When I say “images,” I’m referring to files I have taken from the internet, turned to grayscale and edited for contrast/exposure then exported as a photo file to be uploaded into LightBurn. I do my color corrections in Lightroom, so I’ve been working with .tif files since there isn’t a .png output.
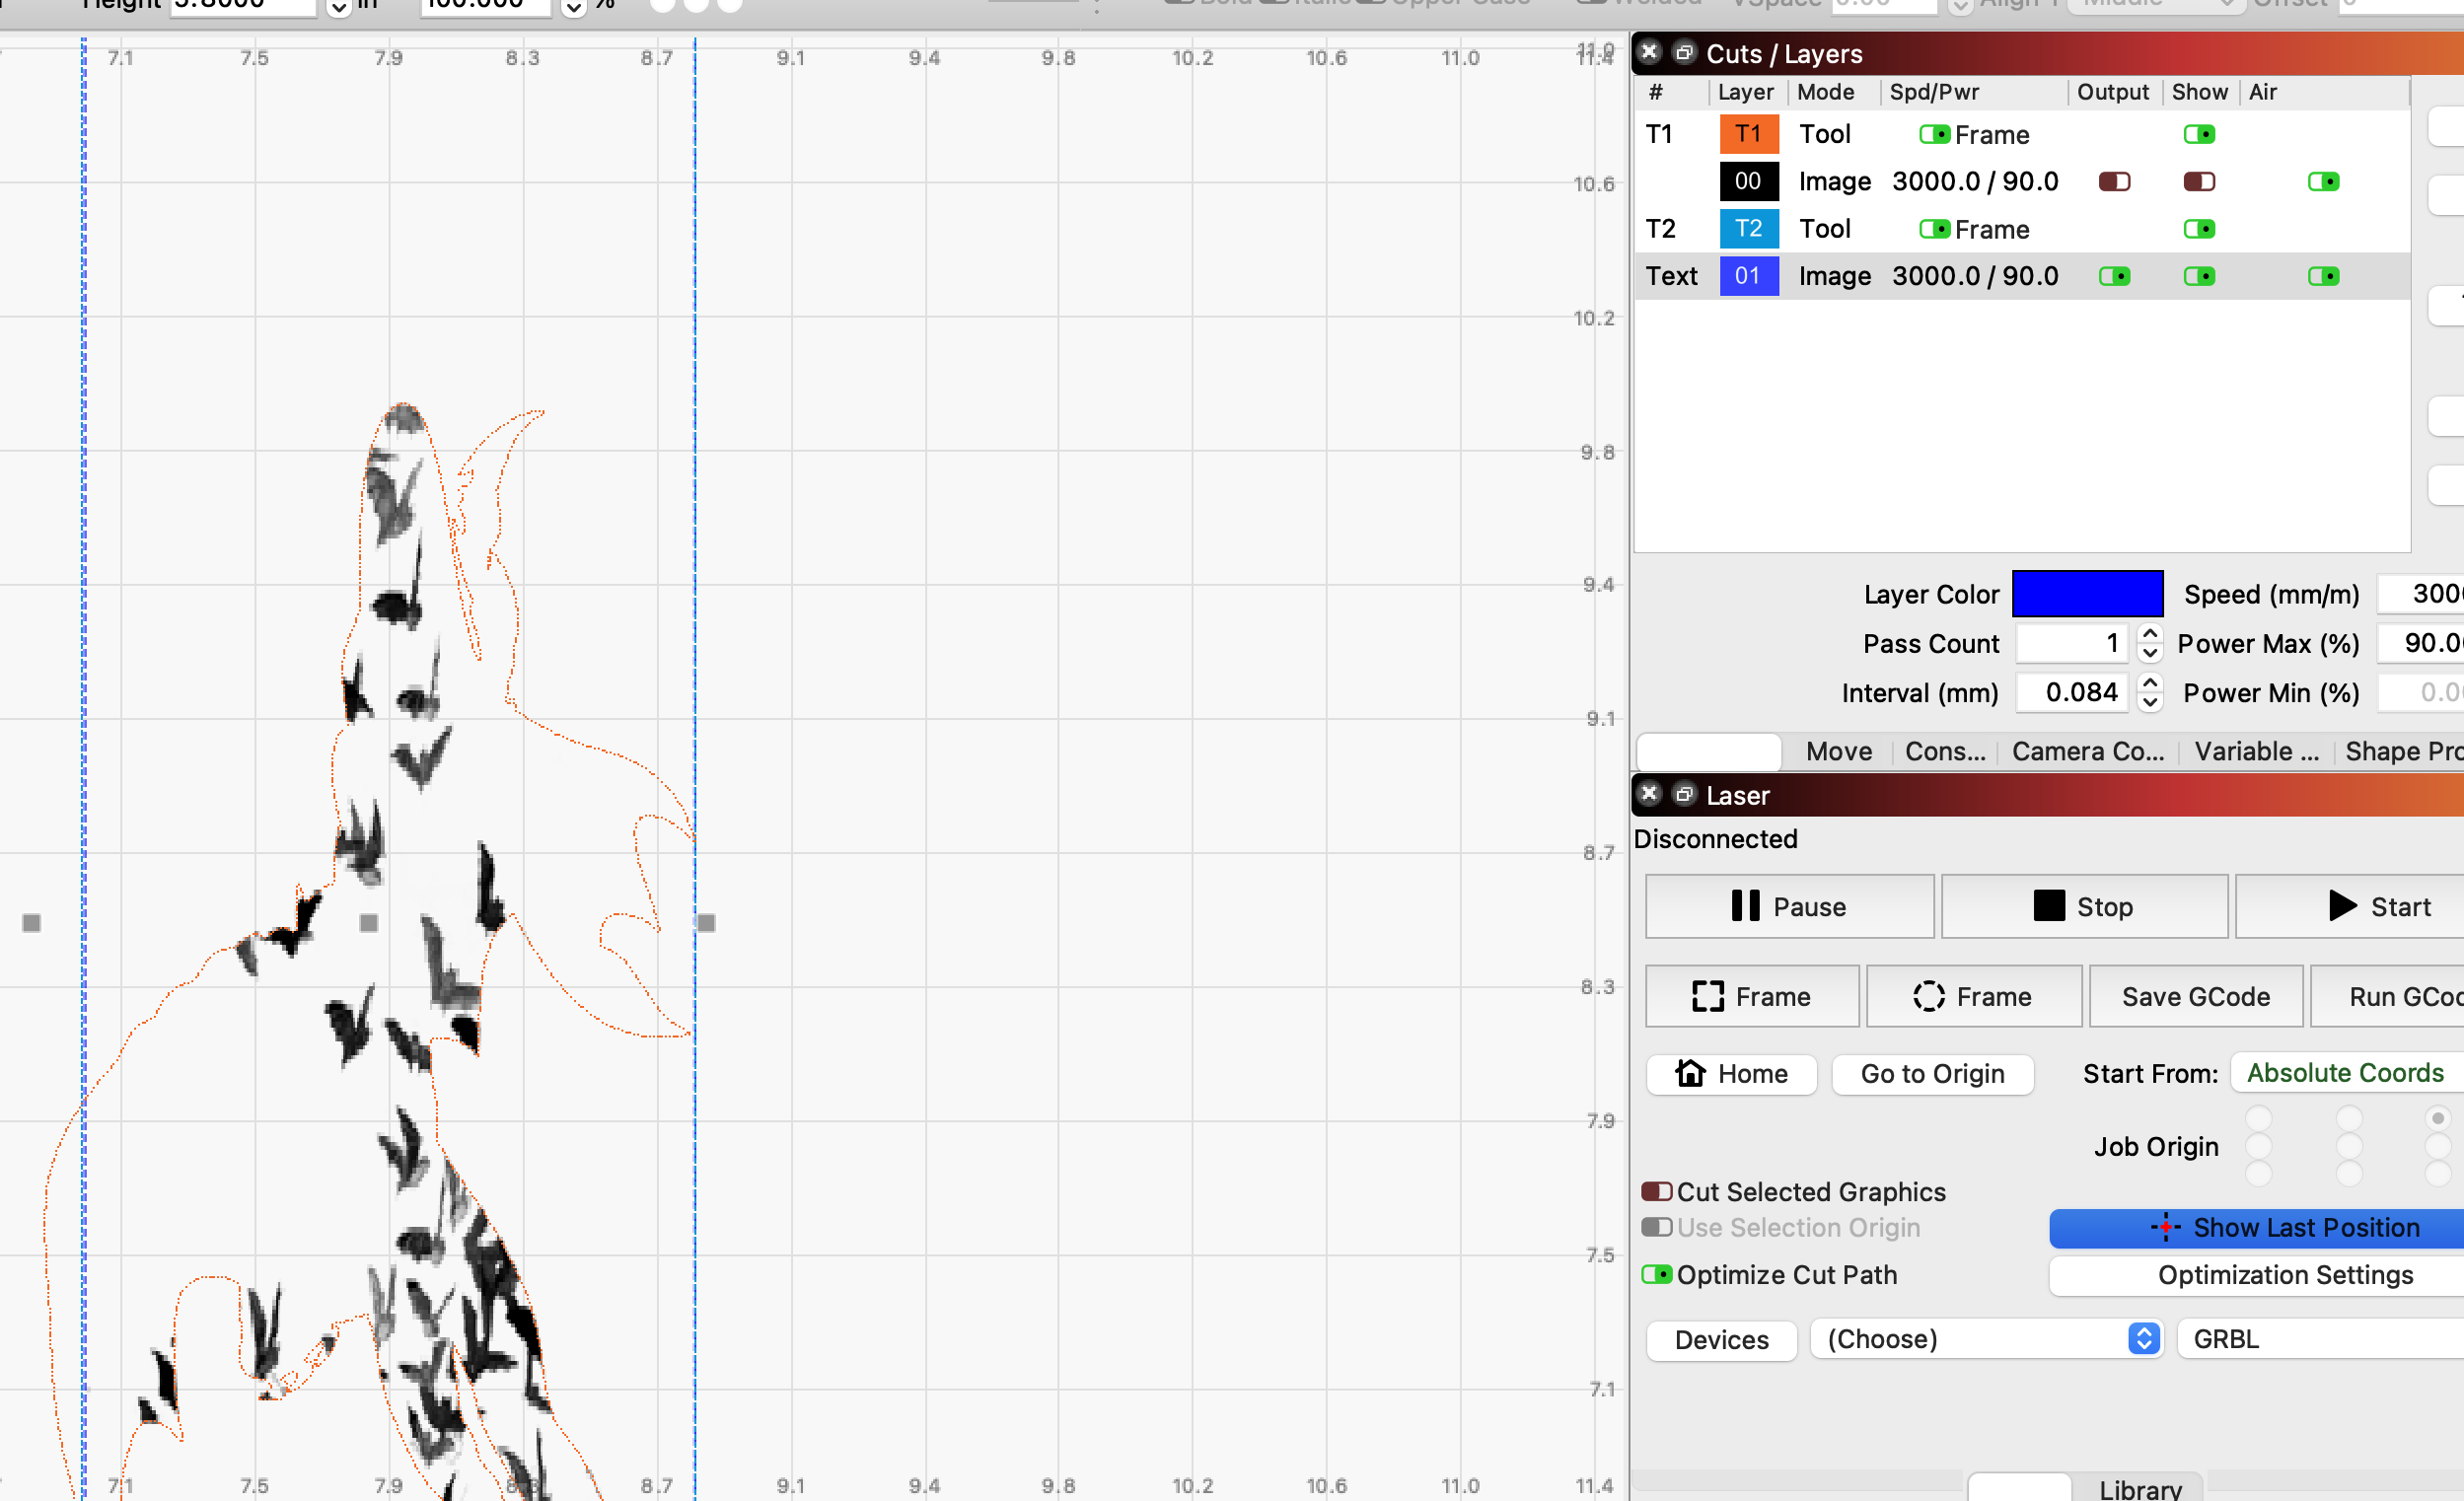
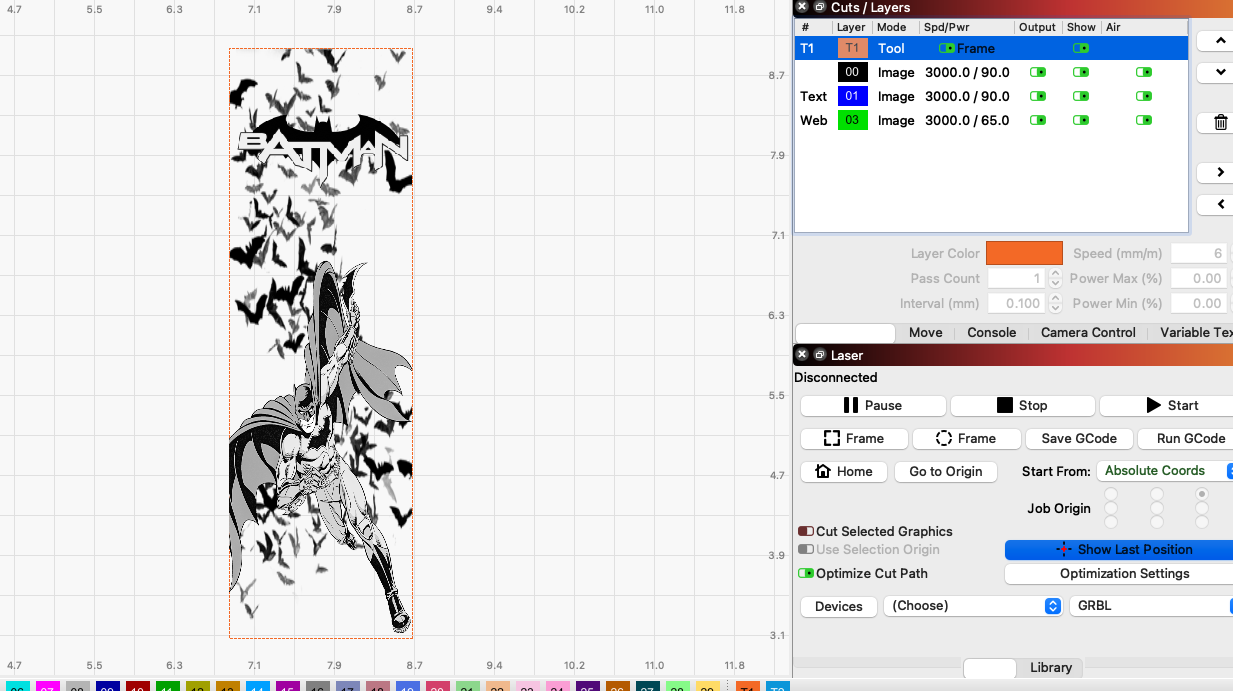
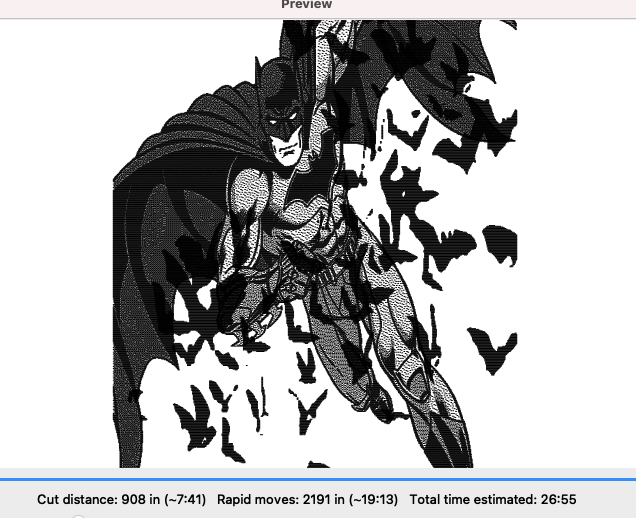
More specifically, in the image below, I have Batman as my top layer that is set to be burnt first and that layer has also been pushed to the front. The bats are my third layer and are pushed to the back and are set to be burnt last. However, the bats burn over Batman (as shown in the attached preview). I am wanting to make sure that my bottom layers do not burn over my upper layers.
TIF and TIFF are considered bitmap raster images in LightBurn.
Technically, TIFF is a flexible, adaptable file format for handling images and data within a single file, by including the header tags (size, definition, image-data arrangement, applied image compression) defining the image’s geometry. A TIFF file, for example, can be a container holding JPEG (lossy) and PackBits (lossless) compressed images. A TIFF file also can include a vector-based clipping path (outlines, croppings, image frames). - Source: TIFF - Wikipedia
You can see that the TIF format has been placed on an Image Layer, thus you will need to mask to have the job to produce as you describe, or convert to vector art for layering.
If one of the only ways to get the effect I’m looking for is through masking, I imagine I would have to edit the Batman image so that there is no extended edges and instead crops tight around the actual character itself, correct?
Hard to say with what you have provided. I might start with a trace to produce my masking shape. May take a couple traces to build what would be needed, then group those as the clipping part of the mask. Again, hard to say as you are not showing the individual components that make up this composite.
There are only three individual components (as shown in my cuts/layers window in the first photo). One is the character, two is the logo and three is the bats. I will attempt the tracing as you have suggested and see what kind of results I get.
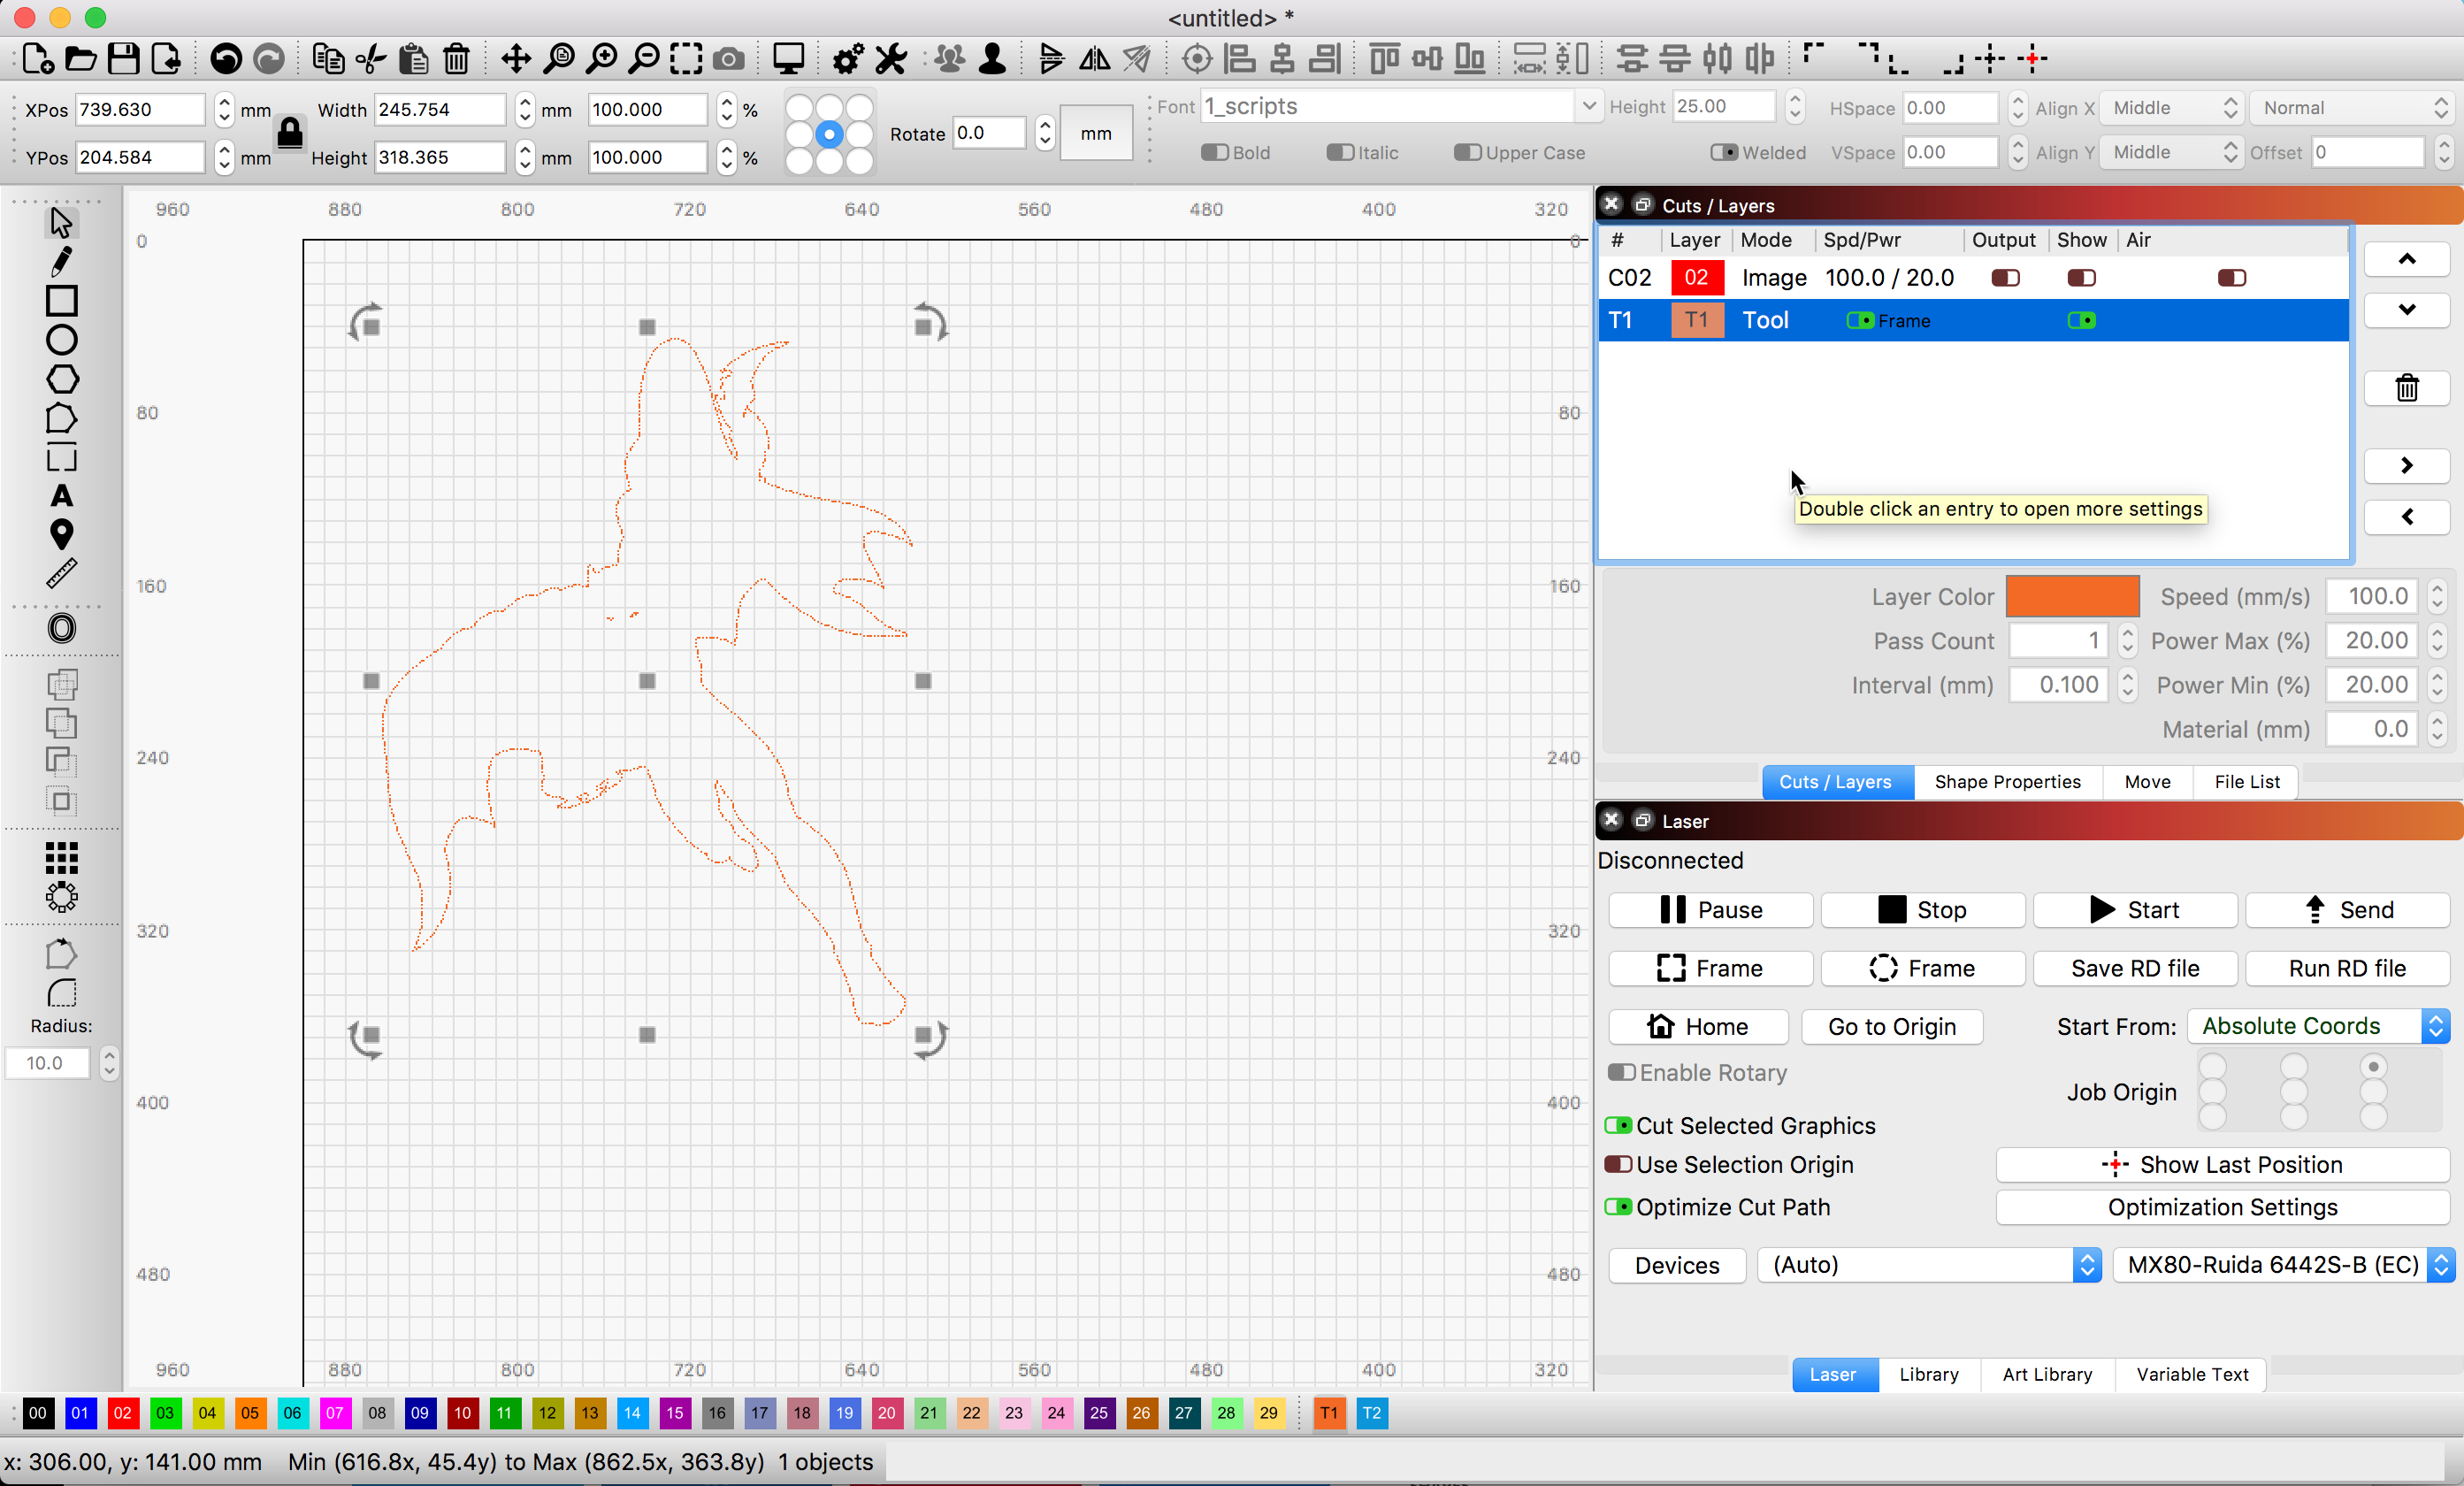
I don’t think I am understanding what needs to be done to fix my issue. It doesn’t help that I’ve been working at this for hours and have become increasingly aggravated with what I feel like should be a simple fix. I have added another screenshot that outlines my individual layers for further reference.
If you have not done this type of work previously, this is relatively complex compositing.
I took a similar image to show what I mean by using Trace Image to build the mask tool cutter.
Traced to get the outline (you could delete the eyes), placed on Tools Layer to use as a mask boundary to cut out that section from the ‘bats’ image. Do similar for other shapes to produce this composite. You can do this in LightBurn or another tool, the task will be the same. You need to cut out and remove the parts that would be covered, using a Mask / Crop tool of some sort to produce a laser ready file, no matter which software used to edit.
I decided to throw in the towel for the night and face it anew in the morning. I woke up to your response and had a “Eureka!” moment at finally finding a solution to my problem, especially one that seemed so obvious. Of course, tracing the image and masking it off should work…and I suppose it is, but not as intended.
I have traced my character image down to just the outside outline and turned it into a tool as you suggested. I then added the bats to the background and then attempted to mask the images. I am getting results now, but it is the opposite of what I’m trying to do as the mask is removing the bats outside the traced outline and keeping them inside it. If I can just figure out how to reverse this, I should should () be good to go.
I’m sorry for being so slow. I honestly don’t know how you’re doing what is shown in your latest examples. I’ve tried recreating it, but still keep getting the background image masked inside my character outline instead of outside.
I have both the outline and the shape as the tool layer, as it looks like it is in yours. I have the original character image hidden and the layers grouped the same way it looks like yours are. But when I choose the background image and the outline and then mask, it deletes everything outside of the outline. If I choose the shape and apply the mask there, it still remains within the outline. If I choose all three layers, I don’t have the option to mask. I don’t know what I’m doing wrong at this point.
Hard to tell from this image, but check that the mask cutter includes all shapes as a single cutting group. I have the oval (offset shape in 2nd example) and the batman as a group on the Tools Layer.
Wow. I somehow didn’t understand that portion of the video as being the same as what I was trying to do. I FINALLY got it to work. I appreciate all your help and I’m sorry for taking up so much of your time.


 ) be good to go.