I have an 80W Co2 Chinese laser. I struggle with burnt edges when I cut wood.
I have tried a lot of settings (slow speed, low power; high speed, high power;…)
Have any suggestions to try and get rid of the burnt edges?
I have an 80W Co2 Chinese laser. I struggle with burnt edges when I cut wood.
I have tried a lot of settings (slow speed, low power; high speed, high power;…)
Have any suggestions to try and get rid of the burnt edges?
Some level of burn is normal, as laser works by burning through a wood.
Can you attach a photo?
We need a little more information, you can show your layer settings for a cut and indicate what kind of wood and in what thickness you want to cut. I assume you use air to blow out cutting tracks and keep your lens clean.
Thanks for the reply!
I use air assist with a pump (25L/min) that came with the laser. I also have a compressor I could hook up to it but somehow that makes it even worse.
I cut 3.6mm multiplex
Here you can see my cut settings
There must be something wrong with your focus, I cut 3-4mm MDF, HDF and plywood with my little K40 at roughly the same speed as you. In general, I always go for the highest possible speed because it gives the least black streaks.
However, there are also wood deliveries which are sometimes very difficult to cut properly.
What does “normal” 3-4mm BB plywood look like at the edge when you cut it?
Good focus. I find the perfect focus distance then move it down about 1/3 -1/2 of the thickness of the wood so it’s actually focused somewhere near the center.
Use the highest speed you can get away with. The longer you linger, the more it chars.
Put as much high velocity air as you can get into that cut. ( I found the stock air assist pump to be little short of worthless for cutting and things got much better when I went to a real compressor and about 40psi of air.
I tried all your tips. nothings seems to have any improvement on the charred edges.
anything above 15mm/s and I don’t even get through the wood on 100%.
Only partially, I cut with my K40 standard 12mm lens, 3 and 4mm with a single pass, 5mm and more mostly require multiple passes and do not get as nice with birch plywood, with poplar plywood there are no problems at all. What I want to say is that the type of wood means a lot.
With the same machine configuration I have cut 16mm acrylic, quite slow but nice, (you can find a picture and post on a similar topic here on the forum).
Karel, not to be irritating, but do you now have full control over your laser beam focus settings ?, the nozzle is not too hot to touch?
If everything is 100% in order, I will find myself a thick piece of acrylic, disassemble the nozzle and do a 10 second test. Here you can compare your result with the test Russ Sadler has presented on his page. (only to find out if your tube is ok)
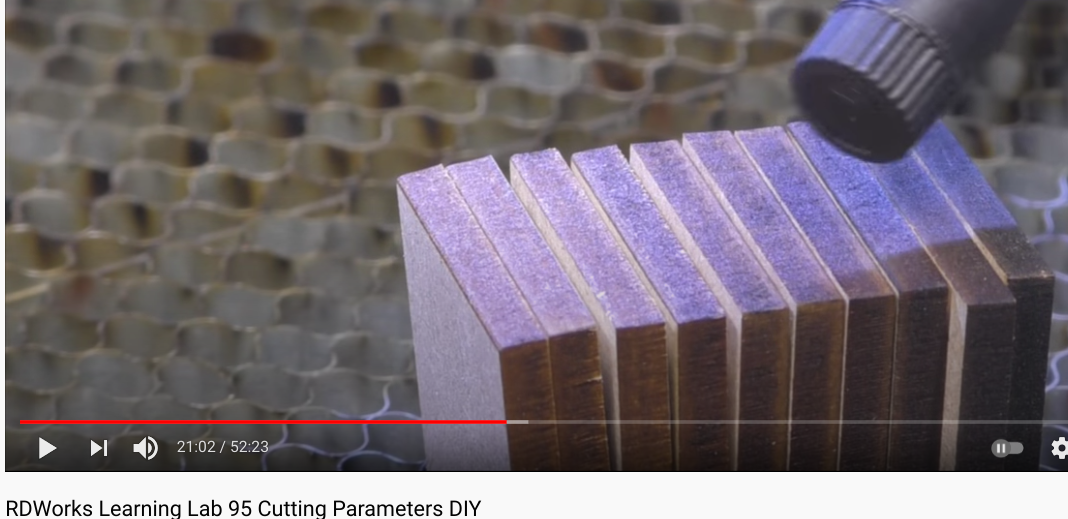
If you have the patience to sit through one of his classes… Russ has a lot of the answers. For your specific question about burnt edges, I’d suggest wading through at least the first half of this video on deriving your own cutting parameters, where he systematically takes you through the progression to arrive at clean edges…
As he demonstrates here, there’s no simple answer… as there are simply too many variables and every material and every laser setup is different. But with a systematic approach and a lot of trial and error – and DOCUMENTING our findings – he proves it’s possible to eventually find what seems to work best for a particular material and laser.
I don’t think there’s anything wrong with your amount of charring personally. It doesn’t appear to have rounded over burnt edges like you’d get with an unfocused or dirty lense. In my opinion that looks quite standard from my own experience. It could be a little lighter possibly but it’s just part of laser cutting semantics to me. If you want truly unburnt edges I’d recommend looking into trying cnc routing. I plan on getting one at some point mostly because every cnc intrigues me and the awesome inlays you can achieve with routing. Anyway I hope you can figure out a good way to lighten it to your liking, have a good one.
Sorry but I see it a little differently. If you have too many brand marks, there is either something wrong with the laser setup or with the material. You can not make a children’s puzzle that the children get black fingers from, or a small box with an engagement ring for the girlfriend where everything that is touched by the box gets dirty.  I could and will not accept such results, the whole idea of laser machining is lost when it takes longer to clean the items as to make them.
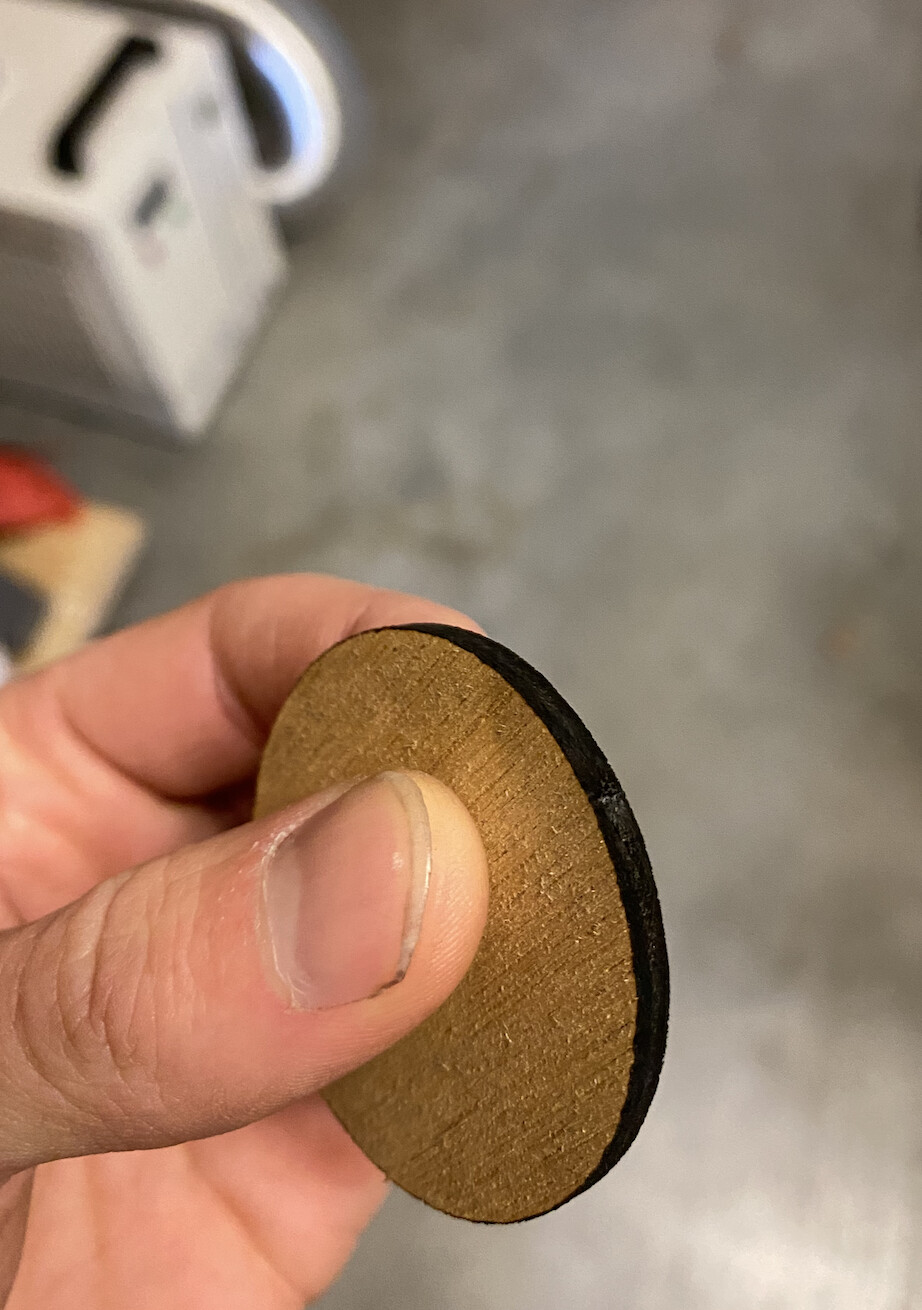
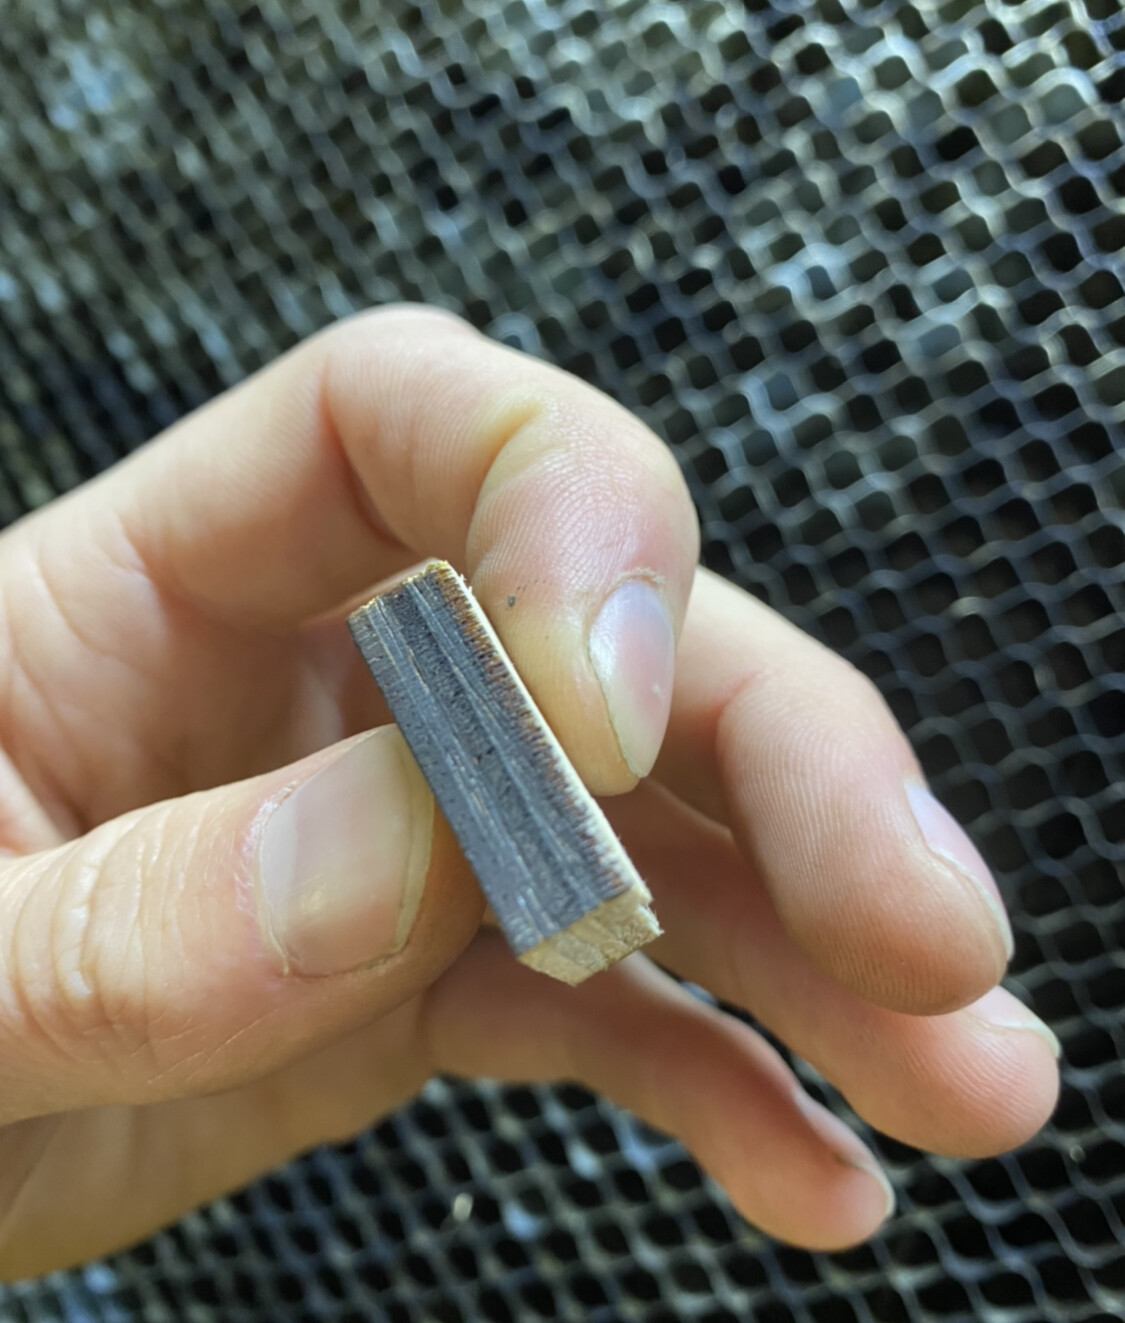
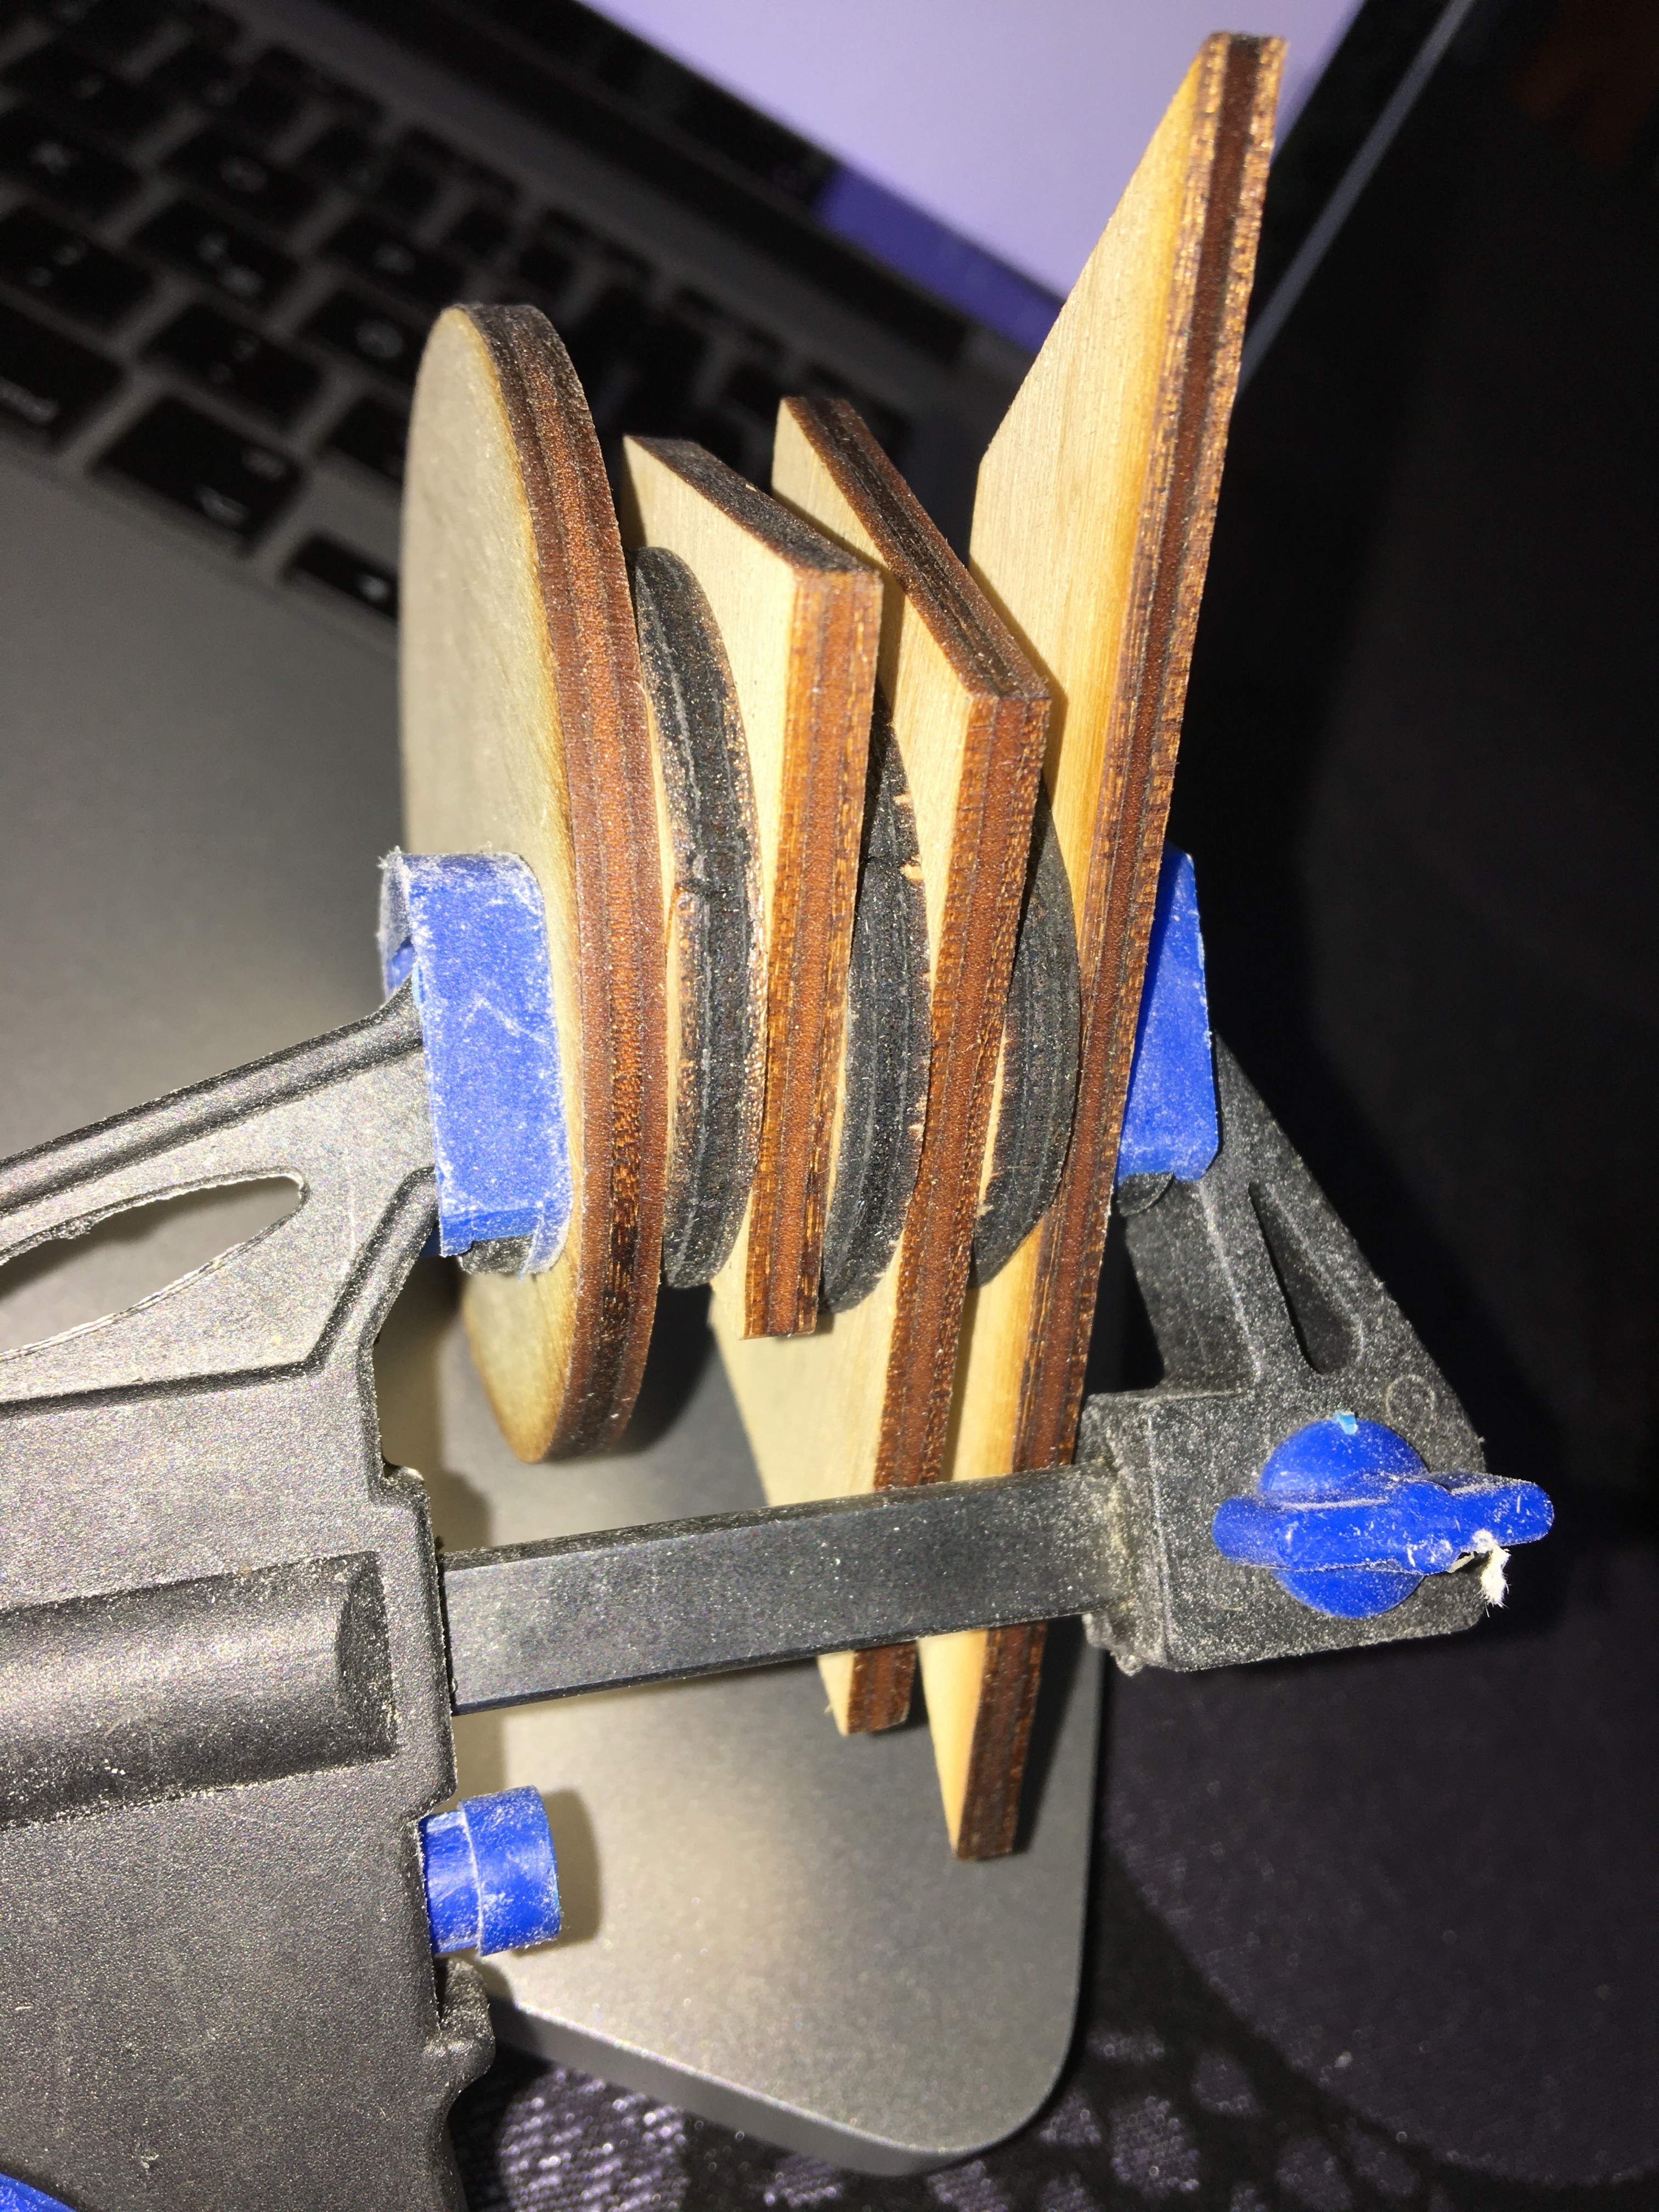
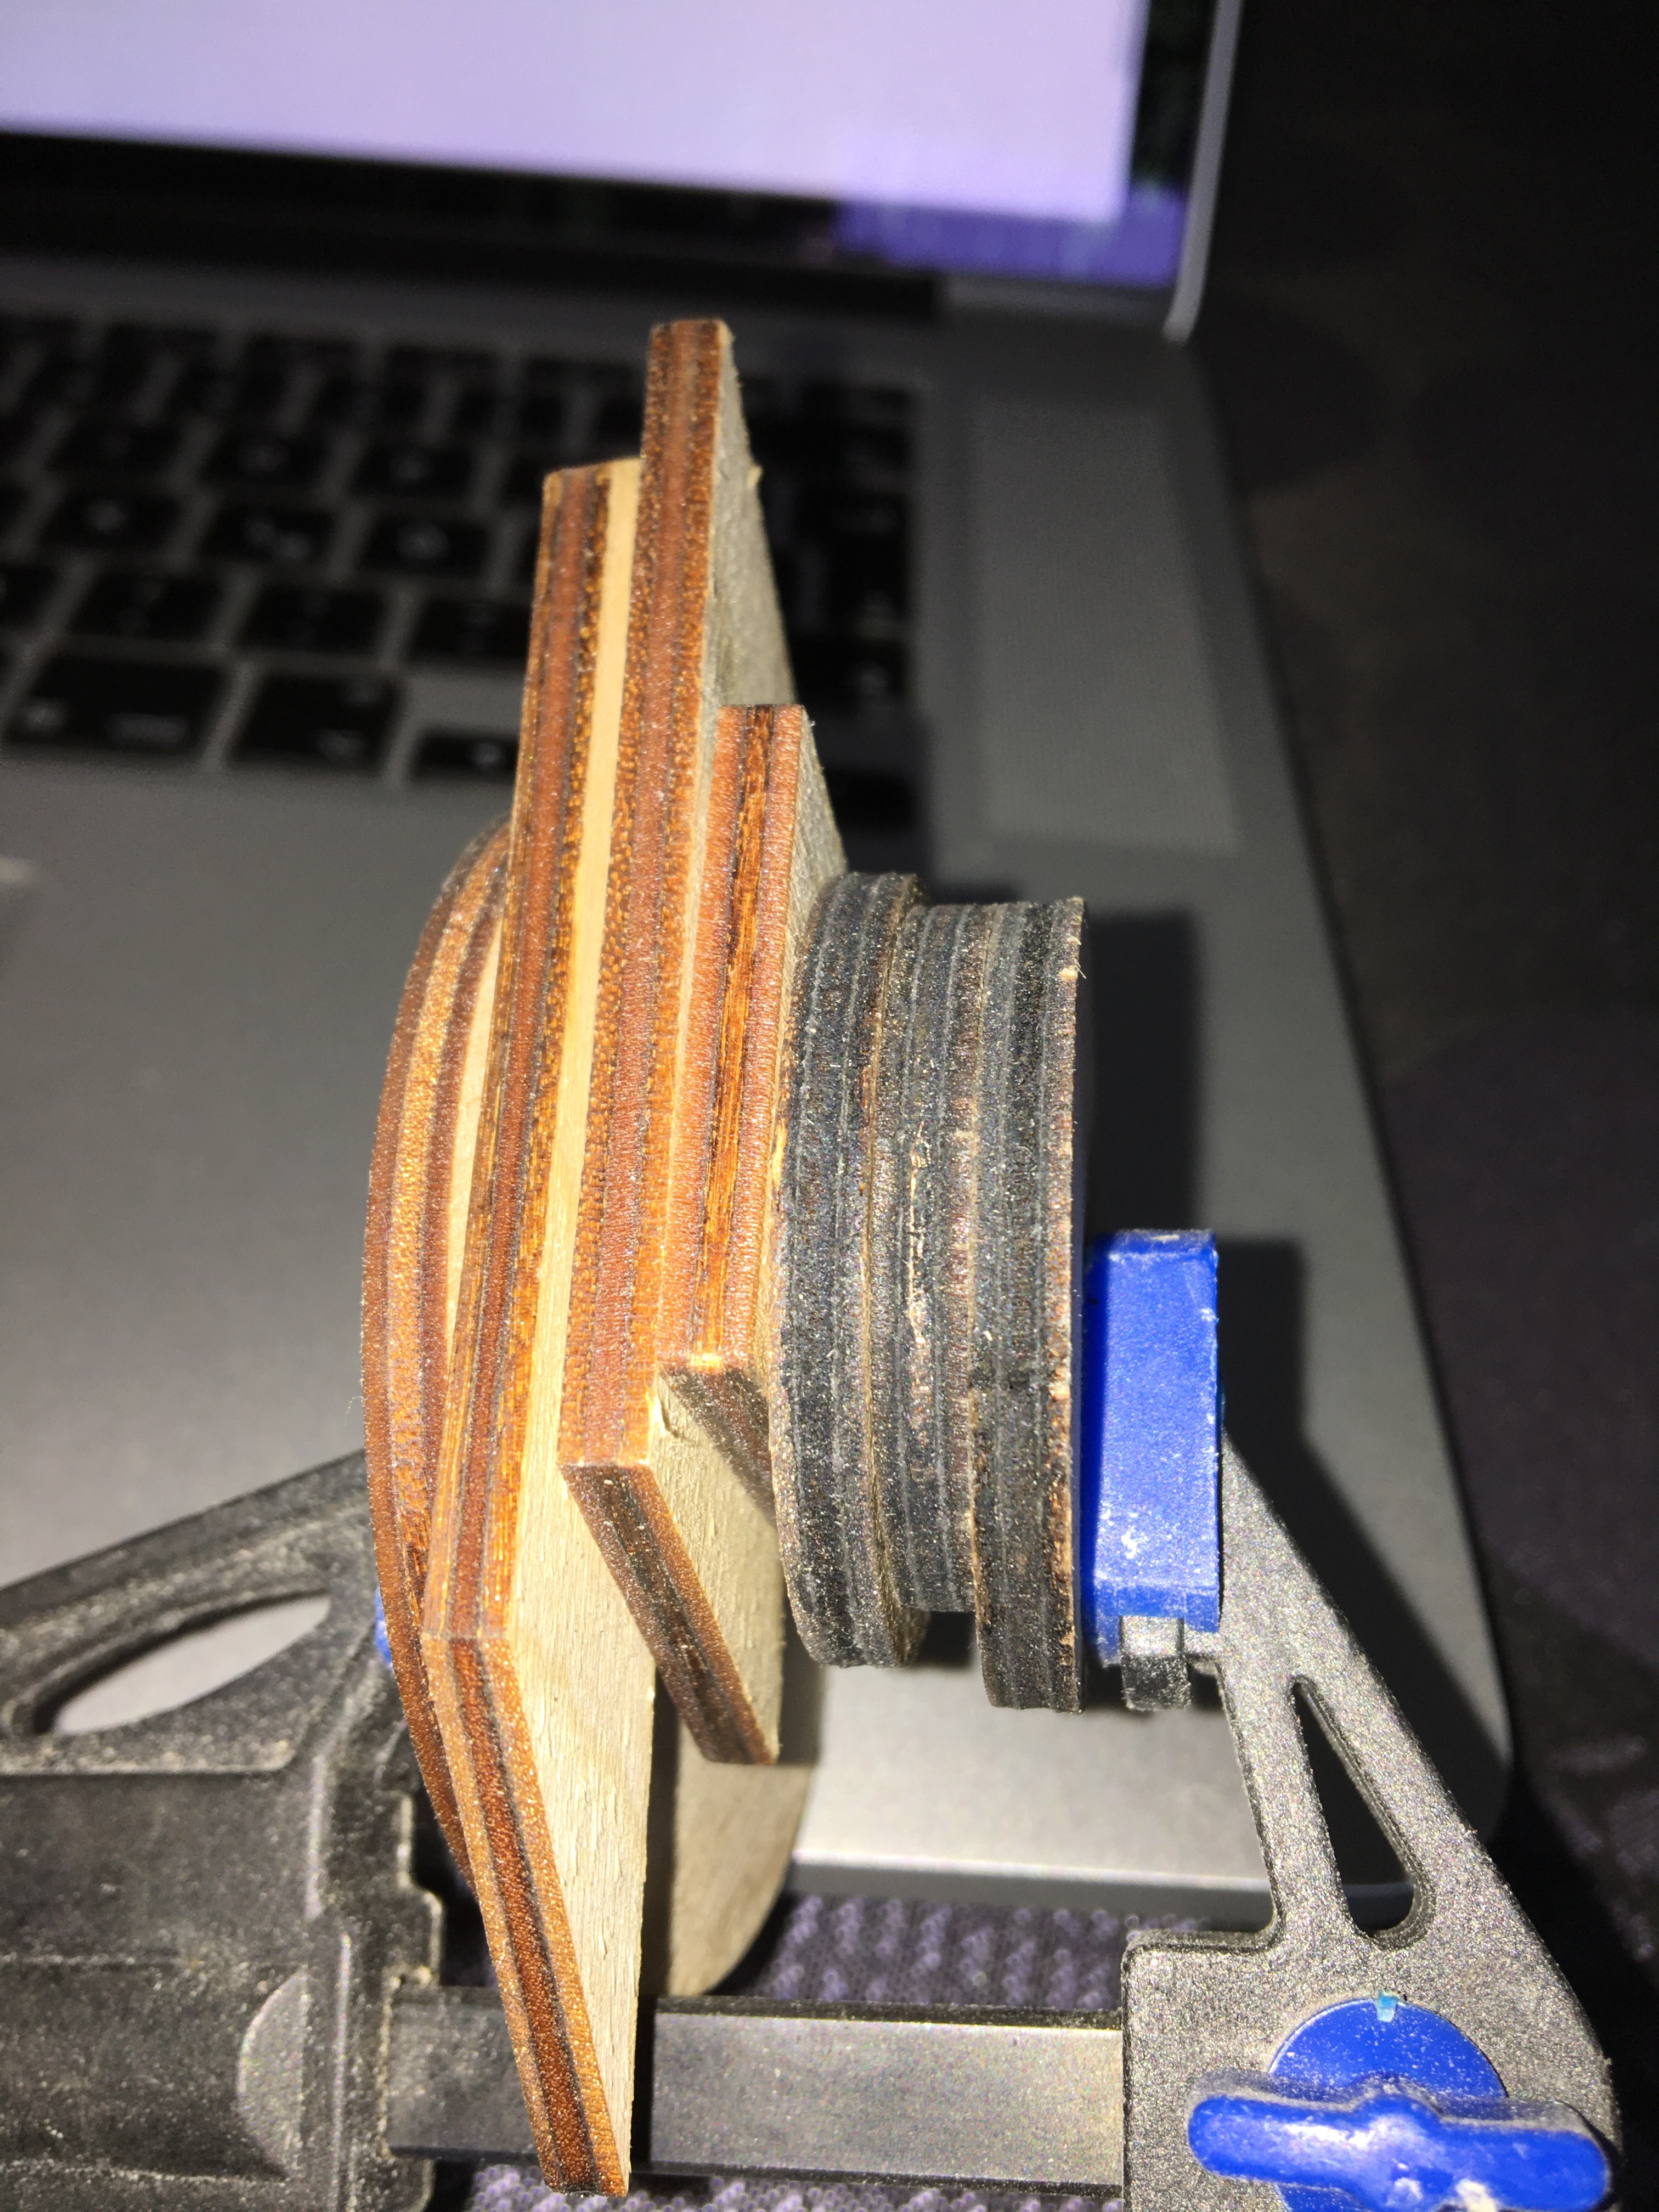
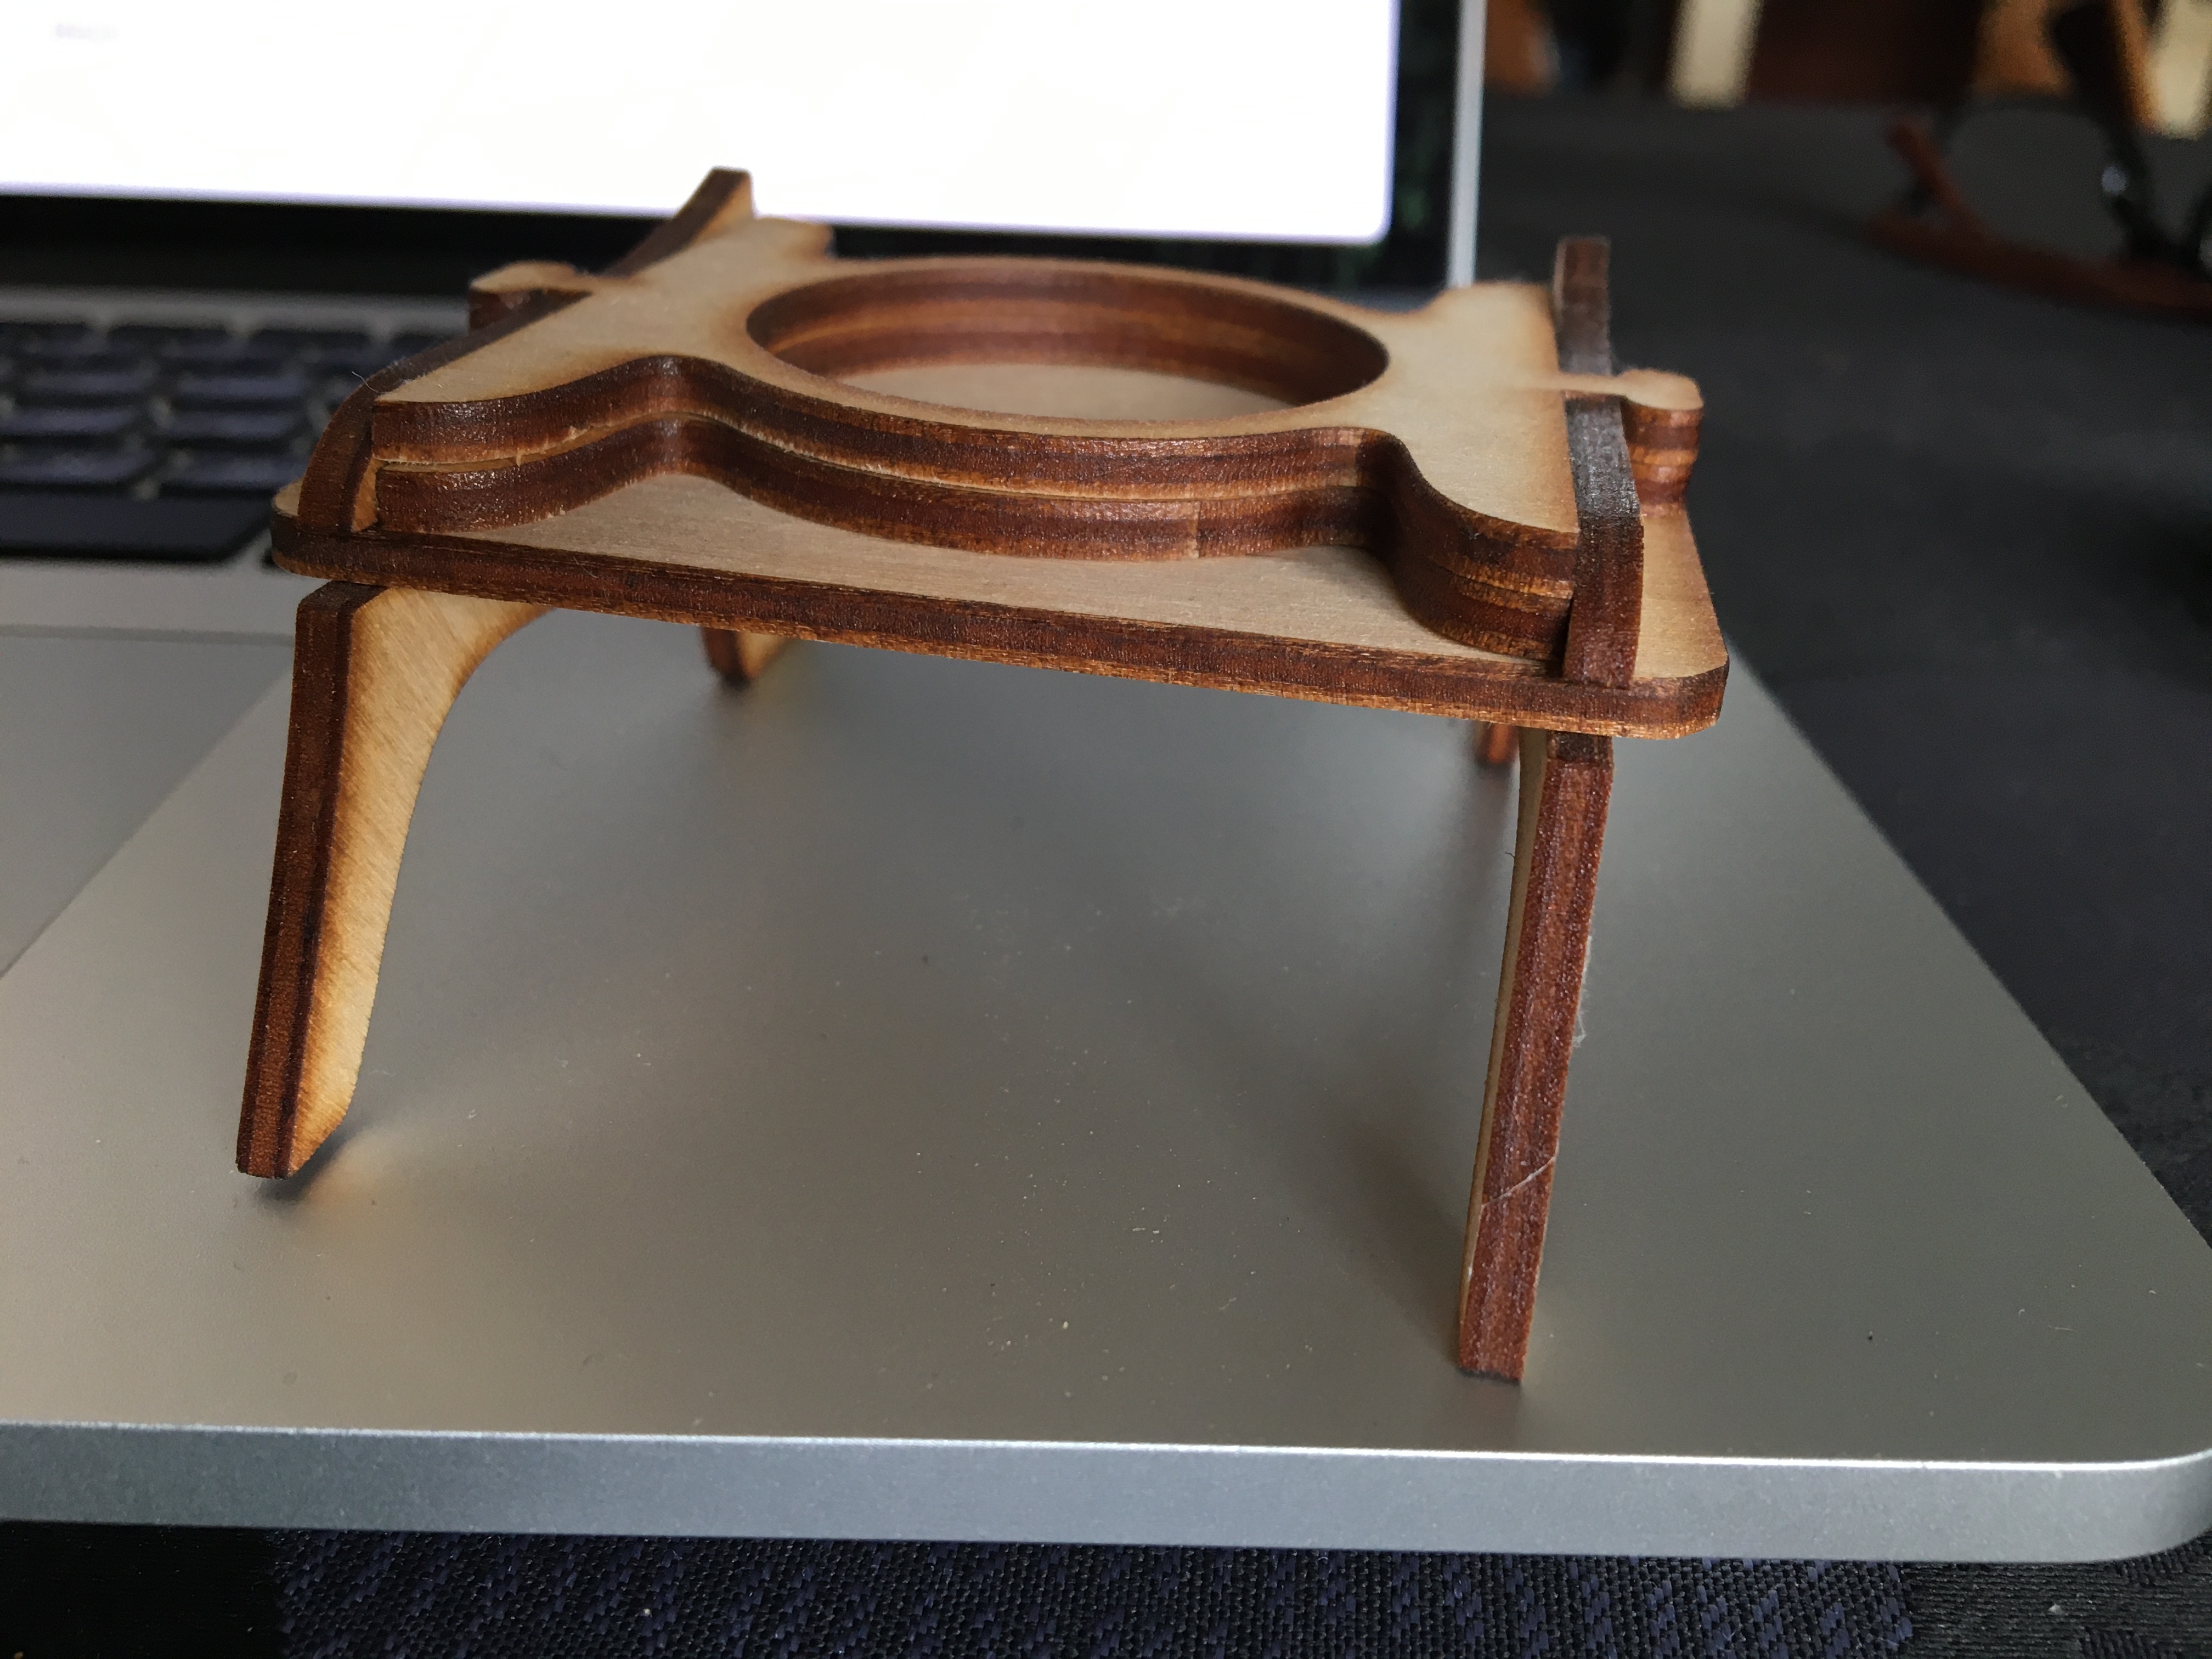
The pictures show test pieces I have made in 4 mm and a small sterin candle stand in 3 mm BB plywood.
The black pieces are from a sheet of Chinese wrapping material with more waterproof glue than wood inside, I can not use that, it’s that easy. (possibly with much more power and higher speed, but it does not matter because I only have 35 Watts)
The light items are completely clean with no finishing at all.
… and it’s not balsa wood!!! 
You make a good point with those examples. All I make is signage that gets painted or stained and sealed so it’s a non issue for me, I would have never thought of products like that, man I love the versatility of laser cutting. I will admit that your pics of the wood cuts looks amazing  . Maybe one day I’ll play around with setting until my cuts look as nice.
…maybe I just watched too many Russ Sadler videos, at least the man has infected me with the interest in more material tests and I actually like the test runs themselves, to find the best possible results.
My wife asks me once in a while why I make all the round slices and for what I want to use them for … 
Hey Karel,
Three things I see here:
1 - if you’re running 80W for straight cutting, set the layer settings to 100%/100%. For cutting plywood at 80W, you need all the power you can get… At 10.0%, you’re only using 10% of the laser power. (Although if you’re actually cutting 1/4 plywood and LightBurn says it is at 10%, I don’t think LightBurn is actually controlling the power of the laser so maybe a moot point. None the less, if you can set power on the cutter, make sure it is set to 100%.)
2 - For your 1/4 inch circle cut, other than the chairing looks good. The other thicker cut is not cutting as well and looks a bit inconsistent, especially with the top having less charring than the bottom. This looks like a lens problem but more like too thick of material. With any lens at a certain vertical point when you get too far past the focal point of the beam it just gets too out of focus. Think of the bean like a thin pointed triangle, pointing down. The focal point (vertically, the bottom of the triangle) is where you set your focus and where the cutting happens. The deeper you go, the more you go up the triangle and the beam gets wider and more out of focus and also gets shadowed by the edges of top of the cut.
Unfortunately a different lens may not fix the issue. The lens on your cutter was selected by the manufacturer to get the most bang for the buck at 80W. A different lens may work worse! It’s a bit like burning ants with a magnifier glass (gross example, I know, sorry, but every 8 year old boy has done that!), the more out of focus, the harder it is to burn the ants. With perfect focus, the ants just vaporize. The focal point of the laser is the same.
If LightBurn can control your Z axis (Do the UP/ DOWN arrows under MOVE move the Z axis?), you can use “Z Offsest” to fix the beam problem - but this only works to a limited extent.
In Device settings, turn on ENABLE Z CONTROL (this might be why the LightBurn was not able to control the Z axis, if that didn’t work before), and RELATIVE Z MOVES ONLY. Setting “RELATIVE Z MOVES ONLY.” to “enabled” is important, otherwise the table may crash into the laser head! (Personal experience with that.) This will allow LightBurn to control the Z axis on the fly. Under CUT LAYERS, you should see Z STEPS PER PASS enabled.
The way this works is you set NUMBER OF PASSES to a reasonable number like 2 or 3. Then set Z STEPS PER PASS to how much for LightBurn in inches or MM you want to Z axis to move up for each pass (you can put a negative number here and it will move the other direction). This way the laser can cut some and then the Z moves up and the laser cuts a bit more on the second pass. If you can cut 1/4 inch then you can start with 0.250" per pass. You will need to play with it to make it work and it is limited in how deep you can go. (Obviously, if LightBurn is not able to control the Z axis, then none of this works.)
3 - As for the charring what I find works best is to use the compressor and throw a lot of air at it. I have a 130W laser and use 30PSI and get no charring, just brownish edges. At 80W you may need to adjust to something less than 30PSI. An air regulator with a gauge (Harbor Freight) just before the laser cutter works well.
However, with 80W to play with, and working with plywood, which you have to work at to cut, there may be a certain amount of charring you just have to put up with. Wiping the the edges with a damp cloth will keep the charring from coming off on hands.
Last thing - The type / brand of plywood makes a difference. Some plywood has inner layer of a different type of wood than the surface wood and some have more glue. Try different types of plywood and see what give you the best result. I use 0.250 “birch” plywood from Lowes (about $47.00 / 4’ X 8’ sheet) and find this works very well with my laser cutter. It cuts cleanly and engraves very nicely. But my laser 130W. You mileage will likely vary.
Also, Poplar Sanded Plywood from Lowes cuts very easily. It comes in 4’ X 8’ X 0.197" sheets for $18.00, so it doesn’t cost much. You can get Lowes to cut into sizes to fit your cutter and you’ll have a lot of plywood to cut for pretty cheap. The only issue is one side is a slightly different color than the other.
Let me know how things work out.
–Ray
I have an 80w and cut 1/8" Baltic Birch Plywood at 30mm/s at 80% power. Their are several things I’d look at.
1 - Insure you have proper mirror alignment and they are all clean
2 - Insure the beam is hitting center of you lens and it is clean
3 - Insure the beam is perpendicular to the lens and work piece.
4 - Do a ramp test to find your proper focus point.
Recommendations,
Get better air assist. The sir pumps provided air somewhere between bad and just OK for air assist. I use an air compressor at 25psi for all my cuts and have little to no charring on the edges.
Use a better air nozzle then the one that feeds air into the lens and along the beam path. Those usually have too large a hole and do not provide the flow pressure/speed to properly clean the cut.
The mirrors and lens with most Chinese 80w lasers are OK. However they are not the best. I upgraded day one and get pinpoint cuts and engravings. This is not a necessity, just a recommendation.
If still having issues feel free to message me at 937-Three 0 Four- 07 Nine Five I’m in Texas, Central Time zone. Good Luck.

I’m glad I found it again.
This topic was automatically closed 30 days after the last reply. New replies are no longer allowed.