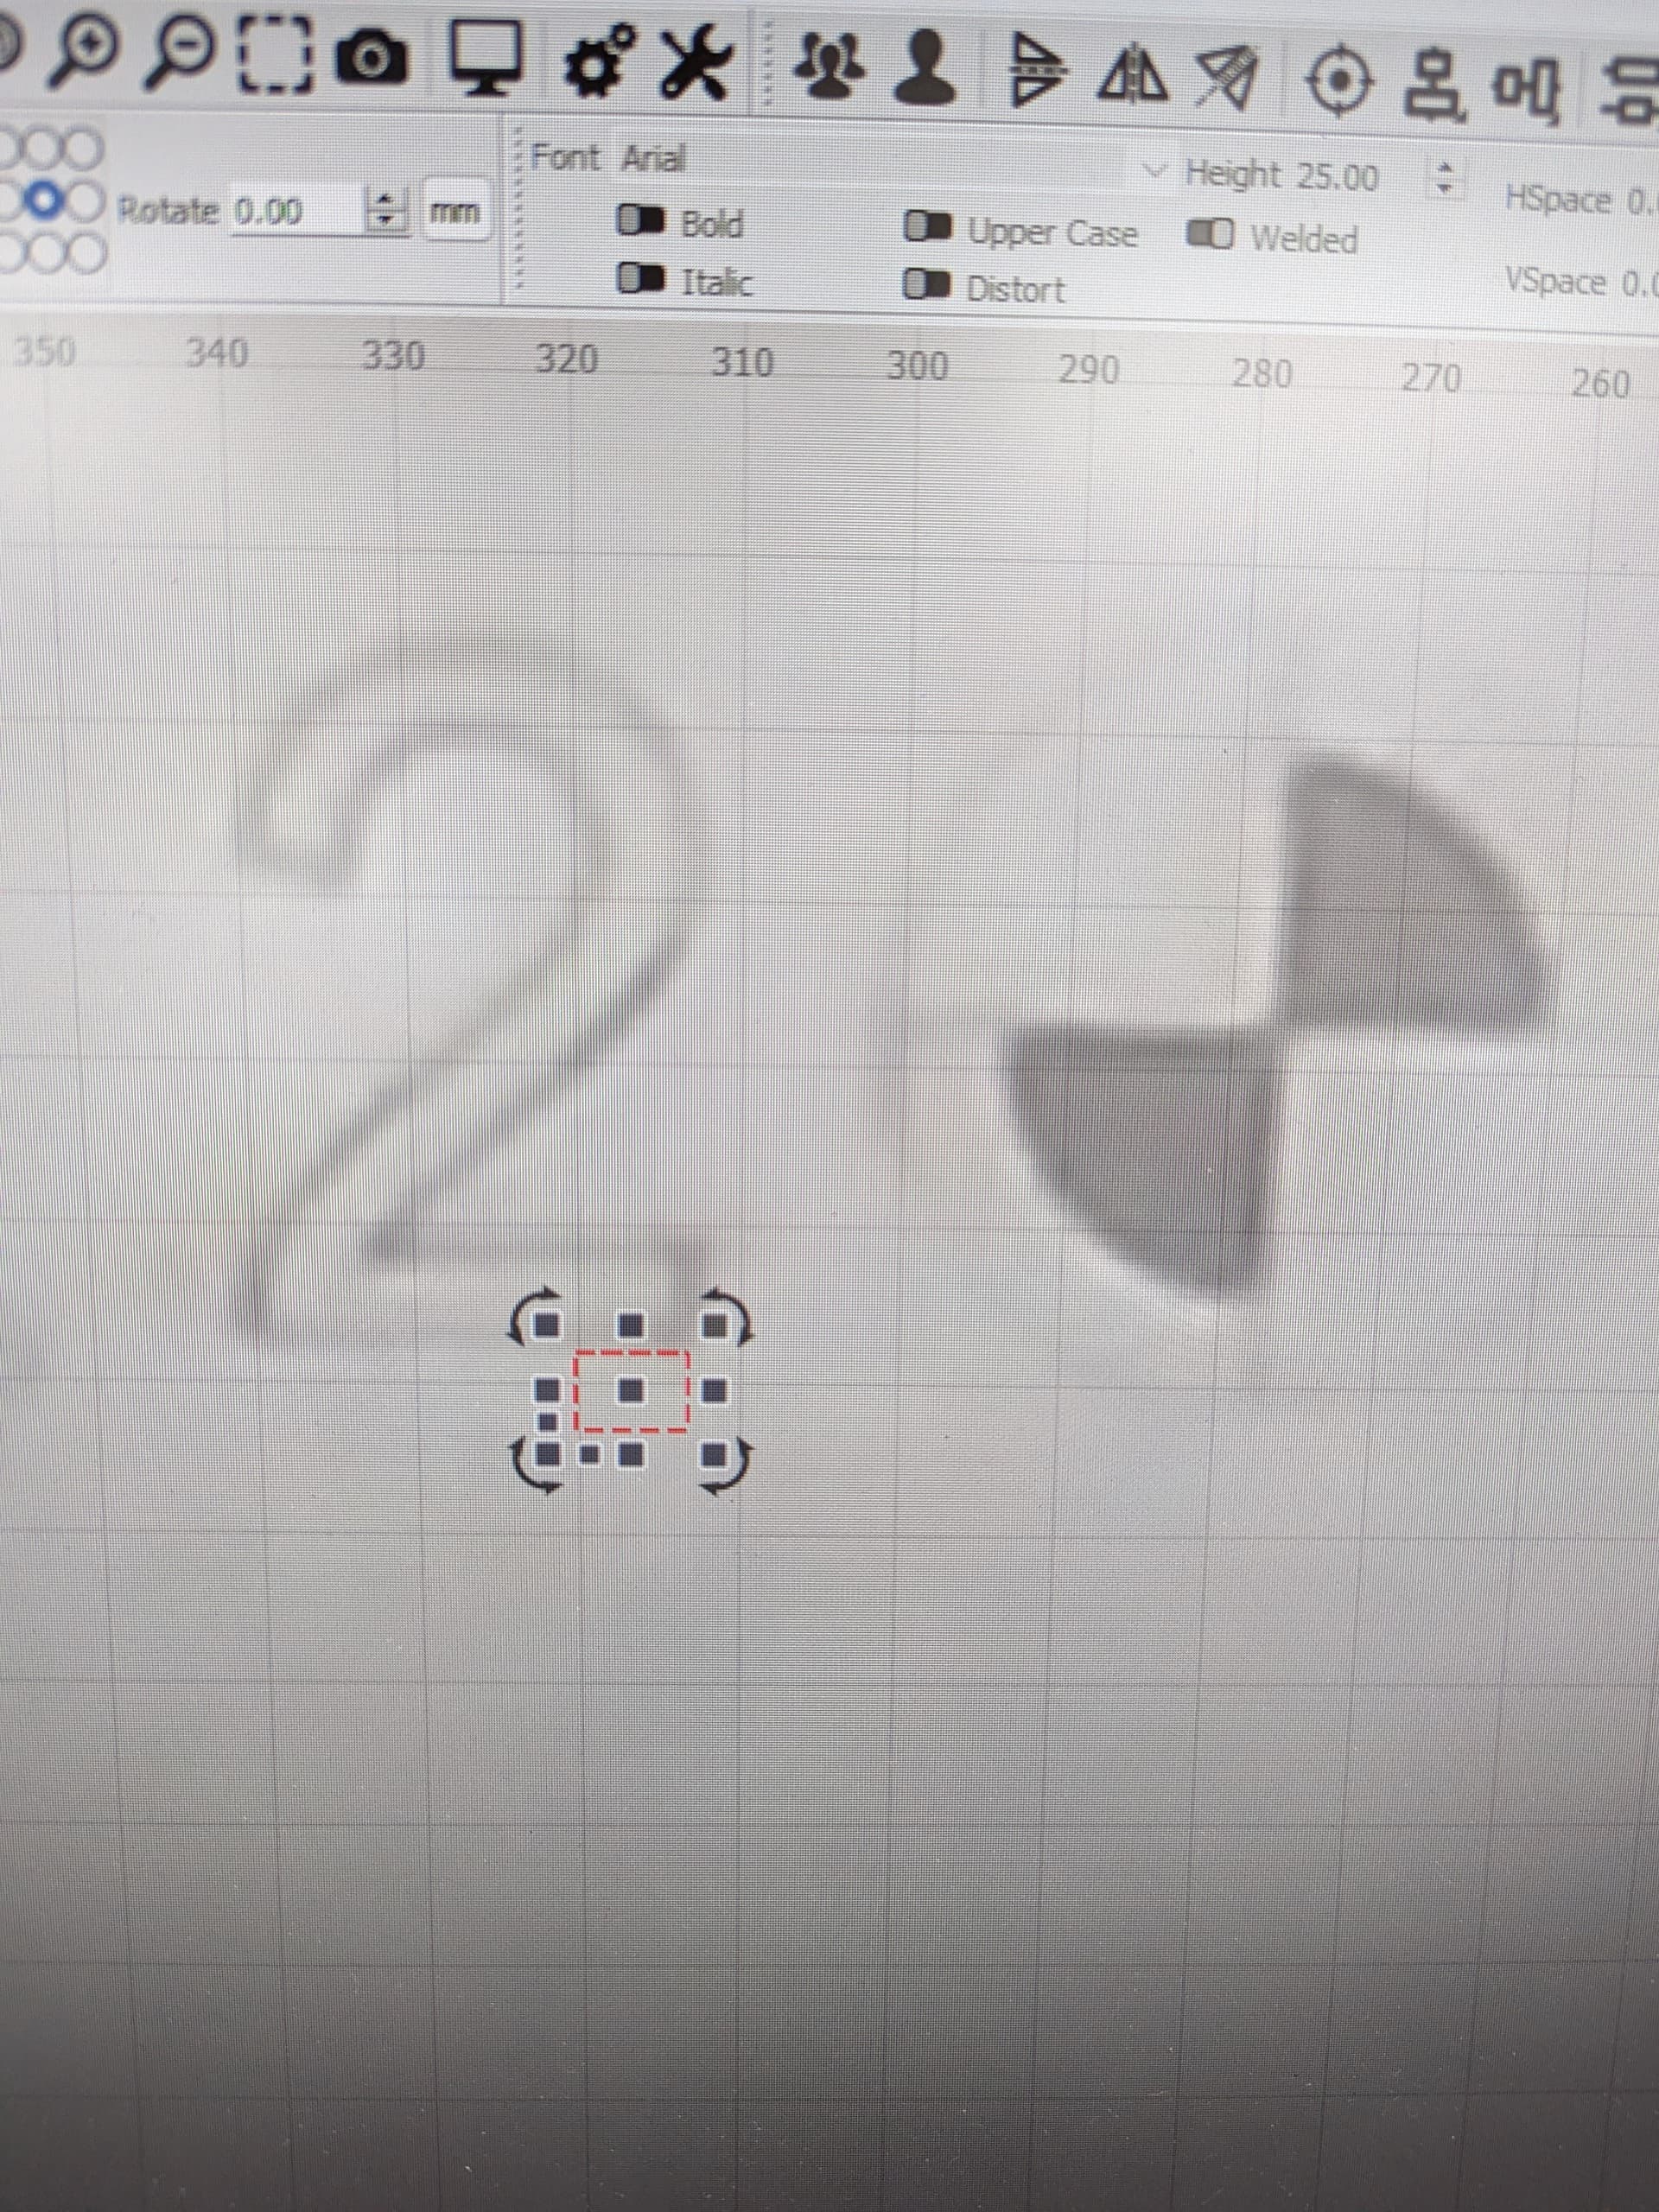
After Calibrate Camera Alignment, I always put an object somewhere to make sure its cutting correctly. Tiny sqaure, as you can see is off once its cut.
I calibrated the lens 3 times to make sure that was not the problem.
Any suggestions why it would be off now? Never had this issue before.
Thanks
I think I’ve been using your software for 4 years maybe 5 years it’s the same camera I bought back then. Not sure the model.
We do this about every 90-120 days and we actually reprinted the DOT page, which they are a little larger than what we have been using. We got some amazing scores, probably some of the best I’ve seen in a long time.
We normally focus (windows cam app) before we do any alignment to make sure the camera is in focus 100%. It’s always been a little blurry when you line up 1-4. But it’s always worked.
I will probably do a reinstall tomorrow and try again to see if that will fix it.
Is this just a matter of routine maintenance or is this addressing some sort of drift?
I think worth a shot but I’m skeptical this will make a difference. I don’t think there’s anything particularly new in the last update. What version of the software were you using previously?
There was one case of a user that benefited from manually removing the camera entries in the Prefs file but that was a one-off and not clear if you’re in the same situation. If I’m remembering correctly in his case he couldn’t get any new alignments to take… it would always revert to an existing alignment.
But if you’ve been doing this routinely for 4-5 years I’d imagine you’d have a pretty clear expectation of process.
One thing that this statement is tickling for me… is it possible that you chose standard lens instead of fisheye lens when doing the lens calibration when you actually have a fisheye lens? If so, you can get false positive extra high scores. Just a thought.
It is also possible that the camera is not 100% in the same position as it should be, (loose in the housing or play in the hinges of the lid or the telescopic springs are not ok…) or the camera height to the material surface is different as during calibration. Even light changes can cause deviations, but not on the scale you show.
When I calibrate on thick paper and then test on 3mm plywood and don’t compensate for the height difference, my camera doesn’t match either. …it can sometimes be tricky
-. Routine Maintenance. We have 5 machines, its important to always make sure things are 100%
I wish I knew the last version. One of my employees upgraded it and I am not sure. If the reinstall does not work, ill try looking at the camera entries in the Prefs file.
I selected fish eye. We have a pretty good set of rules for maintence. Great check list for myself and employees.
I checked that to make sure nothing was loose or out of play. I also use a 4mm piece of wood. Autofocus to it.
One thing that does make a difference is the lighting. On all 5 machines, we have custom LED lights and we do have to turn off one of them (it creates a shadow) when doing this.
yes, this is also my experience, the only point of criticism I have about LightBurn’s camera is that an internal (LightBurn) manual exposure adjustment is not possible. Even my lousy original Chinese led light is just the upper edge of what the camera can handle, you’d think it was the other way around - too low light.
This is the scale used during Camera alignment? If so, not sure why that would make a difference.
I would think reducing from 225->100 would have made your alignment worse since you’re dealing with alignment targets set at less than half the distance.
I also remember that,
… under linux there are also options (outside of LightBurn) to correct the settings, they are just not taken over by LightBurn and not saved either.
I turn off the light or try to regulate it as needed with more or less success. For special tasks, I regulate everything anew and can achieve results of approx. 0.5mm over my entire machine bed - I am extremely satisfied with that. For daily use, for efficient use of my materials, I settle for a tolerance of approx. 1-1.5mm.