Hi
somehow i have difficulties calibrating my webcam lens
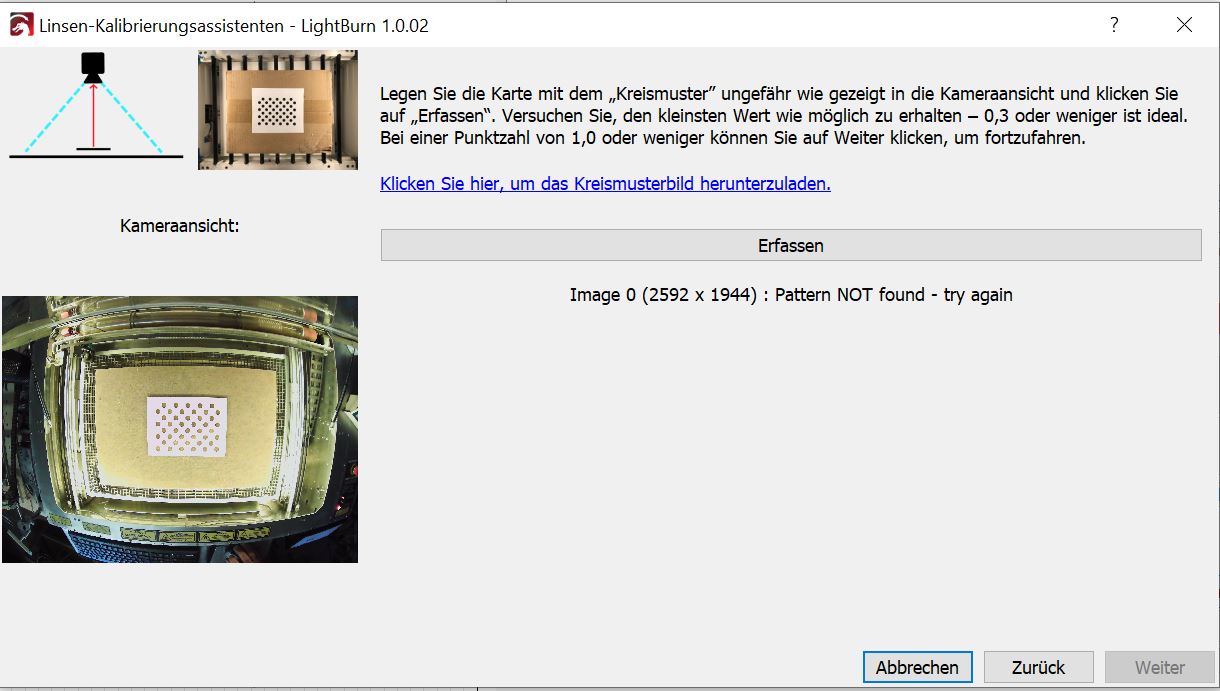
somehow i can’t get past the first picture although i have tried it several times
what am I doing wrong?
can someone help me with this?
how can i optimally calibrate the lens?
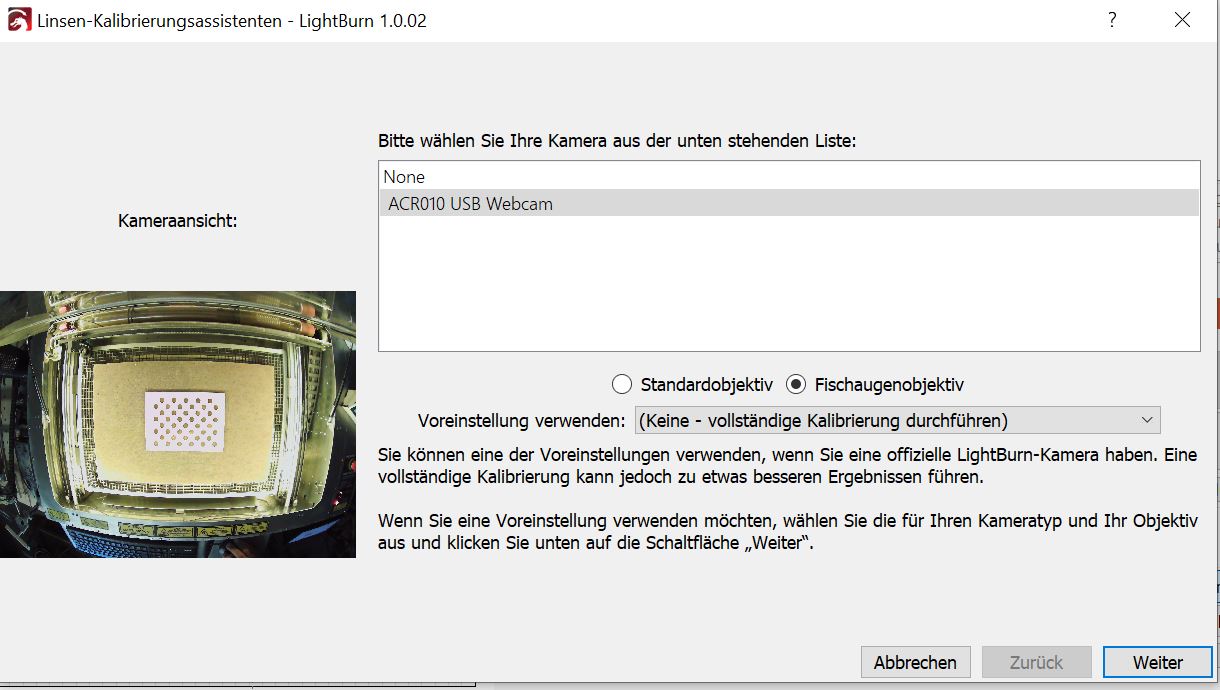

First off, it looks like there is a LOT of extra image in the camera’s FOV. Your camera has a very wide lens, and it appears to be mounted very far away from the bed… resulting in the actual bed only taking up about 1/3 of the entire frame in the center.
I would try moving the camera closer to the bed, as close as you can get it so that ONLY the bed is in view.
Also, there is a LOT of other patterns visible in all of that extra image you’re capturing that isn’t “bed” and all of those extra background objects can create a lot of “noise” that confuses the calibration program.
Also, cover up your entire bed with something solid colored. Again, the pattern created by the expanded metal on the bed can create noise that confuses the calibration app.
Also, I can tell from the sample image you attached that your calibration pattern isn’t FLAT. I can see it casting a shadow around the top and left edge, which tells me that the pattern is curled slightly. It’s 100% IMPERATIVE that the pattern is dead flat! I stuck mine to a thin sheet of white polystyrene model maker plastic (the type that comes in sheets that model railroaders use when building scale buildings and stuff) but any thin, stiff, plastic or metal would work, as long as it keeps your calibration pattern perfectly flat and doesn’t allow it to warp, bow, or curl.
Also… your lighting isn’t even. I can see a lot of “hot” spots, and your sample image appears to be unevenly lit. See how the top rows of dots are dark black, and the bottom rows are very washed out, and almost appear yellow? This can cause the calibration to fail!
Make sure you’re not printing the calibration pattern on paper that has a luster/shine to it, as this will cause the black dots to shift in color and reflectivity depending on where it is on the bed. Some laser printers look black when viewed straight on, but when you tilt the print at a slight angle, it reflects light and the black dots start to disappear when compared to their surrounding (it’s an optical illusion that can confuse the calibration).
Last thing I would suggest (if all else fails) is to change the scale that you’re printing the calibration pattern (try slightly larger or smaller). Not sure why, but this worked for me when I got stuck where it would NOT recognize the pattern, I reprinted it slightly smaller, and BINGO. It worked perfectly, first time!
If you’re still having problems, analyze the image output from your camera VERY closely. Some high-resolution cameras can add a lot of digital “noise” to the final image output, that when you look at it VERY closely, it almost looks like the image is covered in millions of tiny clear bugs crawling around over the entire image. LOL. You can’t see this artifact when you look at it from a normal distance, but when you zoom in and look carefully, you can see this disturbance over the entire image. If your camera is producing this artifact, you can try adjusting your lighting. Sometimes all it takes it reducing the amount or type of lighting a bit, this causes the camera to internally switch over to a different shutter speed, and you can end up with a much “cleaner” and more clear picture! I mention “type” of lighting because LED’s are great, but they can cause HAVOC with digital image sensors, especially in video cameras that are sure to cause the calibration to fail.
Good luck man! I spend hours trying to get mine to work, but once I got it… it worked PERFECTLY, and now I can recalibrate in a couple minutes, and I’m able to score 0.03 - 0.05 on each image, and I couldn’t even get it to recognize the image at first! So stay at it! You’ll get it!
-Dom
- The paper does not appear to be flat.
- Part of the honeycomb bed is still visible.
- The pattern card is not large enough in the view. (it does not need to be on the bed of the laser)
Hi
it is unfortunately not possible for me to bring the camera closer to the bed so unfortunately I cannot prevent the additional edge
i can cover the whole bed
I engraved the pattern from a 4mm poplar plywood and cut it, which means that it is straight, but with a height of 4mm, which will also occur relatively often in later use
changing the light i don’t know how i could do it
I have an idea for that
what if you added a selection frame to the calibration so you could manually make an approximate selection of the test pattern the position and size could possibly also be helpful for the detection
in this way one could perhaps exclude the excess image material and perhaps narrow down the problem with the honeycomb structure
i don’t know if this is a good idea
but i think that it is at least worth considering
You engraved the dot pattern? That may be ok, but won’t be as accurate as printing it on a printer.
Ok then I will print it on cardboard so that I get a flat surface
I just thought that engraving is better because the program then sees what comes out of what it does and so maybe can react if something is not so great I just thought that this program could learn from it