Camera from Cohesion3D originally had a 140°lens. It was way too wide for my machine - a 100Watt 600x450 G Weike machine (The device is configured for 650x400 in Lightburn). I replaced the lens with a 90° and it shows the bed area much better. When the lid is up on this machine it rests against positive stops so it is always in the same position when raised. The camera is mounted almost perfectly in the center of the bed looking straight down in the lid open position. Lightburn 0.9.11 running on Windows 10 Professional with all current updates.
Now for the issue!
When I calibrated I did need to use a box about 2’ tall in order to get the target close enough to the lens for a good calibration. I did all 9 points and got between 0.16 and 0.20 for the results on each - so that seemed like a good calibration.
I then ran the Calibrate Camera Alignment tool. I used posterboard for the target and cut it at 150% to maximize resolution. The alignment went well (but see note below) and I was able to precisely locate the cross hairs.
I then attempted to use the camera.!
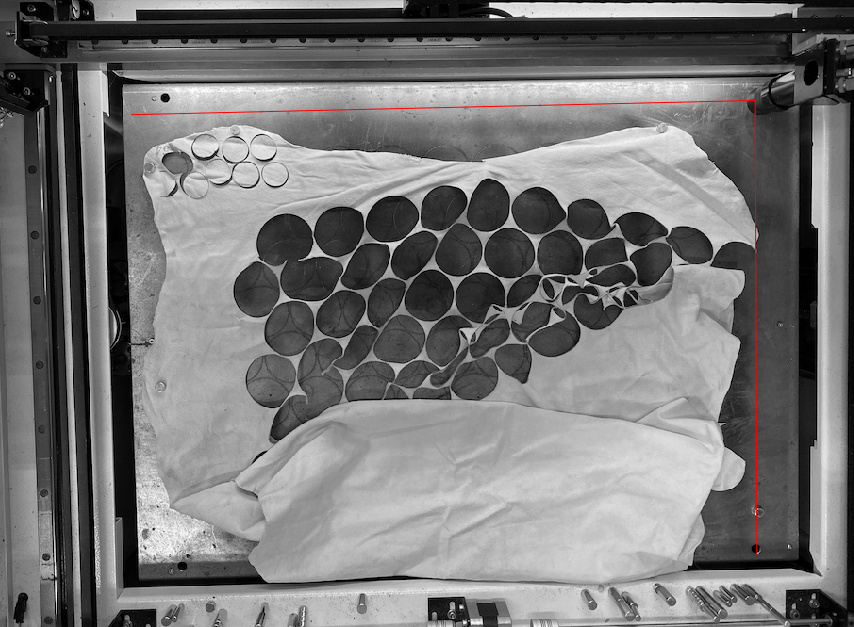
This view shows basically what my camera sees - I took it with my iPhone held right where the camera’s lens was. It is very close to what the 90° lens shows.
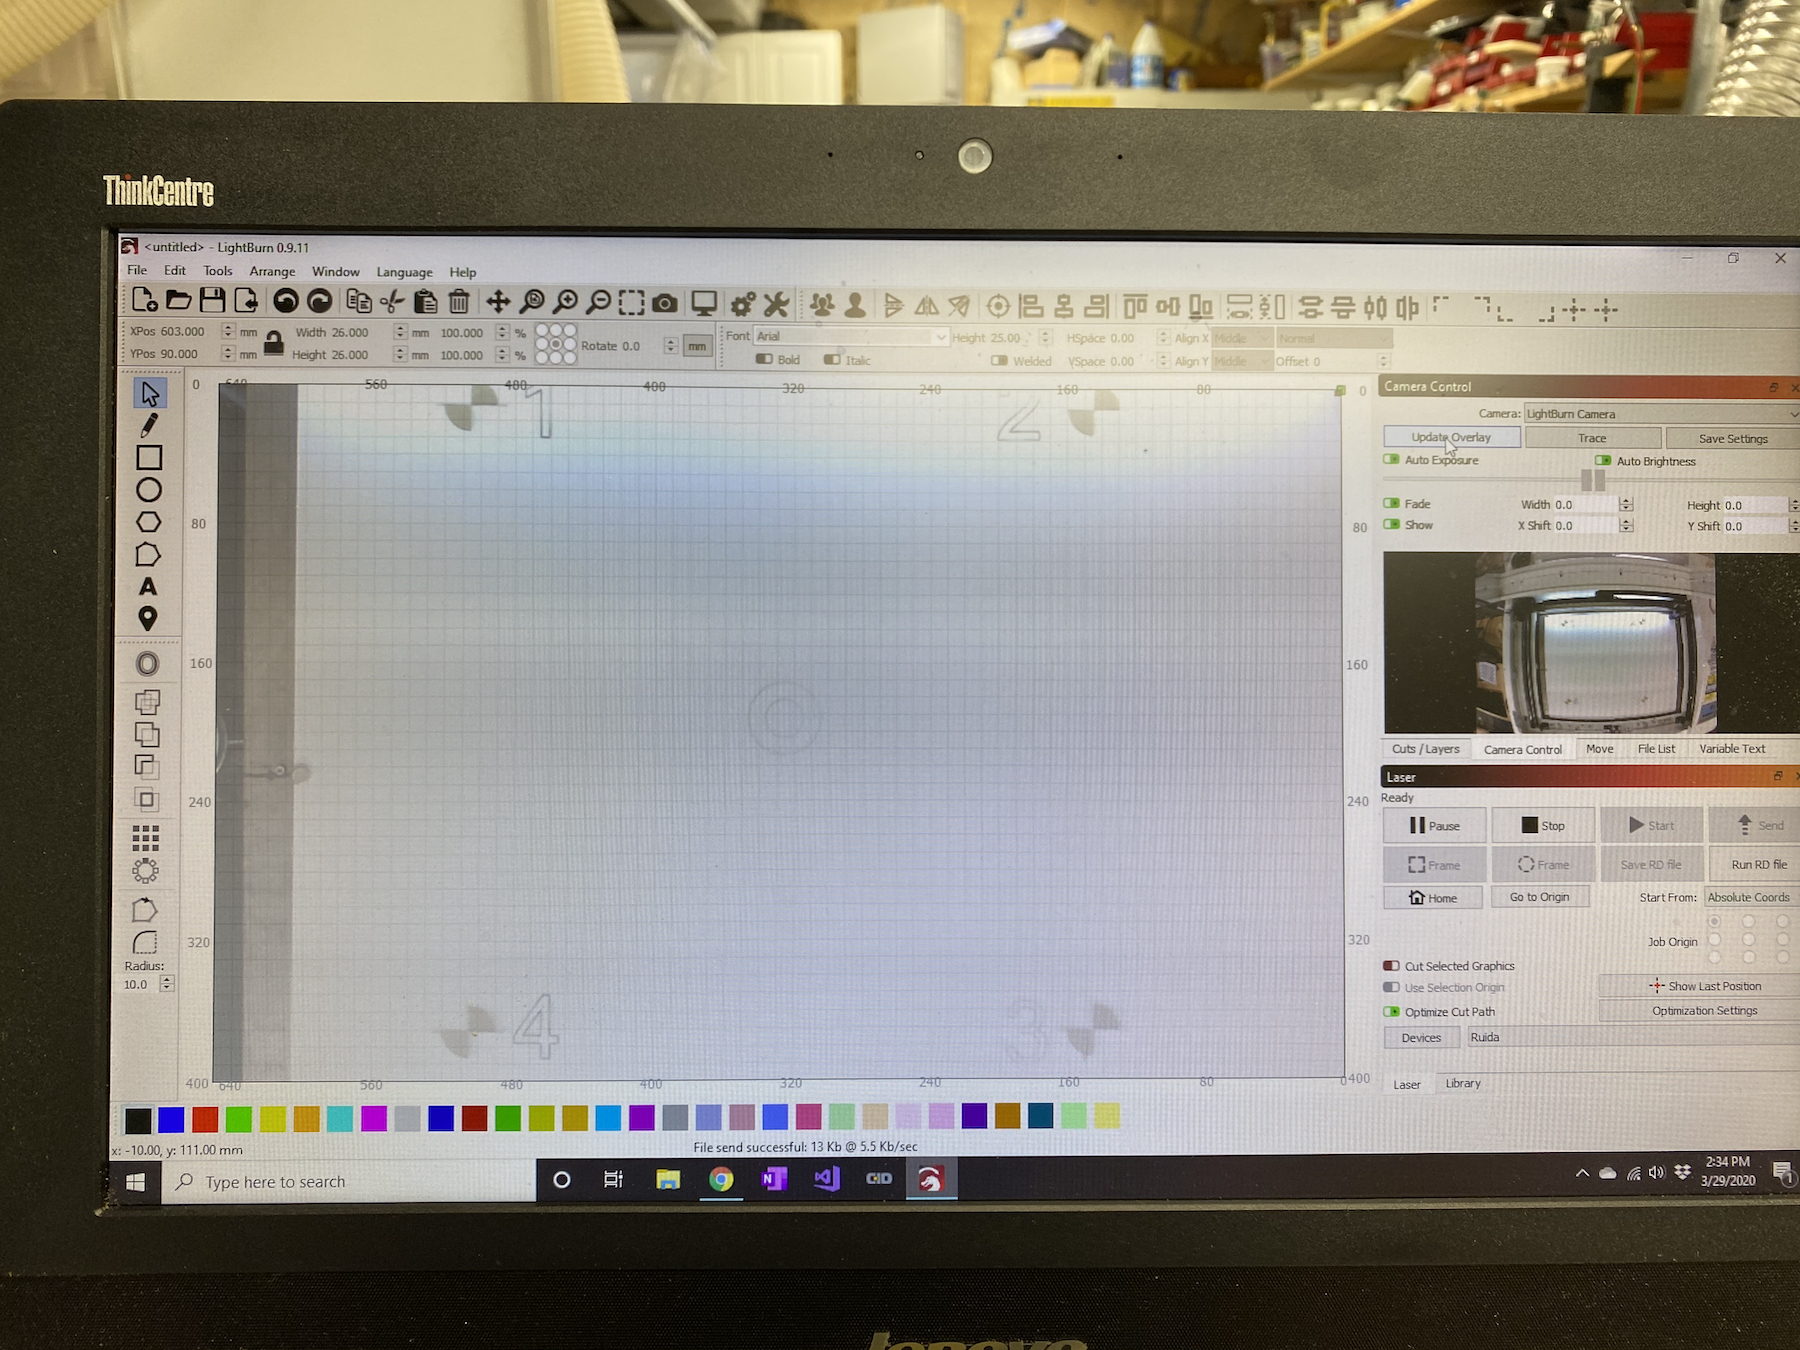
Now for the root of the issue. Here is what I see in Lightburn. Note that the lens above is in the home upper right position. The Lighburn camera overlay cuts off ~50mm of the top, ~50mm of the right and ~100mm off the bottom of my actual work area. The left side looks fine except that the camera image is not aligned with the edge of my bed surface (it shows the 10mm gap you can see in the photo above).
Note that when I first attempted to use the overlay the Width and Height fields were pre-populated with “4.5” and the the position and offset of the overlay was really far off. At least with them set to “0” it is closer but not reflective of my actual bed.
I ran the Calibrate Camera Alignment tool a second time with identical results.
One last question: I notice that if I click the Camera Control “Update Overlay” button that the image will jump up and down a bit (5-10 mm) although I have not touched the laser, lid or camera (and as I mentioned above, the lid is resting against a positive stop). If I click several times it seems to “settle in” and doesn’t jump.
Note: is there a significant reason to 1) scan the upper right-lower left wedge in each circle rather than just cut the lines? On cardboard it was nearly impossible to adjust speed and power so that the cut lines did not actually cut the cardboard. And double stroking the numbers also cut them out. Seems like simple quick 1 pass strokes should accommodate paper to wood to masonite?
I ran through the entire lens and camera calibration again. This time I used 200% increase in the calibration target. Here again, you can see that the targets are cut off and not correctly located on the bed.
I drew a circle around the center circles and they were offset in Y by about 10mm so I used the Y shift to adjust and zero in on the center. After several attempts it looked close but there were too many cut lines to be sure so I moved the circle to target 3. Now, the laser moves from home to the center of the bed and stops - it does not cut 3. However, if I do a frame, it goes down and frames target 3 correctly (and looks like the target is centered in the frame). I have a video of this entire process but I’m not sure if I can post it here.
I’m still having the alignment issue with the camera overlay clipping my bed to smaller than 600x450mm. However, parts are cut accurately, just not outside the clipped region.
As for the jumping issue, I remounted the camera with 3M 485M tape - this is the thin 2 sided tape. I also put a drop of superglue on each end of the camera mount to further stabilize it.
I then re-ran the calibration and when I attempted to draw a circle around the center target (I left the target on the bed held with magnets so it did not move) it is shifted in Y as I described on the other thread. I can close and open the lid, rehome and Update Overlay the overlay stays in the same place most of the time and the new cut is still off by exactly the same amount. and overlays the previous cuts. If I click Update Overlay multiple times, every so often, it will shift the image in Y but the next click puts it back where it should be.
LightBurn automatically crops the image to match the exact dimensions of your usable travel area, as set by the workspace size in LightBurn. I drew red lines horizontally and vertically out from where I guessed the nozzle to be, and that matches the bounds of the image you showed. Is there something I’m missing?
Sorry, my reply to the above ended up in the other user’s thread.
But note from the last image I posted above that the 4 targets are clipped or very close to the edge when in reality my bed is 450mm tall and the target I printed at 200% should have been 400mm tall. Once cut with my laser, there was about 20-25mm of usable area above the top targets and below the bottom targets but the overlay, as you see, clips them.
Hi,
Have you checked your ruida device setup to be sure Y is set to 450mm? Just looking at your first picture it looks like the overlay is being clipped at 400mm for Y.
Cheers
Yes, this laser is 2+ years old and I’ve cut lots of stuff in the 600x450mm area. I know that’s what it looks like and I double checked the Ruida device config in LB and it is set to 600x450 as it also is in the Ruida firmware. I’ll double check the firmware later though just to be sure.
Just watched your video again. The reason you’re getting the 3 beeps at the end of your video is that you’ve drawn that circle out of bounds of your travel. I just went to my machine (600x900 Ruida 6442) and drew a circle just like yours where the bottom of the circle is slightly out of bounds. I get the same behavior. It will frame the circle but if I click Start I just get the 3 beeps.
I think the issue is that you’ve told the ruida where your cut area is. In my case 600x900. My limit switches are probably set at something like 650x950. Thinking maybe the ruida will run the frame as long as it’s not hitting a hard limit. But if I try to tell it to cut beyond what I’ve told it the usable area is I"m getting the 3 beeps. In other words I could tell Ruida my bed is 200x300. I could have it frame something totally out of those bounds (a circle with a center point at 400x500) because it doesn’t hit a limit switch. But it’s not going to run a program that cuts out of those bounds. If I try I get the 3 beeps.
Rescale that alignment pattern and get it a good 2" inside the frame of the machine. I’m 99% sure that’s why your alignment circle I pointed out earlier in the other thread isn’t being burned, it’s out of bounds.
You say your machine is a 600x450. But maybe it’s actually more like 700x550? It may be spec’d at 600x450 but could have more travel than you think. Think about that. Exaggerate it. It’s a 600x450 machine but the actual travels are 800x650. You’d run the alignment and the image you’d get with the overlay would be cutting off 200 pixels in each direction.
Want to check it? Tell the ruida that your machine is 800x650. Jog it (slowly) until you hit the limits and see how far it actually goes.
To prove my point, go tell LB that your table is 200x300. The alignment will have to fit into that little area and the image will be a 200x300 part of the upper right of your table.
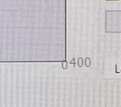
Thanks, a lot to think through! My machine was advertised as 600x400. It is actually something like 620 x 460 so I configured it to 600x400.
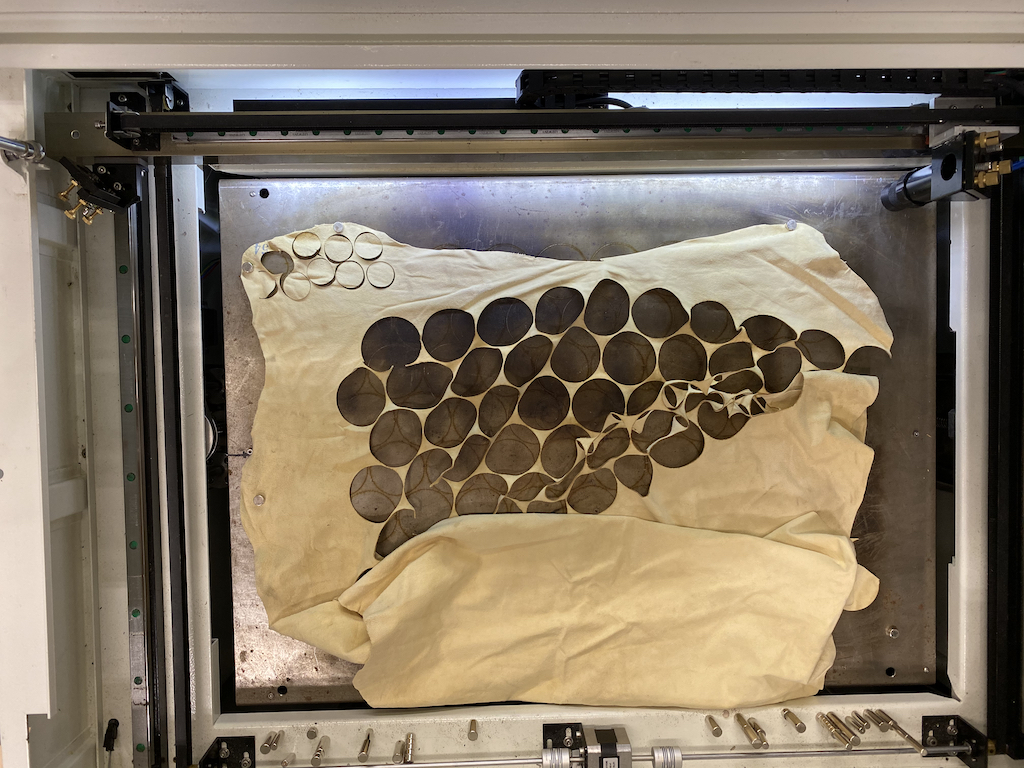
Odd in that when I cut these leather disks normally and I have some that are not completely contained in bounds, I get a partial cut not a complete refusal to cut anything. And if I do a frame and the frame is successful (not truncated) it certainly cuts the part normally. This is not behavior that I normally see. I’ve cut 10,000s of these disks plus lots of other stuff.
I’ll go through everything soup to nuts tomorrow and do a full perimeter cut of a 598x448 rectangle to show that it will actually cut that, then leaving that big piece of cardstock in place I’ll redo the calibration with a scale factor to make sure that I have 2" of margin around the pattern. I’ll cut the pattern and leave it in place and attempt to cut circles around the 5 target areas.
Curious to know your results. But if it’s actually a 620x460 cut area and you configured it to 600x400 then the image you get from the camera is only going to cover 600x400 leaving you with 60mm on the bottom of the y axis being cut off in the image. Also, when you do that cut, measure it afterward. Make sure the dimensions come out to what you told it to cut. I suspect that it will. But doesn’t hurt to check.
To be clear, the machine was sold as 600x400. After some minor mods and testing I determined that I could do 600x450 safely so I configured the Ruida firmware and LB device config to 600x450. I’ve been running that way for 2 years and have cut things that are the entire 600x450 bed (this leather for example). That is until yesterday when I attempted to setup the camera. I haven’t touched the firmware or LB’s device settings - they still show 600x450.
Interesting. Something is fishy. I’ll go through everything when I get back in front of the machine - hopefully tomorrow.
Ok. just checked something. I have 3 computers running Lightburn. The mac ansd windows machines in my office is where I prepare files and LB is configured for 600x450 on both of them. The windows machine I run the laser from is in my shop and I think you got it, it must be configured improperly. The firmware is set to 600x450 but lightburn must not be. I can check that tomorrow. Thanks.