Camera calibration with Wecreat Vision 40W

Hello, I’m using Lightburn version 2.1.04 and LBDEV file I recently received from this forum -

WeCreat_Vision_40W_08_2026.lbzip which fixed the connection problem I was having connecting my Wecreat Laser and LB software.

Now I’m try to calibrate my camera using the Lightburn documented instructions.

When I go to the Camera window I see the Wecreat camera displaying the laser bed, so I assume its recognized the Wecreat camera.

I right click on this window and get header “WeCreat” with options to Edit, Remove, Export"..

When I click on any of these 3 options I do not see any option to identify this camera as

being “pre-calibrated”. Where do I find this?

Thanks for the help,

Peter

Are you following our “WeCreat Specific Instructions”?
As far as I know, that’s not needed anymore. Last time I used it, our standard instructions for camera setup also applied to the WeCreat.

The New Camera Wizard should have offered to select a “Precalibrated Camera”, but I see that’s not an option when loading the WeCreat camera from the included presets.
I’ll report this internally.


In the meantime:
Even though the manufacturer states that their camera is “Precalibrated”, I found that the results are better if you calibrate the lens using the AprilTags card, as explained here:

Hi Aaron , you are correct, when you select the Wecreat camera there is no option for “precalibrated Camera”.

I did make some headway getting as far a printing the calibration pattern but could find how to verify the pattern.

Yes, I have tried the “Wecreat Instructions” on your website and got lost trying to follow the instructions maybe because I’m using the latest Lightburn release and the instruction are old…

I’m going to resolve this eventually and made significant progress thanks to all the support…

I will let you know how I make out..

Thanks, Peter

Hi Peter,

I’m just running some more tests on our Vision.
Thank you for bringing this to our attention.
One of our devs already wrote the changes to automatically select the “Pre Calibrated” preset in this step.
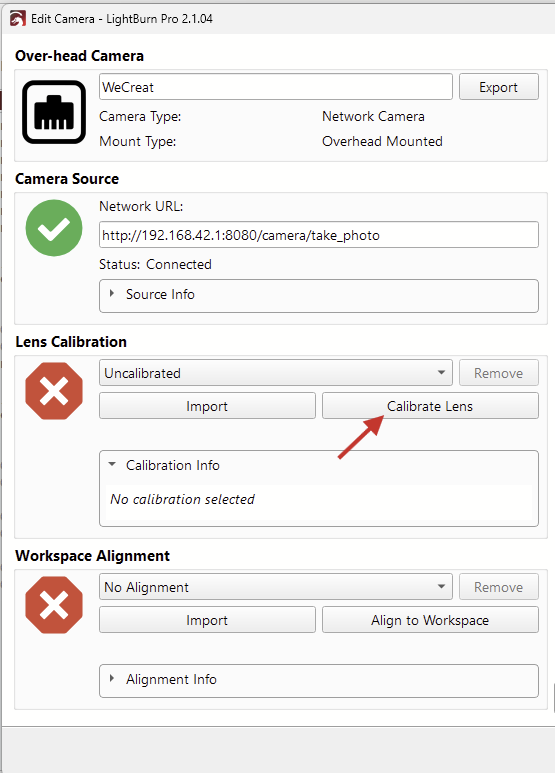
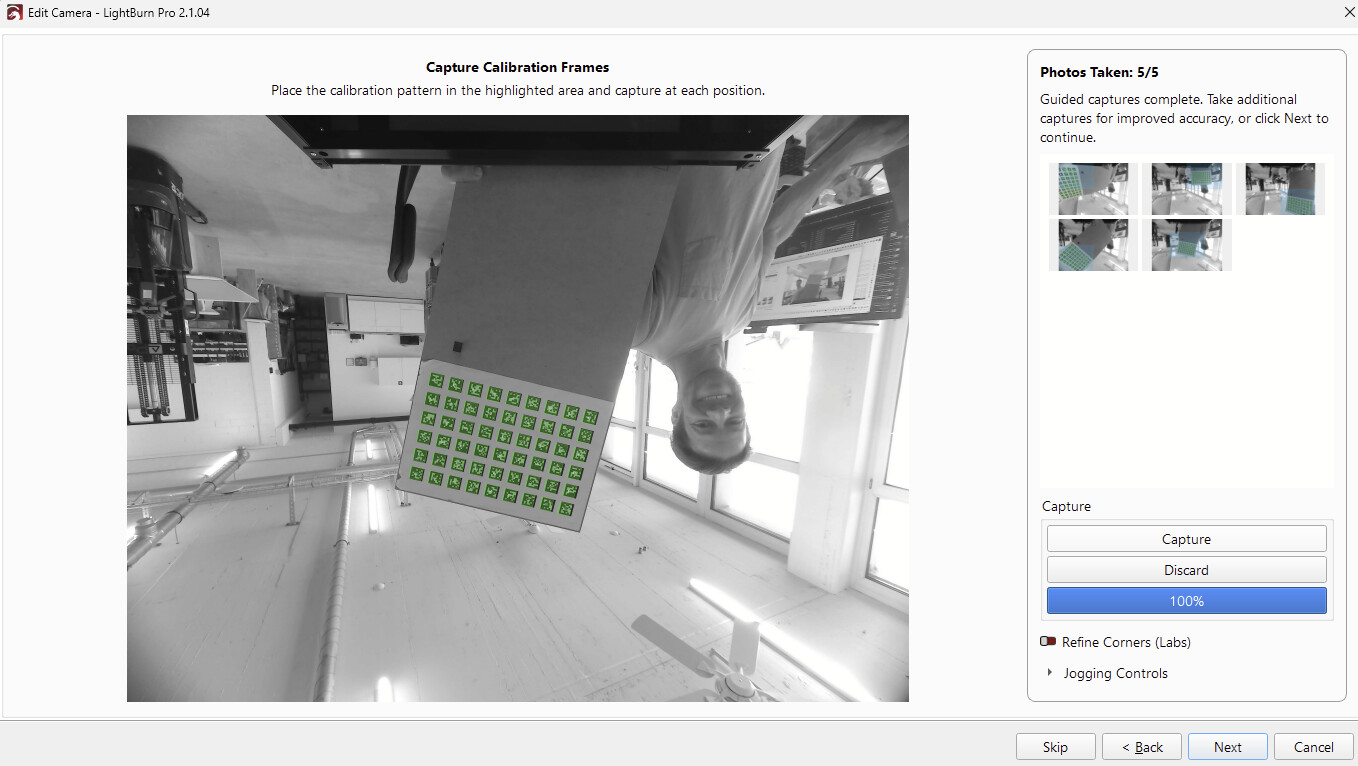
Currently, you need to perform a manual Camera Calibration by clicking “Calibrate Lens”.

It’s quick, fun and only needs to be done once.
You can do it with the lid open.


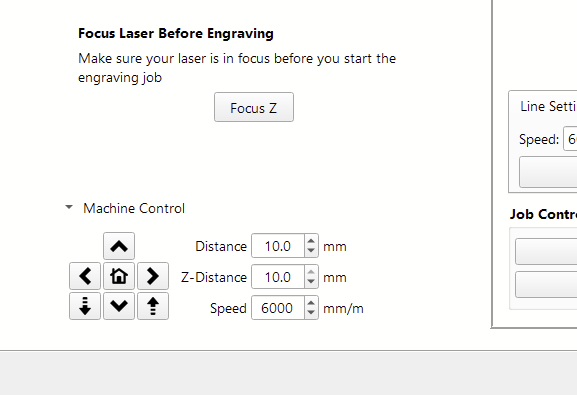
The “WeCreat specific Instructions” are not needed anymore, now that we have the “Focus Z” button in the Alignment Wizard of version 2.1.04

Hi Aaron,

I’m getting there and hope this is the last major hurdle to overcome.

I tried following your outline but I'm still have procedural issues so I've laid out all the steps that I    did to calibrate the camera -

1\.  add camera - selected "NETWORK"

2\.   NETWORK URL: HTTP://192.168.42.1:8080/camera/take_photo

3\.   CALIBRATE CAMERA LENS - "Precalibrated Camera"

4\.  Next screen is Calibrate Camera Lens information only.

5\.  Select your camera mounting position - Overhead camera.

6\.  Next screen "Overhead mounted Camera Alignment Wizard"

7\.  Select alignment method - Automatic Alignment

8\.  Screen - "Automatic Alignment Wizard"

9\.  Screen - "Alignment Pattern Wizard"

10 Screen - "Burn Alignment Pattern" , I focus Z and laser burns a pattern on blank material

11 Last screen in the process is attached.

I’m not sure if I’m going down the right path.

I appreciate all your help and thanks for sticking with me…

Peter

Hi Peter,

That all sounds good.
I’m guessing, you selected the Network camera instead of the WeCreat preset, because of the missing “Precalibrated” setting in the calibration test.
This is probably fine, but as mentioned, doing a Lens calibration with the April Tags is easy and gave me better results than the “Precalibrated Camera”.

It’s important to align it with the camera in the Z-axis (and camera) in the top position.
So, after burning the Alignment Pattern, you need to move the Z-Axis back home with this button in that step:

If the camera still can’t detect the tags automatically at the end, you can go back a couple steps in the wizard, and change to “Manual Alignment” to manually click on the four target markers.

Please attach that screenshot again :slight_smile:

Hi Aaron, What you describe in your last post is correct. Since then I was able to complete the calibration process, to my surprise, but I know I will need to do it again, not sure how accurate the calibration was…

I tried doing a test run with a simple design that has letters, for a “fill” and a box to test a “line” line cut.

I focus the laser and it drops just above the material as expected but when I “start” the engraving the laser resets back to the top of the Z axis then starts the engraving process.

This is probably something I’m doing wrong and just need to get familiar with the Lightburn engraving process on how to set up an engraving job.

As always, thanks for your patience and help.

Peter

This is likely because the Z-Axis is enabled in the device settings.

WeCreat has now updated device profiles on their website!

Please download and import that one. It has the Z-Axis disabled, and should work better in this regard.

Untick this box before clicking “Import”, or your installation will be set to Chinese :slight_smile: (We informed them to change that)

Please let us know how it goes with their settings!
And thank you too for your patience.

Hi Aaron, I will download the latest LBDEV file from the Wecreat website but I’ve never had any success with their LBDEV files. The LBDEV file that I’m currently using, LBZIP, I got from Lightburn, JessN, and it worked great.

Just an FYI, I’ll get back to you.

Thanks, Peter

Yes, they just updated them based on what we sent them.

The device profile you got from Jess should also work, if you disable the Z-axis.

Well Aaron, a major milestone has been achieved, I printed my first job, not much, but it

worked!! I used the newly updated Wecreat LBVEV file and it worked as it should.

I’m not happy with Wecreat constantly telling me that the LBDEV file they had at the time should be working when it didn’t, at least not for me…

Again Aaron, much thanks, if you’re ever in Mass. I’ll buy you a beer…

Thanks, Peter

ps - I still need to do a better calibration but I’m now at a point where things that should be working are working!!!

Wooo!!! Glad to hear!

Yay! that’s great to hear!

You can also use the Shift values in the “Adjust Overlay” menu here to finetune the alignment:

Engrave a rectangle and Capture Overlay.

Then change these values until the engraved shape aligns with the design on the workspace:


But yes, this should not be required if the Calibration and Alignment are good. :slight_smile:

If you decide to redo them, we have this YouTube playlist describing all the steps!

Thanks Aaron.

One last question, at least for now.

Will any of these software changes made in Lightburn affect Makeit software or any Wecreat settings I made earlier before trying to get Lightburn to work?

The reason I ask is now when I use Makeit with earlier projects it does not give me the same results.

Its as if the calibration process I did for Lightburn now is affecting Wecreat. Does not make sense to

me…

I will look at this more today and will get back to you..

Peter