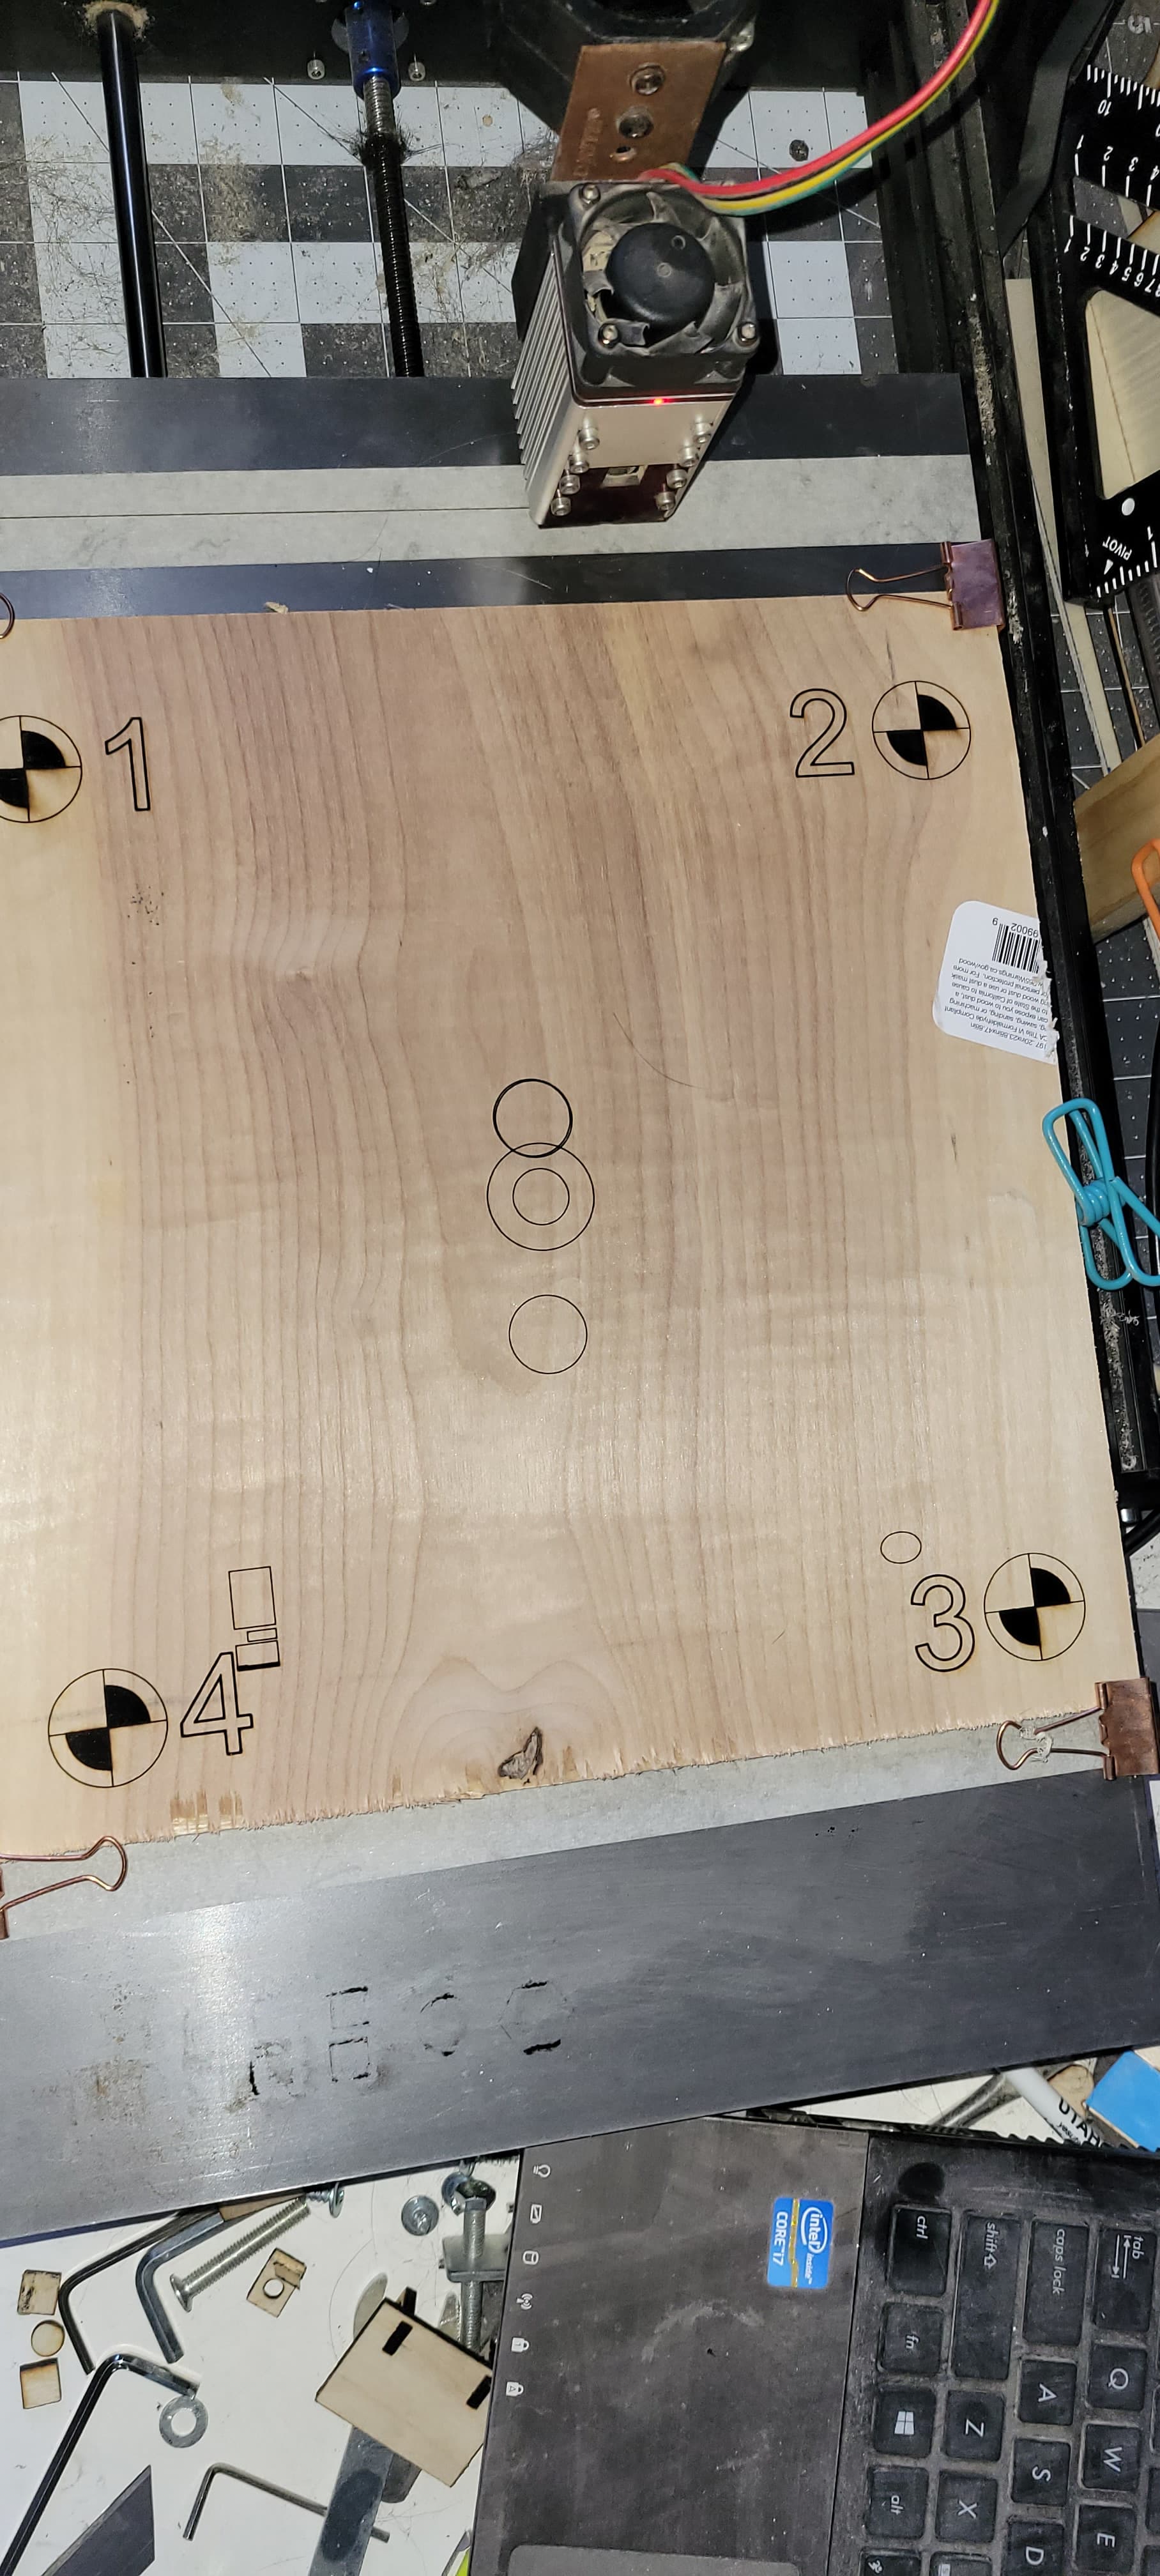
so i have just fitted a 90* angle USB camera to my laser, to my 3018cnc (extended to x290 y335), i fixed camera over head, can’t move. Calibrated lens, got scores under 0.25 all 9 spots, printed camera calibration board, and when i do a updated overlay it’s fine, perfect picture, but when i add a test shape, all engravings are 20mm to high (see pictures), the Darker ring was a test i did, should be in middle of the test middle rings, but run 3 times, and always same spot 20mm off, lower ring was me testing it elsewhere, and that too was 20mm off.
any ideas for help would be appreciated. i run the calibration 3 times, my origin spot is absolute coords, x0 y0 is bottom left corner. doesn’t matter where i put the laser head, when i start it always prints in same spot, off from where it should be but in same place on board, perfect lineup apart from the 20mm high.
Does your laser have homing switches and are you homing before doing any of the alignment activities? Have you kept to Absolute Coords for camera alignment as well as post alignment?
When you did camera alignment, did you burn fresh targets or are you reusing these? You need to use fresh targets for this to work properly.
Can you take a screenshot of your camera controls as well?
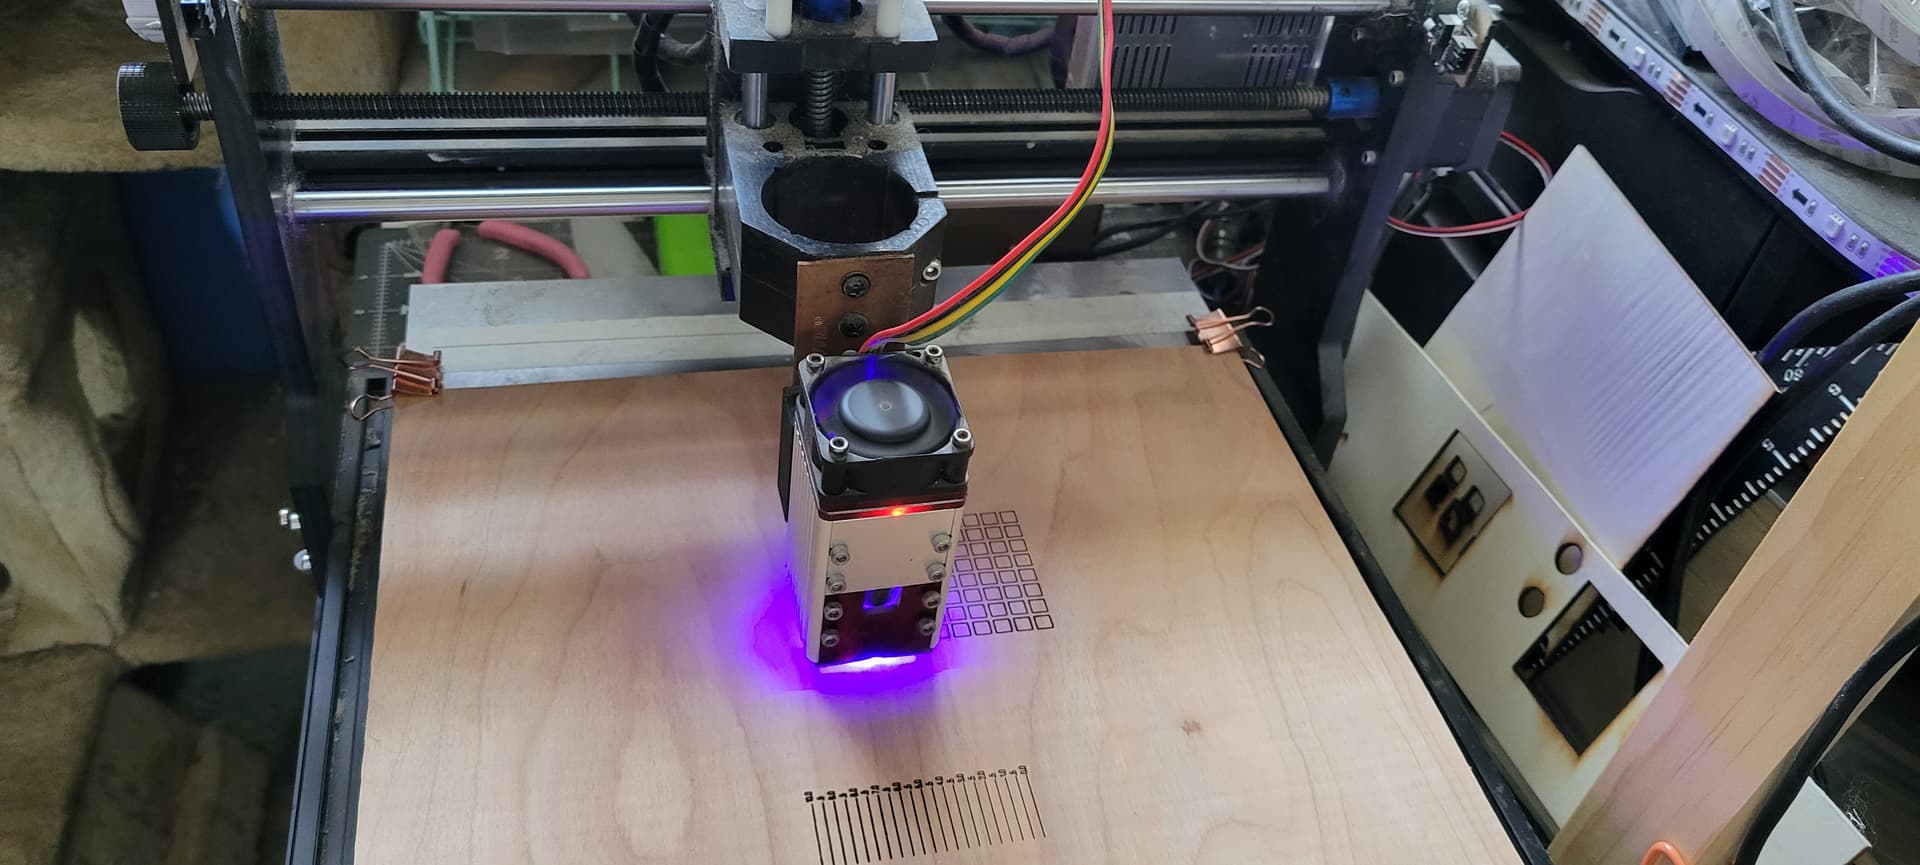
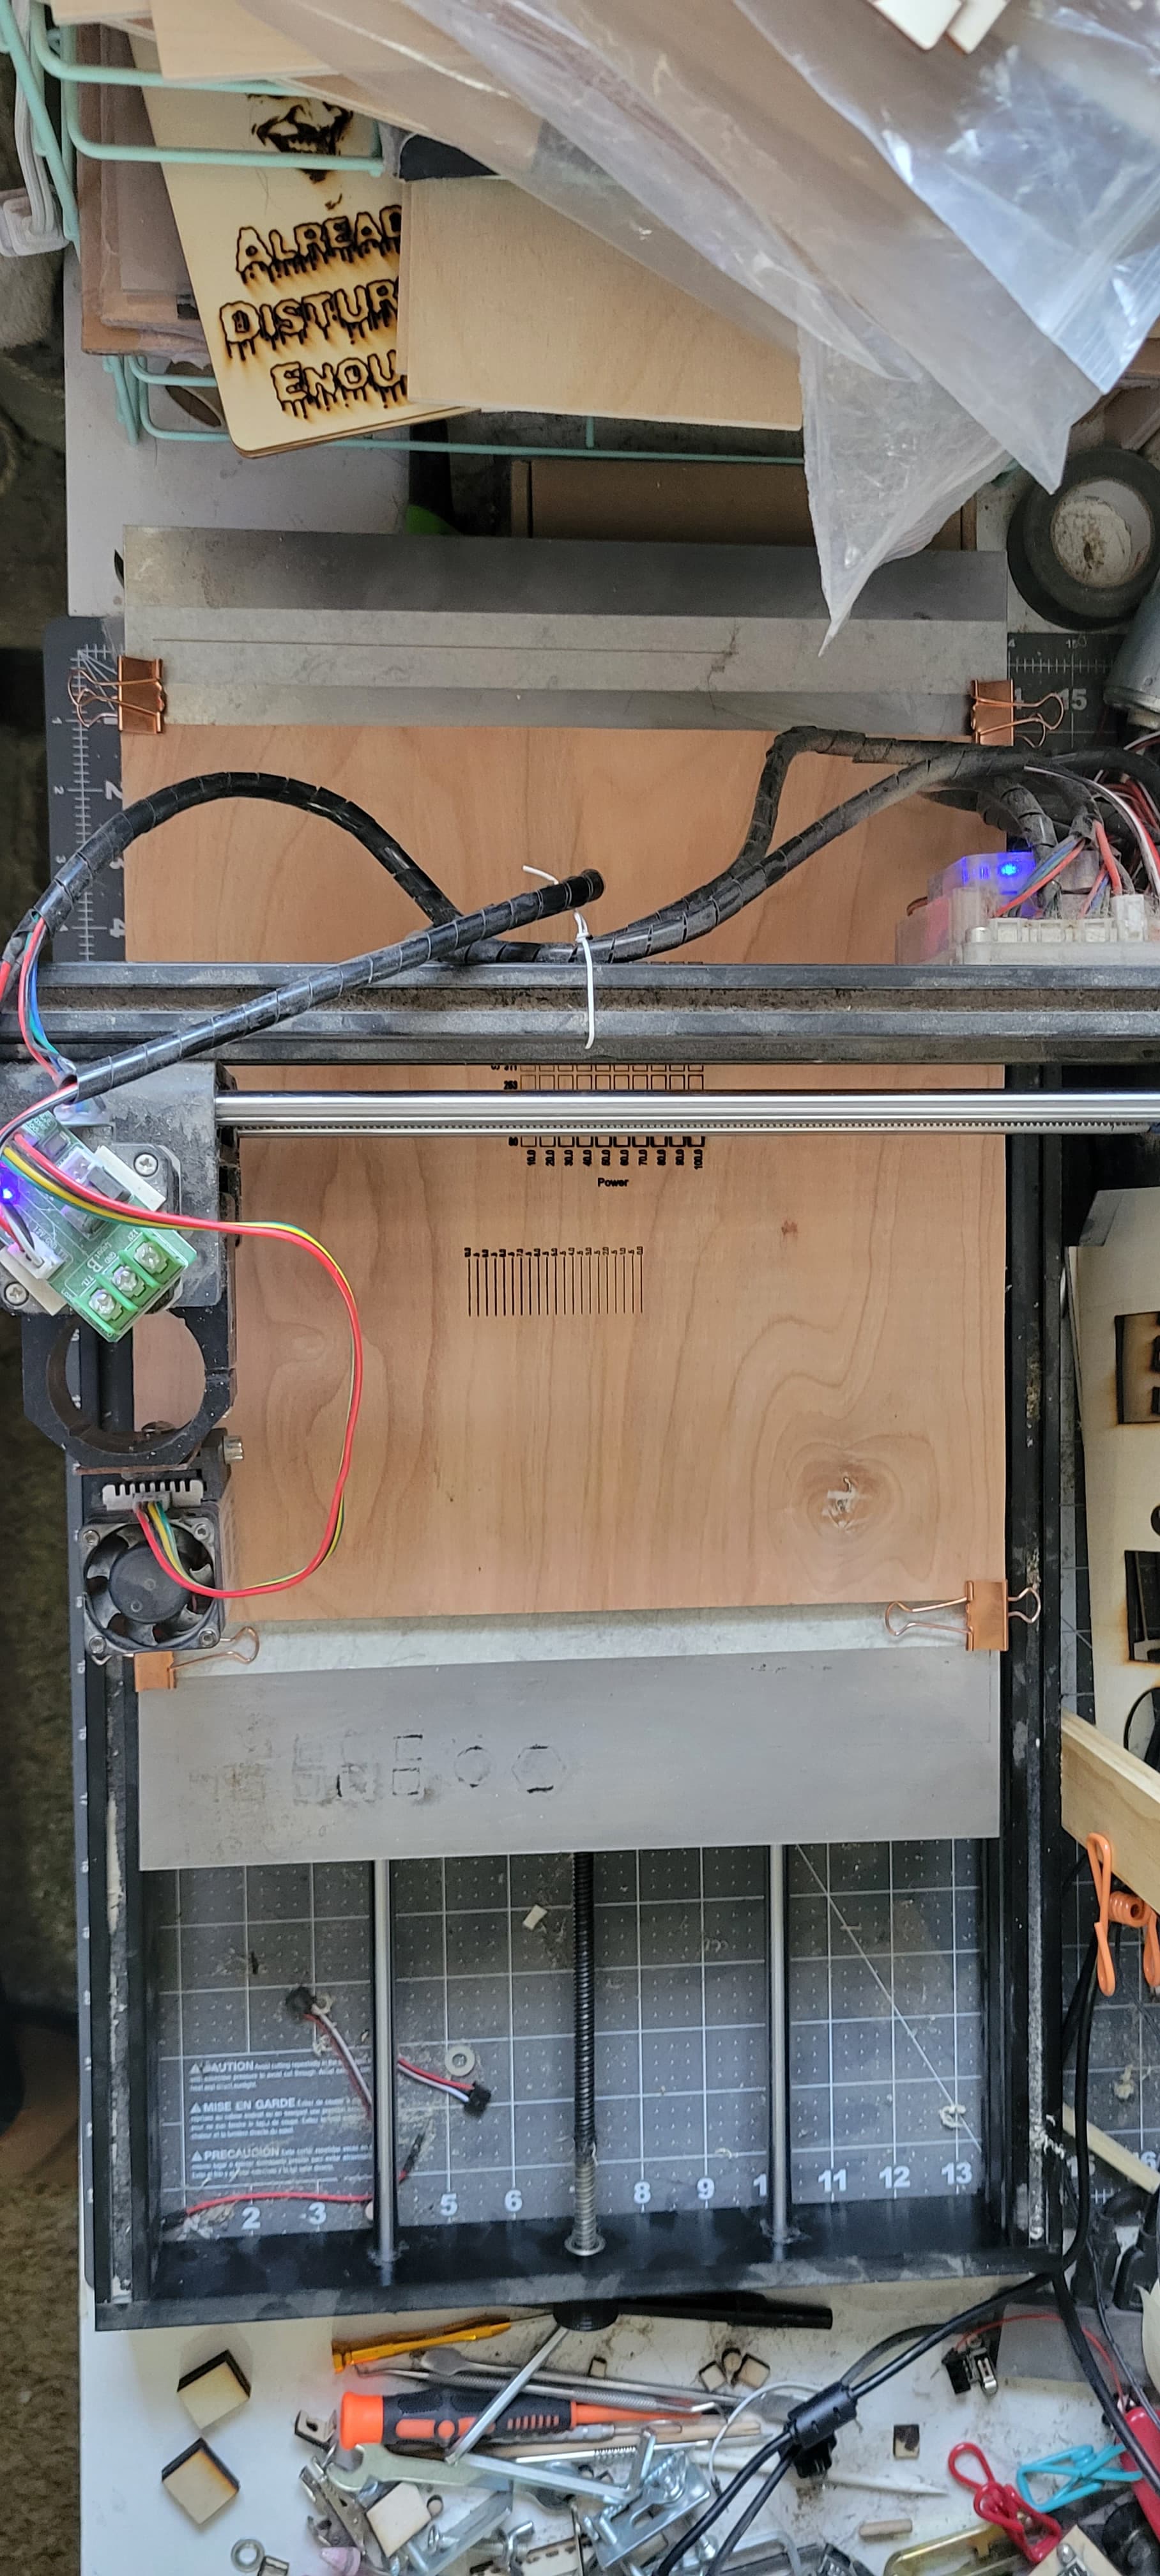
ok no homing switches fitted atm, i did get some, but i haven’t gotten around to making brackets to fit them. i always do a zero by hand in same place on starting lightburn. it was a fresh set of targets. I’m beginning to think it’s just not going to work, because i decided to restart lightburn again, with exact same home spot, and not it’s just not even close. but see pictures, camera controls and also where my camera is located (it was a circuit board usb, so i made a custon box for it, mounted it above platform, but when laser is at 0,0 most of the platform is out of view, and not much i can do, as the laser travel arm goes across the middle and the plaform move back and forth.
How are you doing this? Are you pressing the head of the laser against the frame? How close is the hand positioning? How consistent this is will directly impact placement accuracy.
If you have a stationary camera and reliable homing there’s no reason this shouldn’t work. Especially if you were saying that you could reliably get the objects to position with a consistent offset.
I can’t tell from the picture. What is the relationship of the camera arm to the laser frame? Is it attached to the frame or to the table that both sit on? The important aspect is that the camera arm not move relative to the frame of the laser.
In the screenshot, I don’t see target markers 1 and 2. How did you complete alignment on those?
Is your laser design a moving bed design? If so, that could complicate things. To what corner do you home and what is the origin setting in Device Settings for your laser?
ok to zero, i move by turning x and y axis Nobs by hand until they are in the far left and bottom spot (x0 Y0). Then i start lightburn which sets zero where the laser head is at startup. it is set 4mm above the item i’m working on, which is focal gap for laser (5.5watt diode laser). The laser moves sideways along x axies, bed moves forward/back along y axies. Z axies is for up and down of laser. camera is mounted solid to frame on side and above, but from zero position 75% of bed is under or behind the x axies bar.
the top down view is the home 0.0 position, side is how x moves
I’m going to assume it’s the moving Y that’s causing the complication.
You say that you start LightBurn after manually moving laser head to home position. Can you confirm that reported position is 0,0 at that point? I’m curious because the controller is what is tracking position, not LightBurn. So unless LightBurn is resetting the controller upon startup I don’t see how that would happen. Typically powering on the laser after manual homing would establish 0,0 for that position.
I’m not quite sure about the exact steps but I think you will need to do the following for this to work:
Create alignment targets after homing
Make sure that you re-home before taking capturing image of alignment targets
Complete alignment
Always be at home position when you do the overlay
yer controller has 0,0 and lightburn always returns to 0,0 when i tell it too, when not moving i can adjust it’s position, but i don’t unless i have a good reason. if it’s at home 0,0 the overlay only see’s the very small area that would be 3 and 4, so i move it to it’s far opposite position at x290 y335.
i think i’m just goning to give up and call it as not going to work. thank’s anyway. i watched a ton of youtube video’s, followed them to the letter, but nothing seems to fix it, and not one had a 3018 cnc machine used with camera, which also means i guess if i buy the Xtool at some point like i planned it also won’t work.
It’s fine if you don’t want to pursue this but it should be workable. You’ll just need to be consistent with when the picture is taken. So for the Alignment capture have bed all the way down, and do the same with overlay. All the while making sure you’ve never lost steps with any manual manipulation of the laser head.