When setting up my ACMER P3 48W for the first time, it downloaded the pro version 2.02, and when I calibrated the camera, it showed a mirror image of the 4 corners and burned the alignment circles very deeply with the correct settings for the P3 w48 ACMER. I then installed the recommended version 1.6.01, and now the camera is not picking up the alignment image at all. I have tried different ports, COM 5, COM3. It shows it made the connection in the console, but when I try to capture the image, it does not find it, even if I place plywood under the circle image or not. Is there a setting I am missing? When going through video tutorials and the manual, nothing changes. Could it be that it is being blocked by a previous download of the 2.0 version?
Welcome to the forum, Morne.
I’d suggest installing the latest version 2.0.5 from here: Index of /LightBurn/Release/LightBurn-v2.0.05/
Can you send us a link where it is recommended to use version 1.6.01?
LightBurn version 2.0 introduced a new way to calibrate the camera lens. It uses the new calibration card with the AprilTags and tracking function. The circle pattern should not be used anymore. We’re aware that some manufacturers still ship the laser with this printed dots pattern, and some older instructions can be confusing.)
You can then follow the instructions for camera calibration with Tracking here: Calibrate Camera Lens (Labs) - LightBurn Documentation
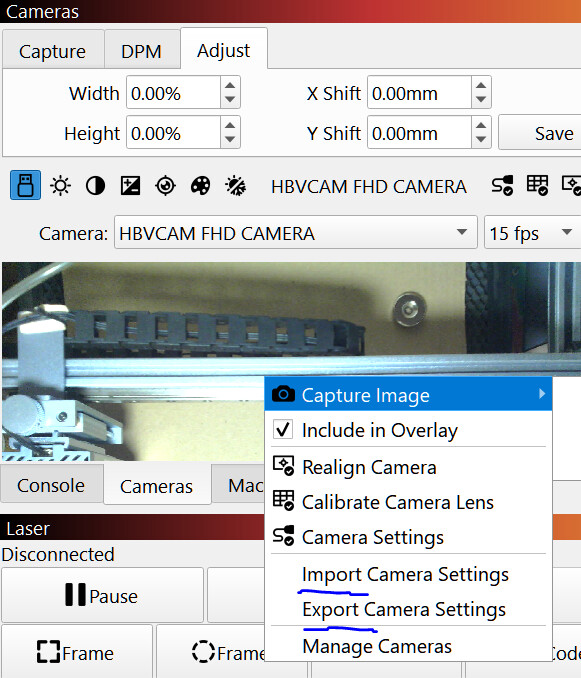
This feature is still in testing (Labs feature) but is currently the most precise way to calibrate your camera. It’s only accessible with a right click on the “Camera” window:

After this, you need to perform another Camera Alignment: Calibrate Camera Alignment - LightBurn Documentation
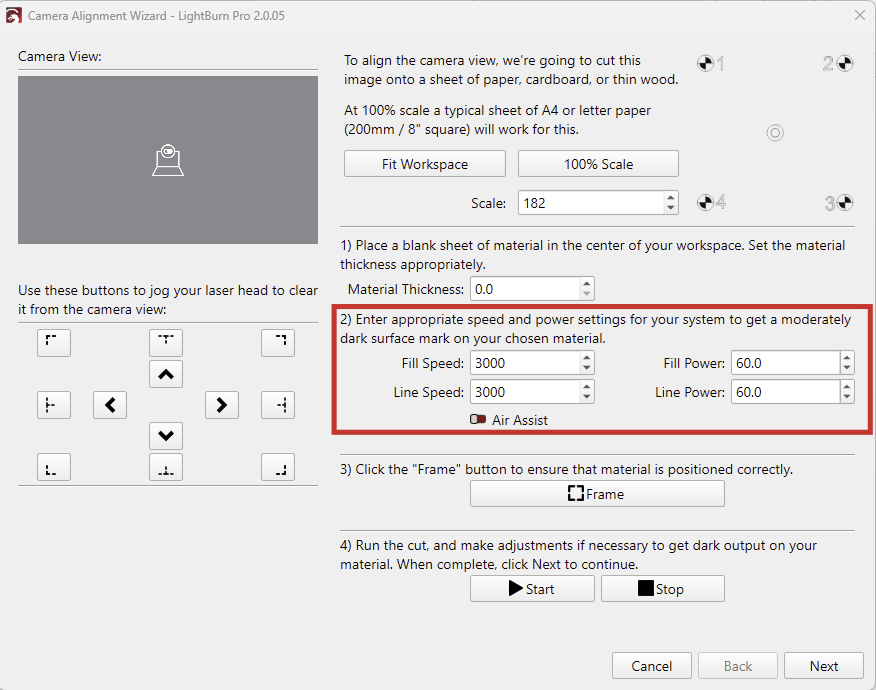
Lower the “Fill- and Line Power”, or increase the Speed here if the engraving is too strong
If your laser is a diode/GRBL laser, then you do not need the “Pro” version. The only difference besides the “Pro” version being for other laser types/controllers is the price. 
That’s correct (but the second part will change slightly in the future.)
@morneb, if you don’t have other lasers with either a DSP controller, or Galvo, please send an email to support@lightburnsoftware.com and tell us the email you used for the purchase. We’ll be happy to change your license to Core and refund the difference.
I guess it’s fair enough, when technology moves towards 100Watt for diode laser, there’s no real difference to a CO2 laser anymore.
Nice service 
Hi thank you for responding. I do have the Acmer P3 48 W diodode/ Grbl. If I download the 2.02, I do not have all the functions available on the left side, things like offset and weld ext. I did come across a YouTube video that showed they used the 1.6.10 version, and thought that was the recommended version. If I do not need the pro version, which one will you recommend?
The latest version should preferably be used.
Offset, and Weld Shapes are there in the 2.0.05, but the toolbar looks slightly different than in version 1.6:
Your Acmer P3 is a Gcode-based machine, which only requires the “Core” version of the LightBurn license.
The Pro version of the license is only needed if you own a DSP- or Galvo-based laser.
As previously indicated, this will change slightly in the near future, as complex features such as “True Nesting” will only be available with the Pro license.
Will “Center Tracing” also be part of the Pro version?, or is it not yet relevant?
Centerline Trace was going to be Core. It’s already free in Inkscape.
I know that but I would really like to see it in LB.
Keep up the good work.
Hi, I installed the 1.7.08, but could not get a reading when trying to calibrate the camera. Back on the 2.0.
After calibrating the camera and doing a test, it came out to about 1 inch off. Is there another way after you’ve done the calibration to align the area that you printed? If I do the update overlay, it shows that it is about 1 inch out from where my original position was. Do I need to go through the calibration process multiple times until it is spot on?
Did you engrave a new set of the four target markers?
This is needed each time you do a Camera Alignment. You can’t re-use the old ones.
The process can sometimes be a bit “incomprehensible” or put another way, there are rarely 2 identical results of the same test under the same conditions…
I would also recommend using the new calibration method from the latest LB version. I have downloaded and engraved lens calibration targets on a piece of 2-layer plastic, (it’s the reddish one) but have been using the same one for a long time just printed with a normal printer, btw. A4 is fine.
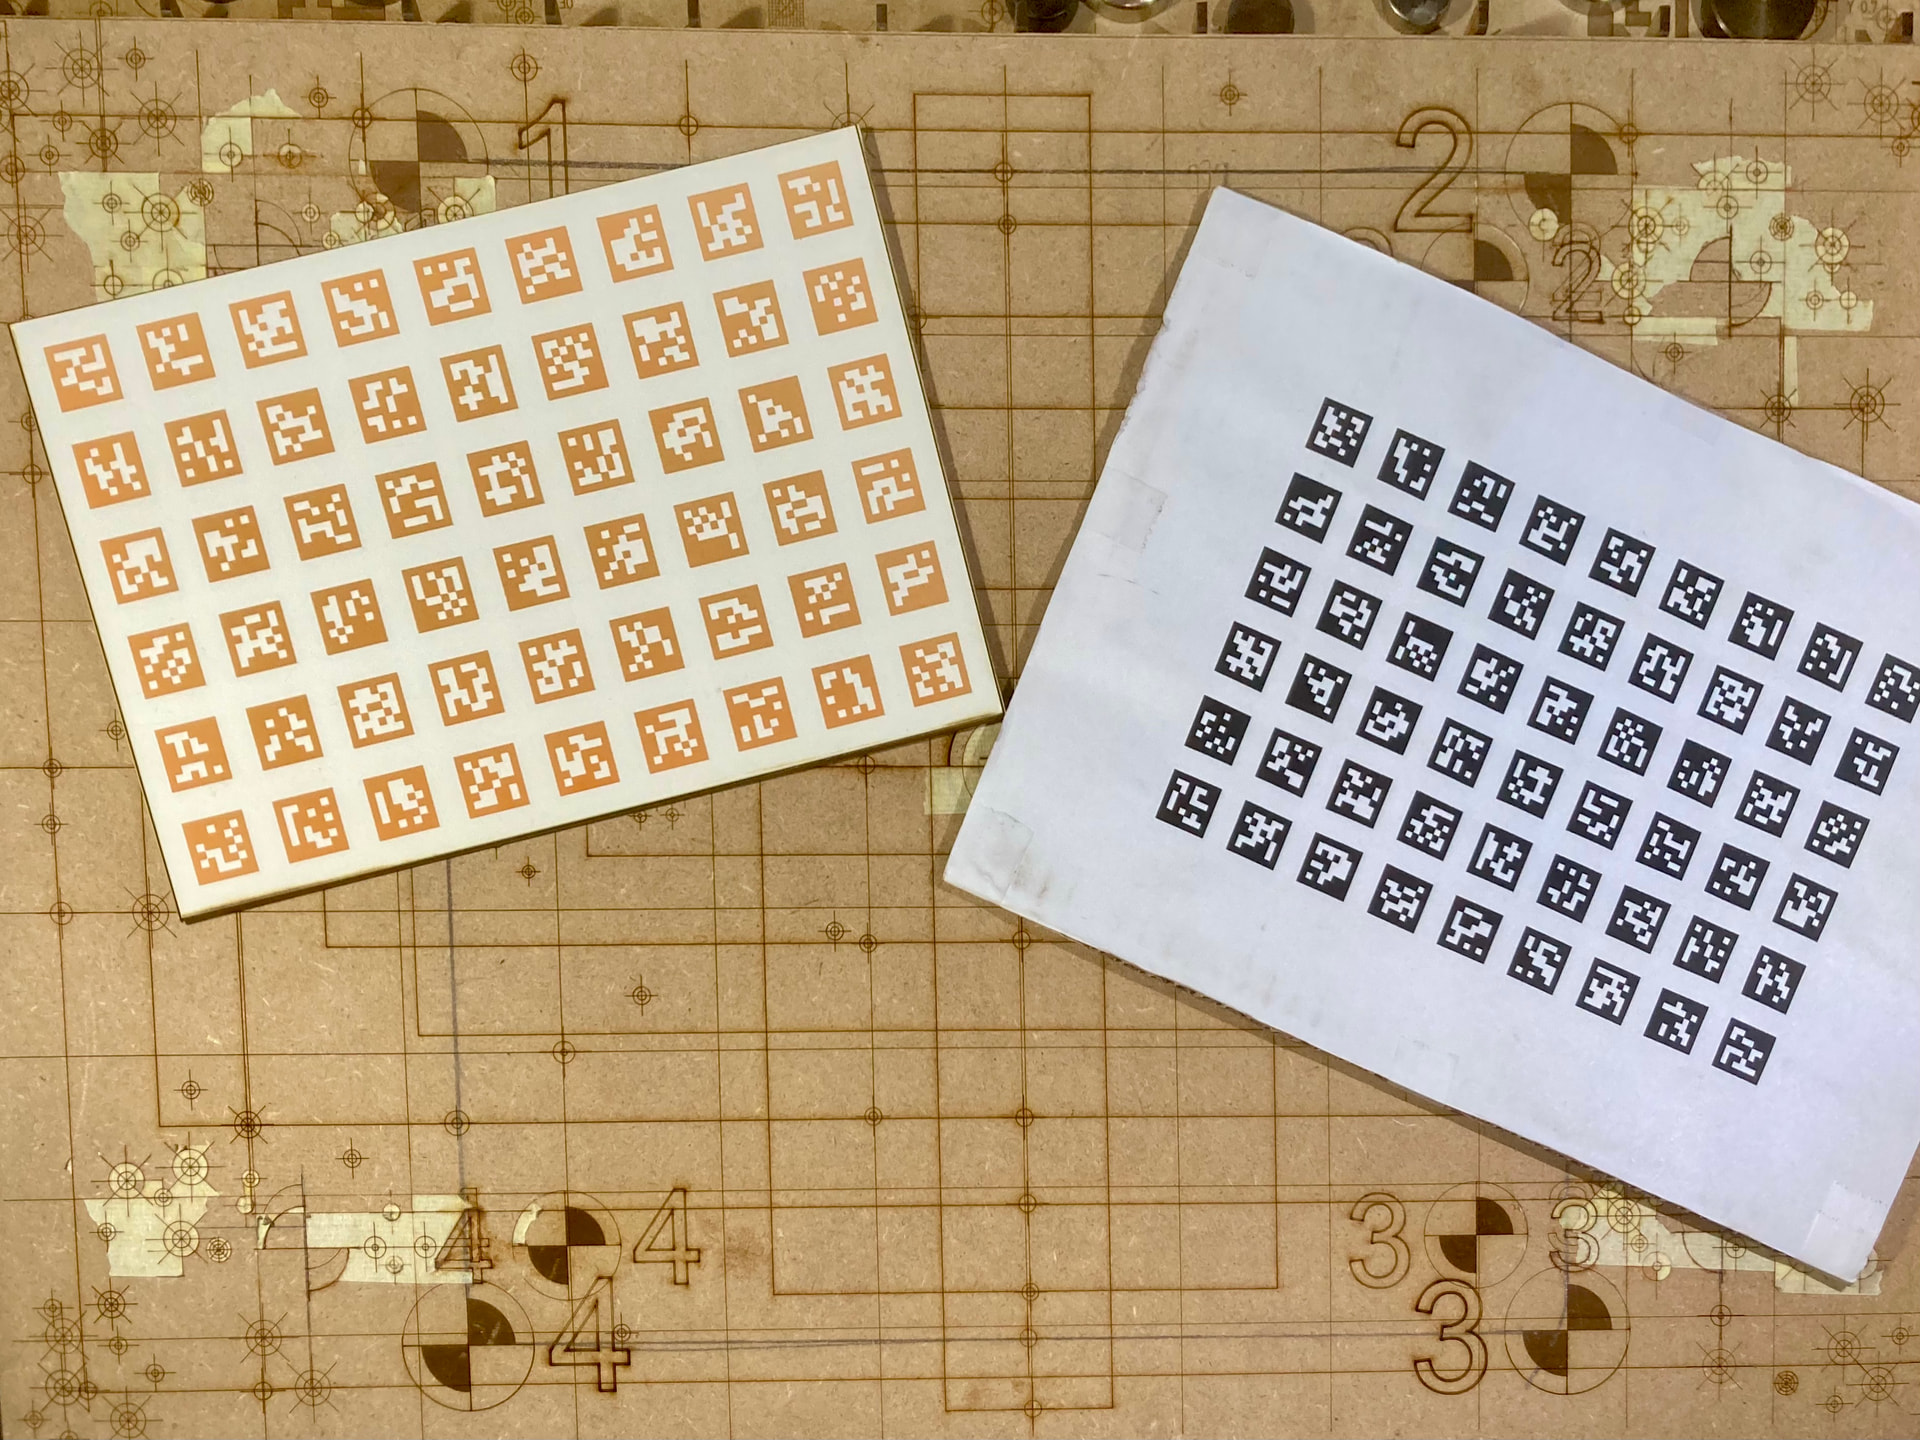
On average, I make 20 scans of the target plate, distributed over my entire machine bed, in different orientations.
Then I choose the profile with the best recognition value regardless of lens type.
When the camera itself is to be calibrated, I again choose the “new” April Targets and correct the length and width so that it is printed with the largest possible distance from each other (350mmx550mm fits my machine, see picture)
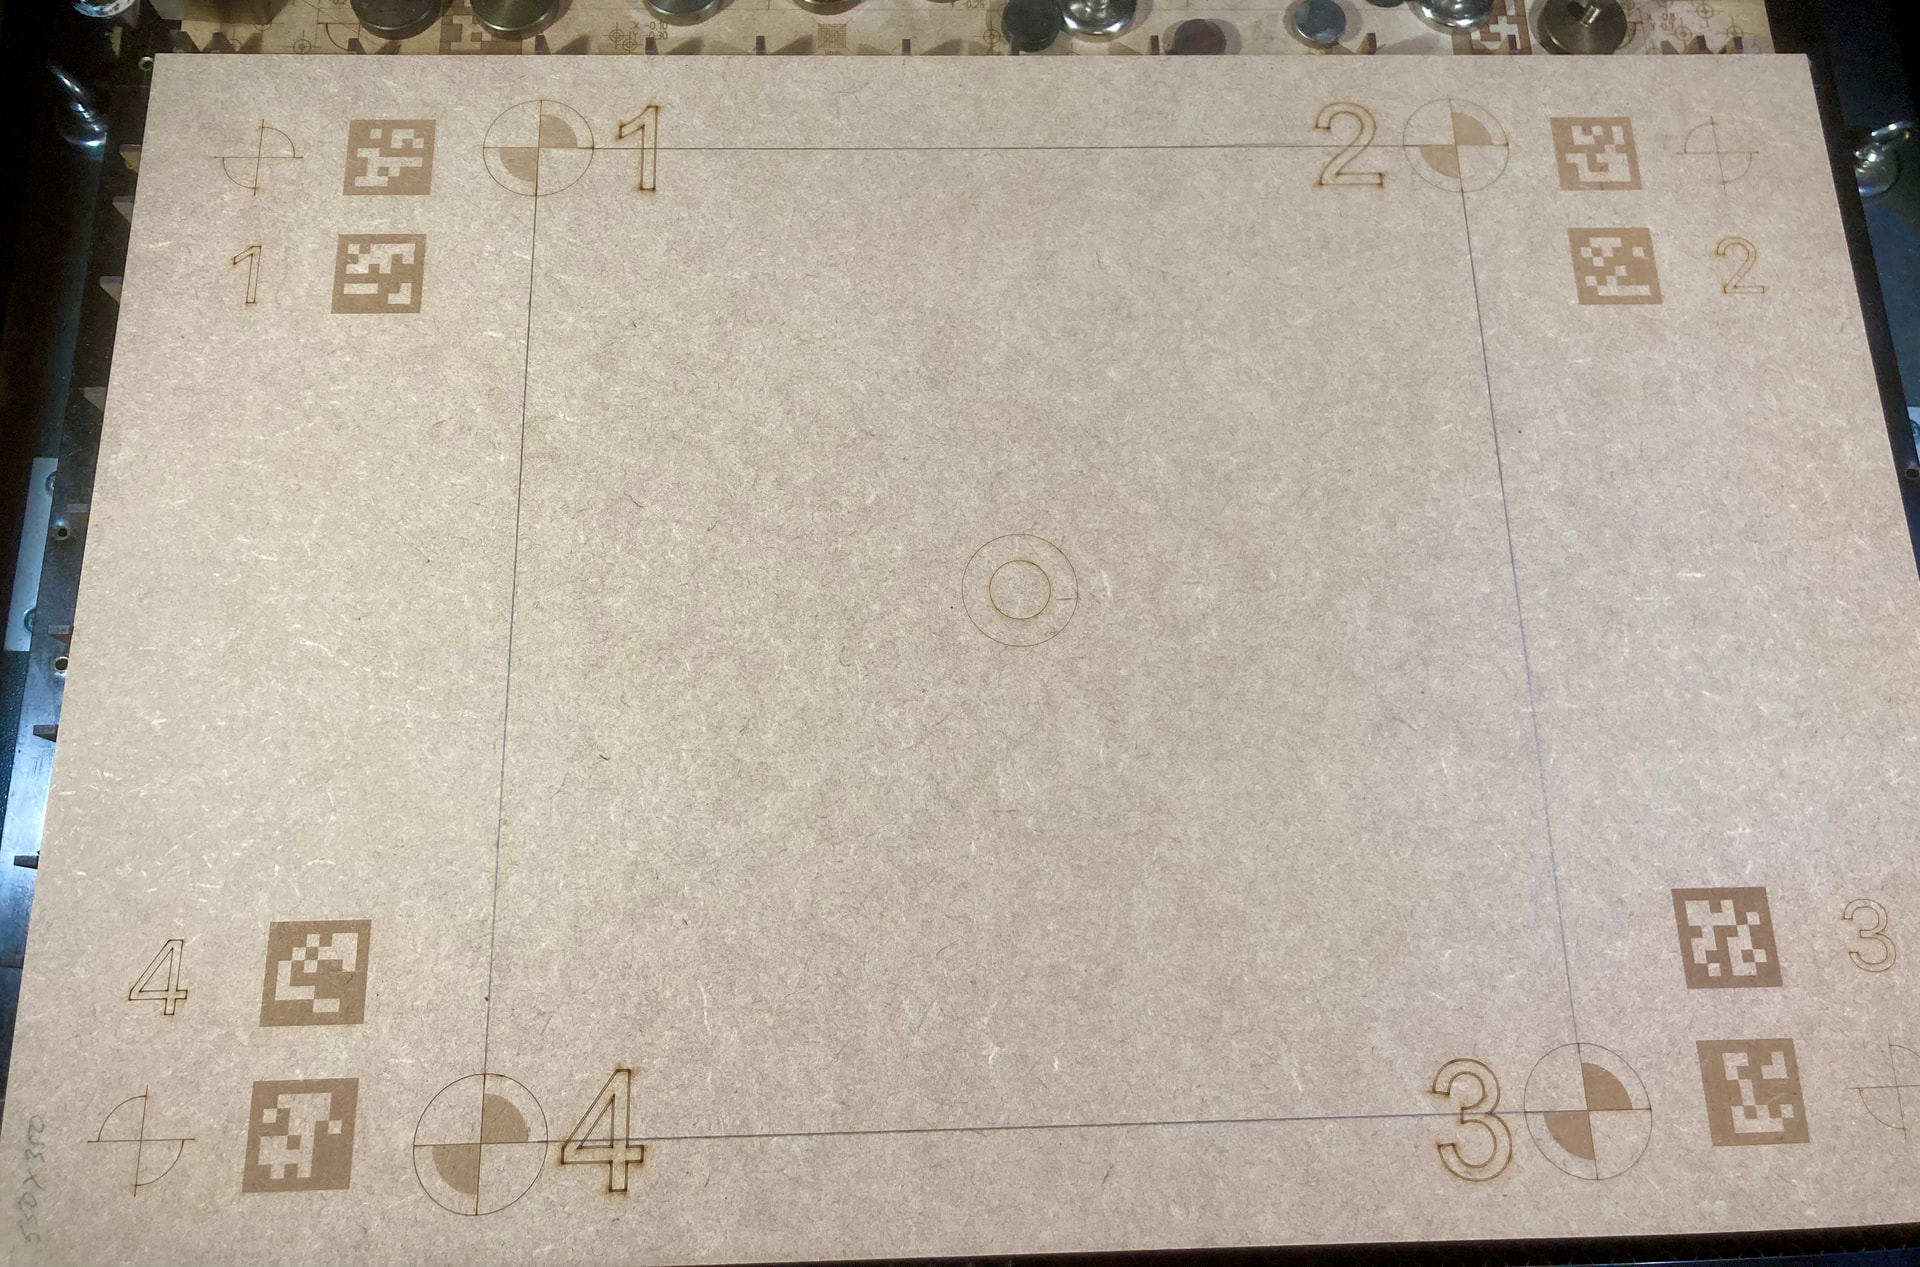
Then I run camera alignment with April targets and save the result.
In the last picture there is a test plate that I use to fine-tune the results across the entire laser bed. If there are deviations of more than 1mm I start over again, with everything.
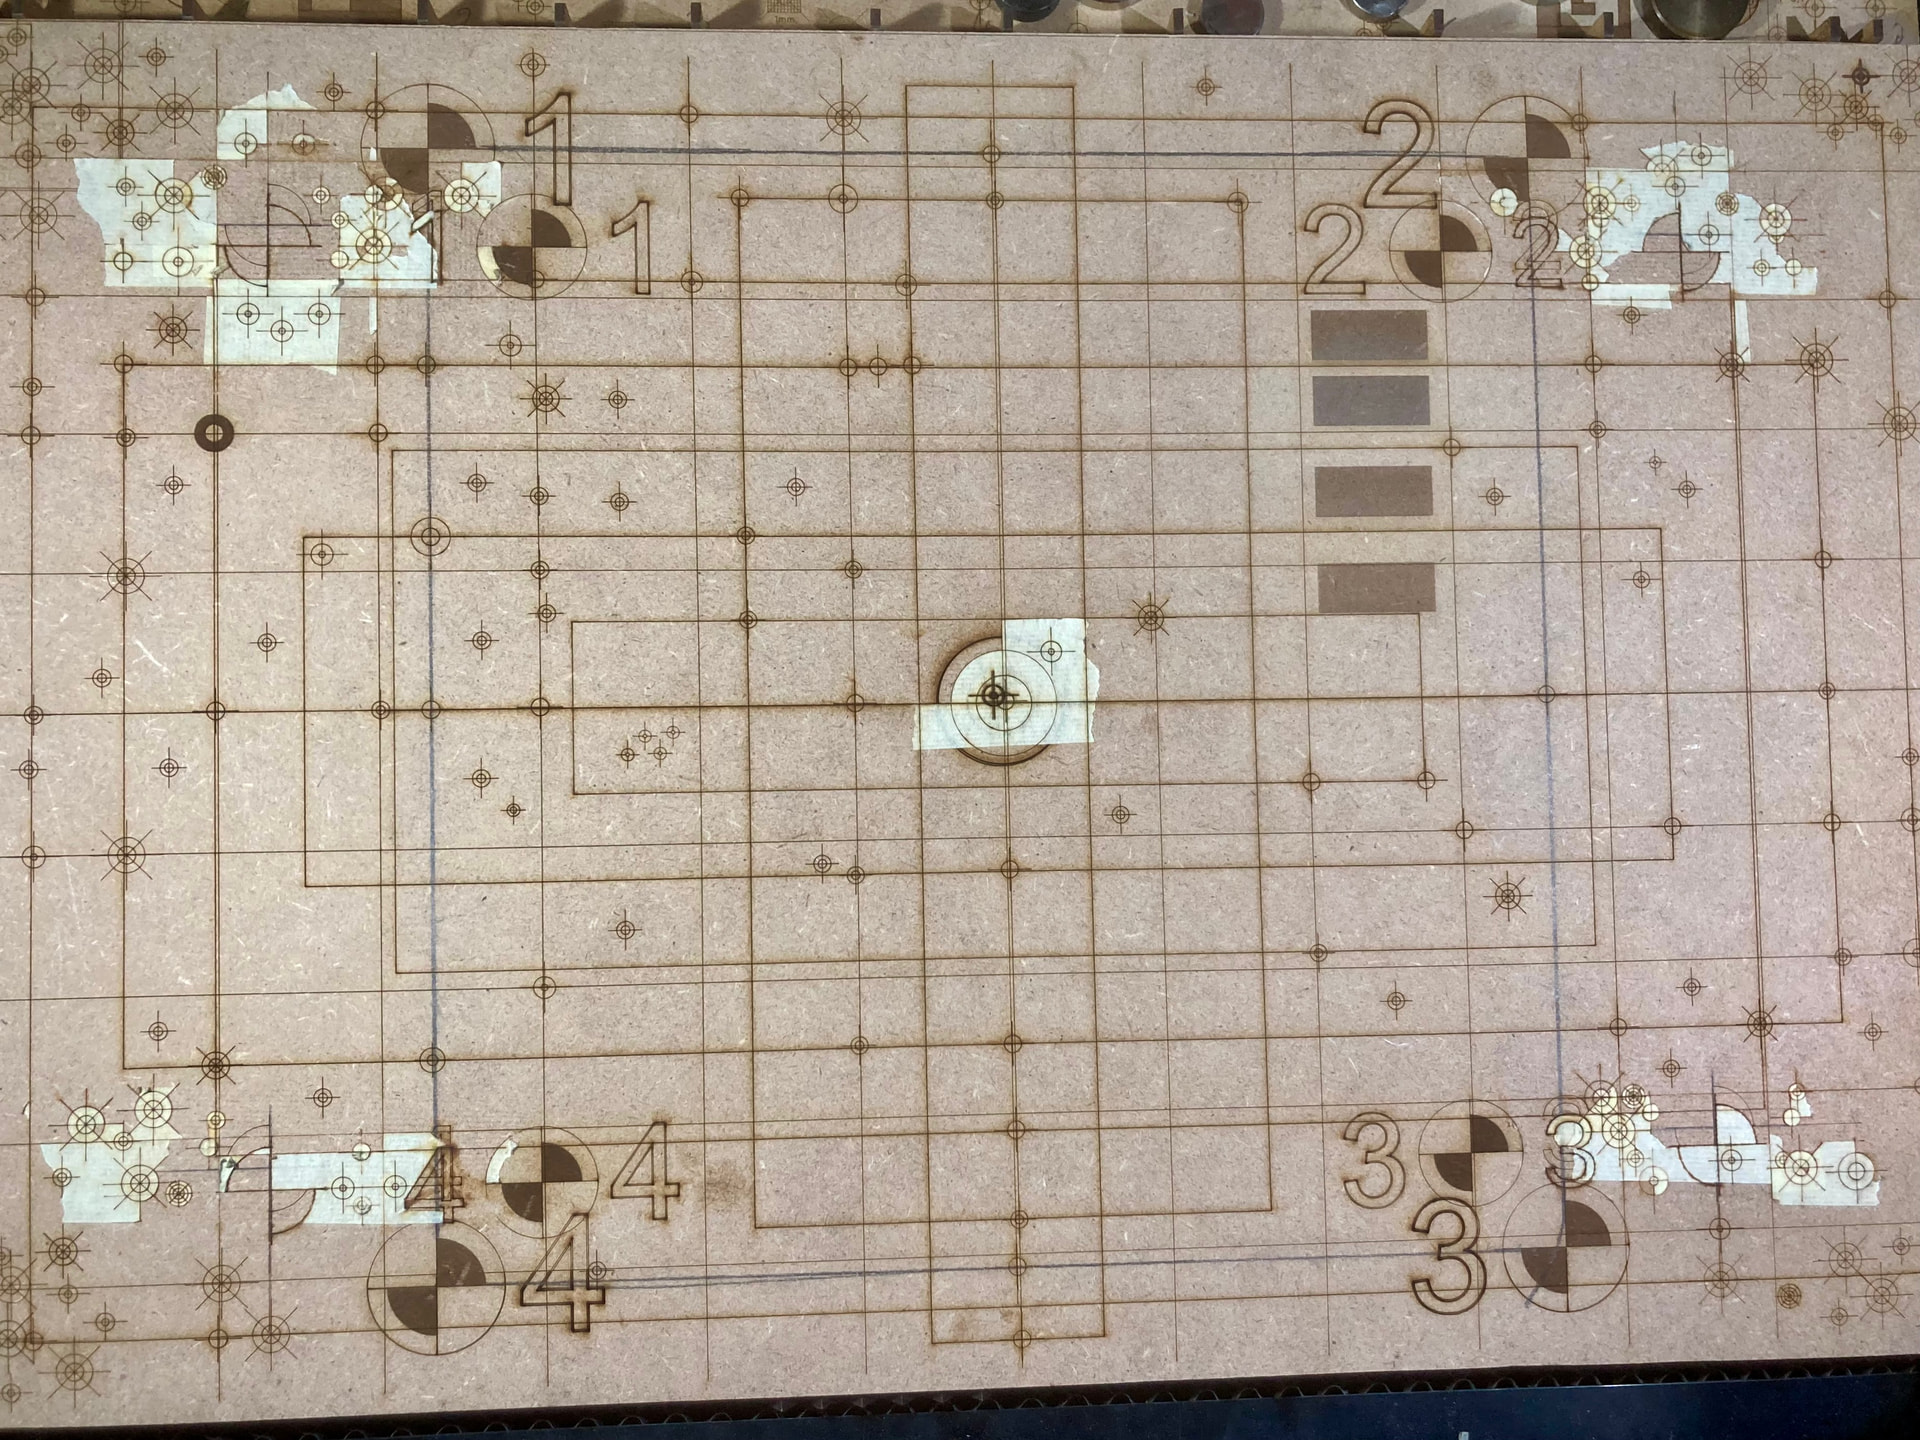
In the picture (nr.2) you can see that I have some physical stops on my X and Y axes, therefore I can “reuse” the camera alignment targets template.
If you are wondering about the way I do it, it is because I make a little more of the lens and camera calibration because I do a lot of tests on different LB/OS versions.
Hope it works out for you.
I used a new alignment, but only on a 200mm x 200mm piece of 5 mm plywood in the center of the printing area. I will make it as large as possible and try again. Thank you for all the resources; they are very helpful.
I appreciate all the info. It looks like I have a lot to do.
For me it worked importing the camera settings from a previous 2.0.05 version maybe you can try the reverse, calibrate in 2.0.05 and then export/import to 1.7.08.
Wow now that is a big task for someone that is tech challenged 
Thank you for the information. This platform is great appreciate all the help.