Hi All,
So I’m new here though I have worked with lasers for other people, but I am a new owner / programmer.
So here’s my problem. I setup a Lightburn 90 degree camera on my Boss HP 2436.
The machine is set to soft origin, the alignment program ran smoothly, and I got a clear image to add my crosshairs to. But when I try to test the alignment to the crosshair it’s 3 inches to the right.
I have rerun the program onto fresh material 4x’s with the same results.
What am I doing wrong??
Hmm… If you’re using Soft Origin, that should work. If you place a single circle in the middle of the work page (select it, press ‘P’ to center it in the page) and then run it, does that circle go to the center of your machine’s work area?
Yes the circle centers every time. (I moved, and clicked p again as when I made it, it was almost centered).
Can you show a picture of what you mean here? “The crosshair” is confusing because there are four of them. Are all four of them off by the same 3" to the right? Or are they all off by different amounts? (I ask because I’m trying to figure out if it’s off by a scale, or a shift)
Hi OZ,
Sorry I took Sunday off and had to run a job today that didn’t require the camera before re running to take pictures.
So here’s where I am at. As I previously mentioned I had run the alignment a few times. The best results that I got was when the crosshair was 3 inches to the left of the#1 crosshair. I did not try to move it to another crosshair at that time, as I figured if one was off they all were.
So just now I decided to start from the beginning and run the alignment for the 5x. I did so because the board that I had used the last time had a warp that I don’t remember being there on Saturday. But hey wood warps. The prior 3x I used cardboard, 3rd time was a bit warped as well, so when I ran out of cardboard I switched to the scrap wood.
Today being still without cardboard and having a warped piece of wood, I decided to use a piece of corkboard as I had it, and it’s super flat.
I started the alignment from the beginning, putting the machine into soft origin, and moving forward, It ran so beautifully and took the best picture that I have gotten using the corkboard that I thought, problem solve it was the warped board and I will update you that all was good.
Unfoutnetly that’s not the case.
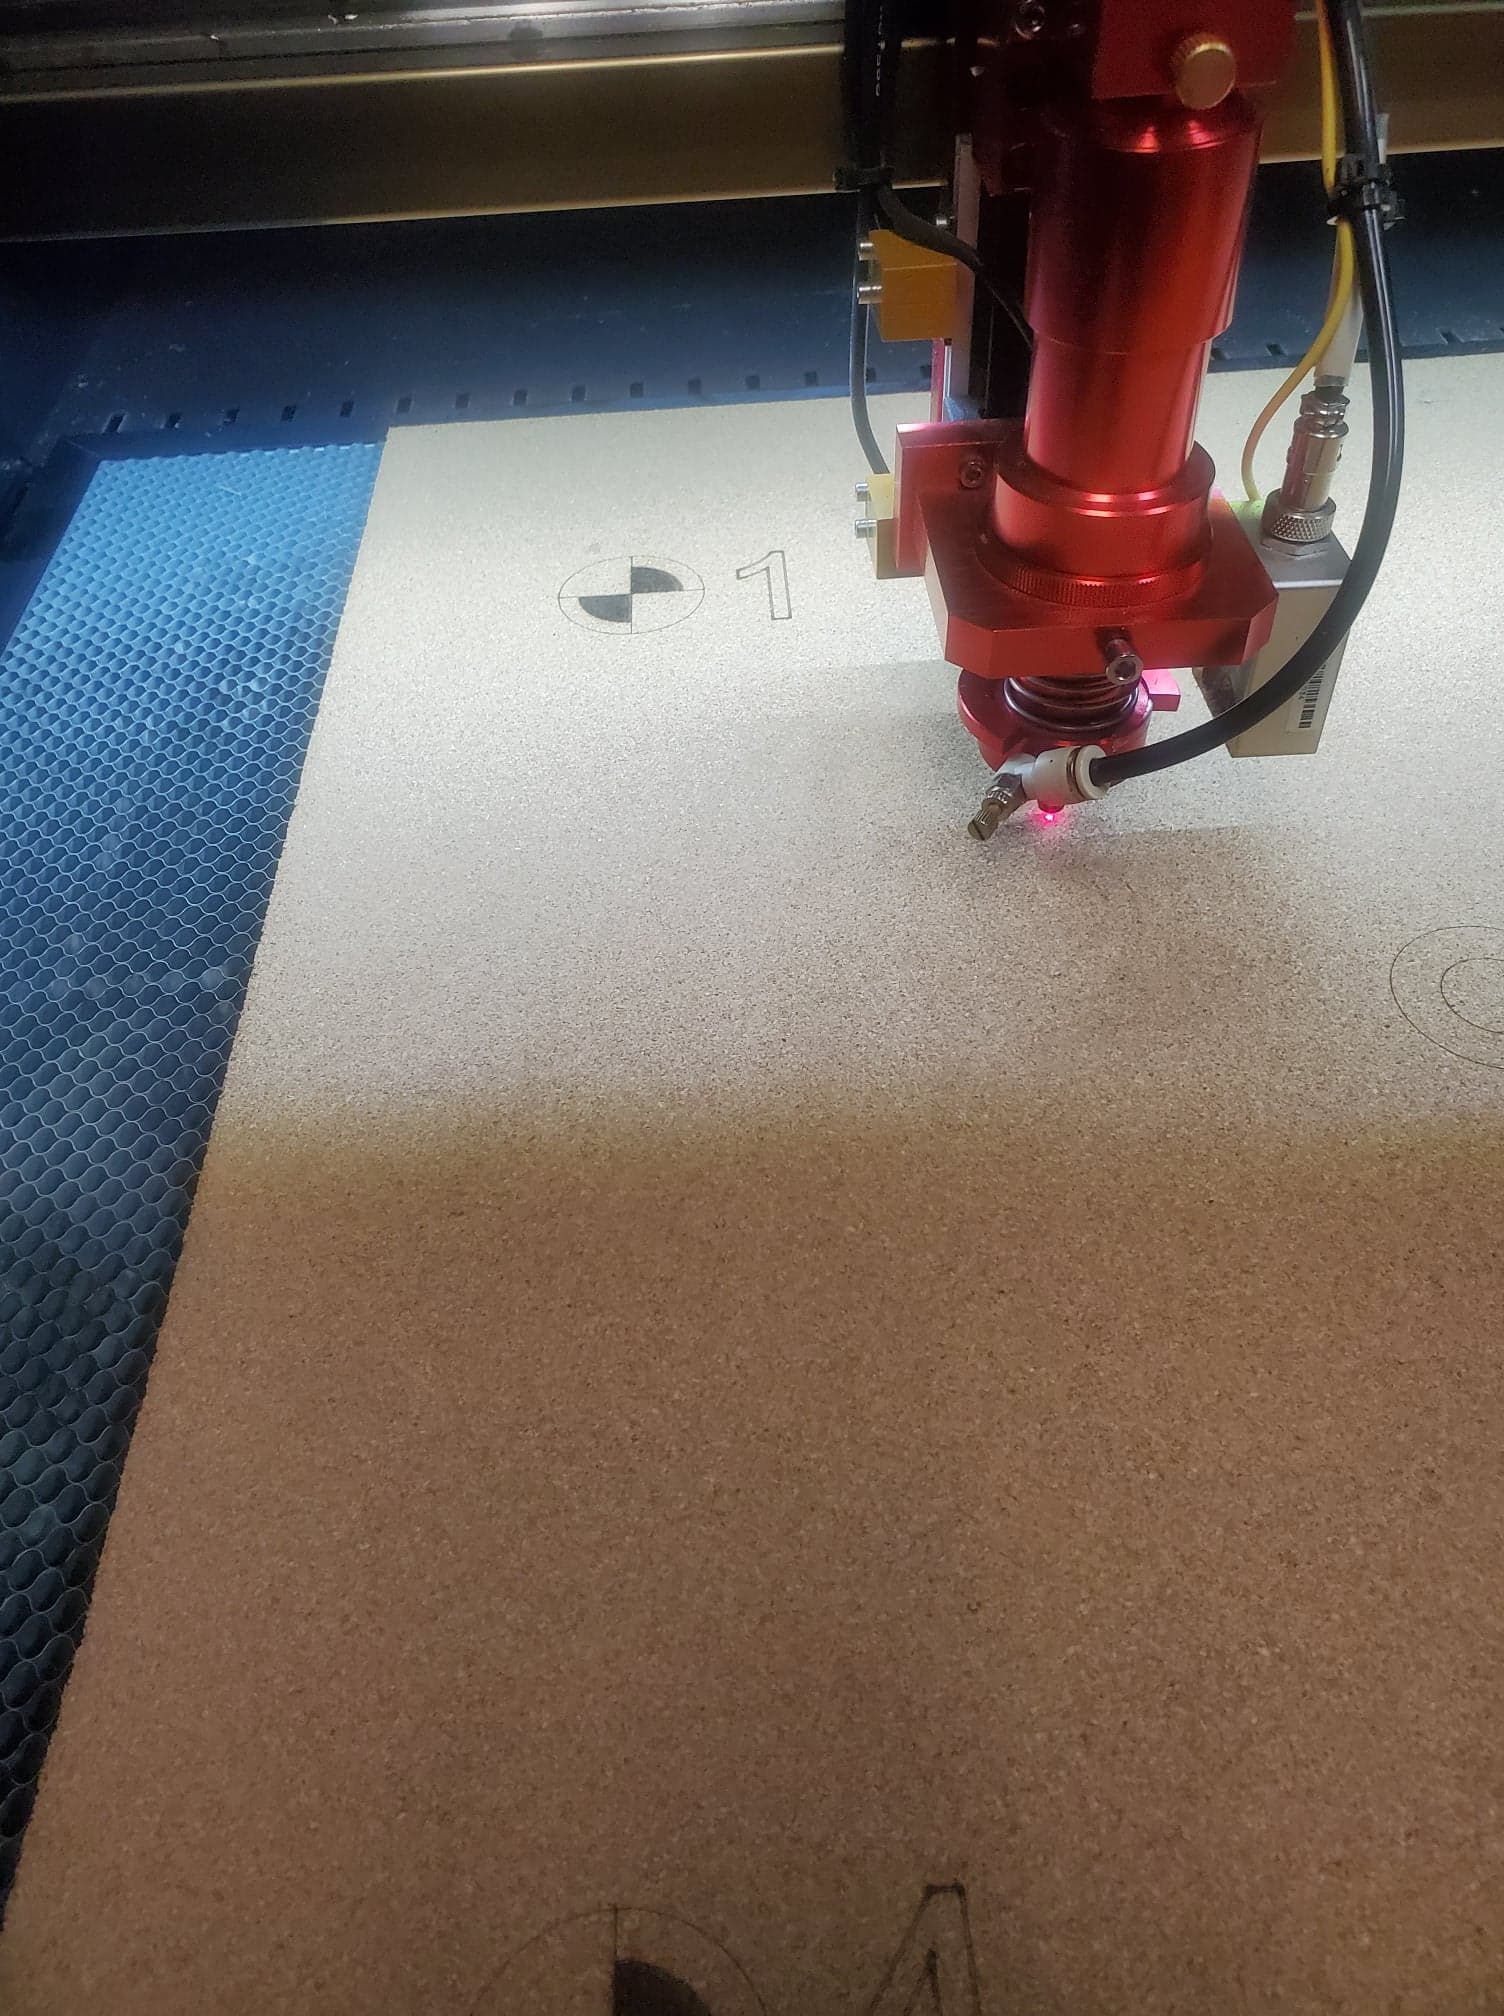
So while the last time as I mentioned the crosshair was3 inches to the right, I had only run the test to the #1 which I had not mentioned.
So that was my best result. The other 3x’s it was to the right and down (only testing the #1 crosshair).
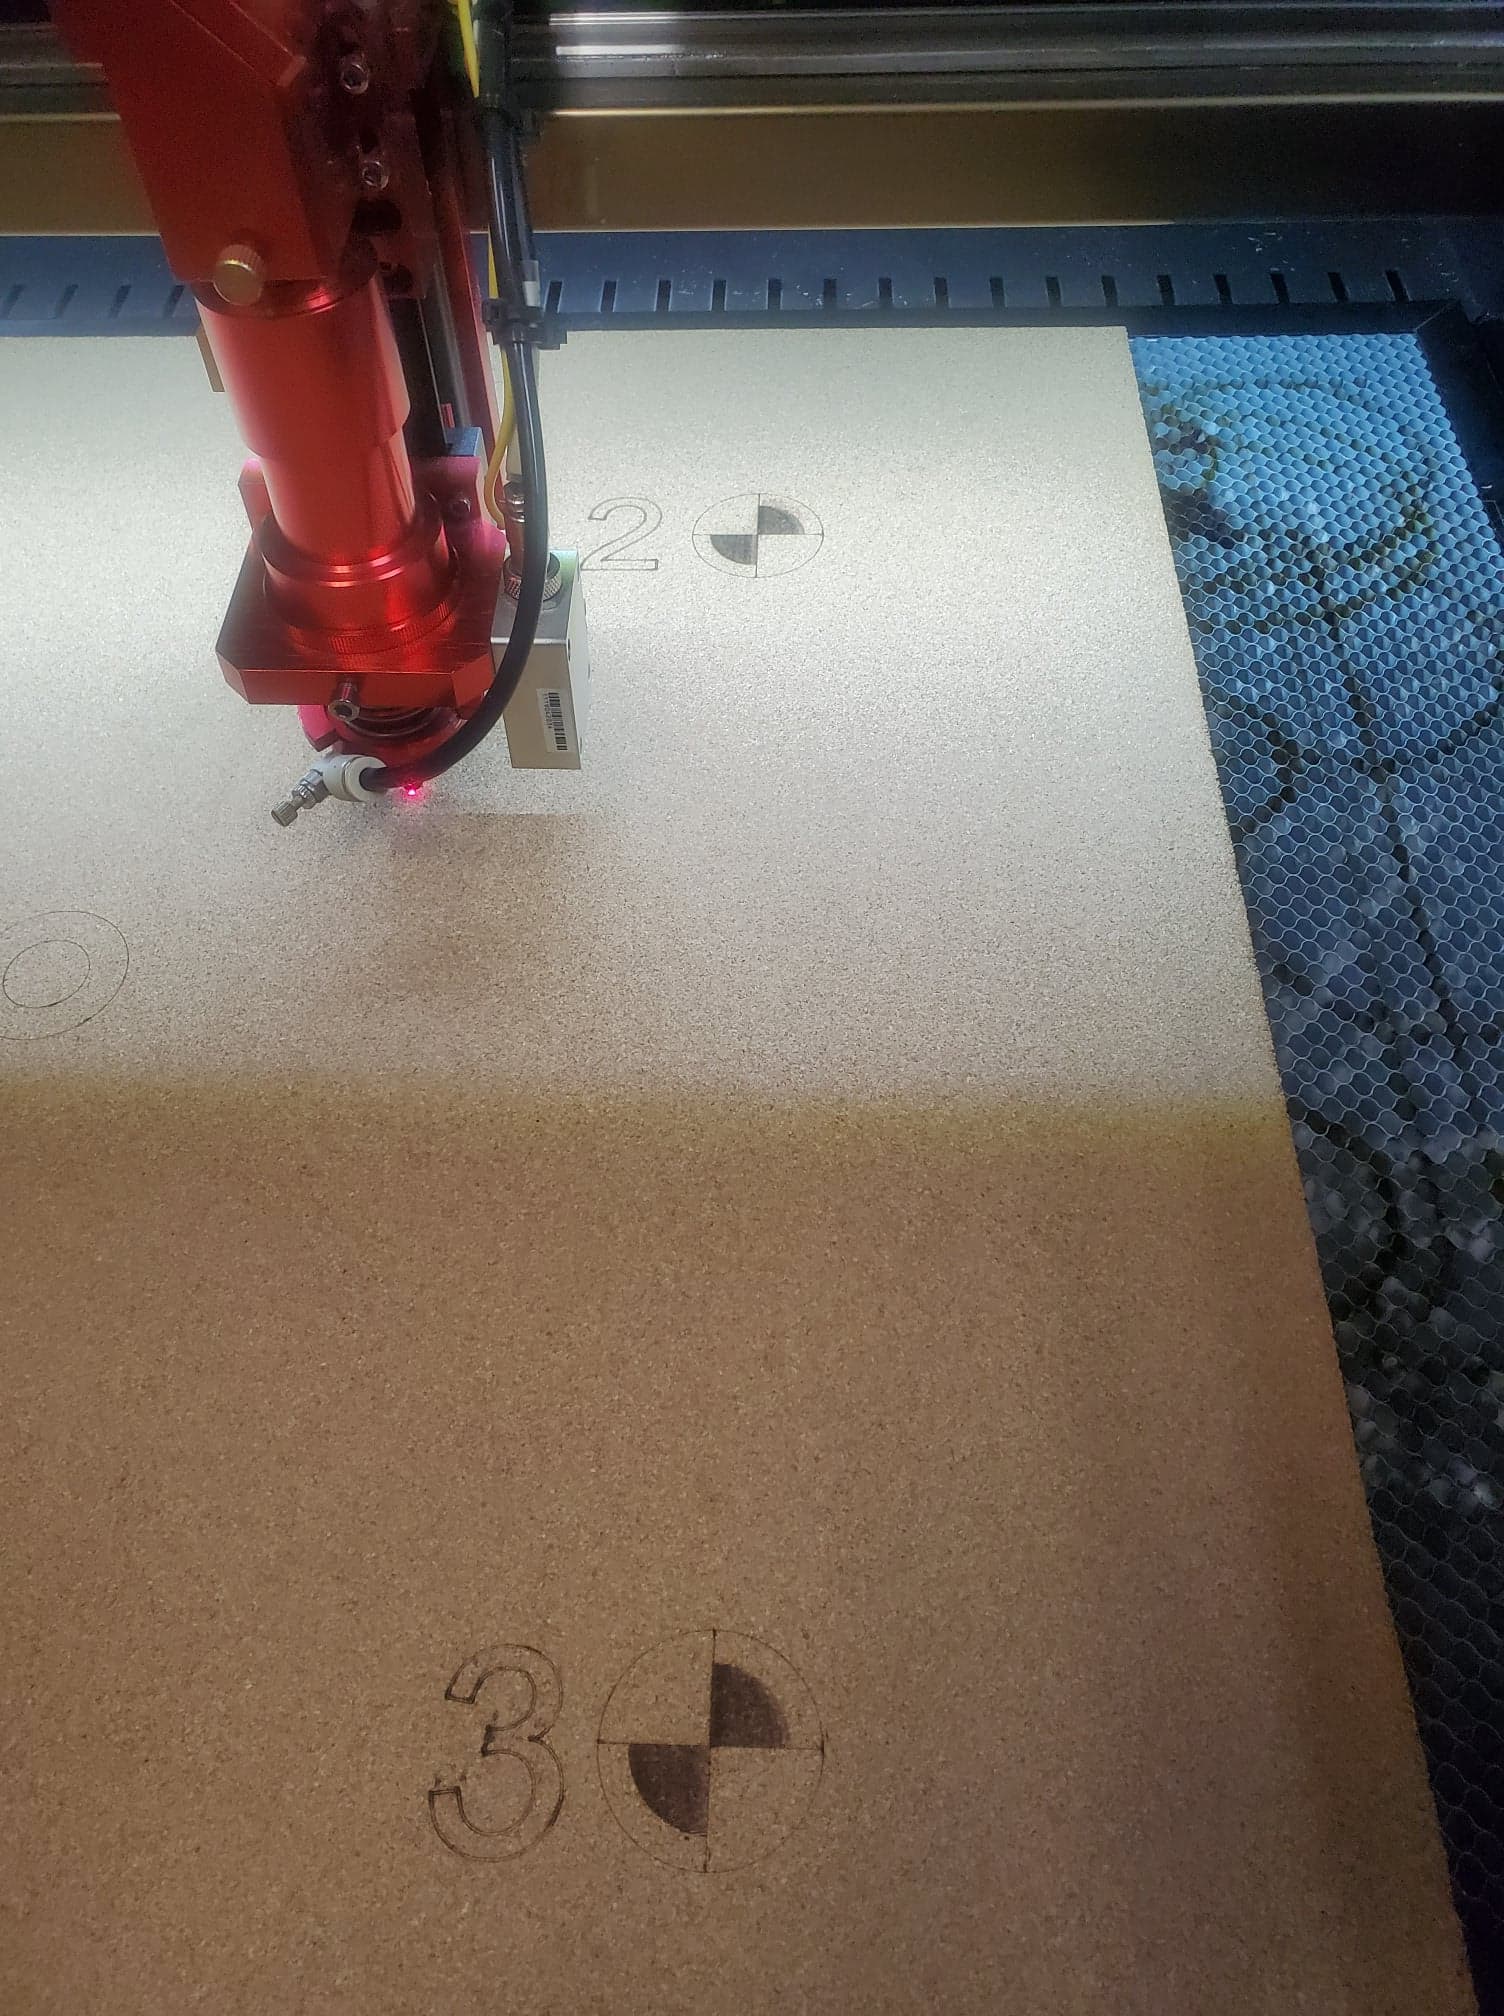
This time it seems to have returned to the first time I ran it on cardboard it’s to the right, and down on the #1 crosshair. So I tried the #2 crosshair. It’s down and to the left.
I don’t dare to run #3 & #4 as if it goes down it will run past my machine limit.
But I am attaching the pictures of #1 & #2.
Now due to positioning I ma guessing that maybe it is thinking the machine bead is smaller? But my setting was setup for my scale was at 220 which lined up perfectly in my machine. Not sure if I previously mentioned it but I have a BOSS HP2436.
Ralph
Most times I’ve seen this happen it’s from someone not re-doing the marker engraving and just re-using a prior run.
That doesn’t seem to be the case here, but there’s one other that’s common, and that is when tagging the markers, if you hit ‘Esc’ and get yourself out of that screen, then go back, and forget to enter the scale again the 2nd time through, the software proceeds thinking you used the original scale factor. Could that be what’s happening here?
Didn’t hit ESC just ran the alignment from the beginning on new material, clicked finish, updated the overlay tagged the #1 marker and the machine moved to the position in the picture. Then I took a picture and tagged the #2 marker and took a picture.
Like I said I’m leery of doing #3 & #4 as if the y go below the numbers it will be beyond the limit of my machine.
Any ideas???
I’m betting if you tag the center circle it’ll be nearly exact - I say this because the center point is the ‘anchor’ here, and the others are relative to it. When you tell your laser to go to point #1 it gets about 1/2 of the way there from the center, and ditto for point #2. 3 & 4 will be the same.
This truly makes no sense. I’ve never seen it fail like this if you run the job straight through without stopping.
The 220 scale is fine, but it looks like that scale isn’t being used when you tag the markers themselves. If you haven’t moved the targets yet, try going into the Camera Alignment tool, entering 220 again for the scale, don’t re-run the job, and just do the capture and tagging. Does it end up close? (IE, at the right scale?)
That worked. Luckily I shut the machine down and stopped working to wait for your reply. Not exactly efficient, but now the camera is aligned.
My next question is, do I need to do that every time I use the camera or change the material thickness?
If so can I reuse the etching or do I need a new one everytime?
You should only need to do this if the camera position changes relative to the material surface. If you swap to a longer / shorter focus lens, change the length of your lens tube, or something like that.
You can export the camera info by right-clicking in the camera control window, which would let you re-import it again later. This is useful if you have multiple lenses you switch between - you can align once for each lens, then just import the right alignment file when you switch.
If you do need to redo it, you have to re-run the markers because it’s important that the laser itself is the thing that places them, so the system is measuring where the laser put them relative to the camera.
The markers are just 4 crosshairs in a 180mm square, centered in your workspace, then scaled. You can create a 180mm square, select it, press ‘P’ to center it in the page, and then scale it to whatever scale you used. Run that in ‘Line’ mode and you can just use the corners of that square as your markers instead of re-doing the full marker run. (hopefully my description makes sense)
Oh awesome, so if I always use the same camera and don’t move the mount as the table brings the material up to the laser head which is always at the same height as is the camera no changes are necessary. Just use it as is whenever I need it.
Such great news.
Thanks again for all your help.
Ralph
This topic was automatically closed 30 days after the last reply. New replies are no longer allowed.