I think I’ve read most everything here in the forum and searched for solutions online . . . but I just cannot get Lightburn to connect or synch with my Creality Falcon 10W.
I’ve tried:
Find the device
Importing the CR Falcon .lbdev file.
Manual setup of the various GRBL devices.
Rebooting Creality Falcon.
Rebooting computer.
Remove USB cable at the laser and at the computer (not using any USB hubs, but straight into the MB), trying new USB cable . . .
Different COM ports (if they appear, usually COM 1 and COM 3 . . . on one COM, LB reads “Ready” (but no response to LB move commands), and the other says “Disconnected.”
It appears to me that other Creality Falcon 10W owners have been frustrated with this as well, but I haven’t found any solutions.
Assuming Windows machine. Has it ever worked or is this a new installation? Did you install the CH340/341 driver? Does the computer make the connection sound when you plug in the laser?
Yes, Windows 10. Where might I download the CH340/341 driver? I don’t have the micro SD card that came with the machine . . . I can probably find the firmware file and the .lbdev file, but I’m not sure what the CH340/341 driver looks like.
Is there a very particular order of establishing the connection, e.g. (1) plug USB into MB port in at back of computer, (2) plug in USB cable to the laser, (3) turn on the laser?
Start with installing the driver. Windows needs it to see your laser, otherwise it’s an unknown device. You can download the driver from this page, yes it’s Xtool, but the driver is generic. CH340 Driver Installation Guide - xTool Support Center
That’s counterintuitive. I never would have gotten the idea to do that from all the places I had looked.
So, after I have successfully installed the generic driver using the executable file, do I have to reboot computer, reboot the laser, unplug and replug the USB cable? Go to Devices in the “Laser” window, then “Import,” then click on the .lbdev file? Or select one of the other GRBL device drivers?
I would unplug the USB Cable from the computer, install the driver, then drag and drop the lbdev file onto the Lightburn workspace. It will automatically bring up the install dialog. Once that’s done reconnect the laser and see if it is located.
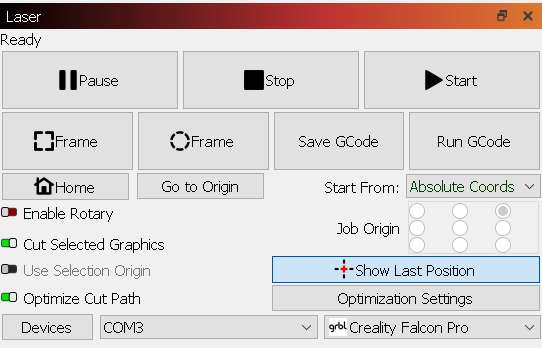
At first, as in the above screen shot, it said “Ready,” but the laser did not respond to any Move commands, e.g. Home or set laser position.
Then, I unplugged the USB cable and replugged it, changed from COM1 (which said “Ready”) to COM3 (which at first said “Disconnected,” but then said “Ready”) and now it seems to be responding to Move commands.
Crossing my fingers and proceeding from here. Thanks for your help. I’m not sure I understand what just happened entirely, but I think it might work
The ready message in the laser panel is confusing. I wish it wasn’t there. It says ready even if there is nothing connected. You need to go to the console window and look for activity there to ensure you have connection. I don’t have a laser connected to this machine and the console window says waiting for connection. Once I connect it to a laser it provides firmware info and some other info and finishes with a connected message.
Good to know. I’m running a CO2 and diode at the same time, in different windows. (If anyone has any observations about running two different kinds of lasers simultaneously from the same computer, I’d like to hear.)
Generally, when I open a new window to use the diode (after opening window for my CO2), the status line says “Ready” (as you noted) but the diode (Creality Falcon 10W) remains unresponsive. I have to physically disconnect the USB cable and then reconnect it, and then it seems to work.
The Creality Falcon 10W diode seems a bit quirky at times – in the sense of absolute coordinates not always being the same on the build table. At least that’s the way it seems to me. I have the workspace defined, but the laser head still seems to hit the frame and grind occasionally, even if I have homed it prior to cutting. I’ll have to observe and reexamine the setup and limiter switches again, I guess.
Are you connected to both machines via usb or are you connected to the C02 via Ethernet?
Rather than disconnecting the cable for the diode try this. Open the drop down menu next to the devices button ans select the proper port for the Diode or right click on the devices button, that should reset the connection without disconnecting. One of those methods should result in a connection.
Connected to CO2 via CAT5 and to diode via USB. The machines are not in the same room as my office, so the USB cable to the diode may be as long as 25 feet . . . and I think I just read that could be a problem.
I haven’t tried right-clicking the devices button, so I’ll try that. (I never would have figured that out on my own.) I have tried selecting the COM port . . . while I can’t figure it out because it doesn’t happen consistently, I sometimes see both COM1 and COM3 in the GRBL device drop down. When both appear, it’s usually COM3 that works.
Also, I’m one of those doofballs who has multiple USB hubs with a dozen or so other devices from printers to cameras to lighting to label makers and even VCR and cassette tape digitizers. Nobody’s fault but my own!