Omg this software is frustrating I am trying to design a simple tartan bow tie. I made the pattern slotted it into the bow tie shape and since then have not been able to close the shapes it’s very fustrating. I don’t understand why this can’t be done quickly and easily. I have messed about with nodes they seem closes but no and I have also tried other methods. I will try and enclose a picture of the basic design I was working with. Can anyone help design this please would be much appreciated, Jason
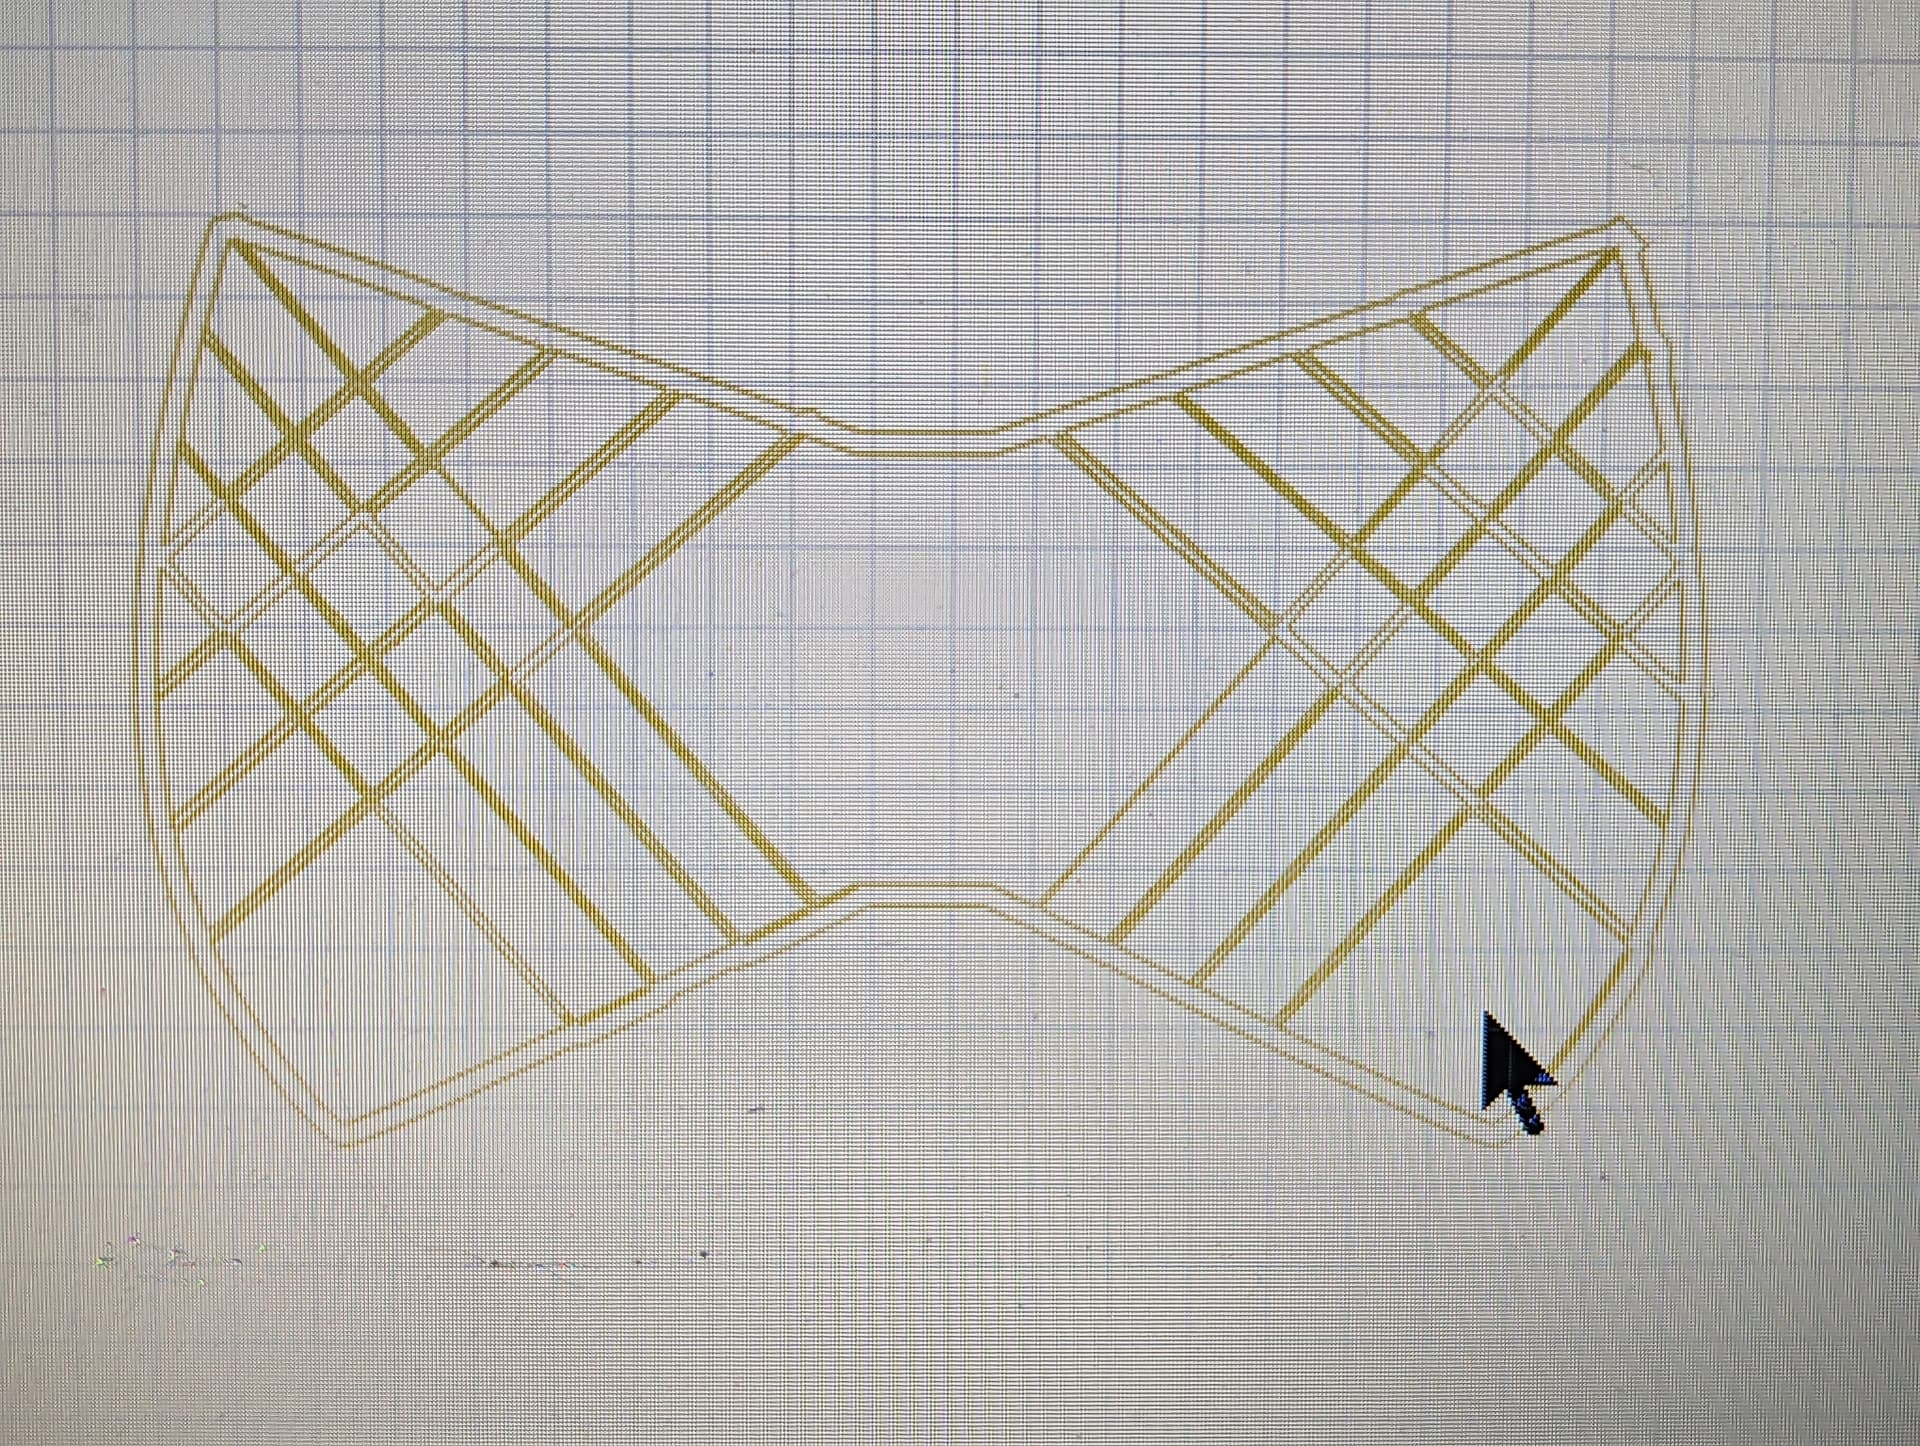
By the way this was not the exact design but it is similar
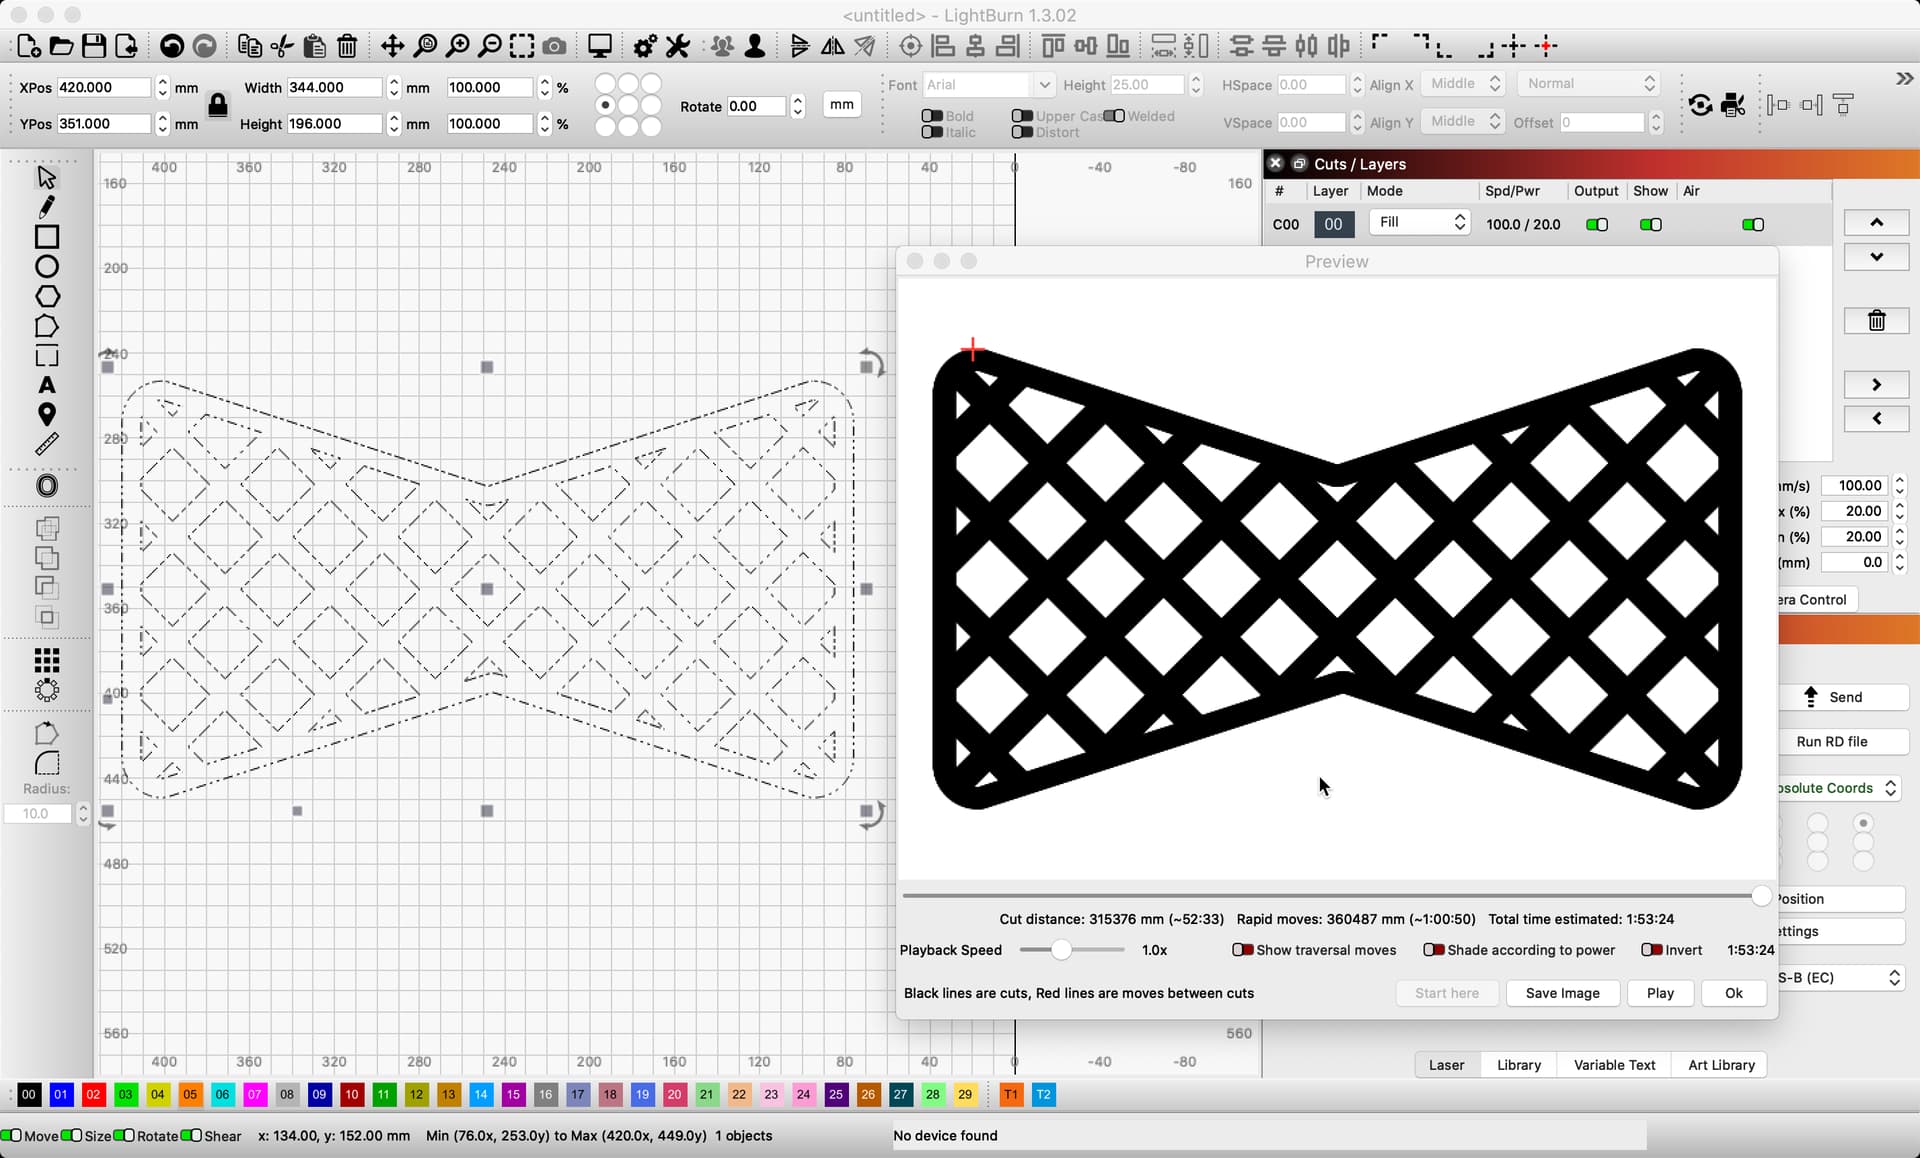
Saw your post and wanted to see if I could produce something similar to assist. I was able to quickly design this.
But showing that does not help you fix the design you have. If willing, share the file that won’t close as you’d expect, and we can take a look. ![]()
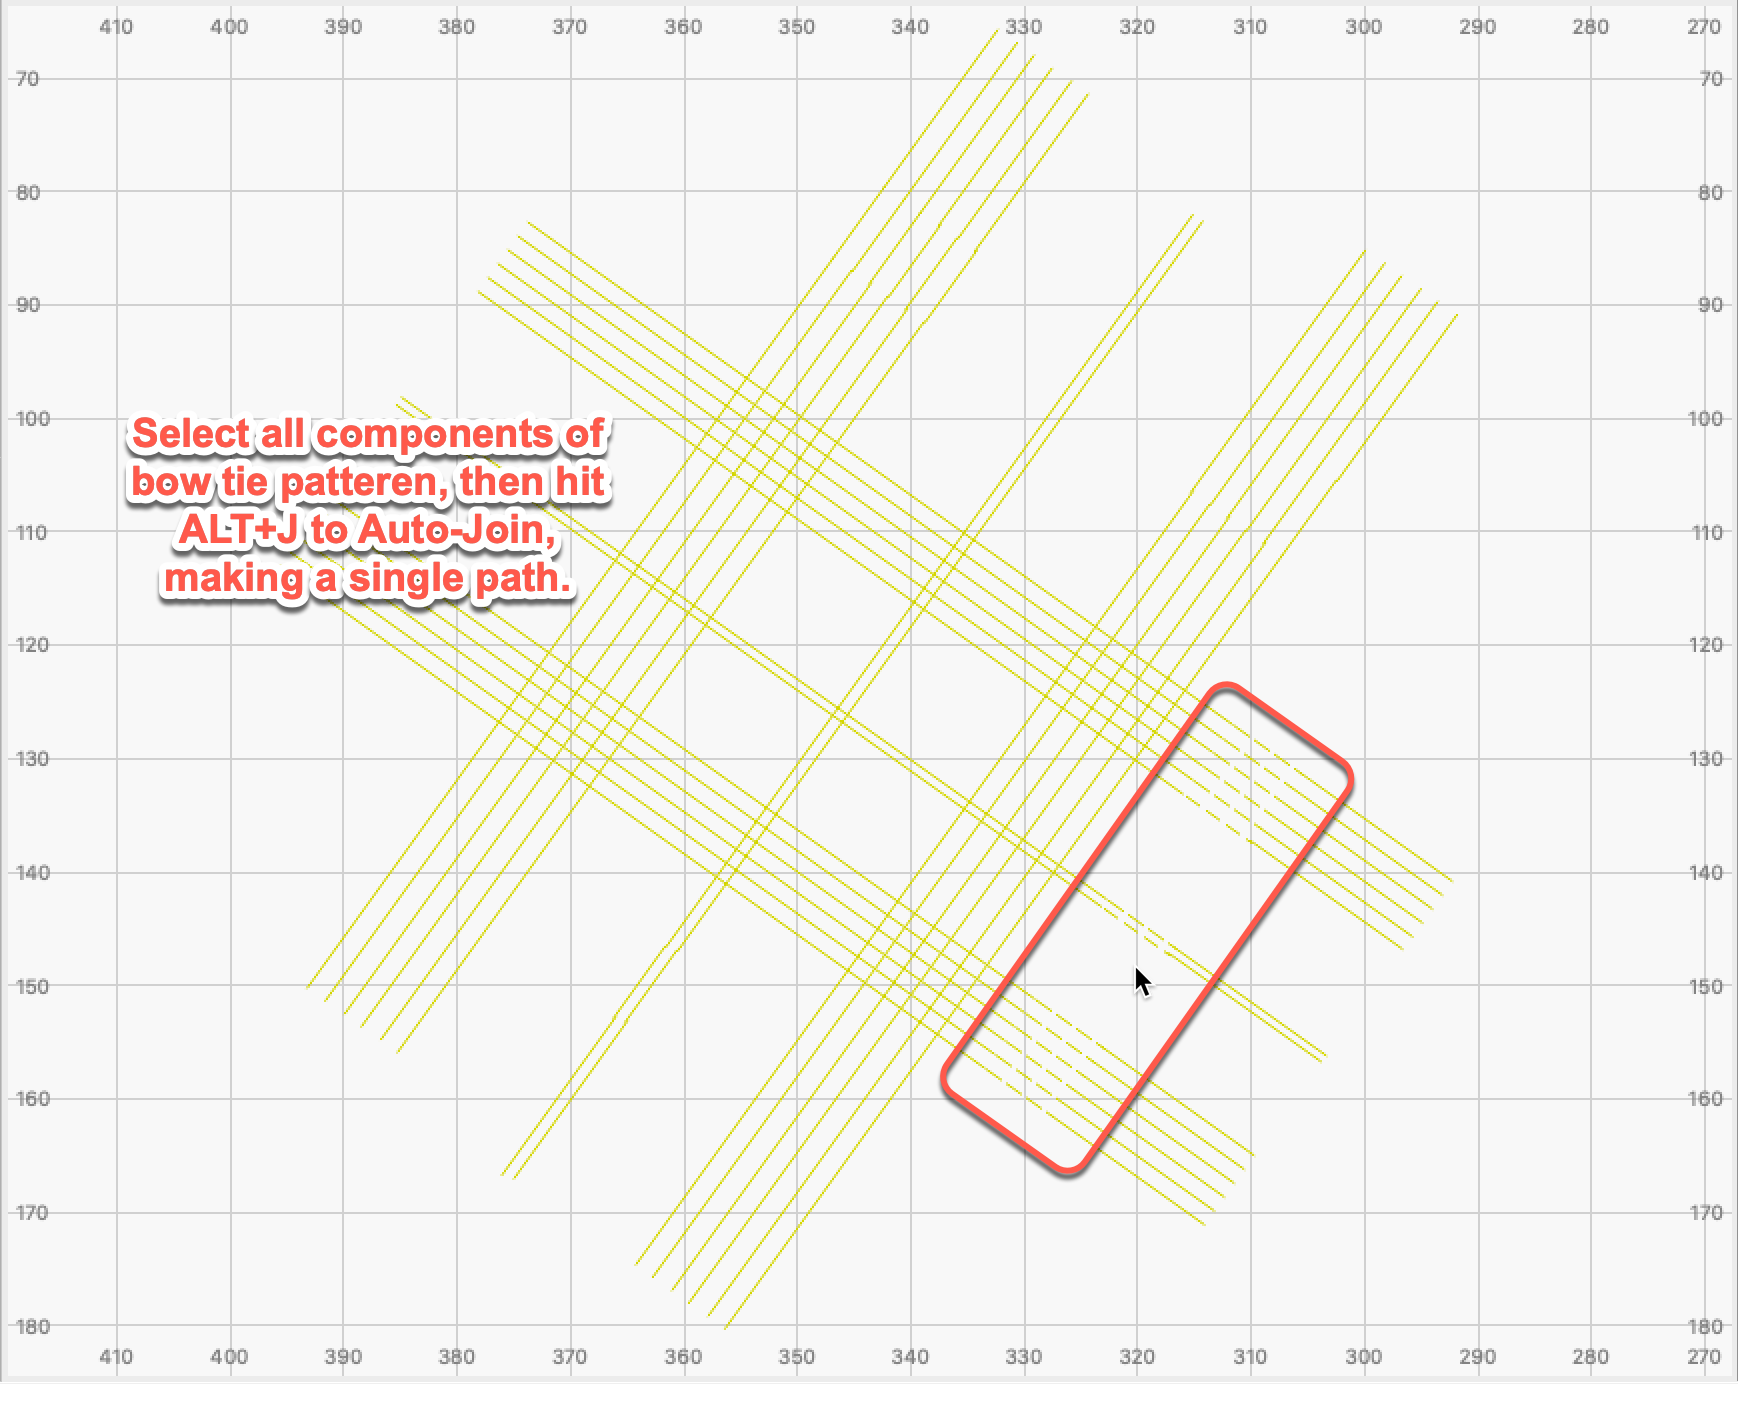
Sometimes, selecting everything in that design, then Alt-B to ‘Break Apart’, followed by Alt-J to ‘Auto-join’ the shapes can resolve what you are experiencing. There is also, ‘Edit’–>‘Select open shapes set to fill’ to help isolate components needing attention.
1 Like
Hi Rick nice looking work and thanks for your help. I am attach my file basically I am trying to have the design symmetrical on both sides. It is a tartan design at an angle. Appreciate your help I will try and upload it.
jason bow tie.lbrn2 (53.9 KB)
Starting with a lot of disjointed single lines, so those would never fill. Will need to offset, then use boolean to “connect” to tie shape. I will have a play and post what I come up with. It might be a bit…but I will get you something today. ![]()
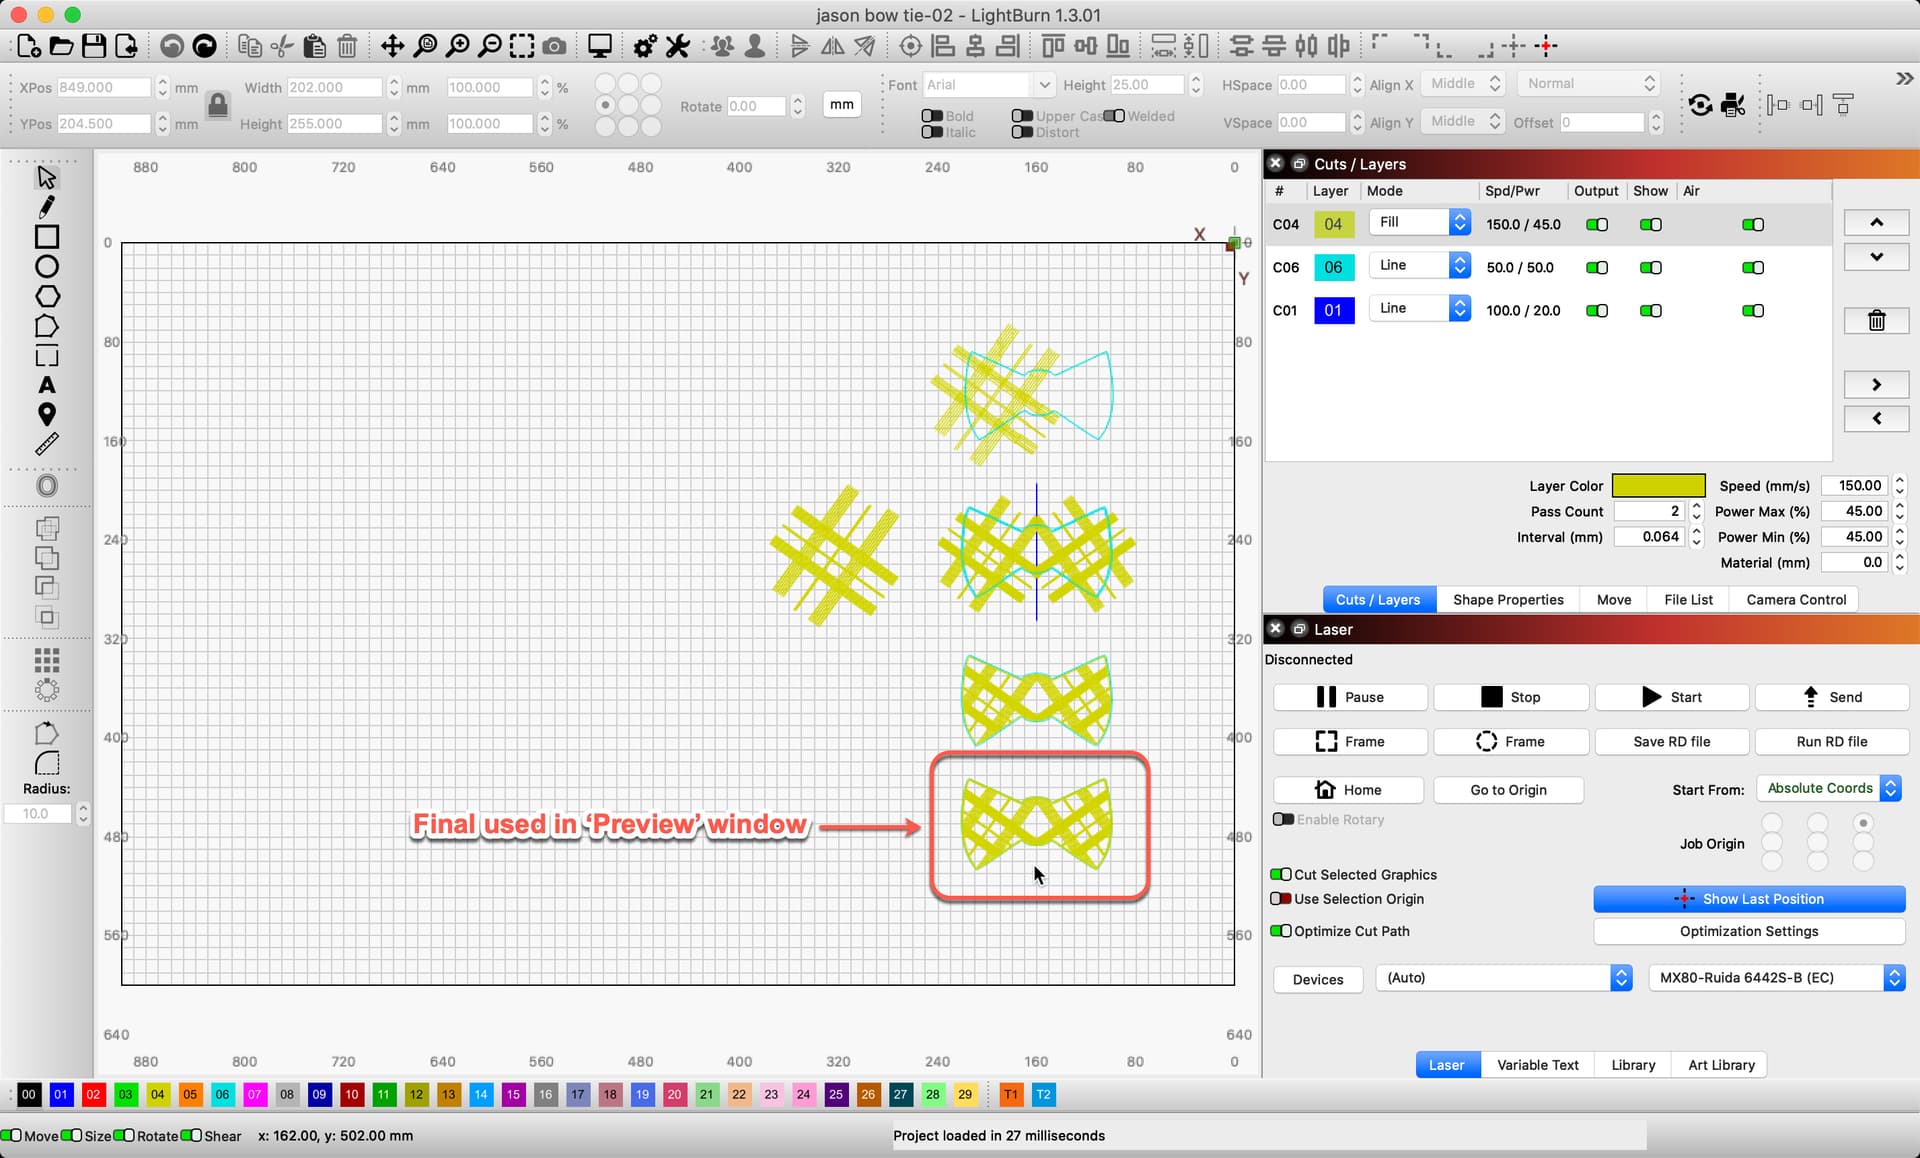
OK, so here is what I produced, starting with your file. ![]()
Is this closer to what you are after? If so, I can write up the process I used to do this.
jason bow tie-02.lbrn2 (395.7 KB)
1 Like
Wow YES very impressive! Thank you so much and really interested how you did it!
You can start by reviewing the file I shared above, and I will write something up. ![]()
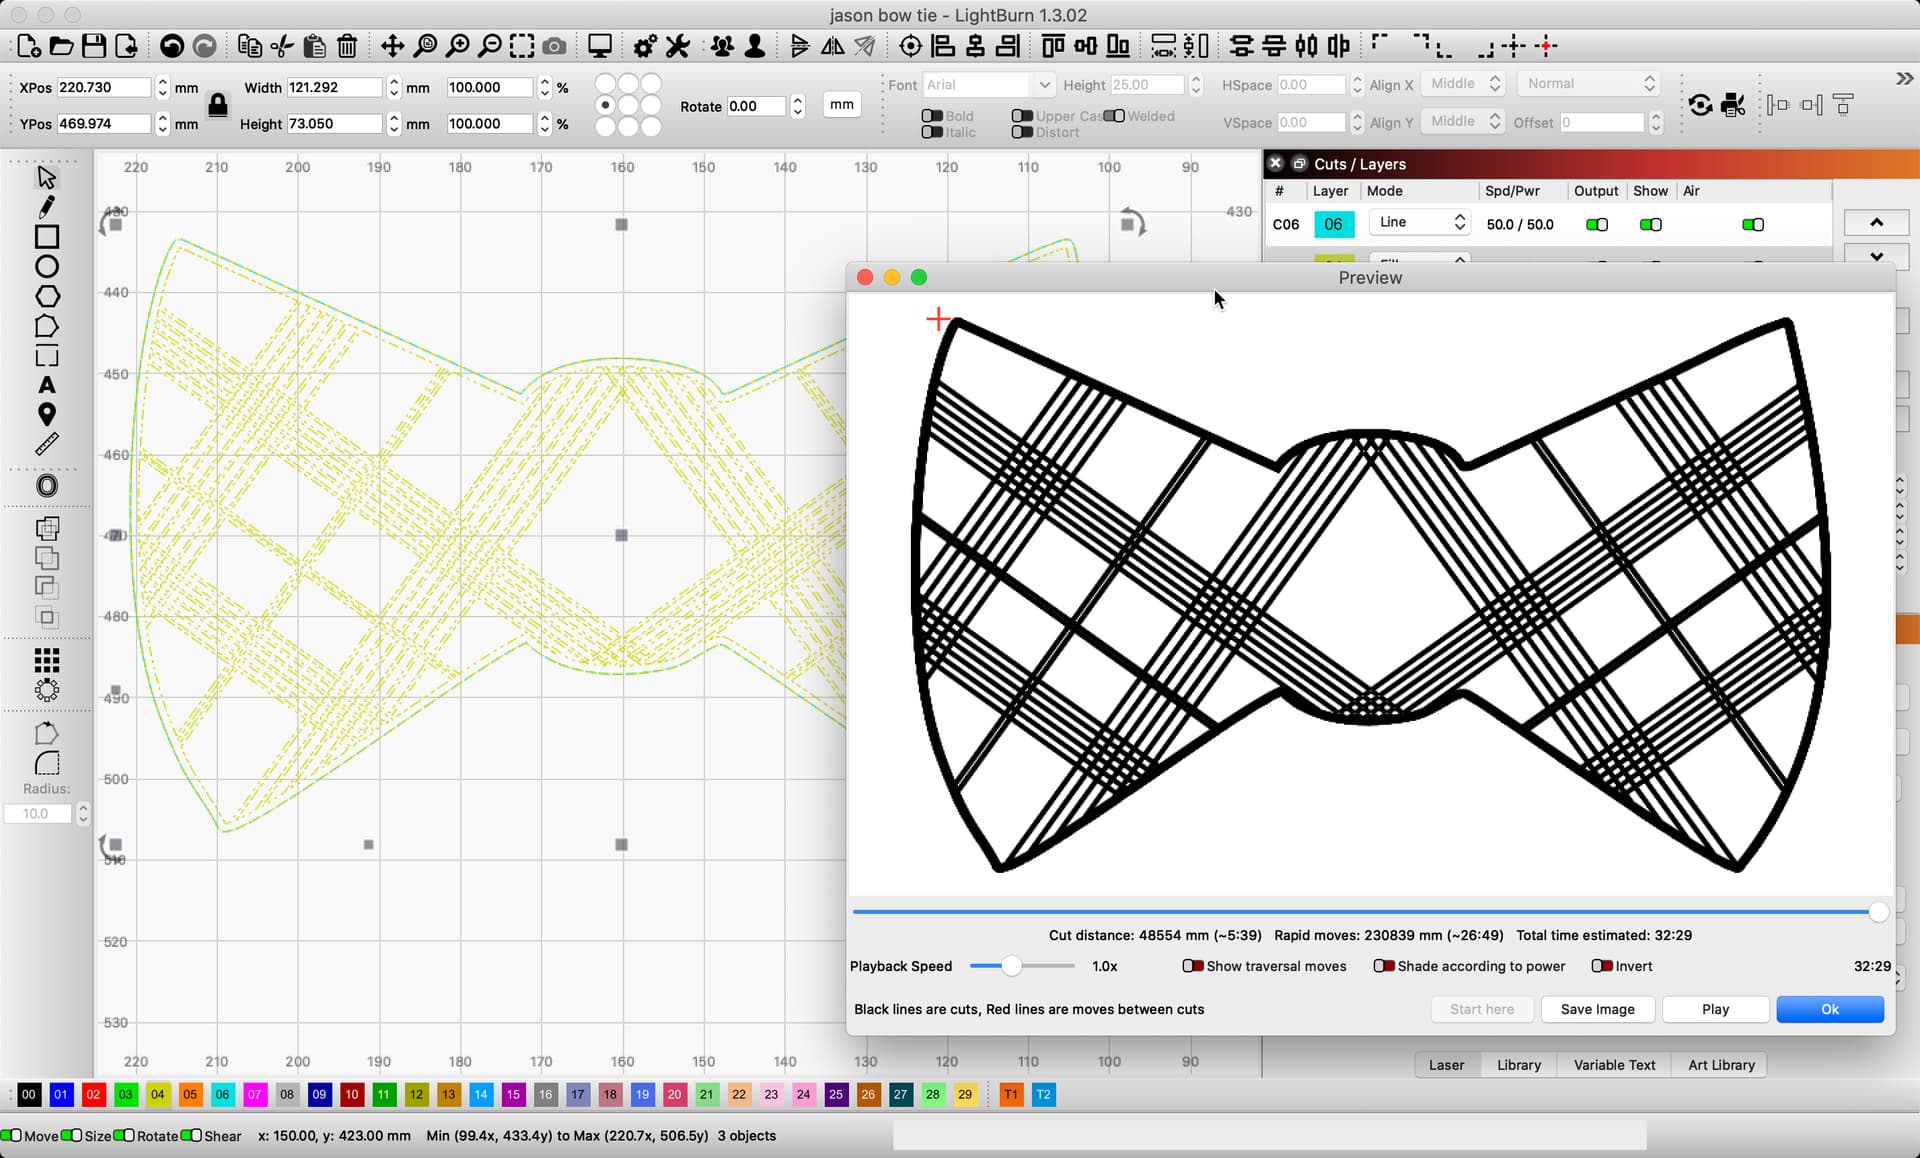
Edit: Here is what I did to produce this @veselka. ![]()
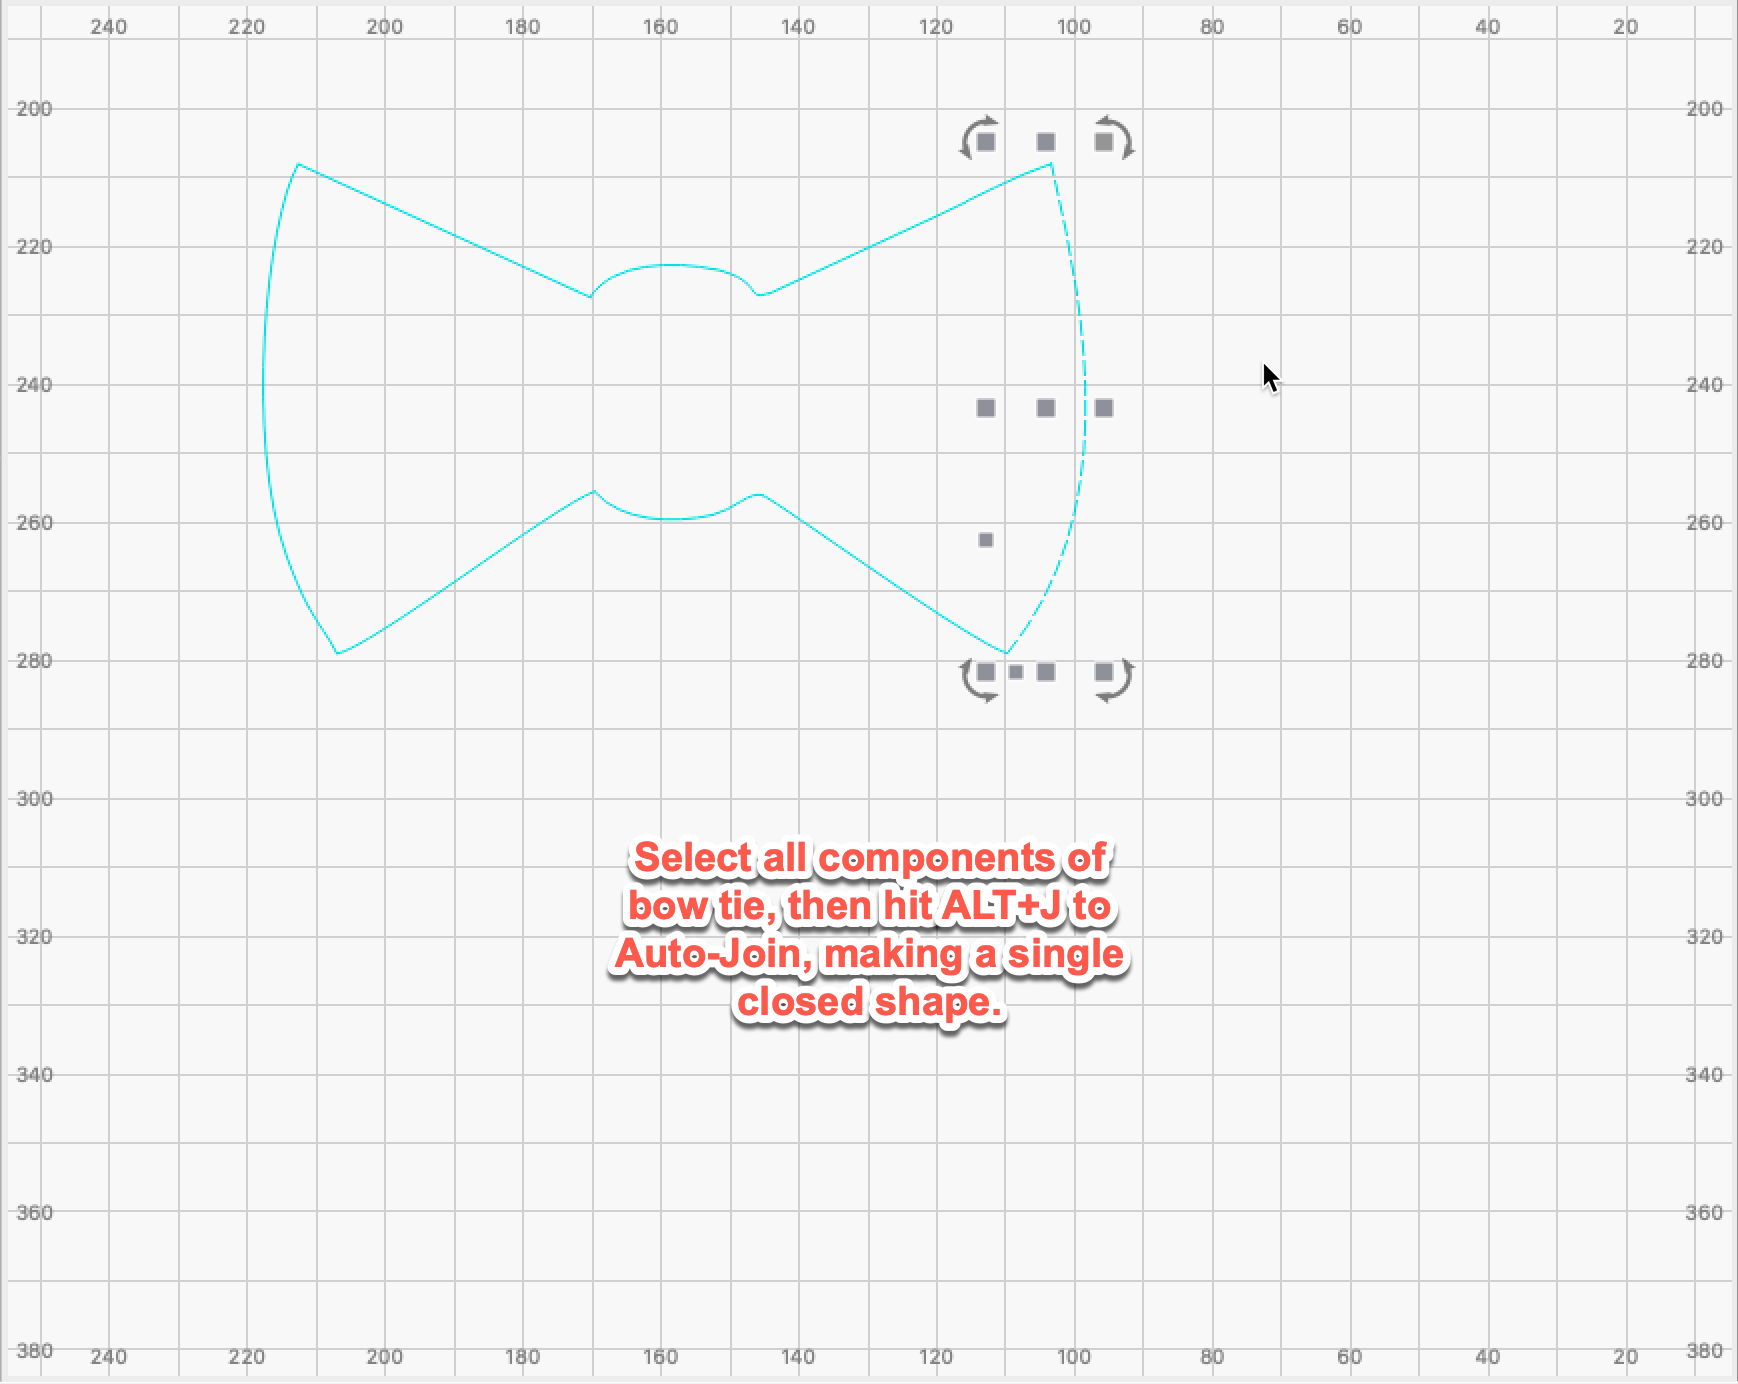
Starting with your file, I note the shapes are made using dis-jointed line segments. First, I used the ‘Auto-join’ to connect things into single pathed shapes.
Then, select all shapes of the pattern and ‘Group’. With group selected, ‘Offset’ outward by 0.25mm. You can have the Offset tool delete the original for you, I did not and removed later.
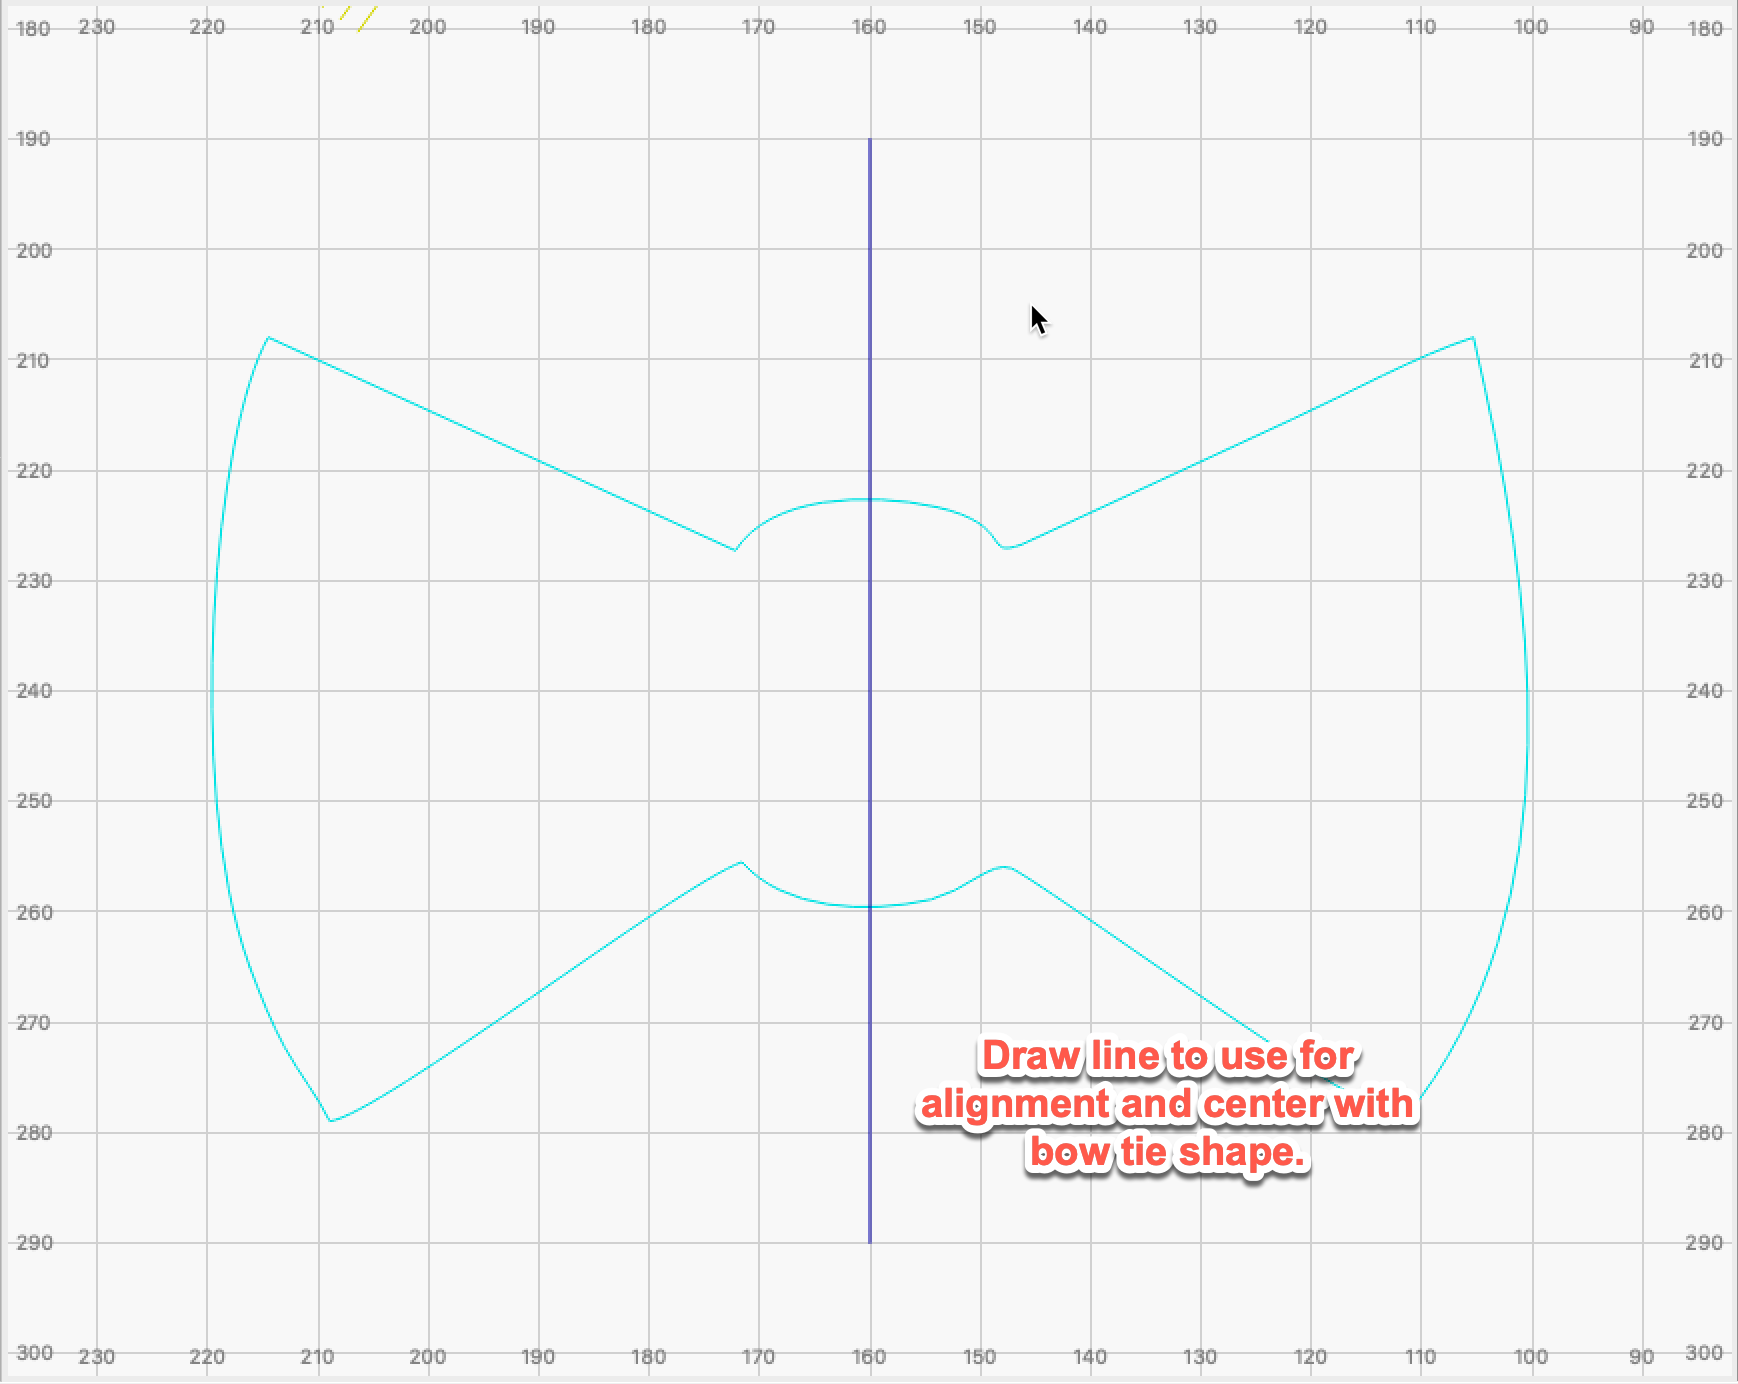
I drew a line to use for alignment and centered with bow tie shape. Moved pattern over bow tie shape on left side. With the pattern selected, hold the shift and select the line, then hit Mirror the current selection across a line to duplicate the pattern on the right.
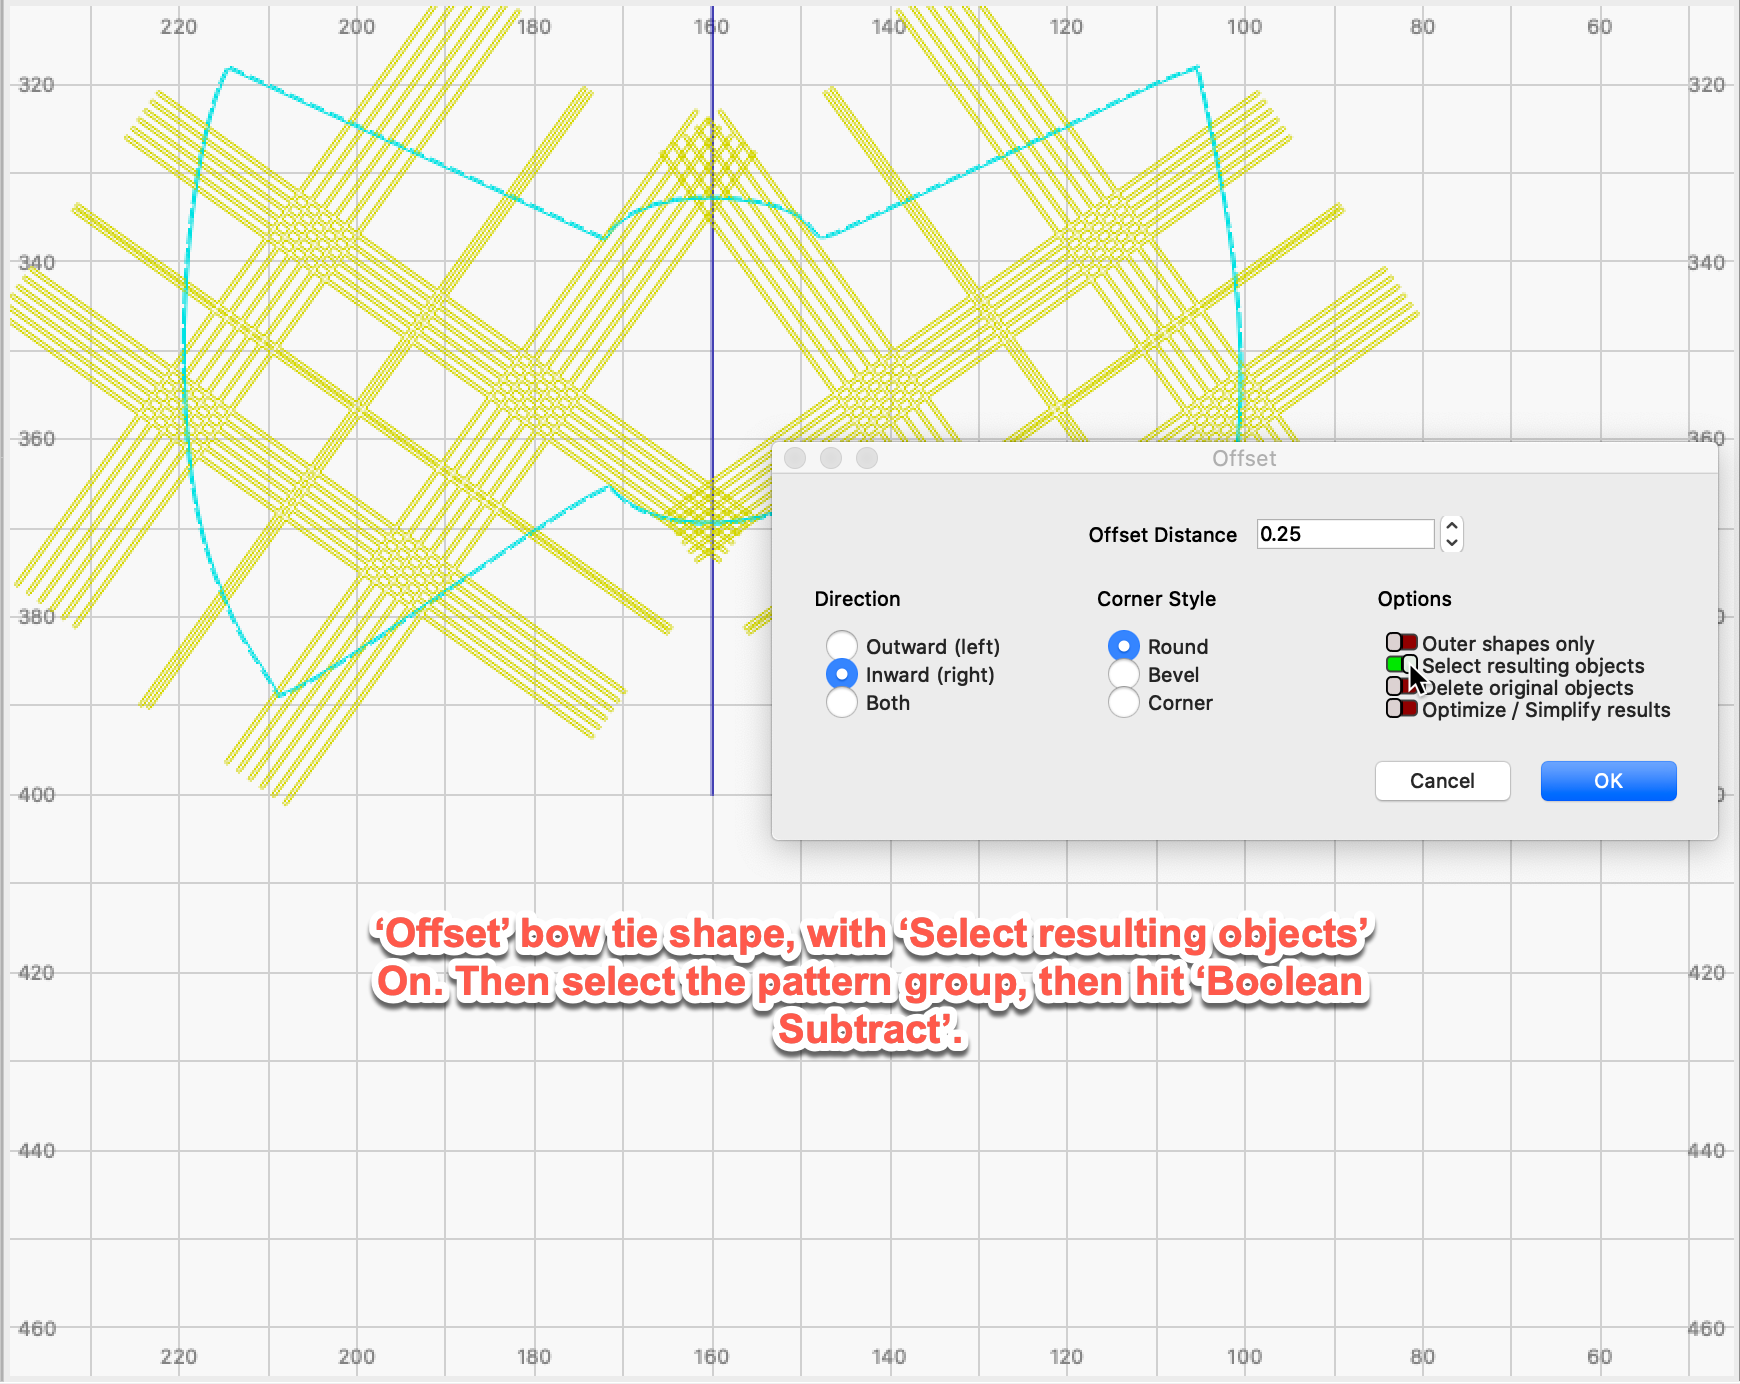
Subsequently, select the bow tie shape and ‘Offset’ by the same amount, 0.25mm, with ‘Select resulting objects’ On. Followed immediately by selecting the pattern group(s), then hit the ‘Boolean Subtract’ button.
Now, select the bow tie shape again and ‘Duplicate’, followed by placing the result on the 04 layer to close the shapes for filling.
- -


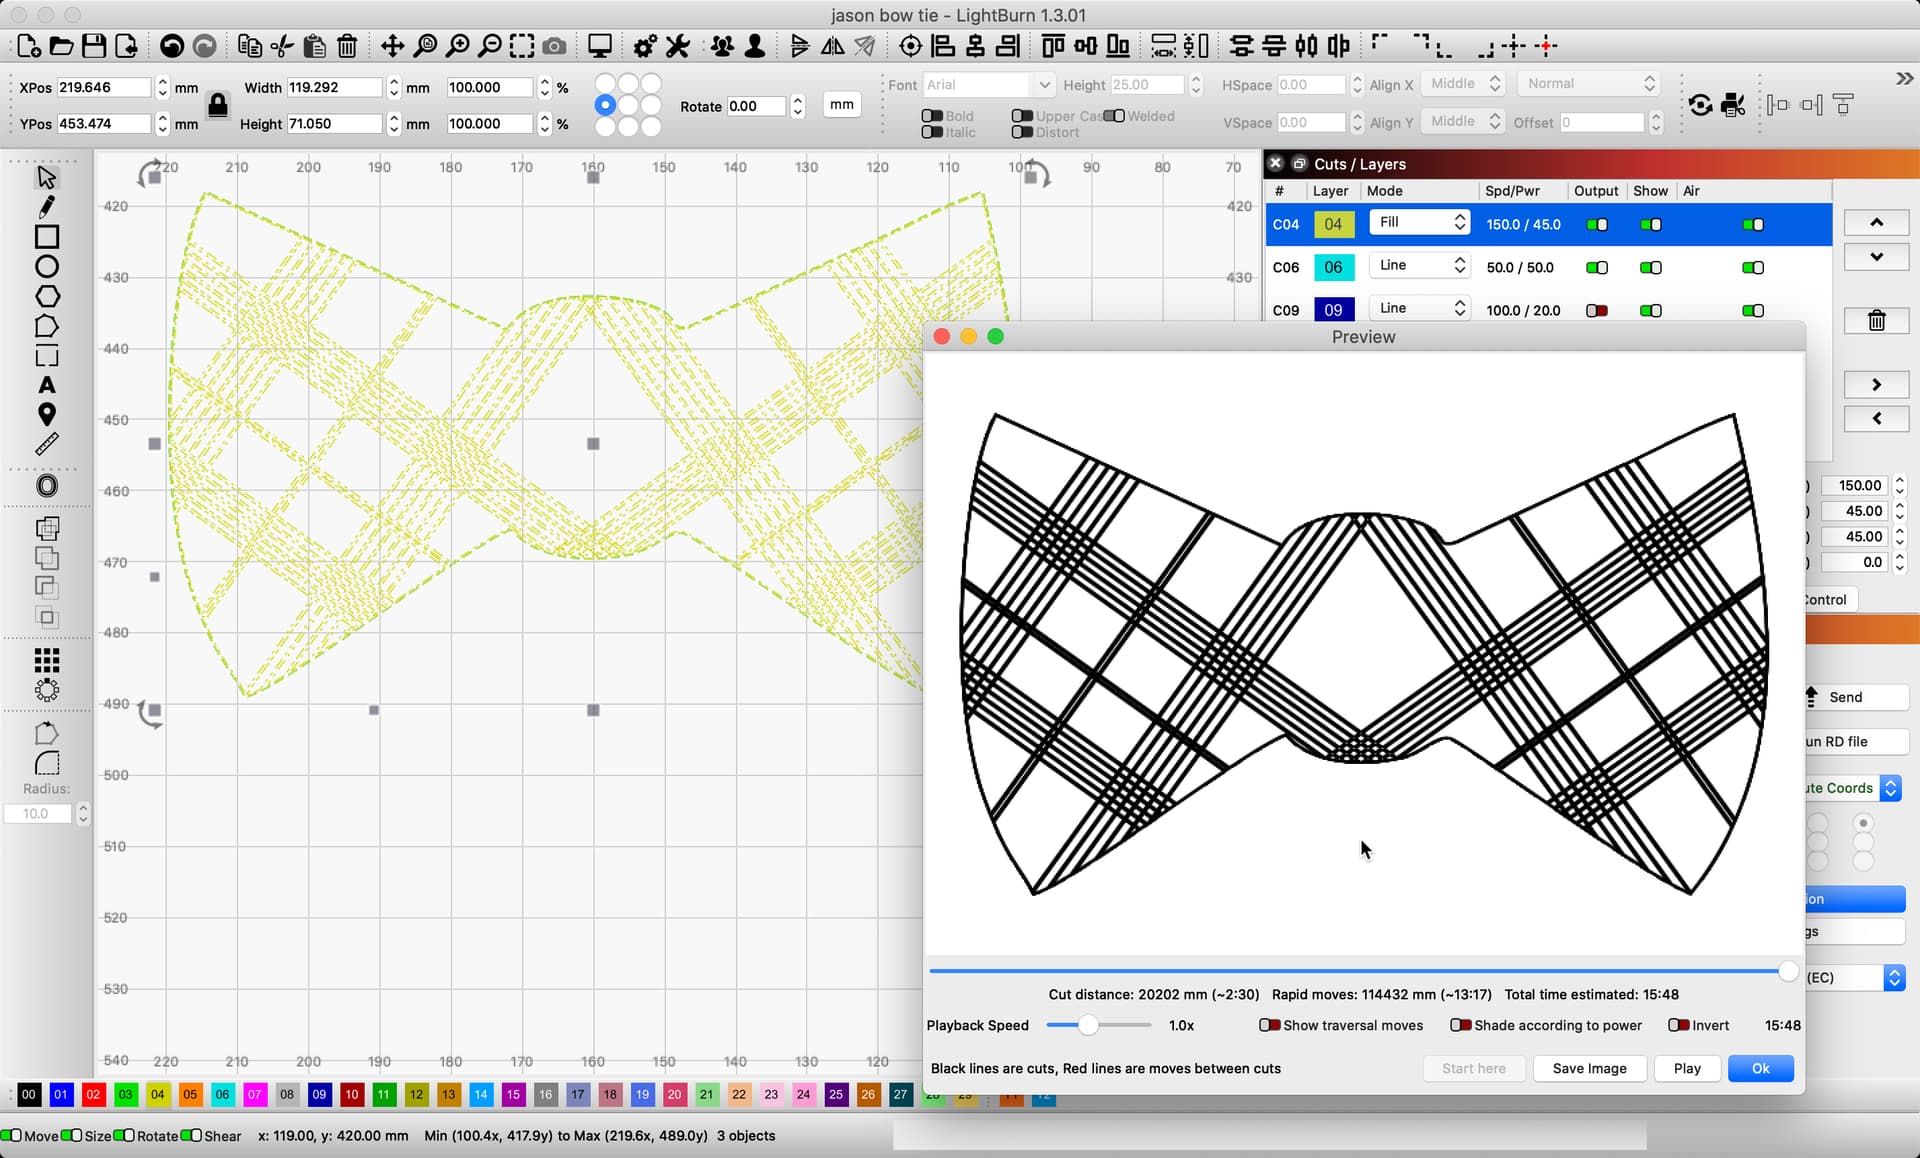

Lastly, check the order of layers will produce as you’d expect. I hope this makes sense and helpful.
3 Likes
Updated! Thanks for the patience. ![]()
1 Like
Thanks Rick for the detailed explanation and illustrations. I see you are have a layers feature which I have yet to learn or upgrade to so some I am a little confused on some aspects lol
Regarding,
“Starting with your file, I note the shapes are made using dis-jointed line segments. First, I used the ‘Auto-join’ to connect things into single pathed shapes”
I didn’t quite get what you mean here?
Sorry for being quite dumb at this. On a more simply level for me if I have the outline of the bow tie and I draw a long thin rectangle and placed that going over the edges of the bow tie is there a way of auto joining the shapes?
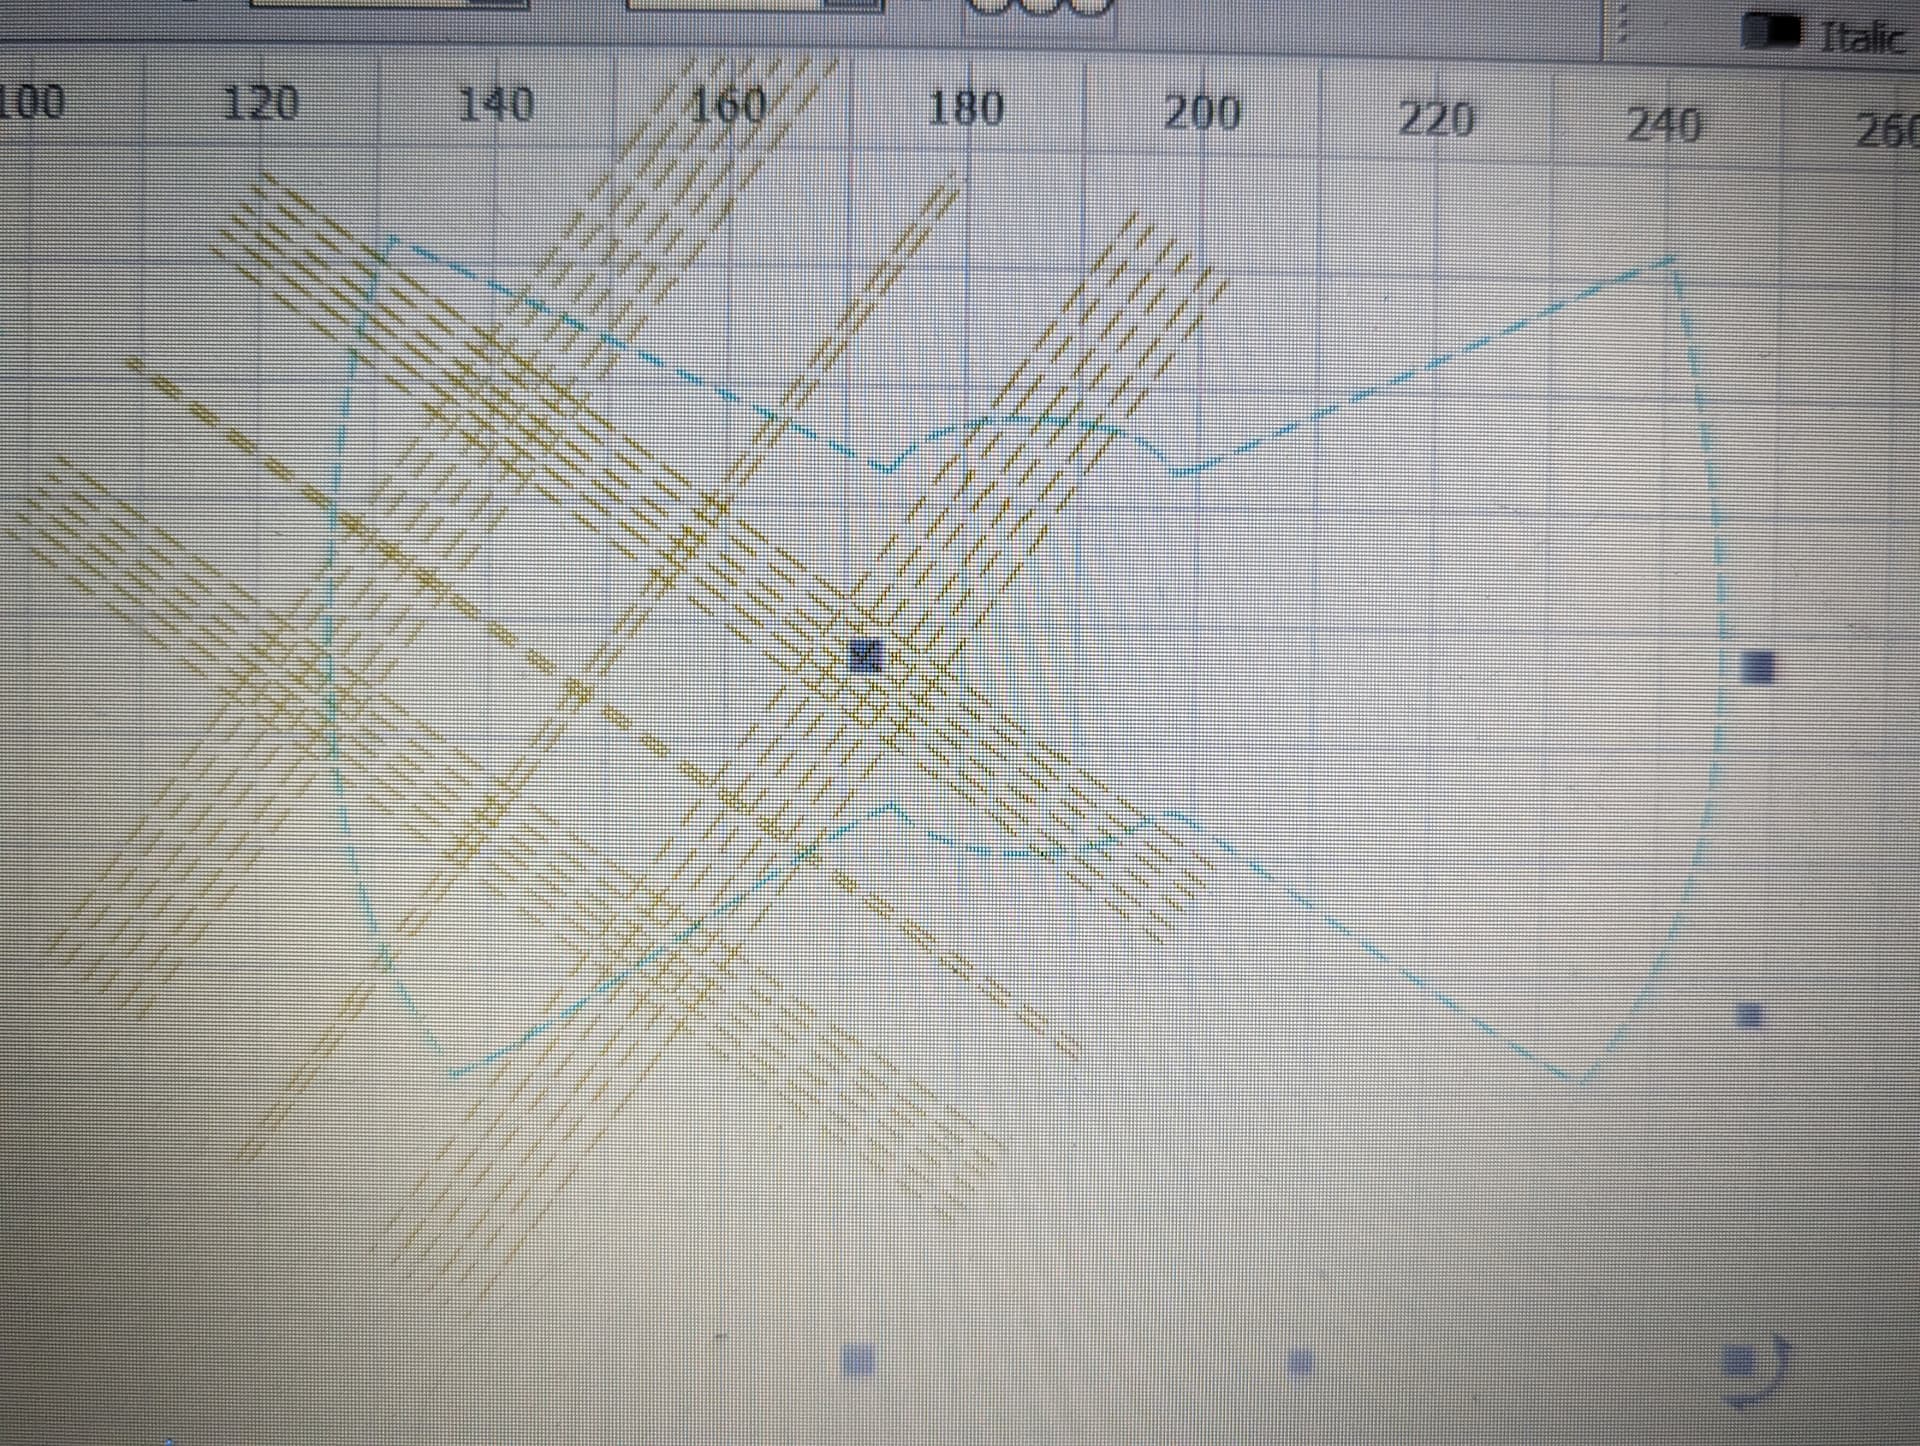
Look at the first 3 images I posted in my example. Note that the line segments are not connected to complete the line. I see 3 segments per desired line, and there should be only a single segment or path to make each individual shape.
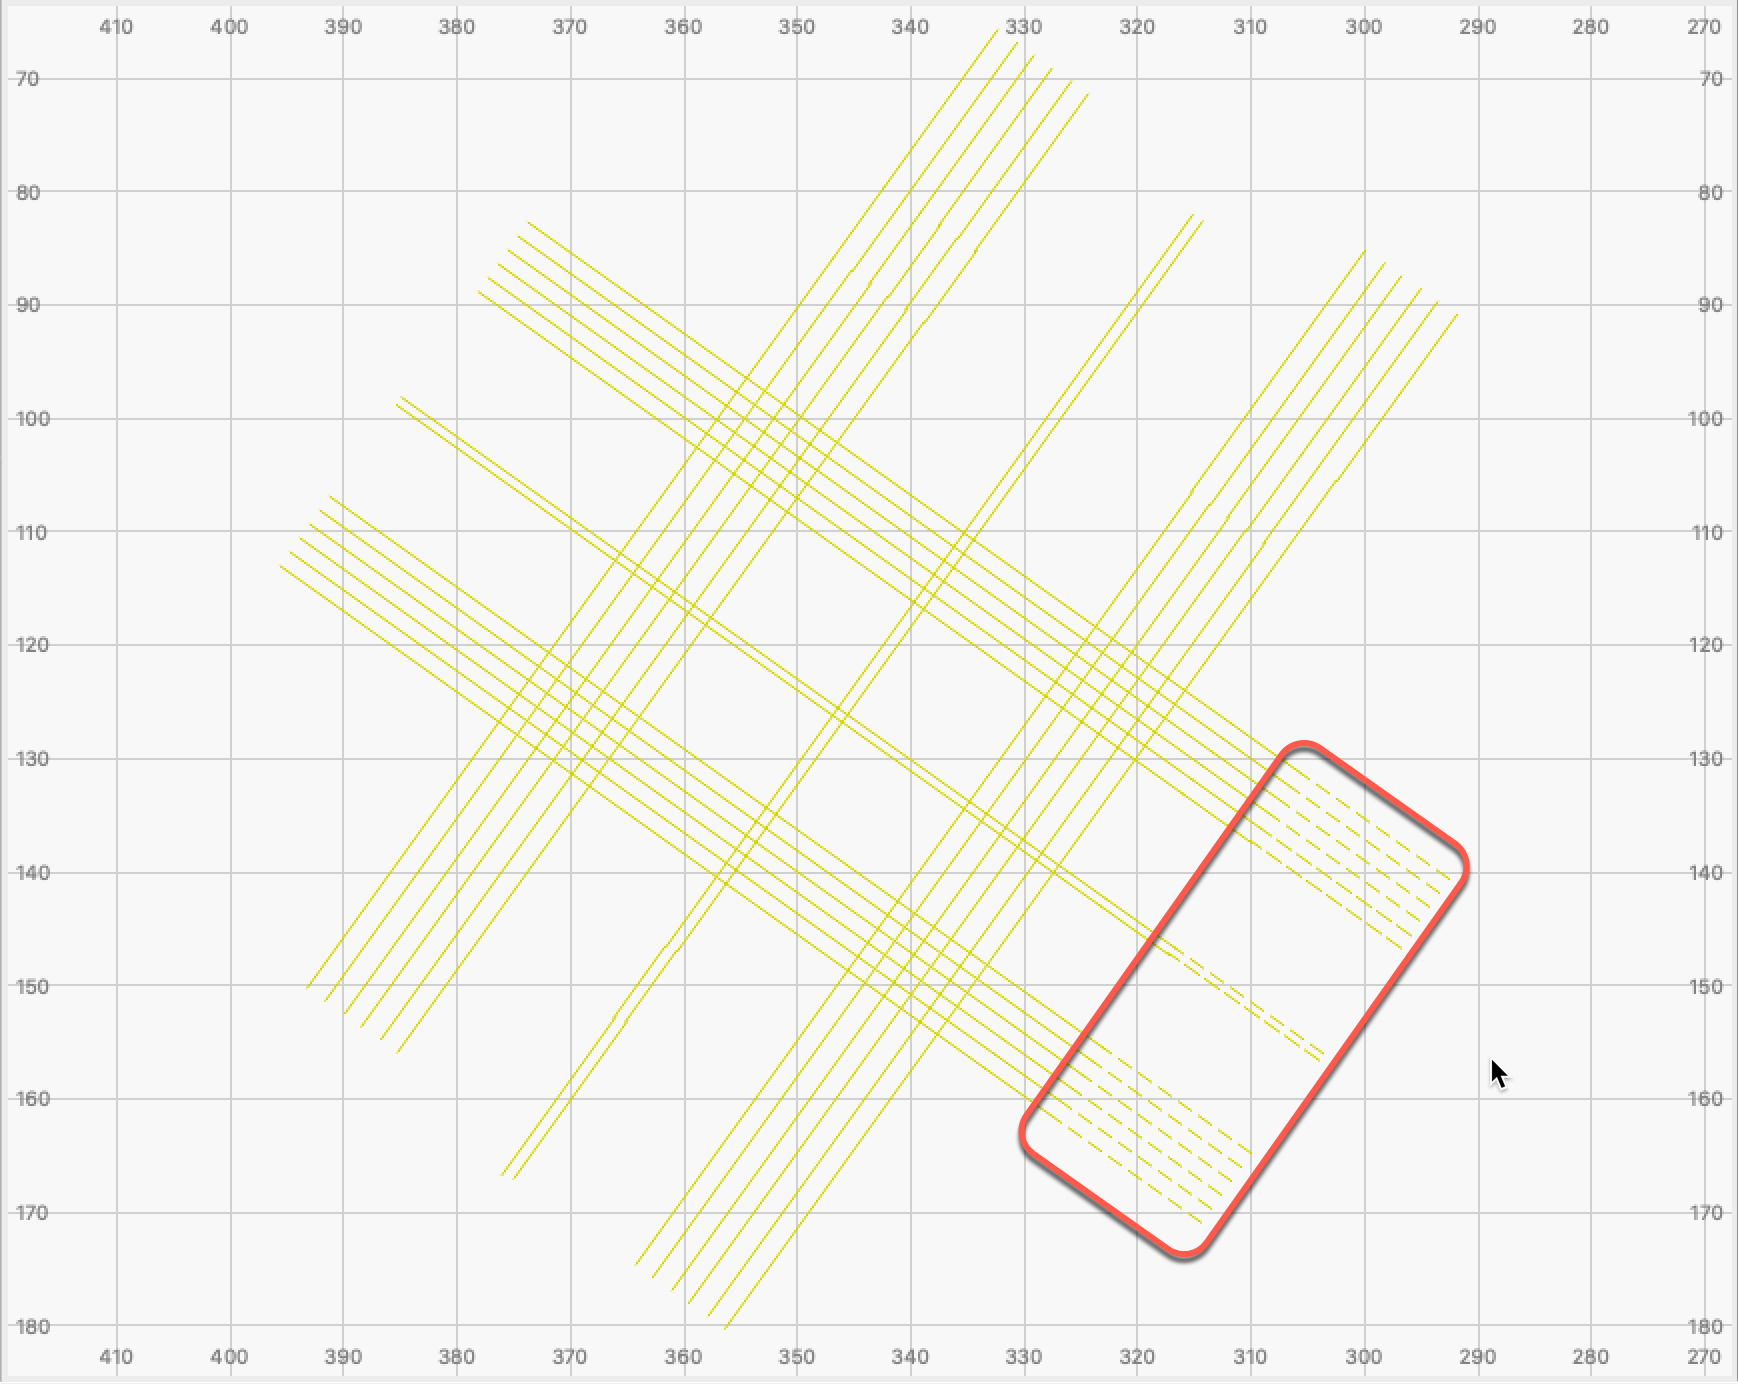
When you select along one of the lines that make up the original pattern design you shared, note that the entire line is not selected. Each line in your original is made up of 3 segments and it should be just one for each.
As for the thin rectangle and joining this shape to the edges of the tie, please show us what you are after and what this looks like. I think you may be talking about using the Boolean tools to achieve this as well.
Help me with some more information here. What are you seeing that you have not played with as yet, and I will offer what I can.
I placed the layers in this order, so the fill would happen first, then cut the tie shape out. The 3rd layer is just used for alignment of shapes, so I turned that output Off (red) as we don’t want or need to produce that layer.
Hi Rick I had a play about and followed your illustration offset bow tie shape with resulting objects and boolean subtract and I finally got it yee lol. Though I am a little confused why that offset thing has to be done rather then just say weld shapes to outer pattern? So instead of each shape been enclosed individually they were all closed by the outer pattern line if that makes sense…Ahh but I guess each shape would not be filled but instead be filled alternate hmm. Re the layers I get that now its just that I downloaded the new version of lightburn and have watching some videos on the new sub layers so got mixed up. Thanks for being so detailed with the illustrations its very helpful.
1 Like
You are welcome. One thing we hope comes through, there are more than one way to get where you are headed. With LightBurn, you are provided several options to achieve your goals, offering flexibility to your workflow.
I am sorry, but I am not envisioning for what you have shared.
If you have in mind the line shapes, then yes…they would not “fill”. ![]()
Having these lines offset, then boolean subtract or “all closed by the outer pattern line” ensures the pattern stays connected to the tie shape and does not fall out. They become connected.
1 Like
This topic was automatically closed 30 days after the last reply. New replies are no longer allowed.