The setup for most of these are pretty simple. Since it ‘flies’ off the rotary, I will assume a ‘wheel’ type rotary, additionally that it’s connected to the Y axes. You did not specify and the setup is slightly different than a chuck type.
Ensure the steps/rotation is correct…
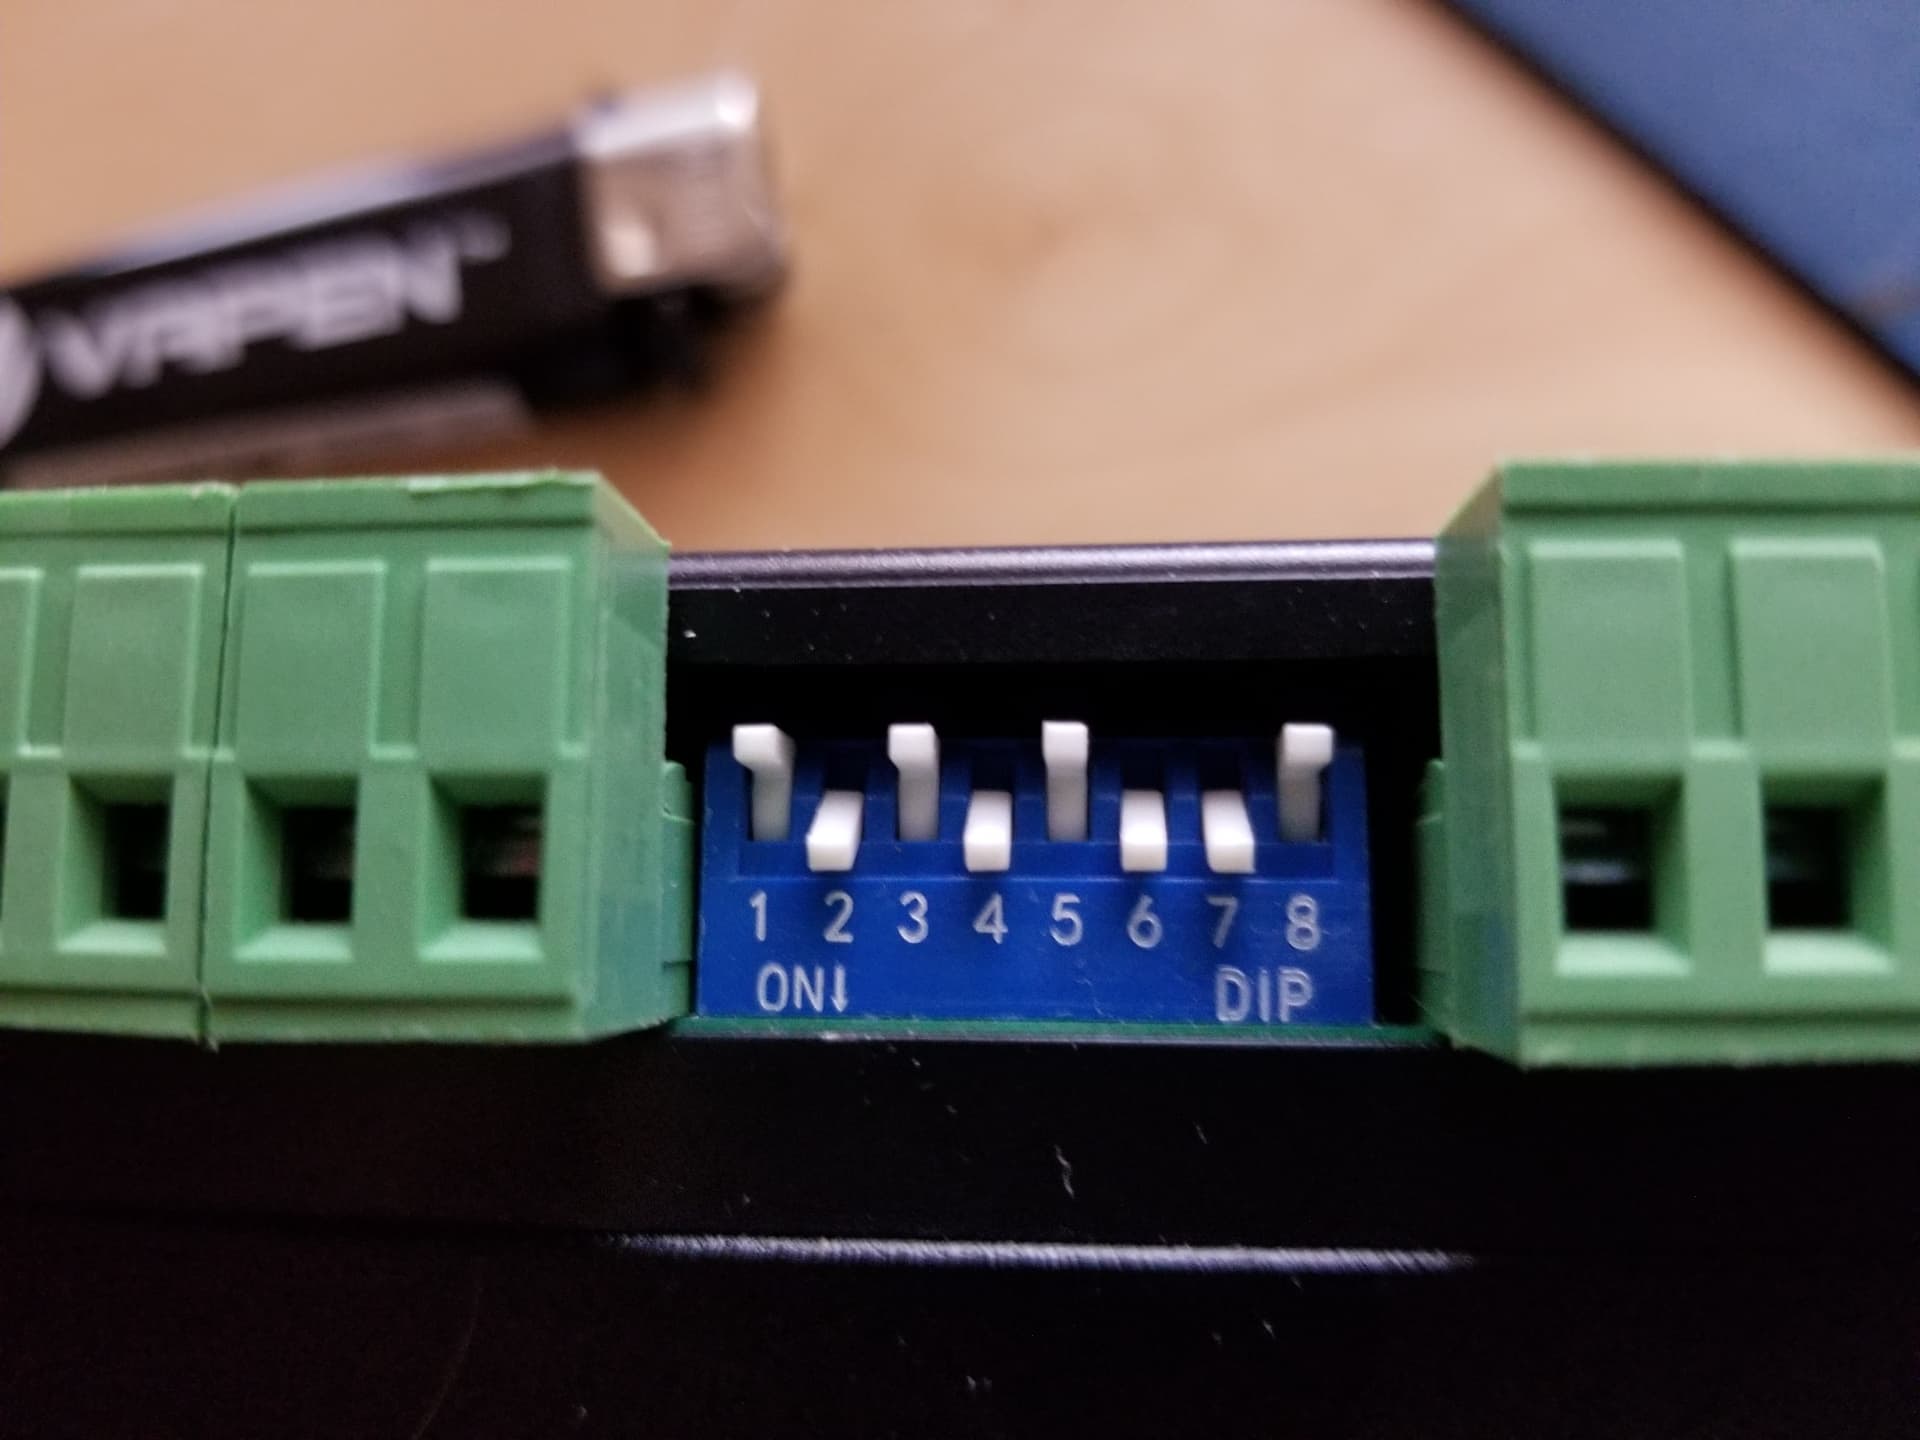
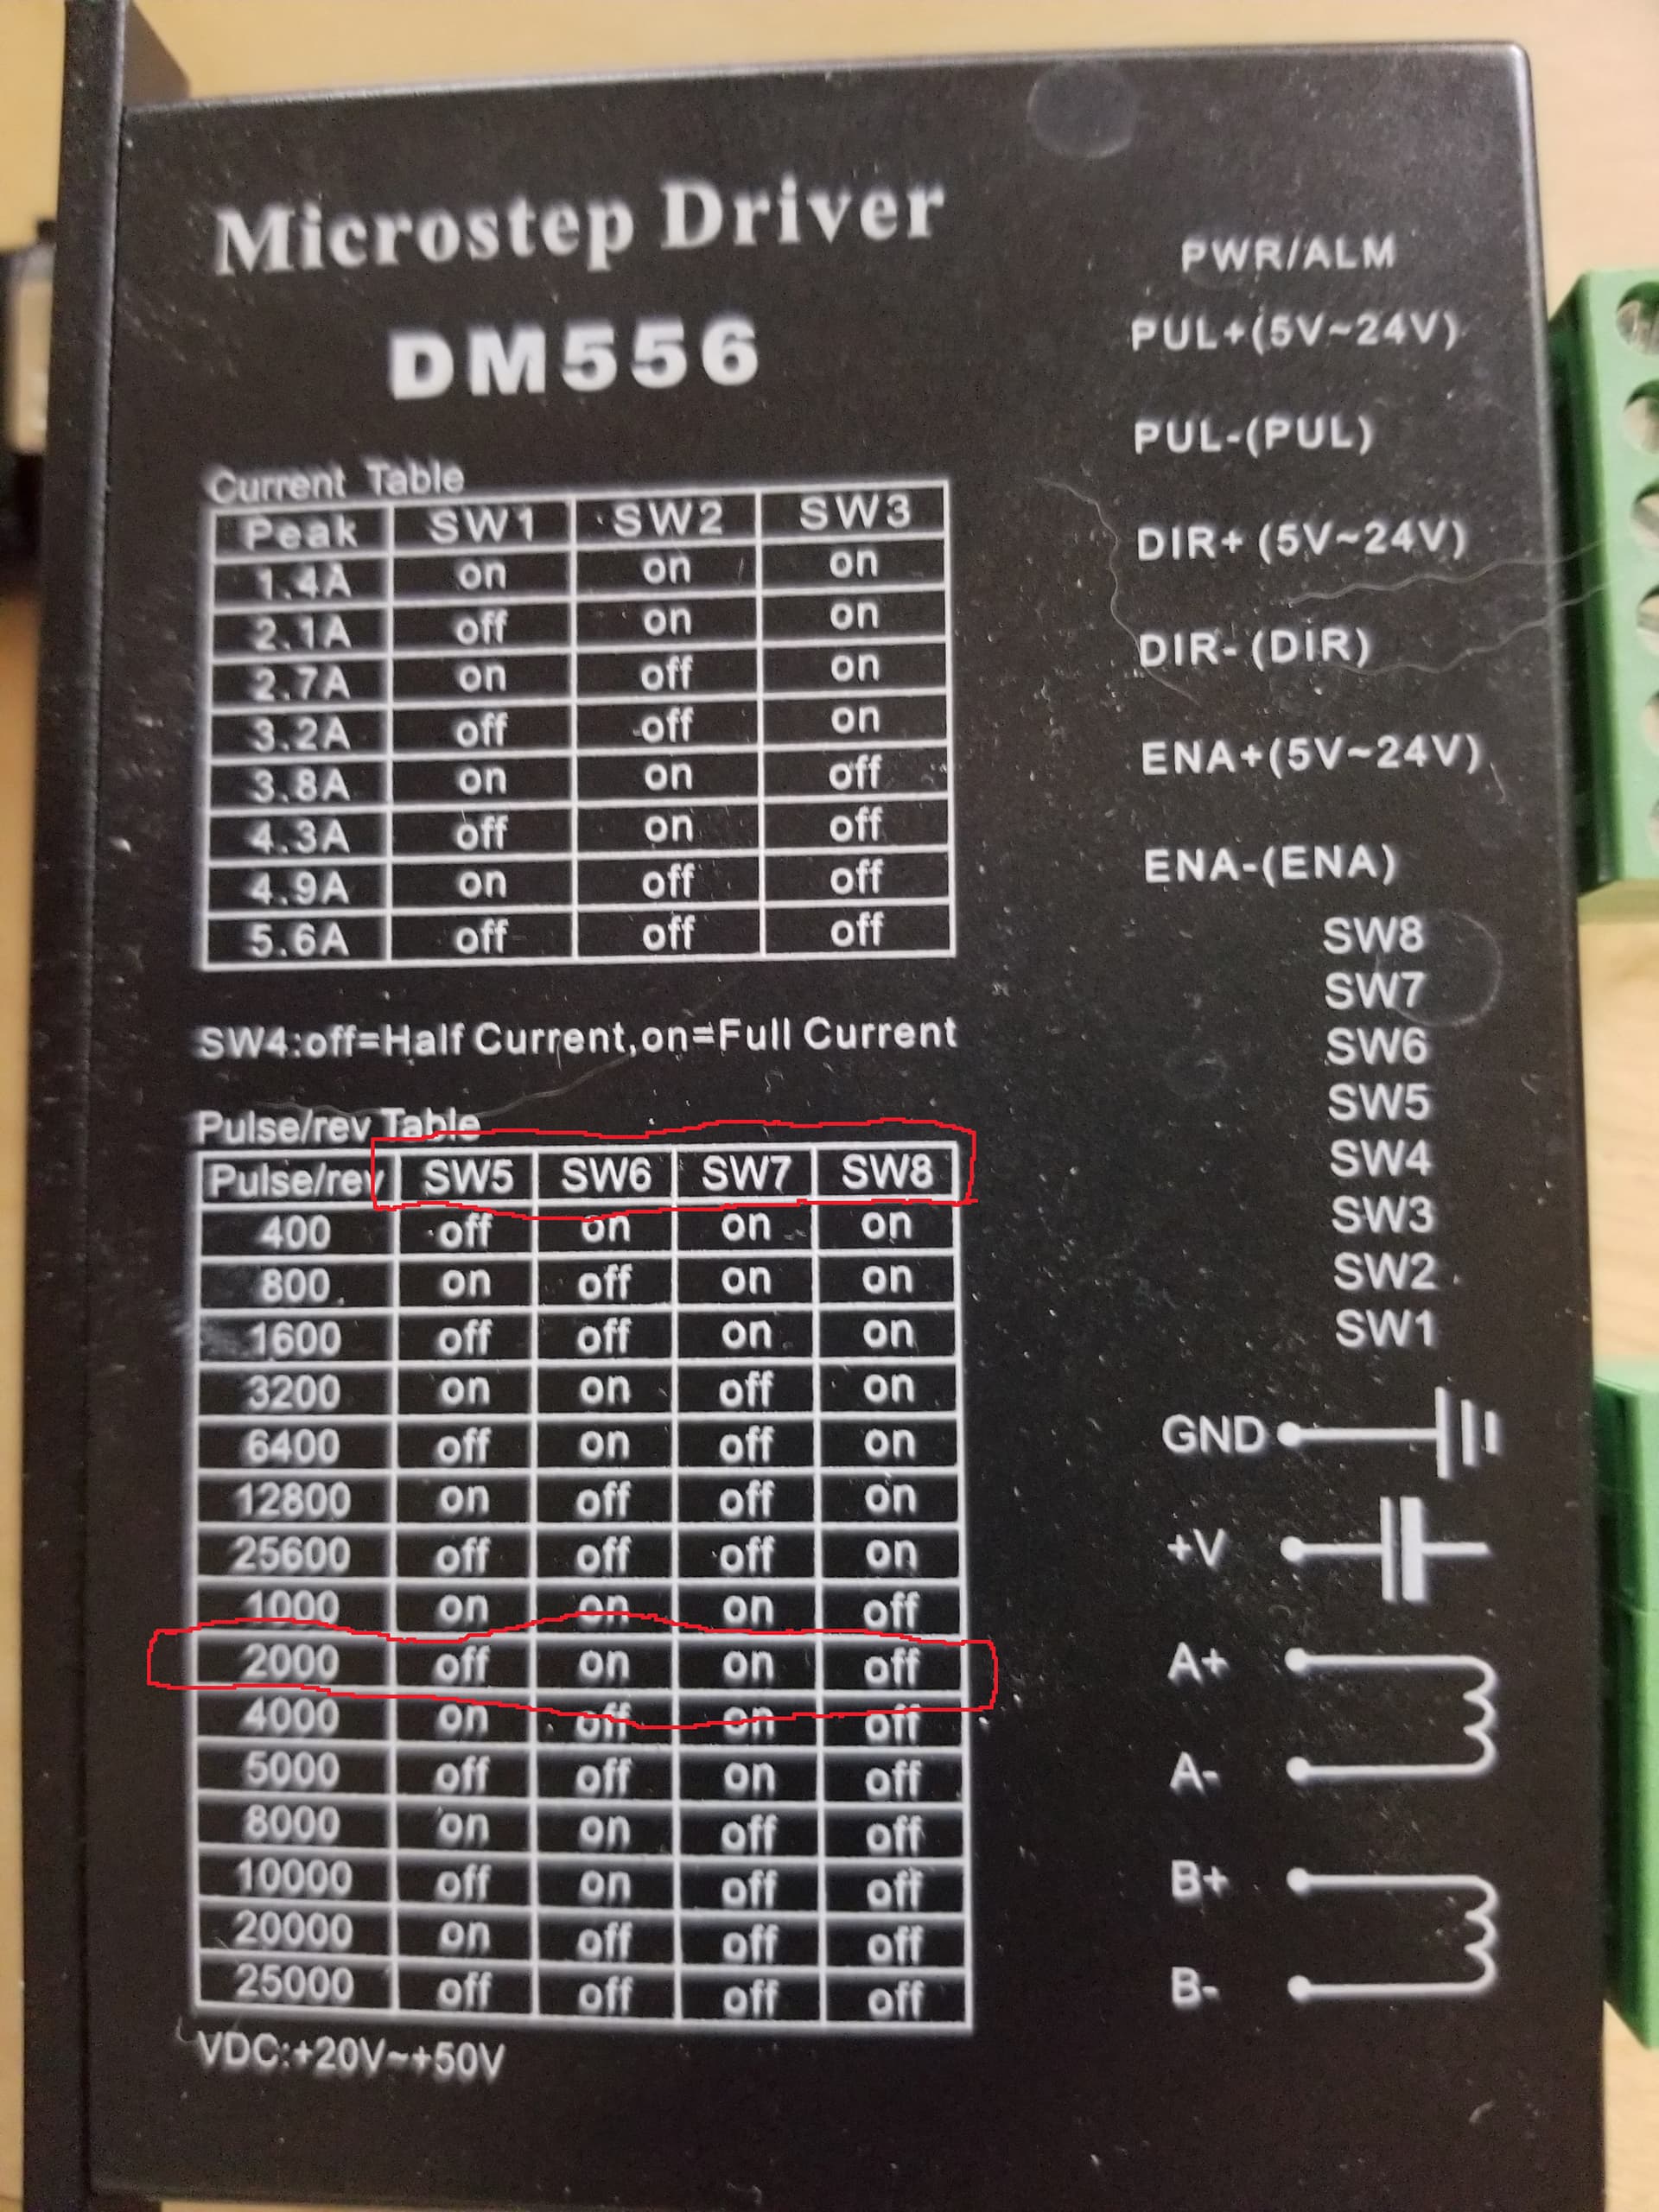
1.Check switches on motor driver board, note ‘on’ direction
- Find the matching ‘steps’ from the placard on the motor driver…
Mine is set to 2000 steps (pulse)/rotation (rev)
Apply the gearing ratio from the motor to the steps/rotation. Enter that in the Rotary setup in Lightburn.
Mine is 2000 (steps/rotation) * 2.5 (ratio) = 5000, that is entered in Lightburn.
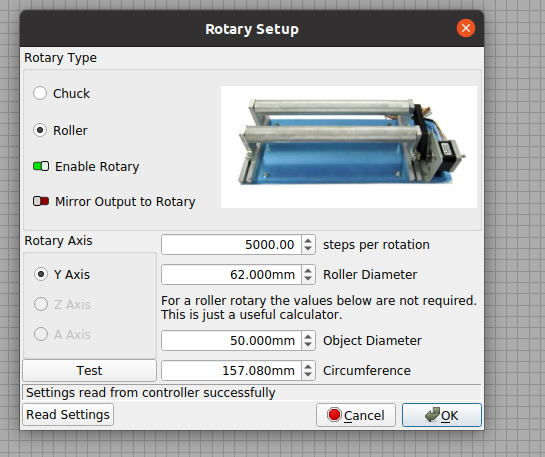
The only other item is the ‘wheel’ or roller diameter. Mine was stated to be 63, but had to adjust as it wasn’t really, ended up at 62. If you have to make any adjustments, this is the place. Everything is digital up to the motor, this is where you fix the ‘analog’ part of the system.
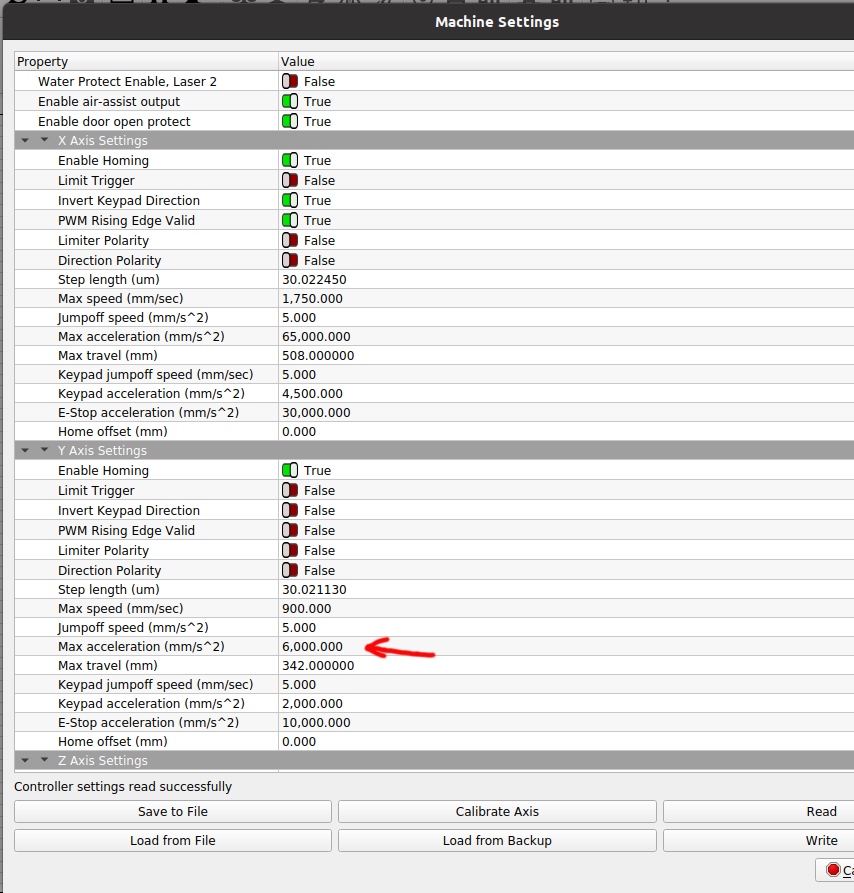
Save your current configuration so you have a backup and then you can modify controller settings without worry of being able to recover. When you get it set up properly you can also save a ‘rotary’ configuration… that you can ‘load’ and ‘write’ to the controller when you want to use the rotary. After use, load and write the original configuration back and you’re back to the table.
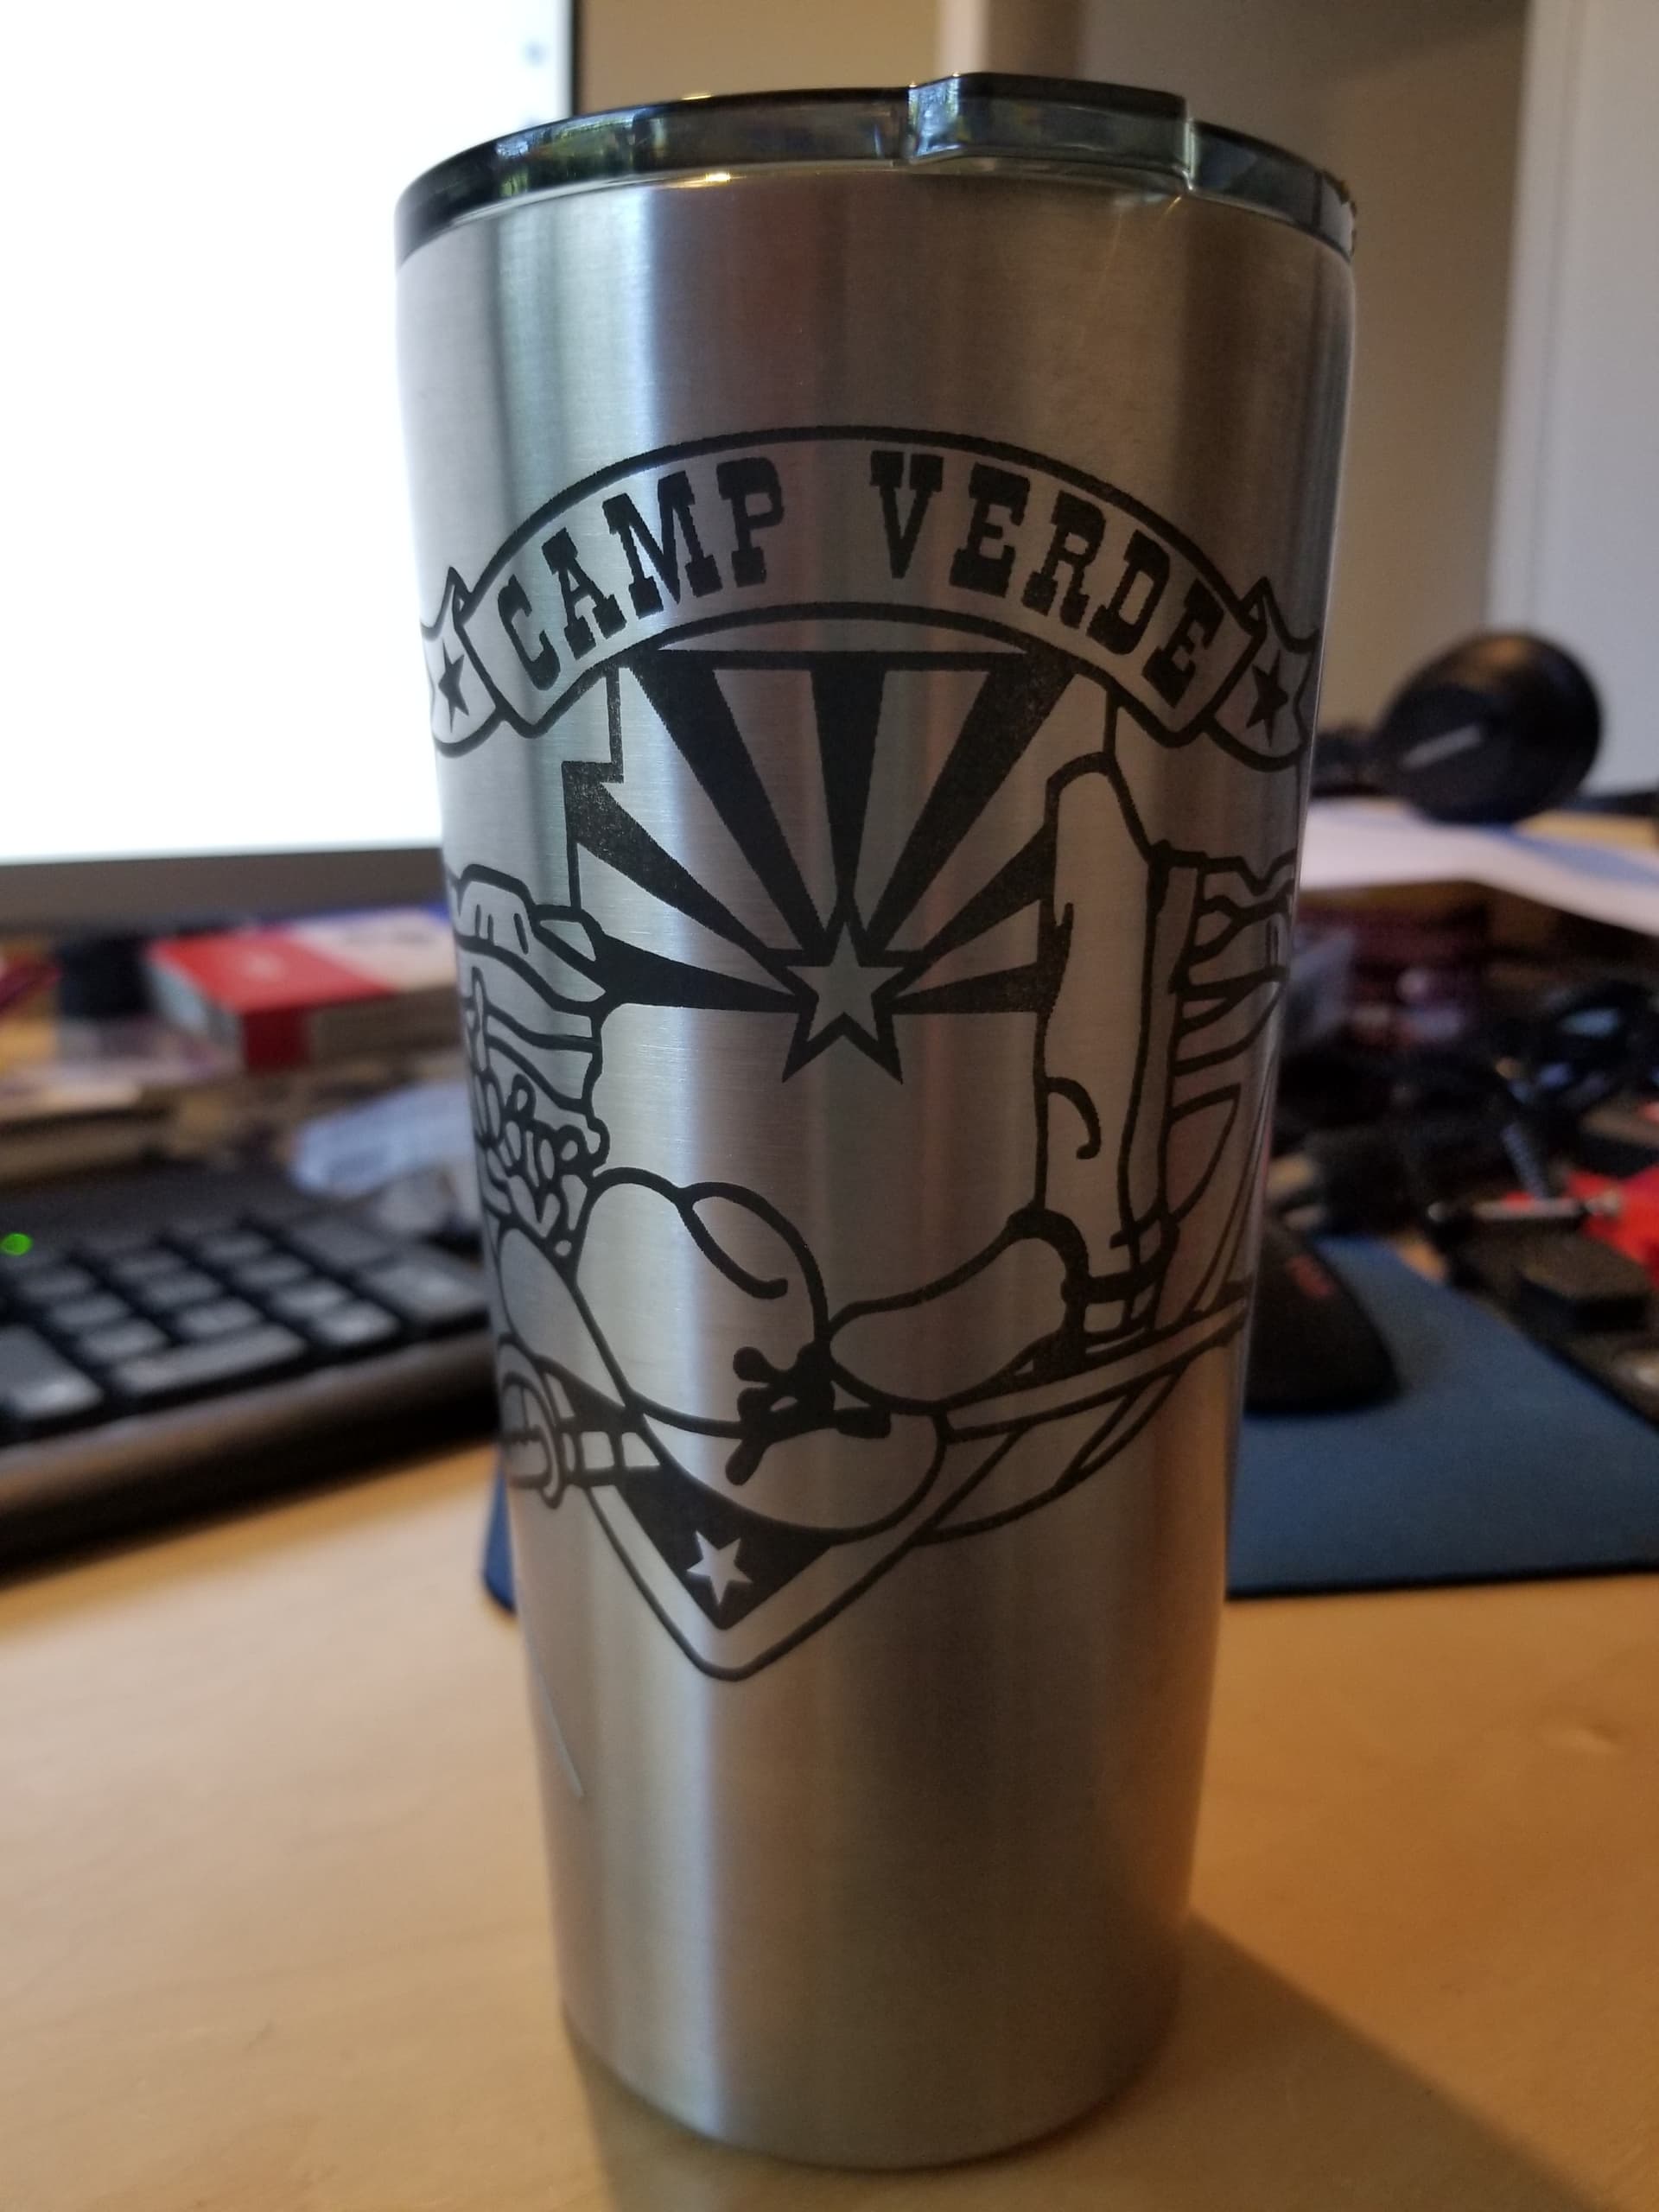
The surface of the cup moves at the programmed speed. Centripetal forces eventually will pitch the cup off the machine. Slow it down… 
What’s happening is that the cup is not ‘held’ well enough to accelerate it at the controllers programmed rate. This causes an alignment issue with the artwork.
Mostly use an image or scan operation, if possible, moving the Y axes by the dpi, small increments and the X does most of the high speed work…
My Y acceleration values are commonly in the single digits. And you have to keep the Y axes speeds down because of the centripetal force.
Make sense?
Good luck… don’t forget the backup…