Using the atomstack a20 pro. 2000mm @ 85% power. I’ve messed with my setup and my design, and I just can’t get this to work. The best results still have the “I” off center. It’s the last step in the engraving process, so it may have something to do with that. It’s centered in the program and preview. I’ve double checked level of the machine. I found that the frame was level, but the body of the laser and the Y(?) Axis rail were off a little. So re-leveled to the laser, not the frame. I have stoppers on the roller body, because I found that cups can walk during other projects. Likewise, I have a heavy nut on the roller extension. I lowered the speed from 2500 to 2000 this last time. I have the image set to grayscale. EVERY time I run this project, regardless of other potential errors (like walking), the I is never centered. There have been a few times it was to the right as well.
Y rollers are notorious for allowing the material to walk around during the engrave. I immediately changed to a chuck style Y rotary for that reason.
One suggestion is to run a rubber band around both the cup and the rollers, to aid in stopping the slip.
I’ll have to switch to a chuck roller at some point. For now I unfortunately have other priorities, like getting an airbrush to save costs, and an updated laptop.
I like the idea of a rubber band, but unfortunately it wouldn’t work with this roller. It has gearing and belts on both sides. For now I’ll have to stick with some wood blocks and heavy nut lol
In your case, I would then break the engrave into two different jobs. The “I” keeps missing the center mark, so engrave without the I. Reset the tumbler and run the I by itself. More steps, yes. Better alignment, yes.
I think that makes sense, I’ll have to figure out how to measure and mark the exact starting position. That doesn’t seem like too big an issue I guess, but do I just do a separate job with nothing but the same size “I”?
Alternatively, is there a way I can change the engraving order? If I could get it to start at the I, then the heart, I feel like there would be less chance of being off.
Try
 .
.
Sweet! I will try that later today, thank you! I assume I’ll have to change this for the next project? It seems like settings are persistent in the program. Then again, does it really matter if I’m just doing the same glasses (different designs), with center left start position anyway?
I would put the I object on a different layer. Turn on and off the layer according to what I want to burn on each run
For alignment, I would make a line on The Frame layer that is longer than the whole image. Align the frame object with the center of your graphics.
Then to check alignment, select that frame line/ object and frame with the rubber band frame button to assess your positioning. Once satisfied, select the desired layer for output.
If that is not clear, I can do a step by step with screen grabs.
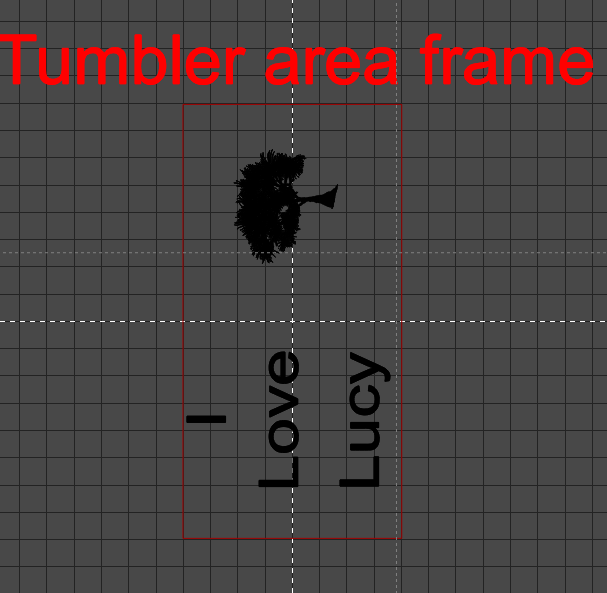
#1 - make a frame that fits the tumbler engraving area and insert text and graphic for opposite side. I adjust the size of the frame so that one length of frame = 1 revolution of the tumbler. I manually space the text and the graphic for equal distance. I count the number of squares on the left, right and between the object and text - then move to make left +right equal to center spacing.
#2 Make another frame around the “I”. Select the Frame, the “I” and the other text - center them vertically (light blue box in the top right of this screen grab - then you can right click and lock the objects in place for added security:
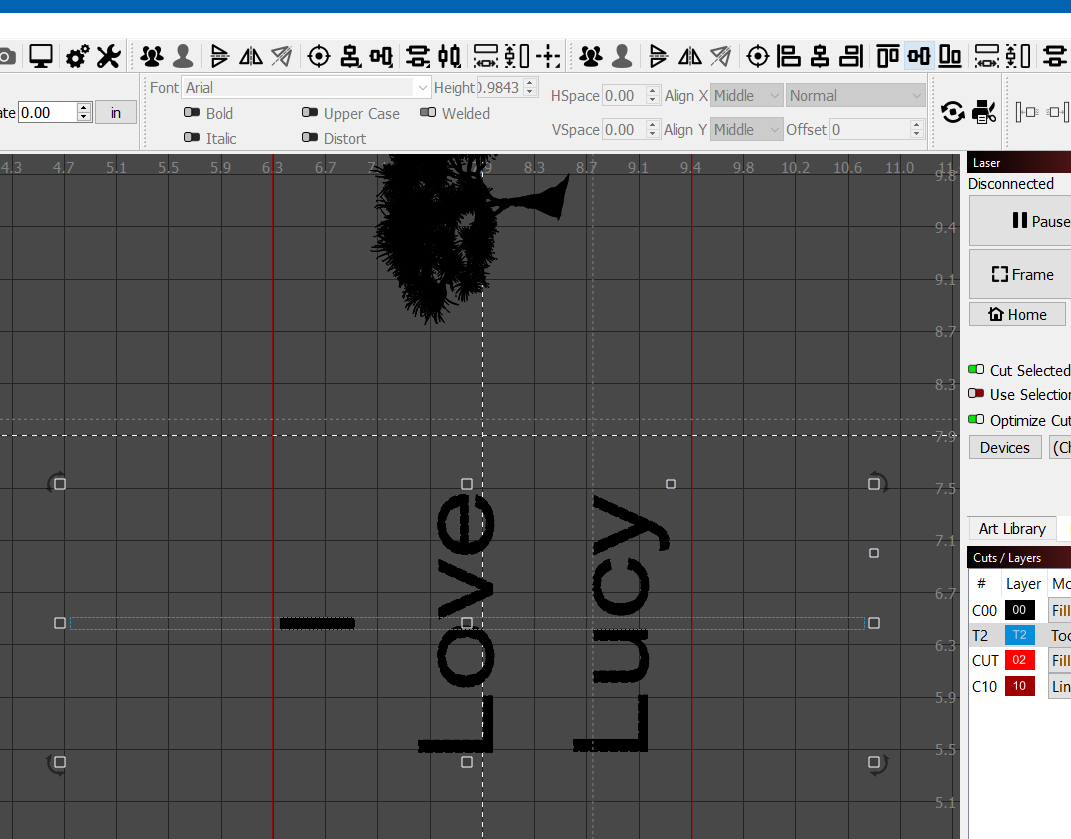
#3 On the laser tab, select Cut Selected Graphics. Select everything but the “I”. Run the job. Then select the blue frame and check where your “I” will engrave by using the Frame command Adjust the tumbler/roller or the graphic on the workspace until you are happy, then
#4 Finish the job by engraving the “I” where you expect it to go.