I’ve read a few posts on the forum about the capture button not working.
Unfortunately, none of the posts have a solution.
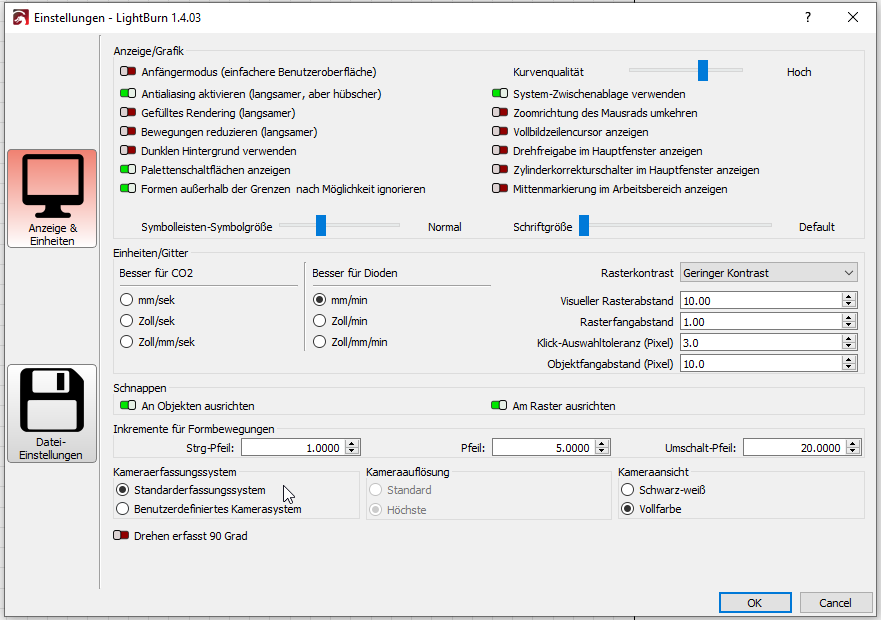
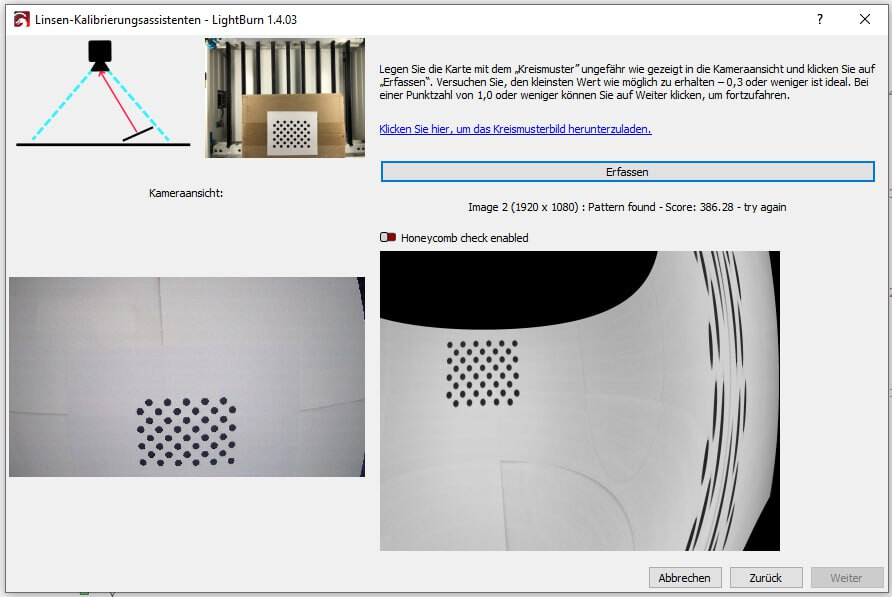
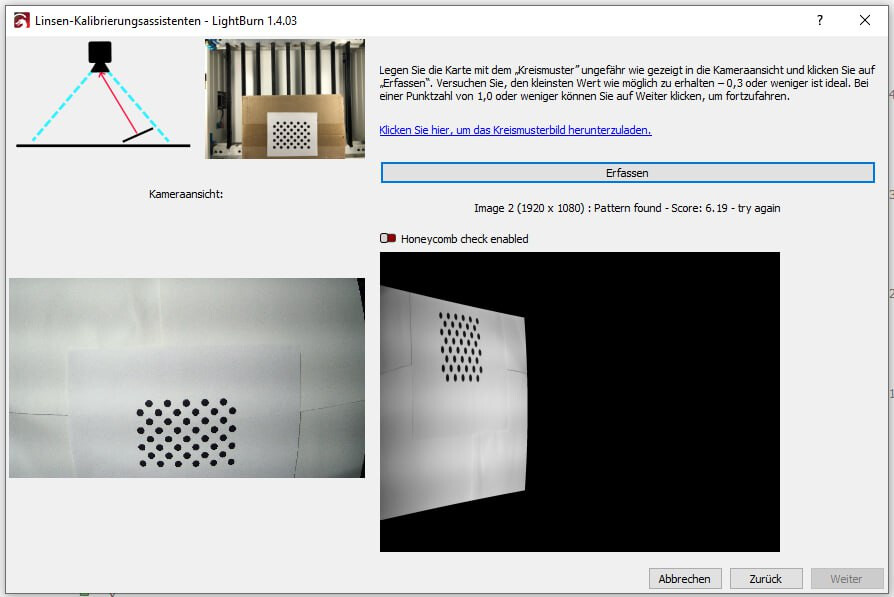
I am currently using Windows 10 with LightBurn Ver1.4.03.
It is a cheap 2k camera from Amazon.
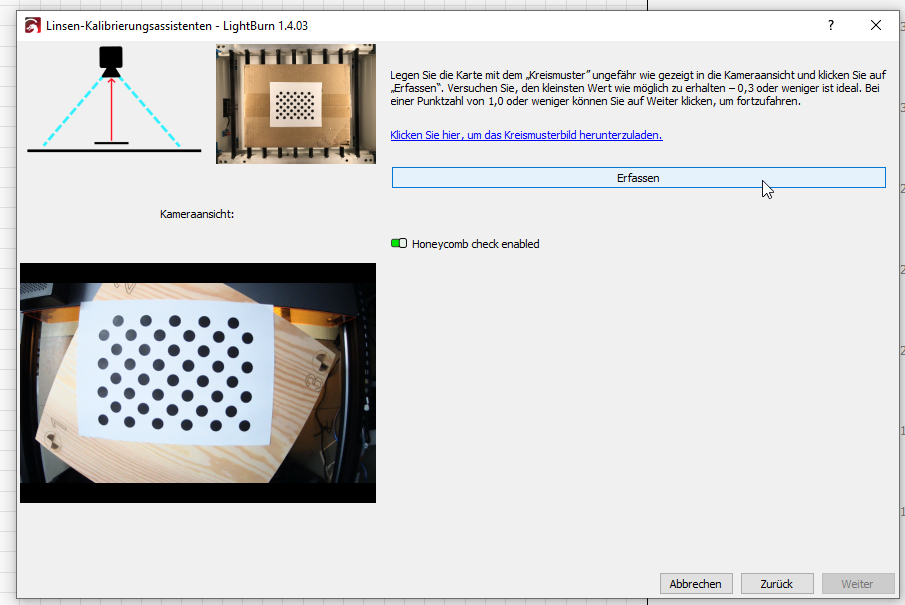
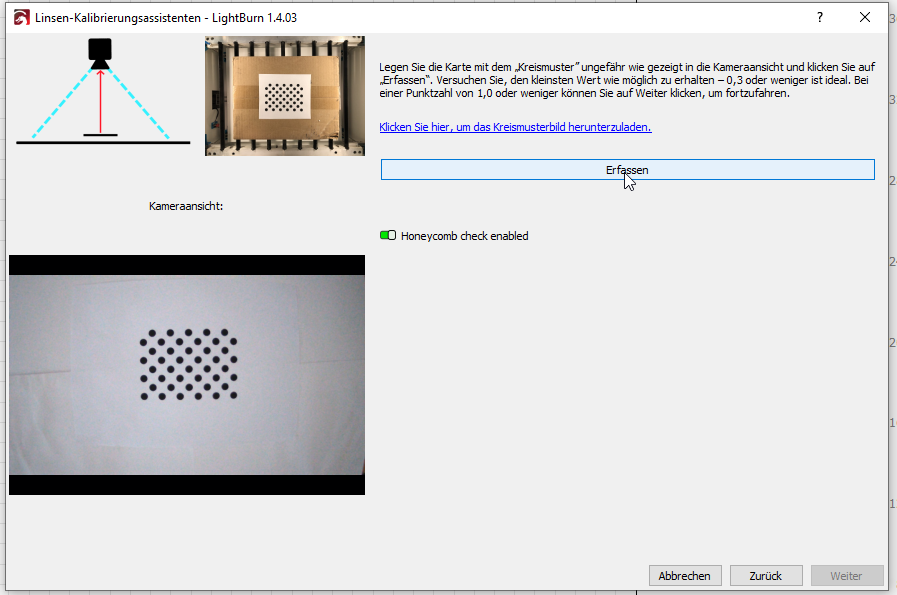
Lightburn shows a good live image when I have the “Custom Camera System” settings enabled.
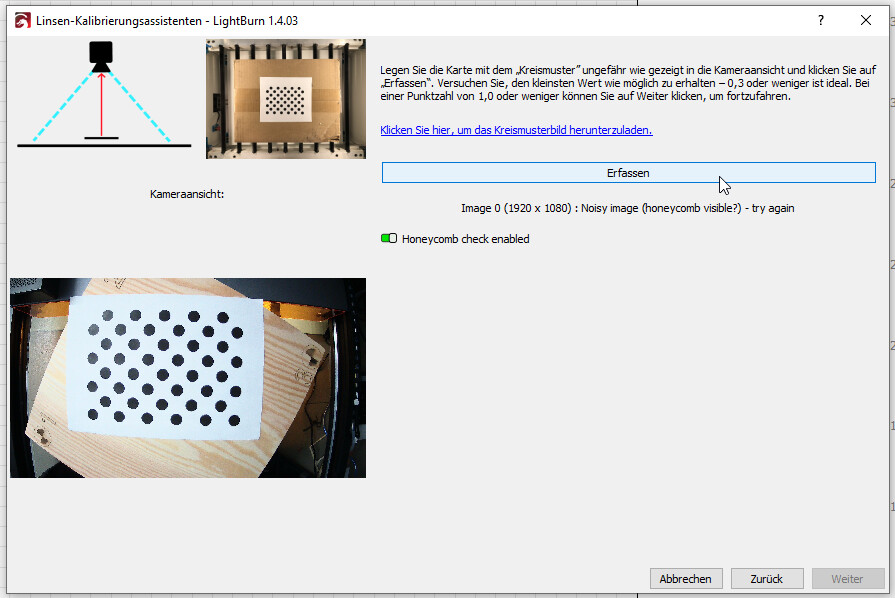
If I switch to “Default Capture System” the picture is very noisy but the capture button works, only Lightburn writes that the picture is too noisy.
I have already tried the following:
- Changed the camera settings (Default Capture System → Custom Camera System).
- Compatibility Mode (Win8)
- In the Windows security settings Lightburn has access to the camera
- Another USB port was also used
- With the Windows Camera App a photo can be created
Below is the log of Lightburn with the camera part:
17:40:48.550 D: “Verbindung wird hergestellt…” busy: false state: 1
17:40:48.565 D: O: “G0\n”
17:40:48.703 D: Paint: 2 uSec Objs: 0 Simple: 0 Point: 0 Skipped: 0 penSetup: 0
17:40:48.835 D: “Verbindung wird hergestellt…” busy: false state: 1
17:40:48.850 D: O: “G0\n”
17:40:49.120 D: “Verbindung wird hergestellt…” busy: false state: 1
17:40:49.136 D: O: “G0\n”
17:40:49.399 D: “Verbindung wird hergestellt…” busy: false state: 1
17:40:49.421 D: O: “G0\n”
17:40:49.669 D: “Verbindung wird hergestellt…” busy: false state: 1
17:40:49.700 D: O: “G0\n”
17:40:49.939 D: “Verbindung wird hergestellt…” busy: false state: 1
17:40:49.955 D: O: “G0\n”
17:40:50.055 D: -----------------------------------------------
17:40:50.055 D: Select Camera
17:40:50.055 D: -----------------------------------------------
17:40:50.108 D: Camera sensor aspect ratio: 1.77778
17:40:50.108 D: Formats available:
17:40:50.108 D: 0 : 1920 x 1080 @ 30 fps
17:40:50.108 D: 1 : 1920 x 1080 @ 30 fps
17:40:50.108 D: 2 : 2560 x 1440 @ 30 fps
17:40:50.108 D: 3 : 2560 x 1440 @ 30 fps
17:40:50.108 D: 4 : 1280 x 720 @ 30 fps
17:40:50.108 D: 5 : 1280 x 720 @ 30 fps
17:40:50.108 D: 6 : 800 x 480 @ 30 fps
17:40:50.108 D: 7 : 800 x 480 @ 30 fps
17:40:50.108 D: 8 : 640 x 480 @ 30 fps
17:40:50.108 D: 9 : 640 x 480 @ 30 fps
17:40:50.108 D: 10 : 320 x 240 @ 30 fps
17:40:50.108 D: 11 : 320 x 240 @ 30 fps
17:40:50.108 D: 12 : 640 x 360 @ 30 fps
17:40:50.108 D: 13 : 640 x 360 @ 30 fps
17:40:50.108 D: 14 : 800 x 600 @ 30 fps
17:40:50.108 D: 15 : 800 x 600 @ 30 fps
17:40:50.108 D: 16 : 1920 x 1080 @ 30 fps
17:40:50.108 D: 17 : 1920 x 1080 @ 30 fps
17:40:50.108 D: 18 : 1280 x 720 @ 30 fps
17:40:50.108 D: 19 : 800 x 480 @ 30 fps
17:40:50.108 D: 20 : 640 x 480 @ 30 fps
17:40:50.108 D: 21 : 320 x 240 @ 30 fps
17:40:50.108 D: 22 : 640 x 360 @ 30 fps
17:40:50.108 D: 23 : 800 x 600 @ 30 fps
17:40:50.108 D: 24 : 1280 x 720 @ 30 fps
17:40:50.108 D: 25 : 1920 x 1080 @ 30 fps
17:40:50.108 D: 26 : 1920 x 1080 @ 30 fps
17:40:50.108 D: 27 : 1280 x 720 @ 30 fps
17:40:50.108 D: 28 : 1280 x 720 @ 30 fps
17:40:50.108 D: 29 : 800 x 480 @ 30 fps
17:40:50.108 D: 30 : 800 x 480 @ 30 fps
17:40:50.108 D: 31 : 640 x 480 @ 30 fps
17:40:50.108 D: 32 : 640 x 480 @ 30 fps
17:40:50.108 D: 33 : 320 x 240 @ 30 fps
17:40:50.108 D: 34 : 320 x 240 @ 30 fps
17:40:50.108 D: 35 : 640 x 360 @ 30 fps
17:40:50.108 D: 36 : 640 x 360 @ 30 fps
17:40:50.108 D: 37 : 800 x 600 @ 30 fps
17:40:50.108 D: 38 : 800 x 600 @ 30 fps
17:40:50.108 D: 39 : 1920 x 1080 @ 30 fps
17:40:50.108 D: 40 : 1920 x 1080 @ 30 fps
17:40:50.108 D: Format: 0 1920 x 1080 @ 30 fps
17:40:50.108 D: Photo: 2560 x 2560
17:40:50.124 D: “enumControls getProcParam 3 failed - Element nicht gefunden.”
17:40:50.124 D: “enumControls getProcParam 4 failed - Element nicht gefunden.”
17:40:50.124 D: “enumControls getProcParam 5 failed - Element nicht gefunden.”
17:40:50.124 D: “enumControls getProcParam 6 failed - Element nicht gefunden.”
17:40:50.124 D: “enumControls getProcParam 7 failed - Element nicht gefunden.”
17:40:50.124 D: “enumControls getProcParam 8 failed - Element nicht gefunden.”
17:40:50.124 D: “enumControls getProcParam 9 failed - Element nicht gefunden.”
17:40:50.124 D: “enumControls getCamControl 10 failed - Element nicht gefunden.”
17:40:50.124 D: “enumControls getCamControl 11 failed - Element nicht gefunden.”
17:40:50.124 D: “enumControls getCamControl 12 failed - Element nicht gefunden.”
17:40:50.124 D: “enumControls getCamControl 13 failed - Element nicht gefunden.”
17:40:50.124 D: “enumControls getCamControl 15 failed - Element nicht gefunden.”
17:40:50.124 D: “enumControls getCamControl 16 failed - Element nicht gefunden.”
17:40:50.124 D: 4
17:40:50.155 D: “No preview index, falling back to video index\n”
17:40:50.224 D: “Verbindung wird hergestellt…” busy: false state: 1
17:40:50.240 D: O: “G0\n”
17:40:50.503 D: “Verbindung wird hergestellt…” busy: false state: 1