Good day,
I have a cork lid in the middle of which I need to engrave the object. When I put the lid under the laser, the object is never engraved in the middle. Please, how to achieve this? I am a beginner
Thank you
Good day,
I have a cork lid in the middle of which I need to engrave the object. When I put the lid under the laser, the object is never engraved in the middle. Please, how to achieve this? I am a beginner
Thank you
One option is to place a piece of wood on your bed and cut out the circle that your cork item has. If you have two edges that can be used to place your new template on, you can use it again and again. You need to save a template file to your new template so you can easily place your items in the cutout and center your design with LightBurn.
Hi Eva, could you use my suggestion?
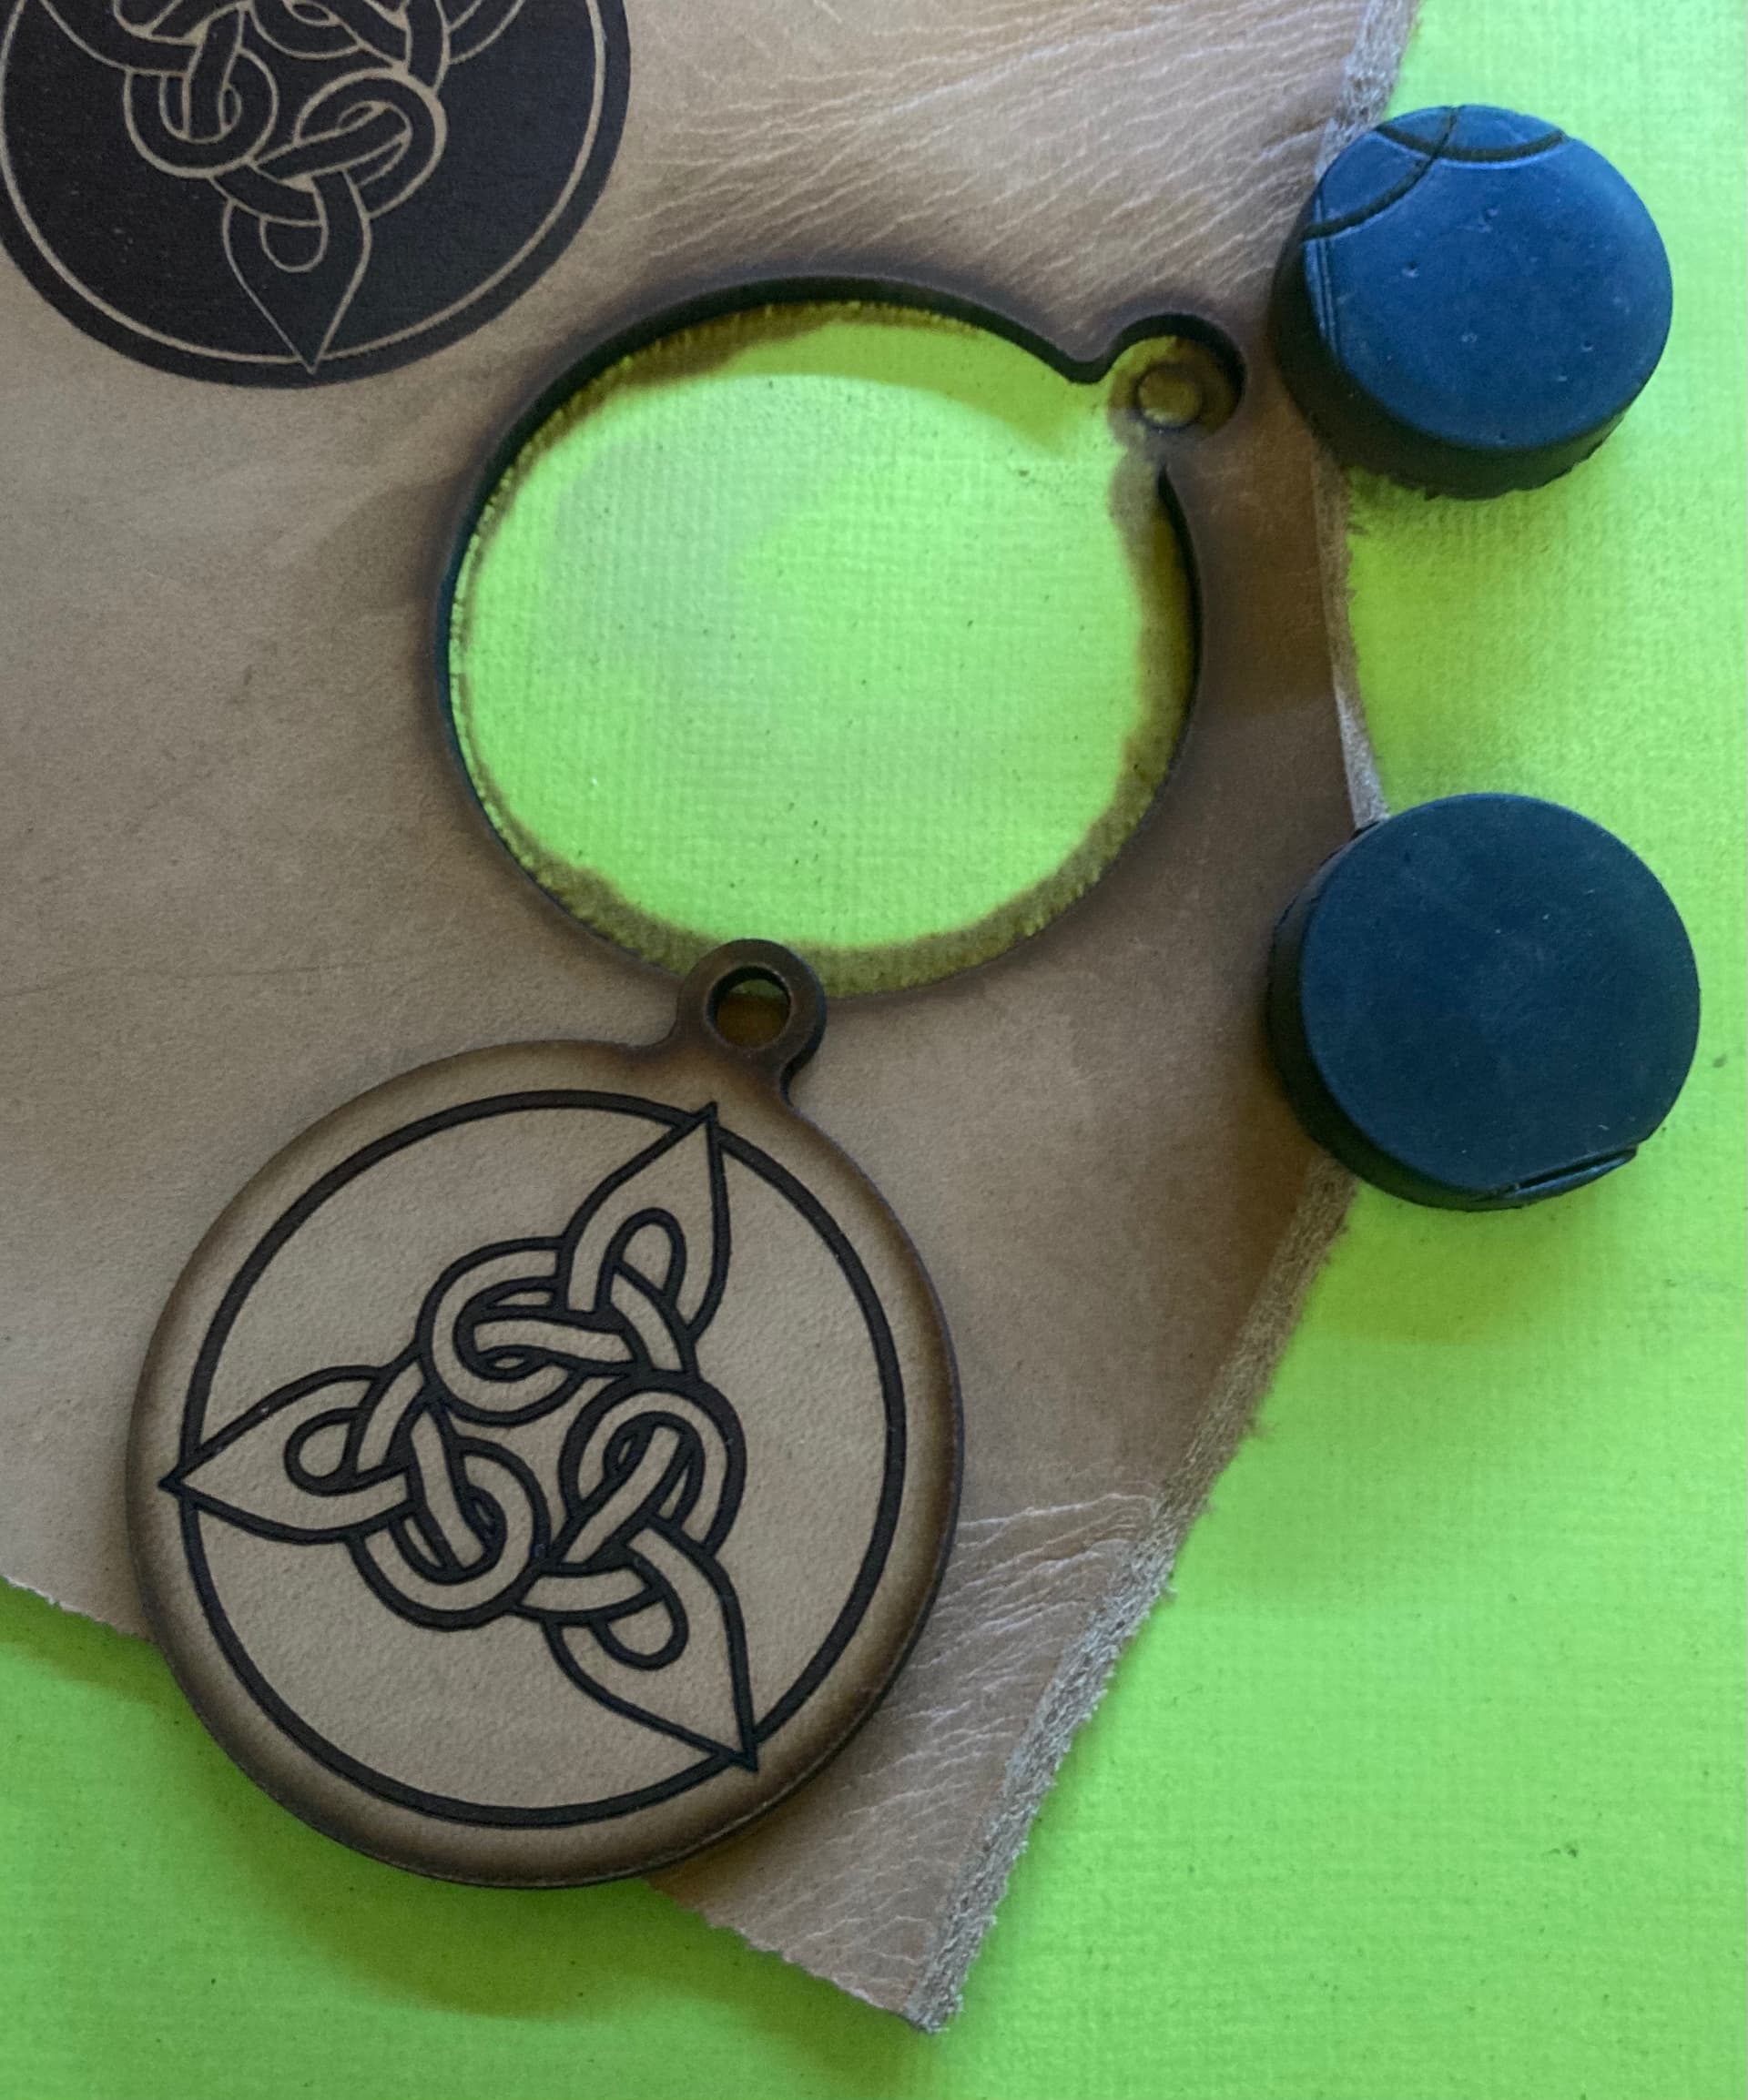
Here’s another little example. I had to test some leather and used this small and simple “template” to be able to engrave front and back.
In LightBurn, you have the outer line (cut out) as a reference to easily center all desired designs.
Scale it all up to your purpose and you have an easy quick fix.
For the production purpose, however, I will use a regular template with fix points for the X and Y axis on the machine bed frame itself.
Thank you so much. You are the best  This is good idea and I tried it. It went well, thanks a lot.
Can I have one more question?
when I engrave a picture through a bitmap, it goes very slowly. When I do it via image tracing, it goes fast, but I don’t fill up some of the areas which I need. What should I do?
thank you
It depends a lot on the image itself. Is it possible to trace it so that it becomes a sketch / graphic, it will be preferable and it is, as you have also noticed, somewhat faster. Very briefly and not very precisely, it is the two different modes of producing the image itself that make up the time difference. What you describe, with the missing parts of your traced image, is not possible for me to judge without having seen it. You can upload the file here or, if it is more private, send it to me as PM. (click on my avatar and the menu will pop up)
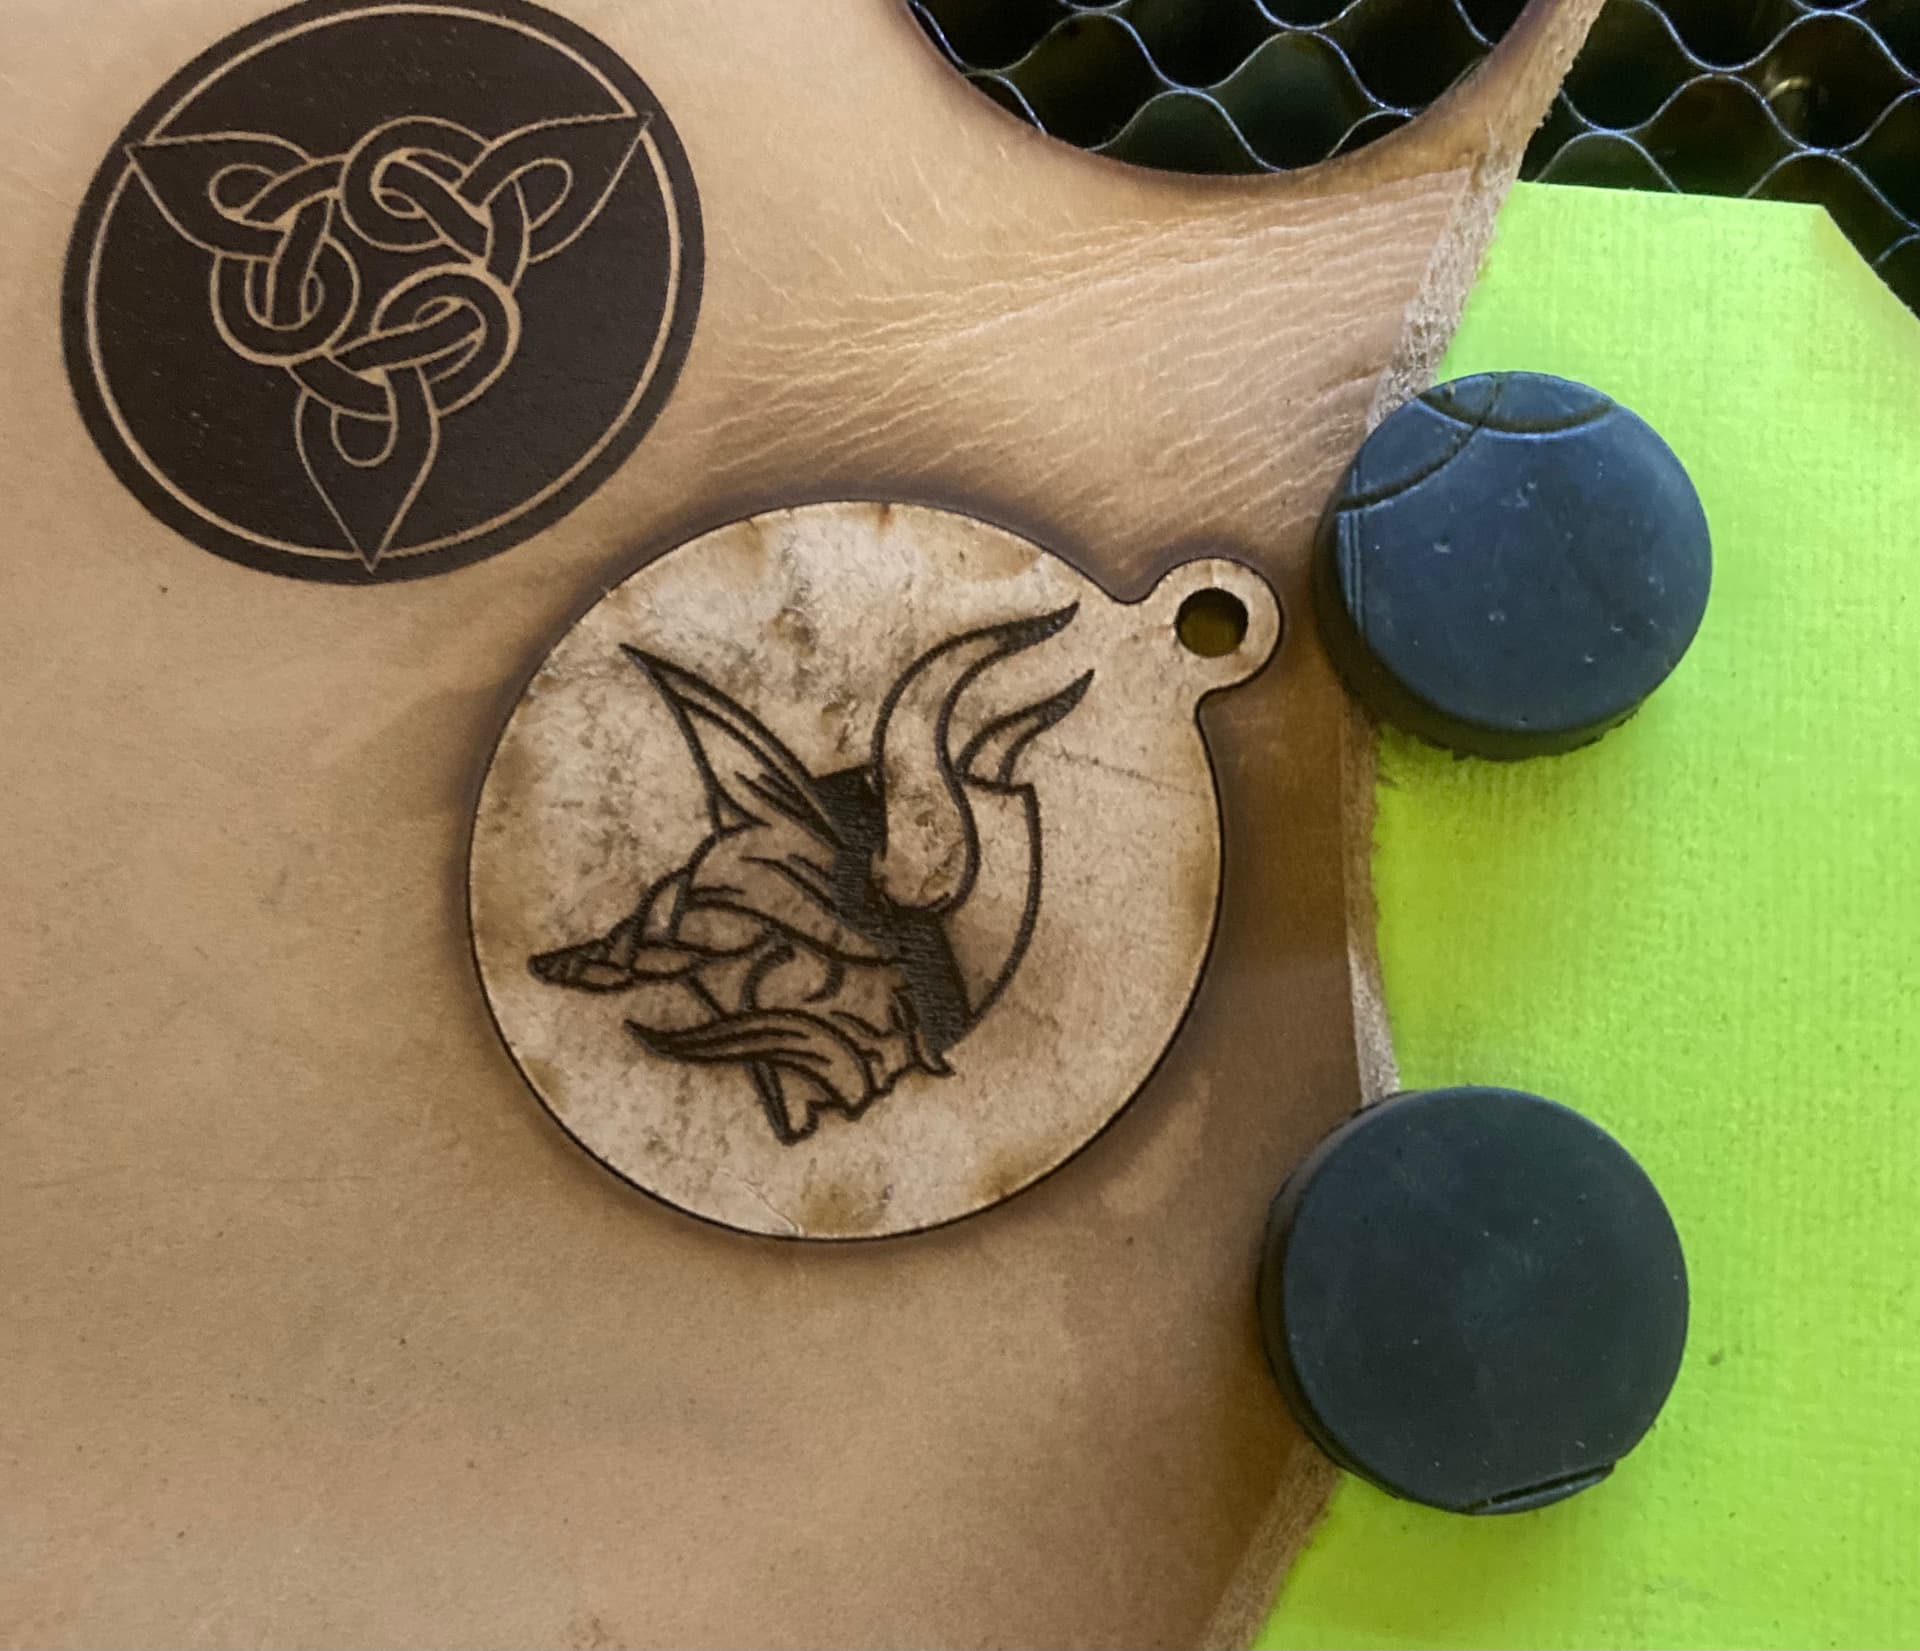
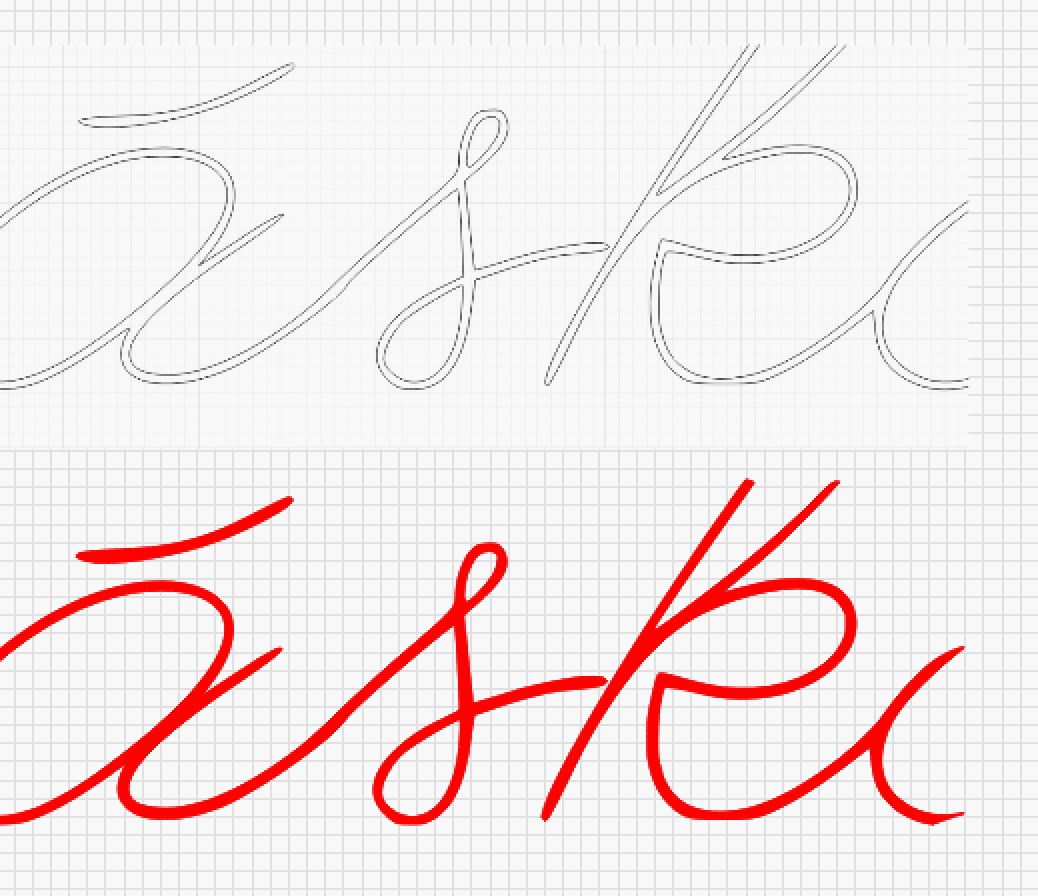
When I trace the image, the upper “droplet” does not fill in its entirety, but only its outline.
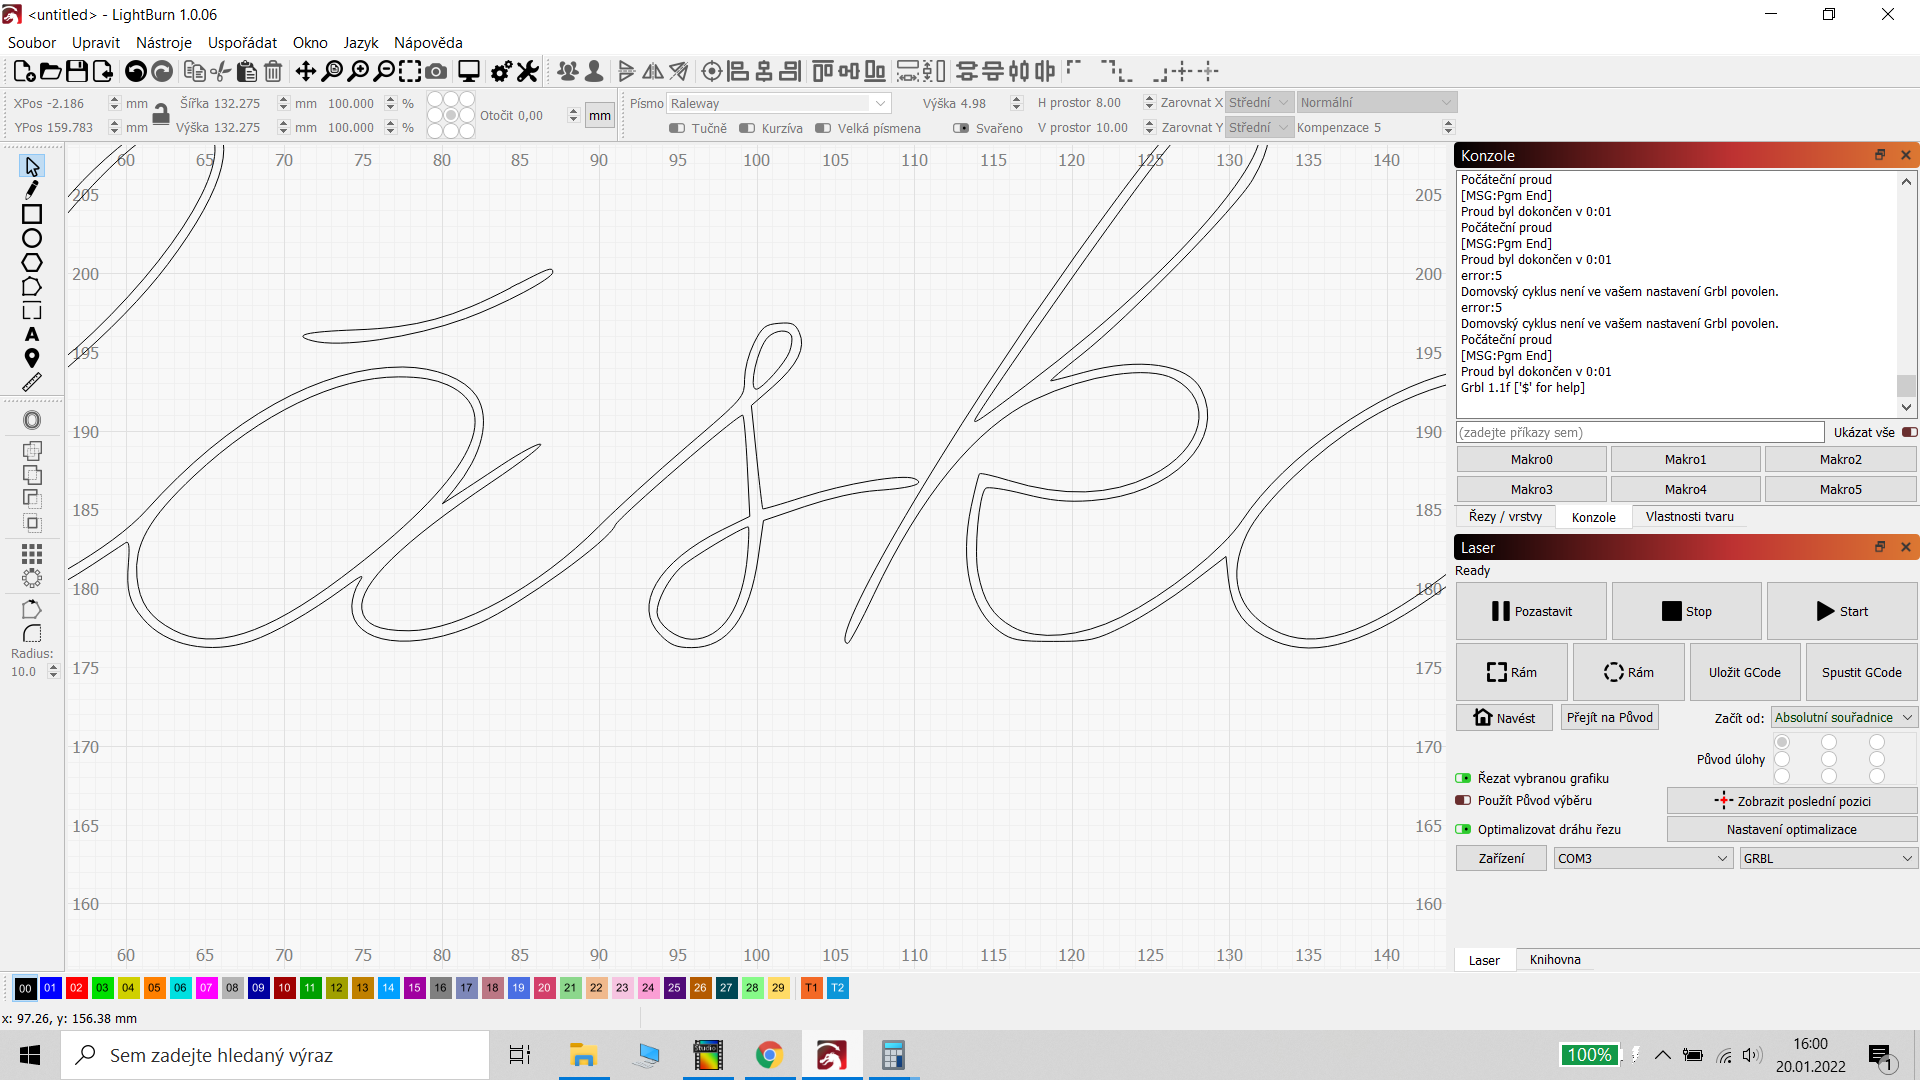
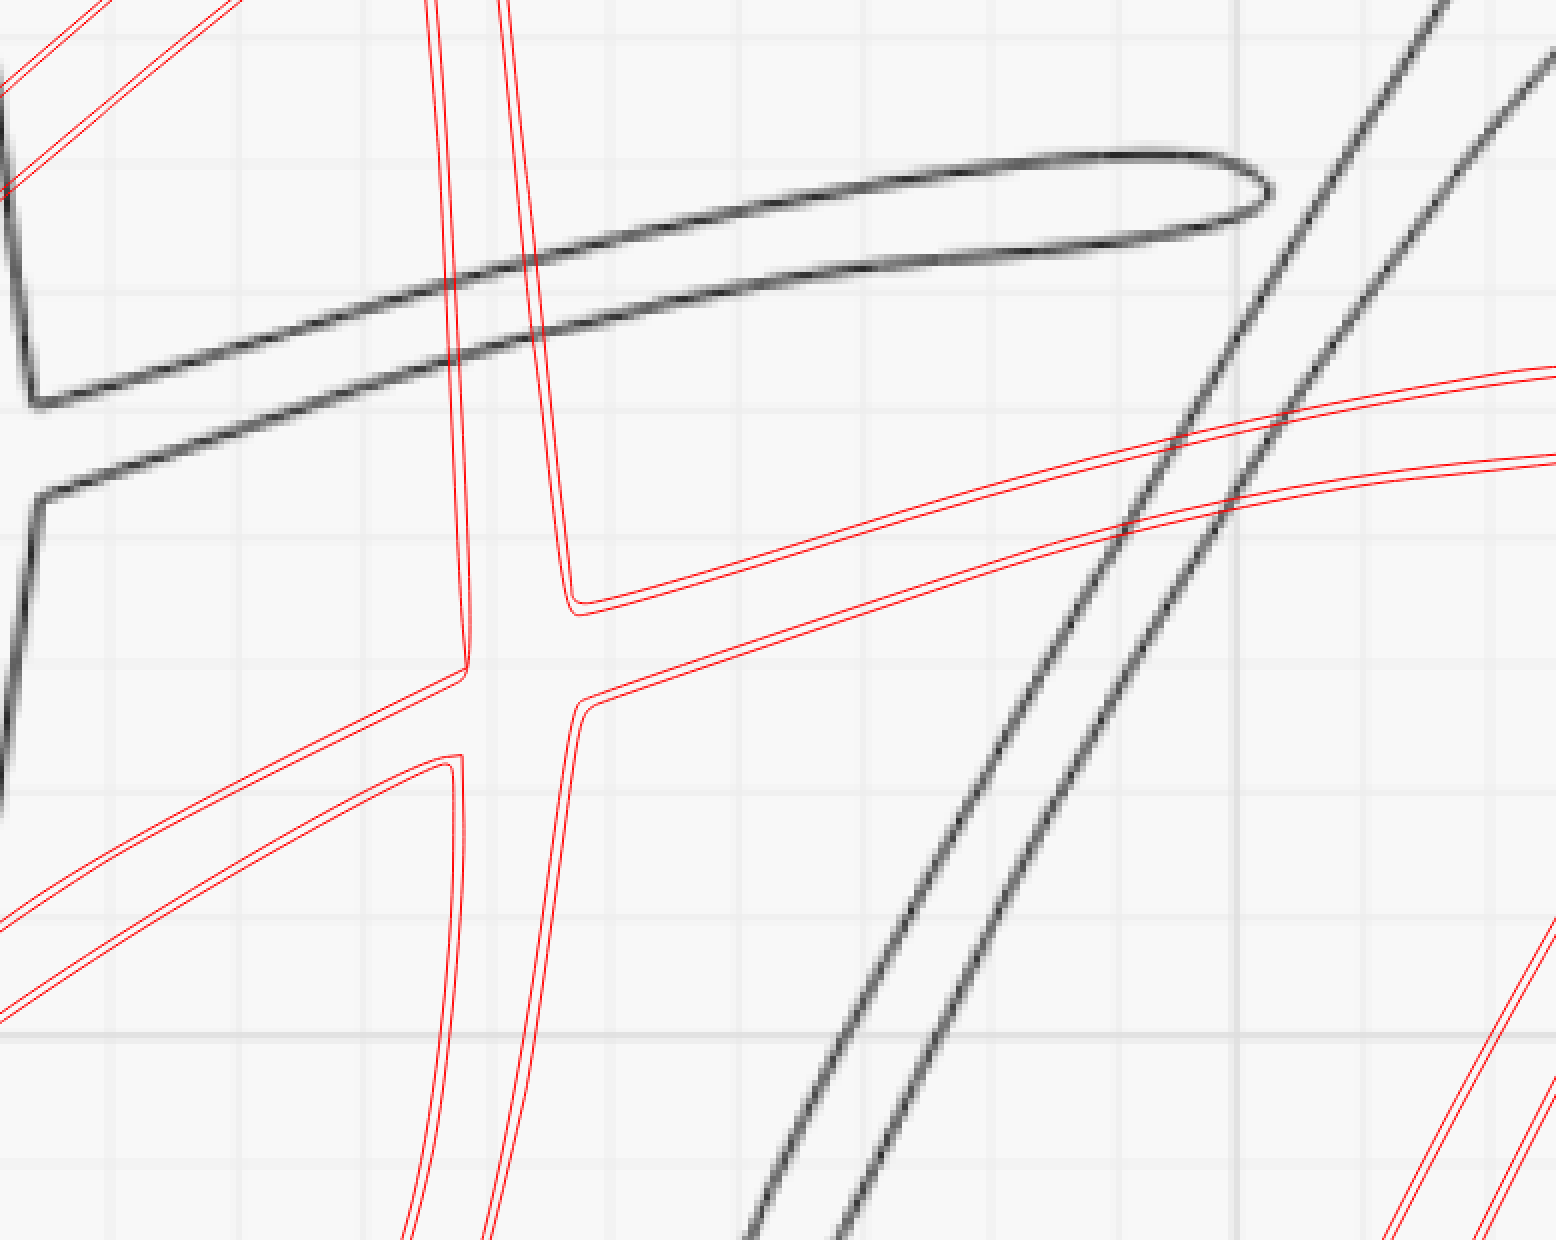
In that text example, the “problem” is that LightBurn does not center trace your original drawing. LightBurn scans / traces both outer lines, if you have not filled in text as in your example, you get 4 lines! I have sometimes, if the task was not too big, removed the duplicate lines and assembled the remaining lines so I can fill them. (just like in the example) With text, it is a great advantage if the original is filled, then it is often possible to make fill text afterwards again without too much work.
For shapes, this also applies, if you trace a filled item, everything is ok, you get “only” one outer line.
There are external programs that handle center tracing such as Inkscape for example.
Here on the forum page there is a section for future wishes and improvements, many have already subscribed to this suggestion, I think you should do the same if you want this feature.
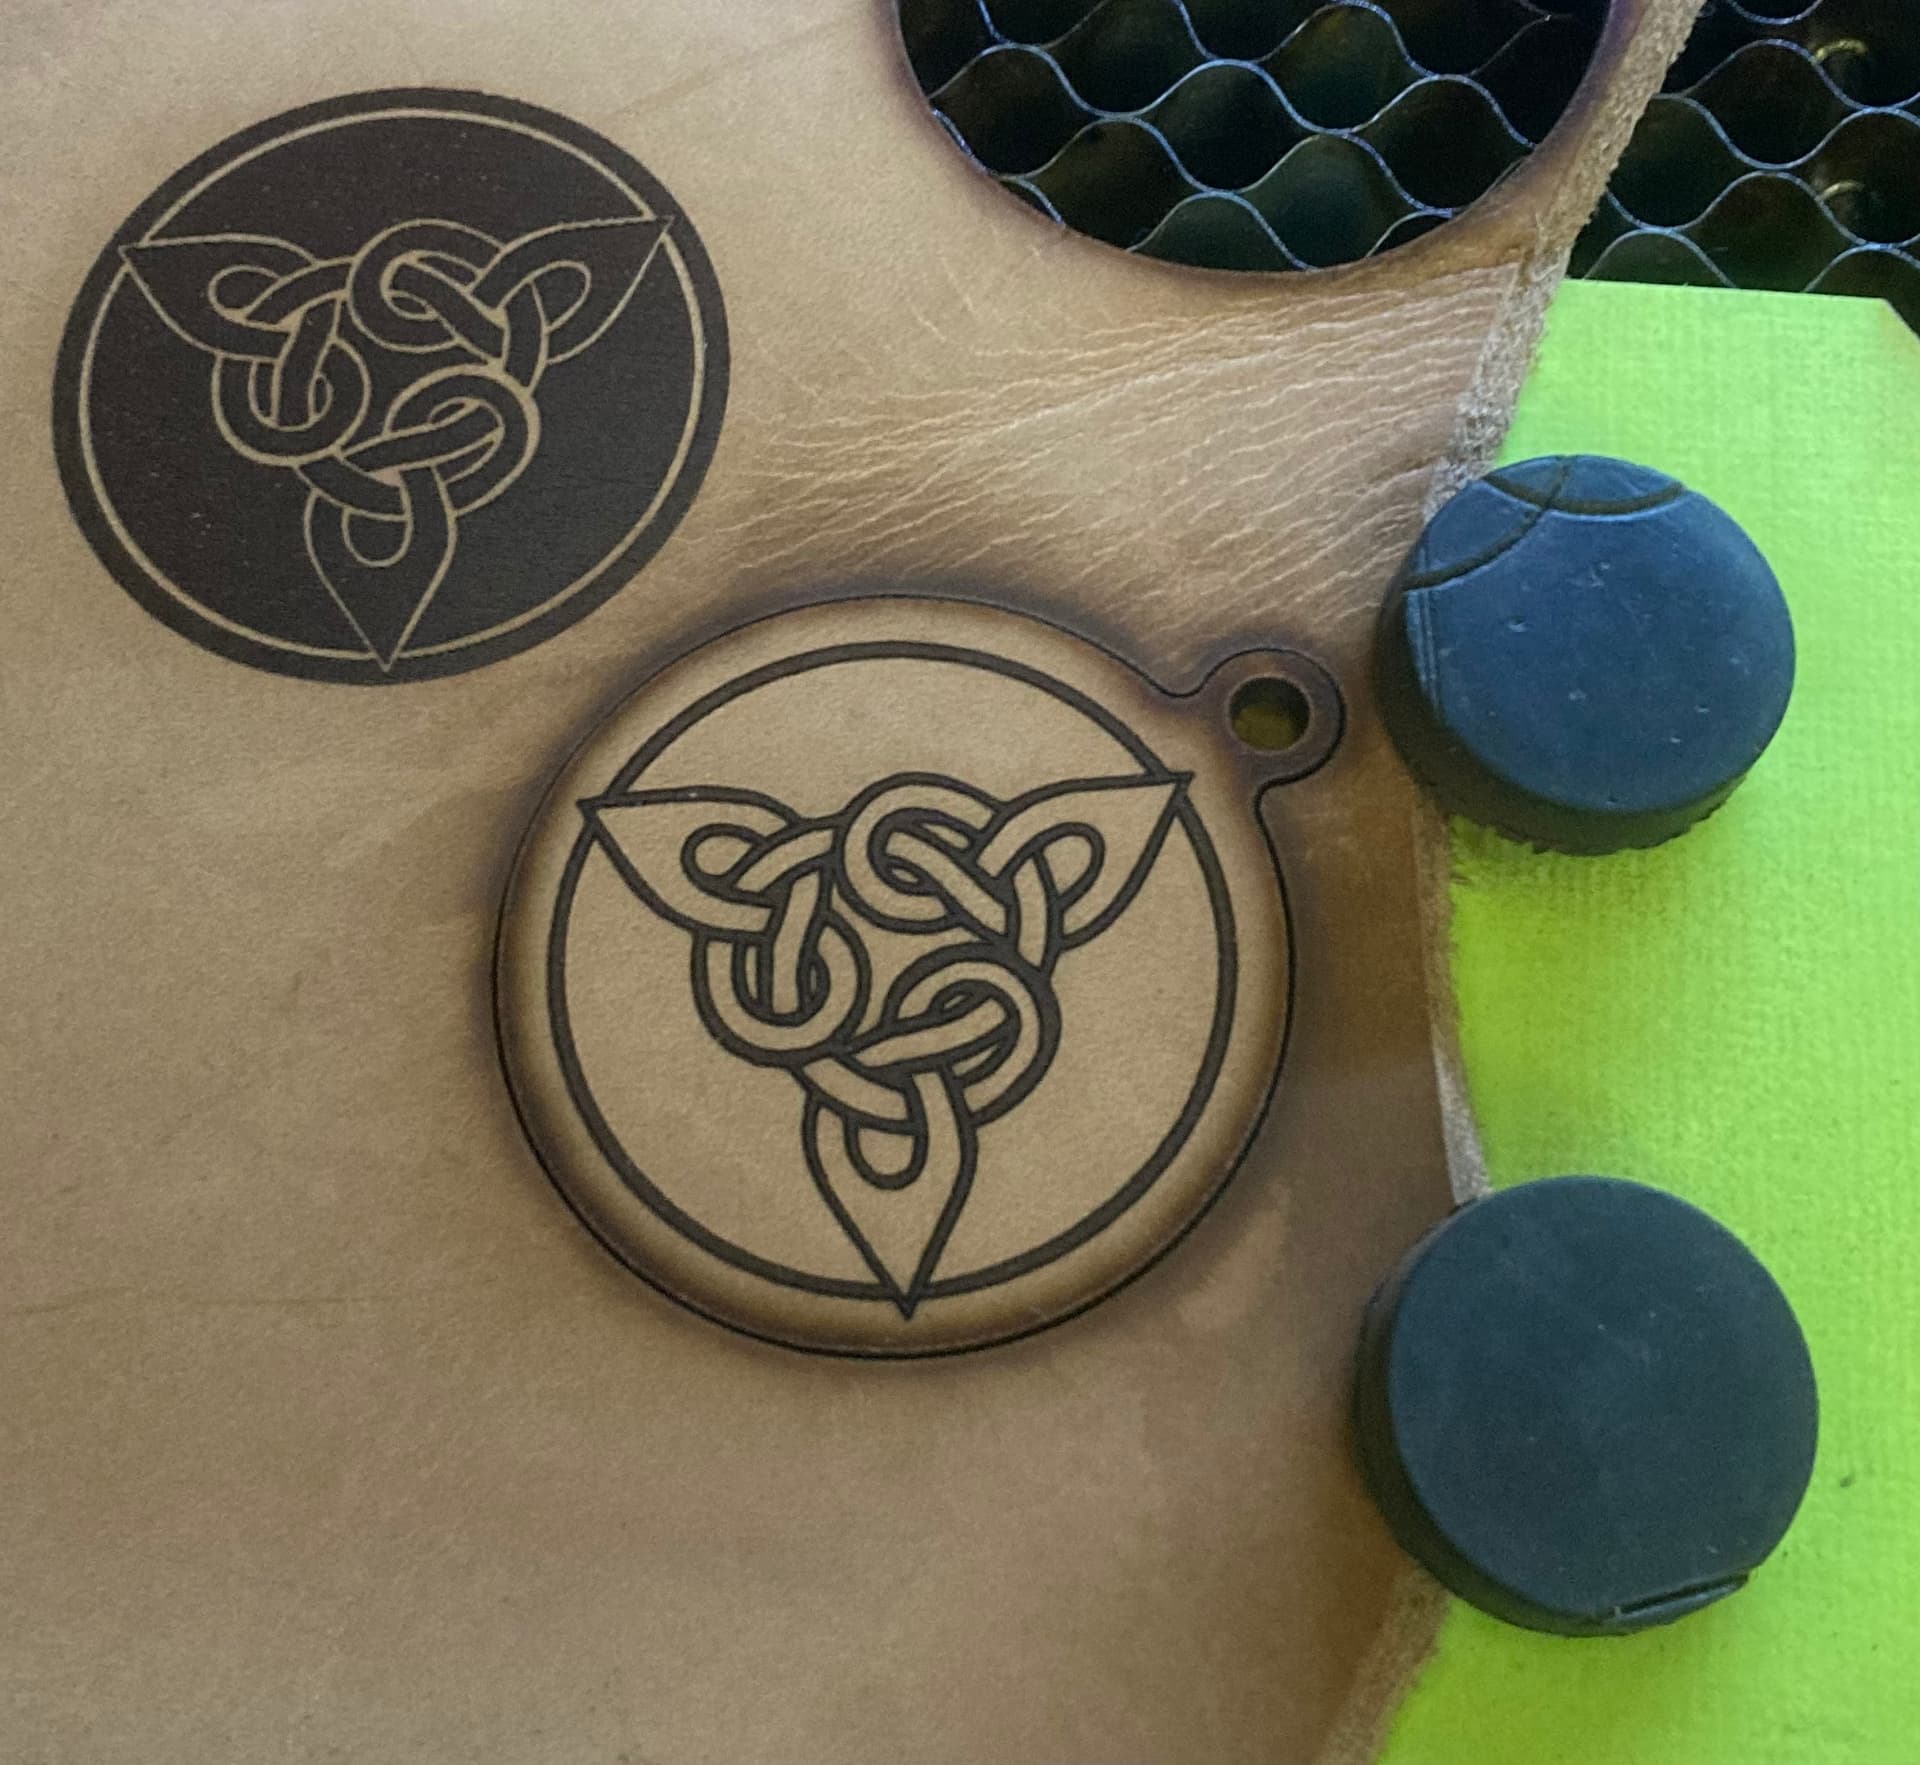
In picture no.1 it is from the original (yours) here we get 4 lines (2 per original line)
It can not be filled without problems.
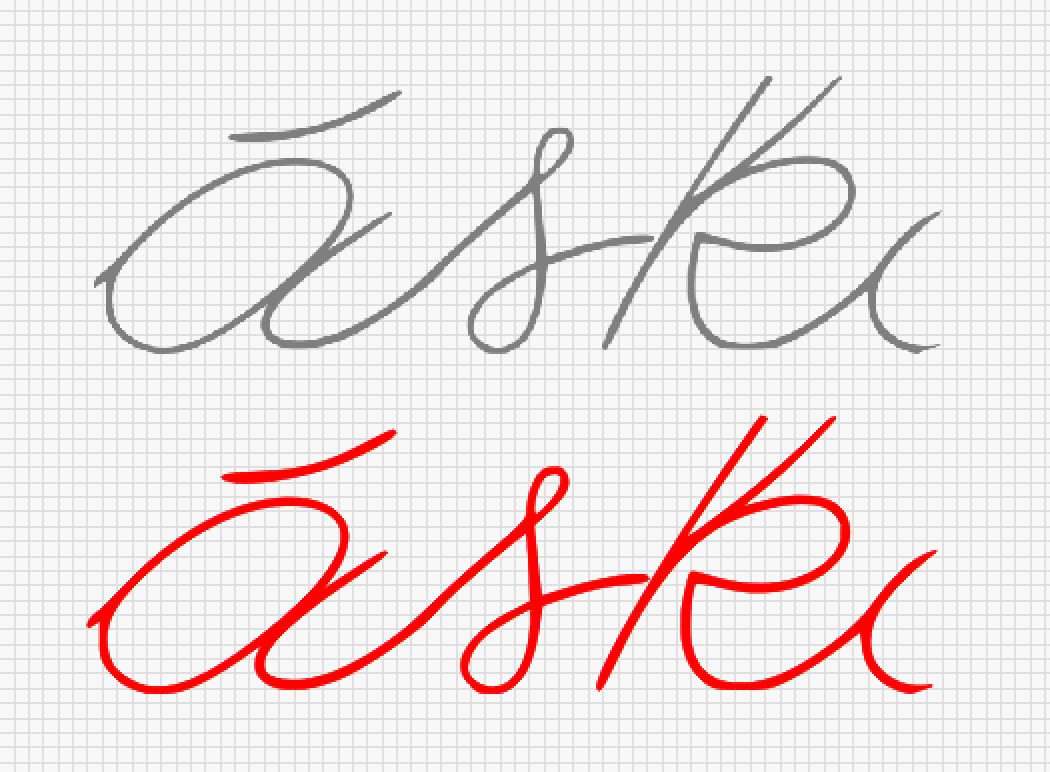
Picture no.2 is the original fill text and not lines, here there are no “problems” with the trac function, here there are only the outer lines which can be filled without problems.
laser work has at it’s basic level 2 different ways to do things and they are often called vector engraving or raster engraving and they operate quite differently.
Vector engraving is when the laser follows a line( vector ) in a design
Raster engraving is when the laser goes back and forth filling in the area of the design.
In your flower example you could Raster engrave that whole thing but it would take a long time as the laser head moves left and right many many times slowly filling in the dark areas of the design.
Or, you can convert the image to a vector image in which case it will probably create 2 lines around all the hollow parts and one line around the dark petal. You probably don’t want 2 lines for each petal so you can edit and delete one of the two lines around each pedal and then select all those lines(but not the top petal) and select a layer color then set the “mode” to “Line” and set the power and speed you want to get the darkness you want. You could also leave both lines around all those elements and set the mode to “offset+fill” and it will fill pretty quickly.
For the leaf at the top you can set that as another layer(color) and set the mode to fill and it will do that raster engraving back and forth of that leaf.
You’ll use LightBurn features like “Image Trace”, ungroup, group, selecting a line and deleting and always run the Preview(TV screen looking icon). Here are 2 examples made from your flower image:
flower1.lbrn2 (37.9 KB)
flower2.lbrn2 (23.6 KB)
thank you very much, i tried it and it really works. I spent two days on it and it was you who advised me. You are very nice. Thank you a thousand times
This topic was automatically closed 30 days after the last reply. New replies are no longer allowed.