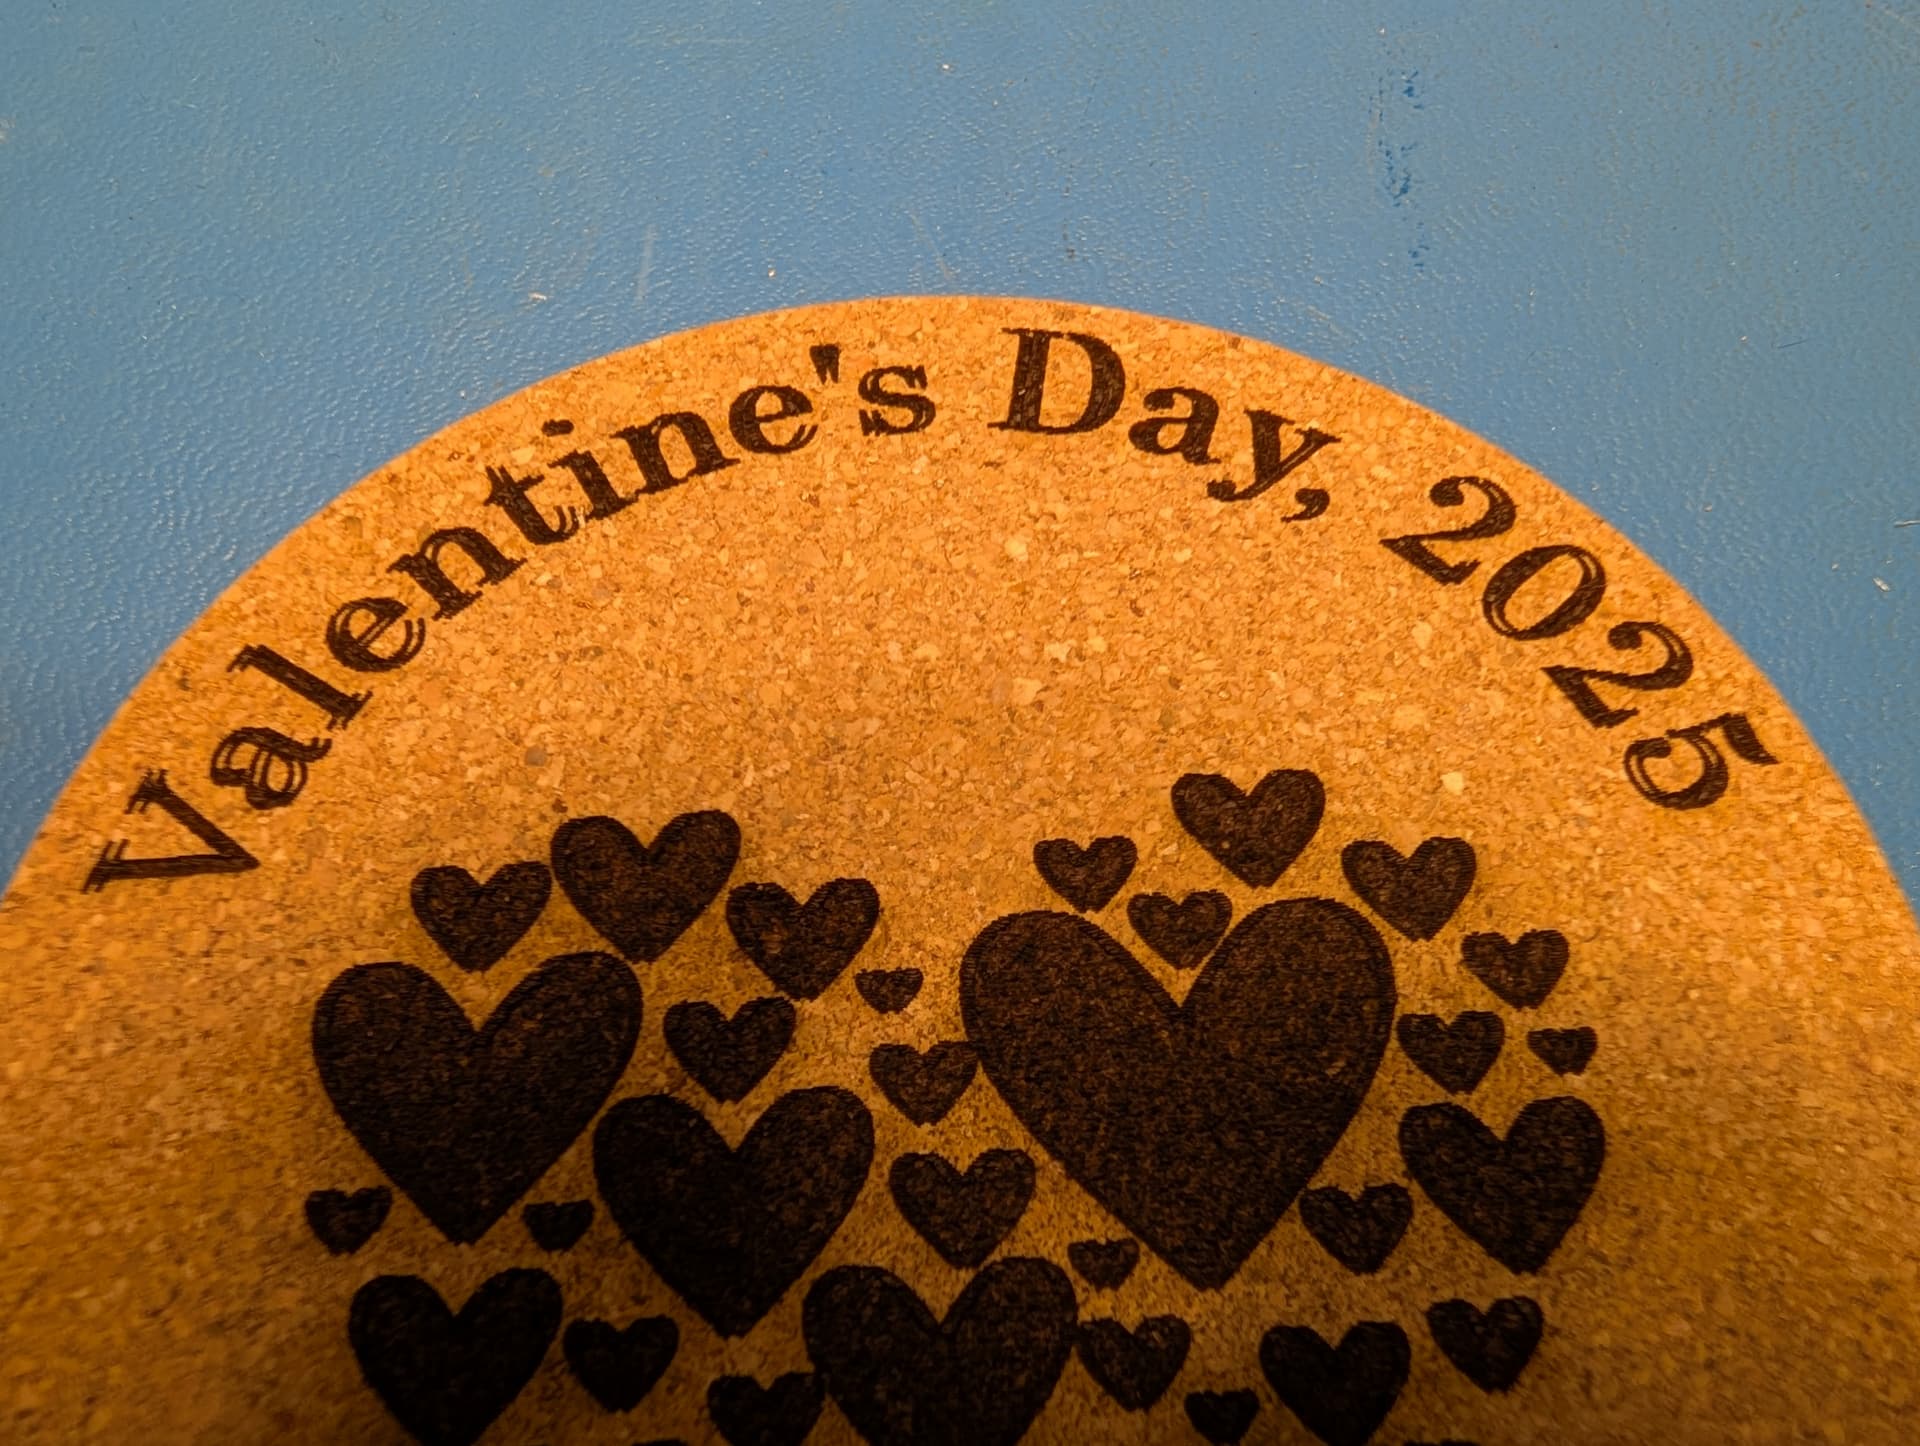
I’ve created a design for the back of a cork coaster. One of it’s features is “Valentine’s Day, 2025” in the Century font. The font looks fine in Word, looks fine in Lightburn, but when engraved on the laser the characters are not filled in.
I’d like to try printing the font without bending it, but the laser is set up with a jig for the coasters and I’m hesitant to move it until the project is done. The hearts engrave just fine, as do some larger versions of the letters on the front side. Is this an artifact of bending the font, a basic defect in the font, or something else? The Century font shipped with Windows as far as I know, and I’d like to stick with it since it’s what I used on the front side.
Machine is an OMTech 50W CO2 laser with a Ruida controller. PC is a Windows 11 laptop running Lightburn 1.7.06.
I just ran your file on a cork coaster. I adjusted speed and power (6000mm/m and 20% pwr) to compensate for my 20w diode laser, but changed nothing else.
The font printed perfectly. That would eliminate Lightburn and the font as being the culprit.
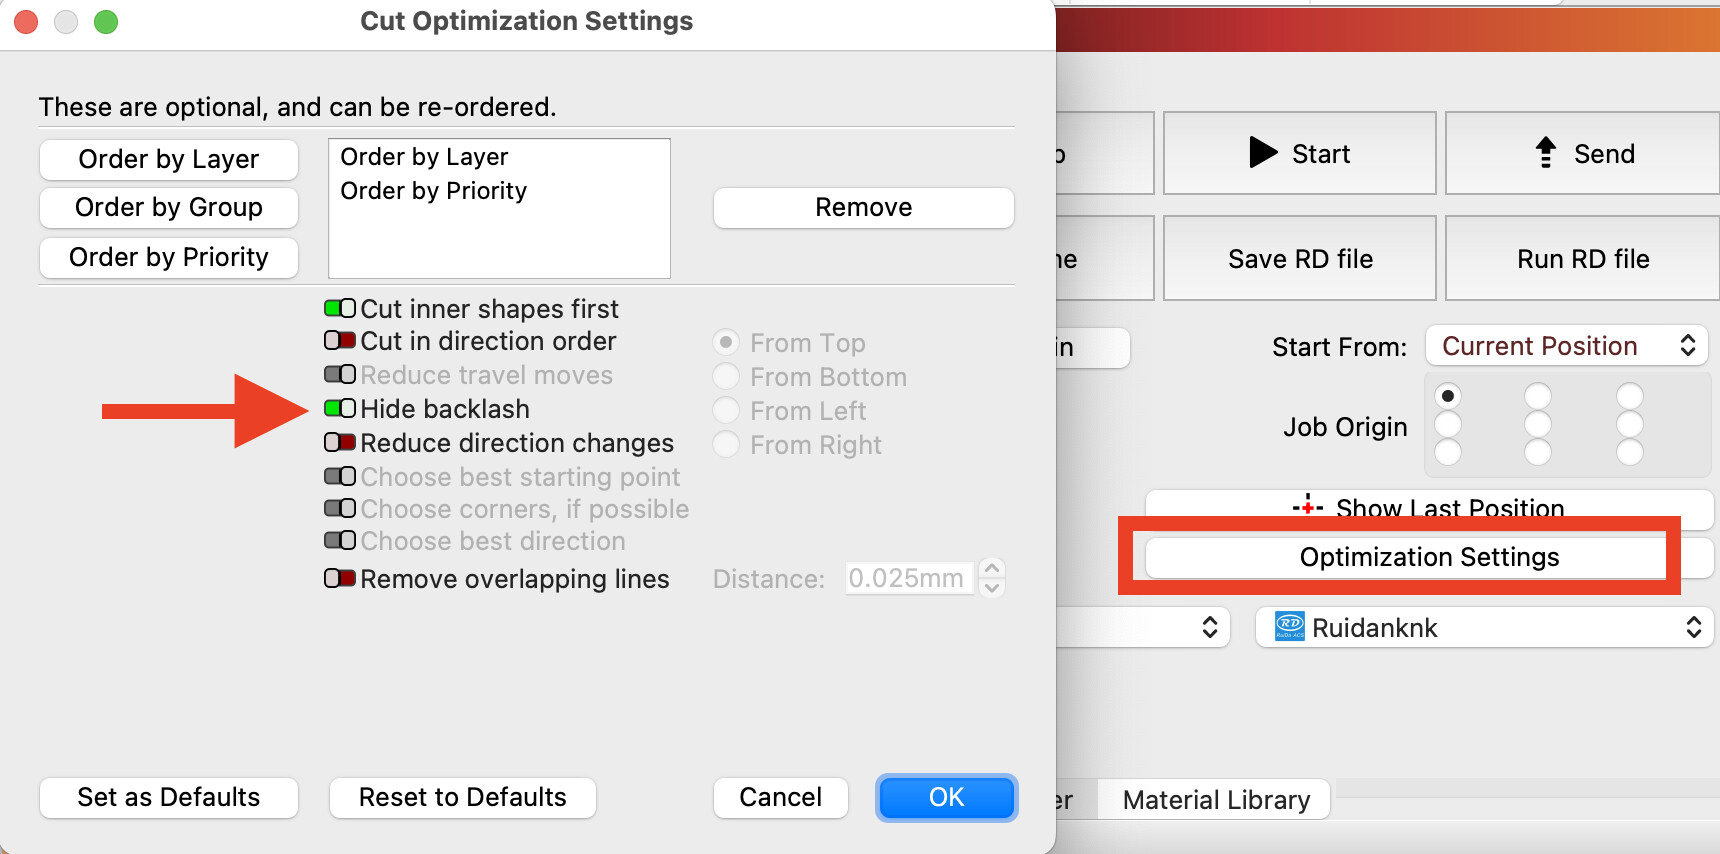
I did try a pass on an extra coaster changing some of the optimizations, including ‘Hide Backlash’, but I didn’t see any difference in the output.
OMTech does not provide any settings for any of their lasers that I’ve found. I’m running 300mm/s at 10% power. Any lower power setting and the laser doesn’t get turned on, and any slower on the speed and I get start to get noticeable charring. I bought a couple of media libraries that are for this laser, but they didn’t have a setting for cork.
I’m not familiar with the scanning offset adjustment, I’ll look into that.
When you get the Scanning Offset table set up correctly, Fill layers may come out in a slightly different position relative to where they are now, because right now they’re slightly off from where they should be.
Run a few cardboard test pieces before you commit to the spendy stuff.
Building a scanning offset table did the trick. I was fortunate that I had a material calibration test burn still laying around that I was able to measure, so I didn’t have to dismantle my jig. The adjustments made it more than clean enough for this project, but I’ll try to dial it in even closer.