I am a new laser user. I have a 100W CO2. My goal is to do designs by cutting 7/16" hardwood. When I use the recommended speed/power settings, my result is excessive charring on the edges. The external cut I can deal with, but the internal cuts are intricate making it more difficult. Another problem that if I use the recommended settings, is that the intricate designs simply get burnt up. It appears that the power is too high. Any siuggestions?
1 Like
Probably need to reduce power and possibly multiple passes. On real intricate designs the laser cannot get up to speed so the power is concentrated. In other words, the speed and power that work on a long sweeping cut will be too much for something with a lot of turns where the laser has to slow down and change direction. Might also adjust the minimum power setting.
Thanks. Makes sense. Regarding the minimum power settings: I’ve been informed that when cutting, both max and min power settings should be equal. Is this not so? What would you recommend I try for the difference between the min and max power settings?
I always set min power for cutting and leave both the same for engraving. Min power allows the laser to reduce on slow down so you don’t get overburn on the corners / direction changes. Engraving uses a side to side scan and it doesn’t slow down during the scan, it uses overscan, where it goes past the design to change direction, allowing full speed for the entire engraving.
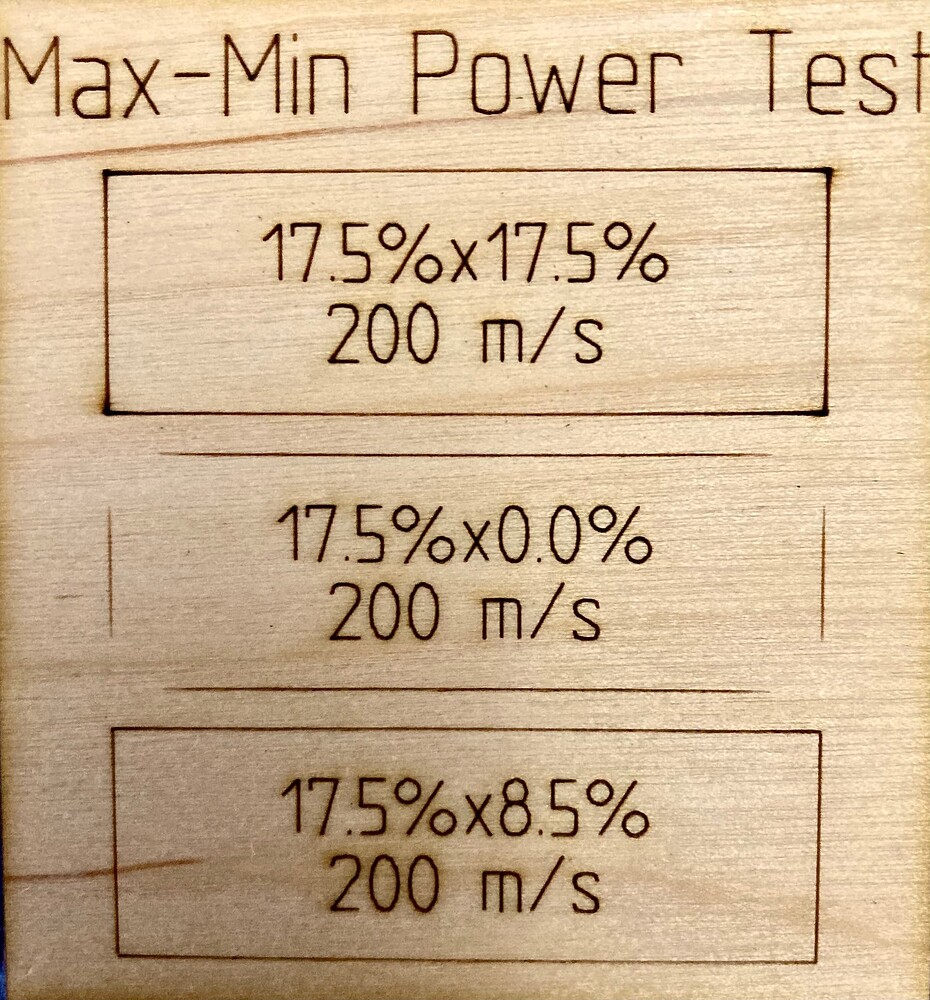
You have to experiment to get the setting for your machine. On my 100W, I typically use a min of 8.5%. On some materials I have it as low as 7.5% or as high as 12%. It all depends on the material you’re cutting.
1 Like
Wow! Too awesome! That clears up alot. Thanks so much.
1 Like
I’m attempting to practice cut on 4mm thick plywood (scrap paneling). I’m set at 80% (100W unit) with speed of 8mm/s. Min power at 10% . I’ve done 6 passes, no charring, but it still does not cut through. Is this normal?
It’s probably the material. Depending on the glue that was used it might never cut through. Buy some laser plywood to ensure success.
On a side note, are you sure you are properly ficised? Are your mirrors properly aligned?
2 Likes
Tim hits the nail on the head again, as usual
Probably exterior plywood, the kind that hardware stores sell for outdoor use.
You can (sometimes) cut it, but you’ll never be happy with the result, but 100 Watts …
That’s more what I suspect is your problem.
Test your focus with a ramp test and cut some known material that you’ve tried before to compare.
NB I cut 5mm plywood (laser-suitable) with 60Watt at approx. 15mm/s and 45-50% power, depending on the supplier.
I took everyone’s advice and focused the laser. It was a bit off. I also went to 6mm oak. Edges are black but no charring. Happy. I cut 6 4"x4" designs with a clean cut through, but now the machine will not cut through. The performance seems to deteriorate with use. The water cooler is running at an acceptable temp and since I have a 6" exhaust, I open the windows in the shop to avoid negative air flow. Any ideas?
When I run into this kind of problem, I try to be as systematic as possible.
I will start by comparing the current cutting effect with a reference piece (I have a large collection of reference examples).
If there is a difference, if I want to cut another material with known parameters and effect, it is also not as expected, I will start troubleshooting.
As a starting point, we can say that there are only a few things needed to get a result with laser cutting, or in other words, the following parameters must be met.
1 - Ok material
2 - OK power
3 - OK focus
Cooling, extraction and compressed air support are also important but theoretically not necessary to be able to bring the machine’s power to the material.
Point 1 should be a reference material that you can be very sure has the properties/quality that it was tested last time with success.
Point 2 Since I assume that you, like most of us, do not have a “laser power measuring instrument”, the material test from Point 1 should be used for comparison. If expectations and results do not match, I go to Point 3.
Point 3 Inspection, cleaning and/or replacement of all mirrors and the lens.
Simple standard alignment test with tape or target holder and cardboard targets (much more precise and faster).
Adjust alignment until it is 100% ok, not “just about” as some mistakenly propagate. If you cannot get all mirrors to hit the center, over your entire machine bed, then you will not get the maximum possible power from your laser transferred to the material.
An important point is to make sure that your laser head/nozzle is perpendicularly set, a test shot with the correct focus distance should be able to hit the center of another test shot with 100mm focus distance. The test object should of course not be moved during this test ![]()
If the 3 points are positively fulfilled without the material test being satisfactorily carried out, the laser tube and power supply probably need to be checked/replaced.
These are my procedures I use in case of errors or during the main inspections.
Because you were cutting that job at a low speed your Ruida controller would have ignored your 80% max power setting and cut at only the min value of 10%.
Refer to our documentation here for more detail about why this happens:
Larry…
You didnt say what Lens you are using ?
FYI I cut alot of 3mm and 2mm bass wood and my set up with 130W
is :
I use a 3" lens, gives nicer deep cuts, set to about 11mm off the material…
set at tested power and speed of your choice..
When I determine my speed and power… for 2mm it is 28mm/s @35W
this is fast enough to keep the head moving and the power is about 10% over that of what it takes
to do the cutting, so I ensure a clean cut all the way thru on the entire design and when making wierd cornering and turns in the cutting..
( I also set the MIN ans MAX powers the same, at these setting with the 15PSI air.. cornering is not an issue for burning )
But the main ingredient is 15PSI air (usually add on external) with a small oriface nozzle to better focus the air into the cut for cooling and reduced surface burning…
chuck
2 Likes
I had this issue, I also added a ma meter to monitor the tube current, and it would start out at 10ma then drop to 8ma…
It was my cooling, not cool enough, As Bernd instructed, I reset my cooler (I have a chiller unit, not bucket water) to 20C and now the cutting current sits constant after start up from OFF, and with a bit of runtime it only dips about 0.5ma keeping the water flow around 19C now…
Just something to consider…
1 Like
Thank you everyone. I’ve got some work to do. I recently retired and the 1st laser cutter I’ve ever seen was when it was dropped in my driveway. New life and new challenges. Love it!
My lens is the standard on the Omtech 100W. It appears to be approx 3/4". I’ll make a few other adjustments. I’m sure I’ll have more questions. Appreciate everyone and have a Merry Christmas!