The lineup of layer colors at the bottom of the screen in LightBurn…Is there any way at all to change one of them to hex color F8DFA1…I cut wooden shape cutouts with LightBurn, and I have an inventory in the thousands, and am adding more all the time. To save material, it became necessary to be able to photograph the shapes without actually cutting them out. LightBurn helps me do that, but it is a time consuming process with lots of steps. Being able to change the hex color of one of the layers I rarely use would save untold hours of time by cutting out, at minimum, 3 of the steps, and allow me to quadruple the number of items I am able to offer in a very short period of time. For reference, F8DFA1 is the light tan color seen in the included photo. Thanks!

Well, in a word, No.
It’s not really a color and they are not user editable. It’s just a label that we put on a layer and built some import tools around. I dragged the provided image in and the dark imported into Layer 00. I saw two shades of tan in your image and they were ignored. Are your wanting the inner shapes on different layers?
I don’t quite follow, and I’m hoping that this is partly due to a lack of understanding on my part as to what the finished cut-out looks like.
If you’d be so kind as to take a screenshot of the workspace in LightBurn with a few objects, as it would look shortly before sending it to the laser, I may be able to offer a more direct route. The following link is helpful for sharing two or three steps in a workflow.
Photographs of finished work are also welcome but please avoid sharing digital photographs of screens. Some folks seem really sensitive to the Moire patterns that this can generate.
If you’re working toward fitting odd shapes together to save material a Docking or Nesting tool may offer a solution.
I imagine that there’s a way to get to your goals faster with some of the other ‘hidden features’ LightBurn offers.
We don’t actually hide features… but we do joke about where we hide them and how well hidden they are.
What I’m doing is that I cut all manner of wooden shapes to sell to creative, crafty types on Etsy. I have thousands of shapes available, but I find it financially unwise to cut each one out to photograph for listing purposes because I may or may not ever sell any given shape, and if I don’t sell it, it amounts to wasted material. Thus, the need to get a photo for listing purposes without actually cutting the piece on the laser physically. At this point, I found a quicker, better way using some of the ‘hidden’ features of LightBurn. I have created a file of puffer fish shapes in LightBurn, as seen in the attached screenshot
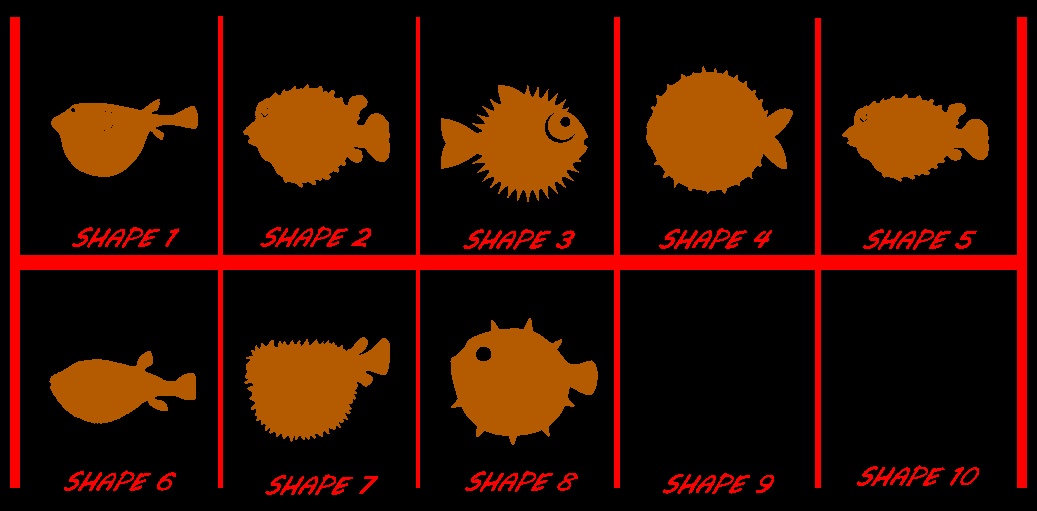
. This will be screenshot and placed into Paint, and then cropped, also in Paint. Then a web based color replacer will change the red to white, and the brown to hex #F8DFA1, which is close to the color of birch ply. Which amounts to a listing photo of an item I haven’t even physically made yet. This method is 4 steps less than the way I was doing it before, taking about 70% less time than before, and even looks better than before. So it turned out that I didn’t need to change that layer color after all. (And I didn’t really think I was going to be able to, but figured it wouldn’t hurt to ask)
The screenshot I just put up is after it was cropped in Paint. Here is a screenshot while still in LightBurn.

I’m glad you found a way with even fewer steps.
This topic was automatically closed 30 days after the last reply. New replies are no longer allowed.