I am trying to connect a new 15 w chinese laserhead with my sculpfun s9 lasermachine. The old sculpfun laserhead has 3 pin connector while the new laserhead has 2 pins. What would you suggest? How to determine which 2 of the 3 wires to connect to the new laserhead?
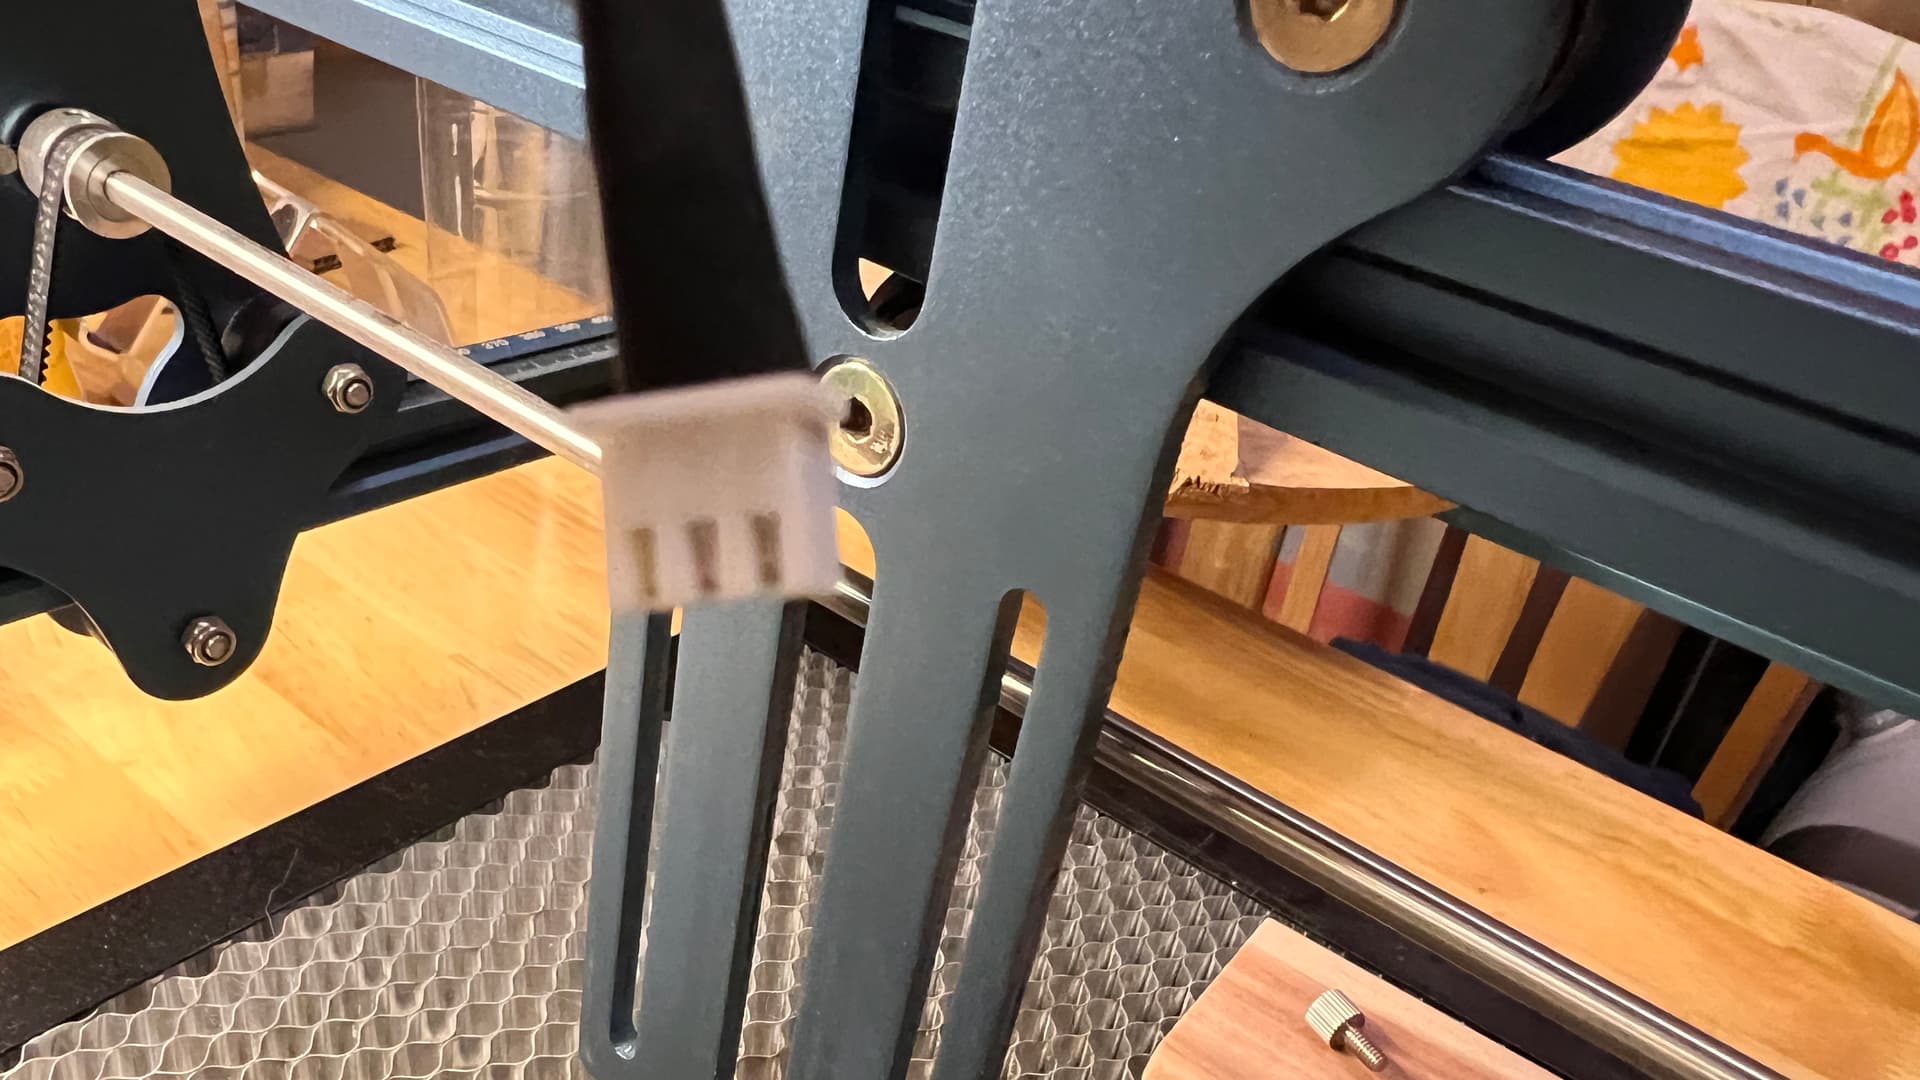


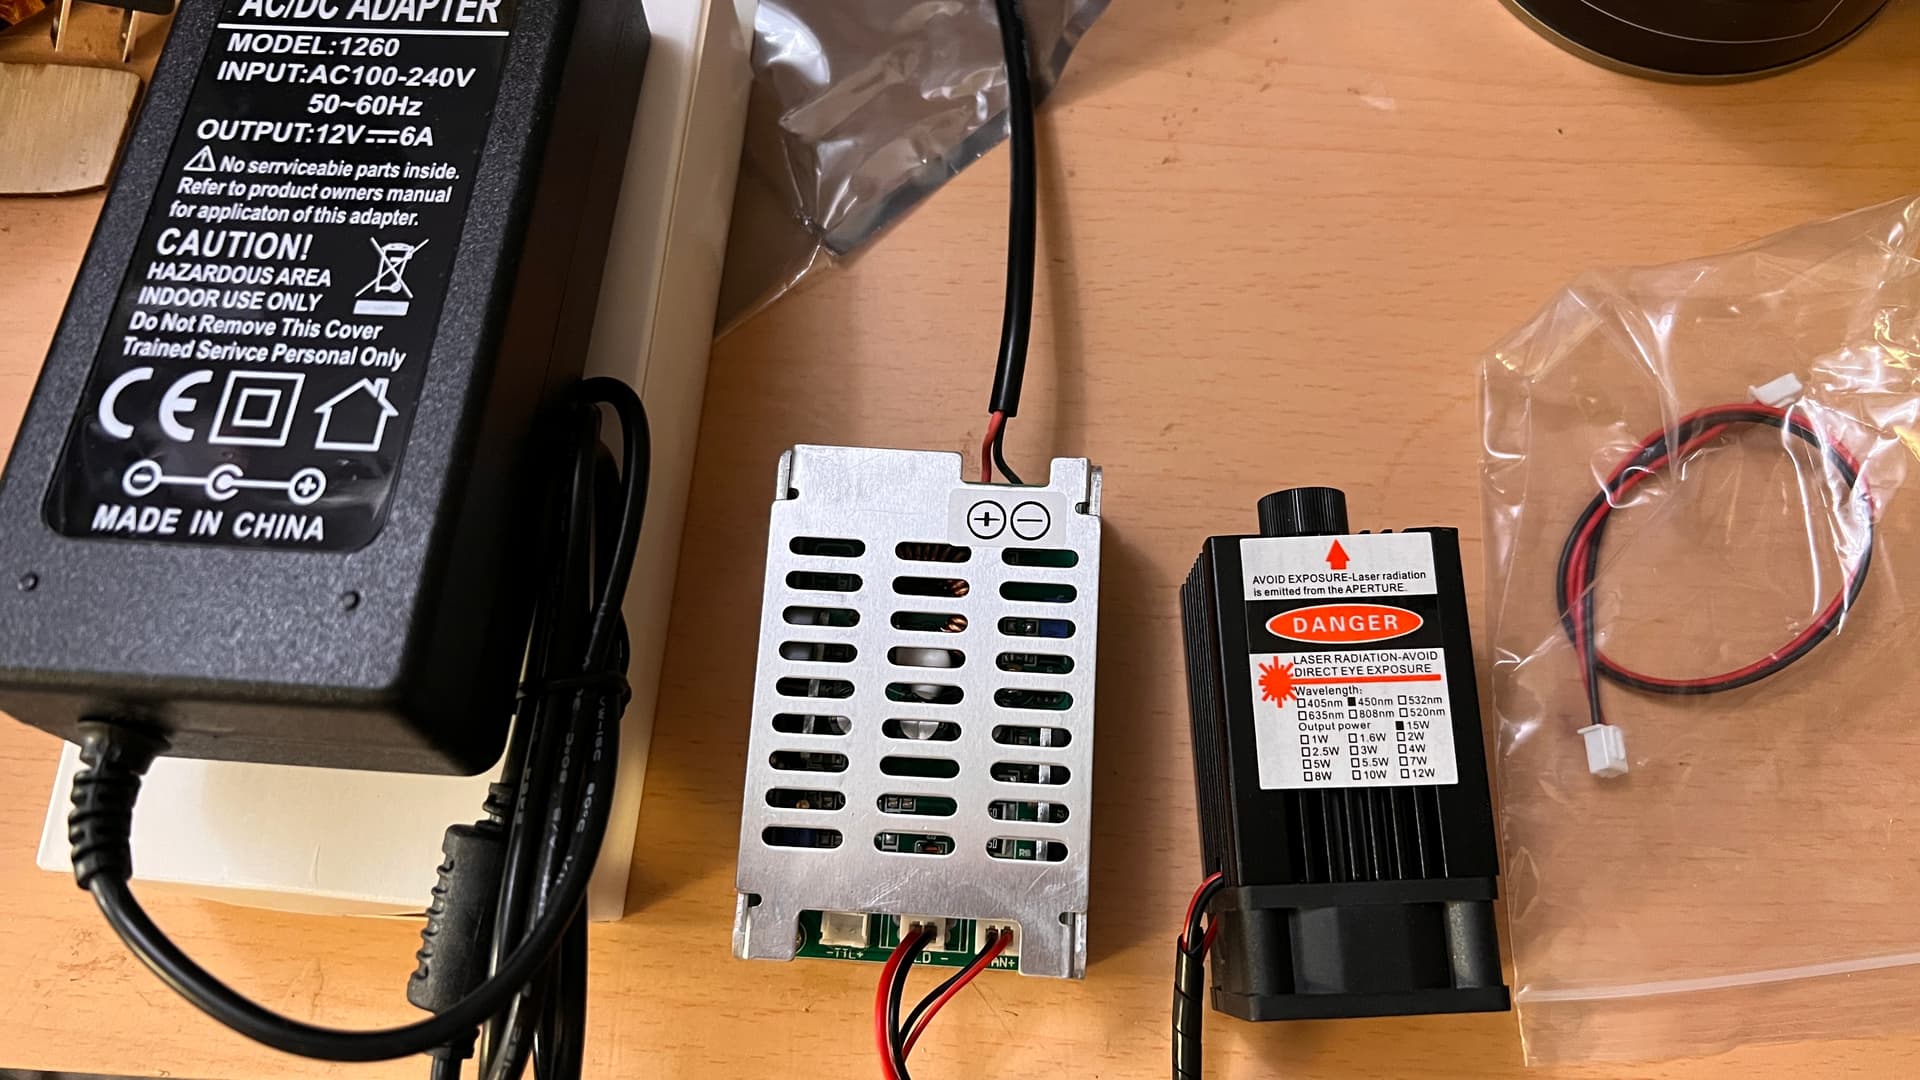
the first two pictures are the sculpfun s9 connector cable and the laserhead also 3 pins. the later pictures show the new laserhead with 2 pins.
Perhaps the new laser head is intended for full-power cutting and does not have a PWM input.
Although wire color codes can be misleading, a simple red-black pair generally connects directly to the power supply and does not support PWM modulation.
Do you have a link to the new head’s brand / model / description / documentation?
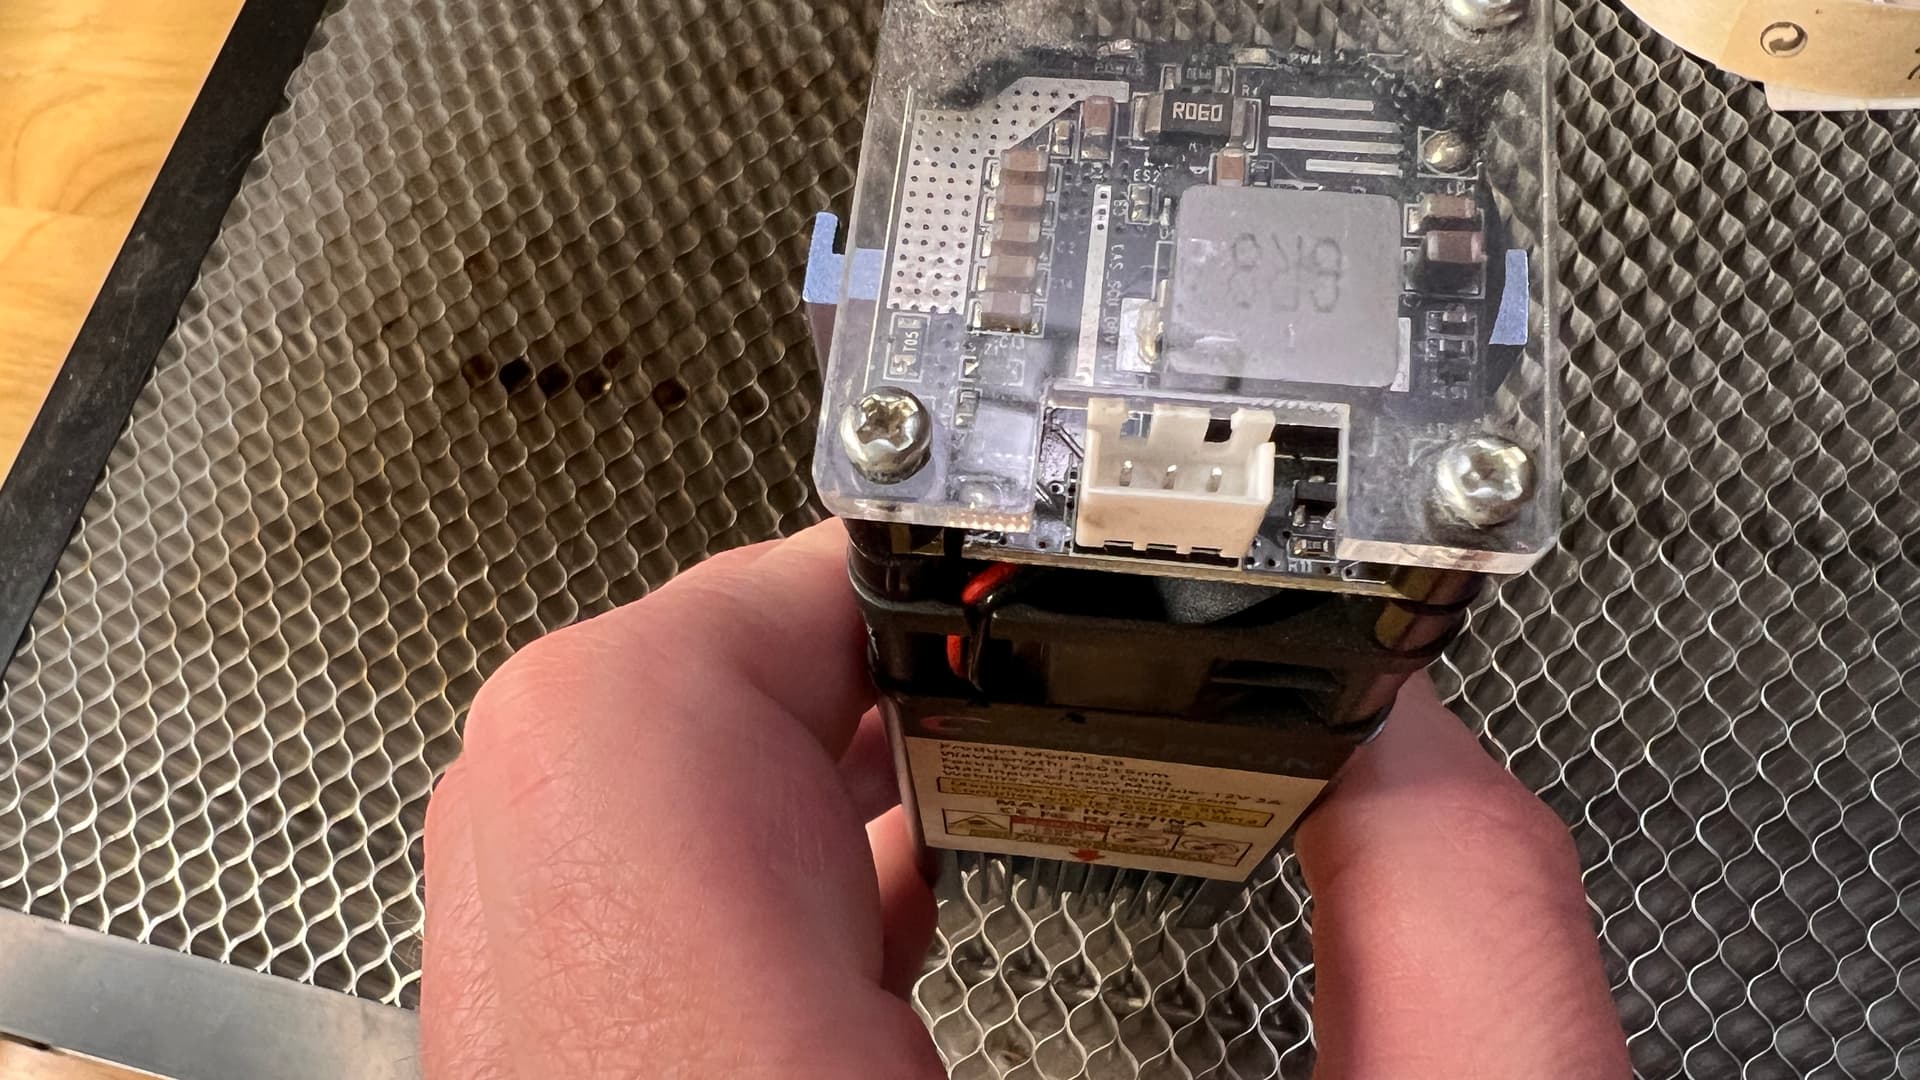
I am living in China and it has no brandname. Can you take some information from the “electric board” in my uploaded picture 3 where it says: TTL?
I just plugged it in to the power source and it shone blue, which seems to suggest that its a full power cuttung laser. correct?
I misunderstood: I thought that was the Sculpfun board.
Assuming the TTL input on the 15 W laser controller board is intended for PWM power control, then (I think) that’s where you connect the PWM signal from the Sculpfun board.
You may be able to identify the PWM source terminal on the Sculpfun board from these pictures:
It may be as simple as identifying the PWM wire in the existing three-wire cable, then connecting that wire and the ground wire (probably black) to the TTL header on the laser controller.
Perhaps @misken can provide more information.
Is there a way to identify if this laser is a full power without a pwm input? What does TTL on the electric board of the new laser usually stand for? Thanks for your help so far.
I assume TTL is the PWM power-control input, but that’s a guess.
I would normally assume the laser would not fire without a PWM signal connection, because that’s the safest design, but your experience suggests I am wrong.
Without any further documentation on the laser head and its controller, I cannot offer any other suggestions.
First of all: be aware that this cheap no-name module never ever has 15W optical power output! The print will be the total power output, which leads to the assumption that it has about 2-3W optical output. Remember the S9, which has 5W optical output, was advertised as 40W or even 90W laser. So, this module will be a hefty downgrade for your laser. I would believe if it was labled as 5W module, but it’s much too small to contain 3 diodes for 15W true optical output. No way.
That’s just a warning, don’t be surprised if you need to at least three times more time for your projects. And since the spot will be even worse, I’d think that you won’t get more than 25% of the S9 effective power.
To me, it looks like a voltage-driven module which has the extra control board outside of the module. The connection you need will be the TTL port. If you have a look at the Sculpfun mainboard, there is the same port, labeled TTL with S (signal) and G (ground) wires (it’s where the original module uses a two-pin connector with only one wire in it). Connect S to the TTL+ pin of the laser control board, and G to the TTL- pin. It seems that there is a cable delivered for this port.
Thanks! Will keep you informed about my laser-upgrade journey!
Hello again, I sent the first laser back and ordered directly from sculpfun. The 10W laserhead arrived today and I just replaced the old 5,5W with the new 10W Laser. Very easy process, took about 5 minutes. I realized that for the sculpfun s9 I dont even need the sheet-metal plate that came with it. Just unscrew old and screw new laser on. Here are some tests. The first two cuts still with the old 5,5W head and the later with the 10W head. Video is in German. If anybody need English, I will translate and re-edit. Thanks for your support

1 Like
Nice video! A few remarks on it:
- if you have the chance to add an air assist pump, this would increase the cutting capabilities by about 30% and additionally keep the lens clean. If you cut without, you should check the lens after each longer cut for dirt particles and clean it. Otherwise, the lens will die fast.
- don’t cut plastics you don’t know what it’s made of. Most plastics are bad, not even for your health, but also for the laser itself.
- Use faster speeds. I recommend using at least 600mm/min for cutting, and respective number of passes. Your cuts show a lot of charring, and this will be drastically reduced if you use higher speeds. You even will save time in the end.
For reference:
lens cleaning and maintenance: Guide to mechanical adjustments and maintenance
material settings and dos and don’ts: Settings guide - Diode Laser Wiki
(also available in German)
1 Like
Very much appreciated! The air pump is ordered, will keep you updated.
1 Like