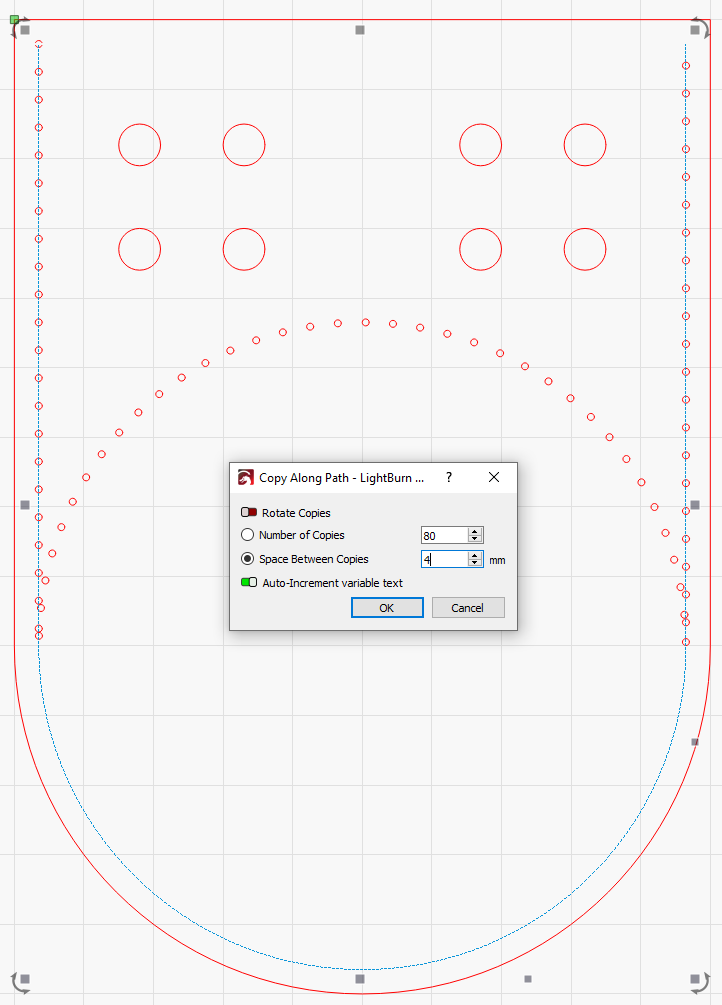
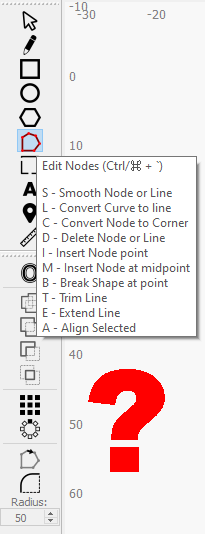
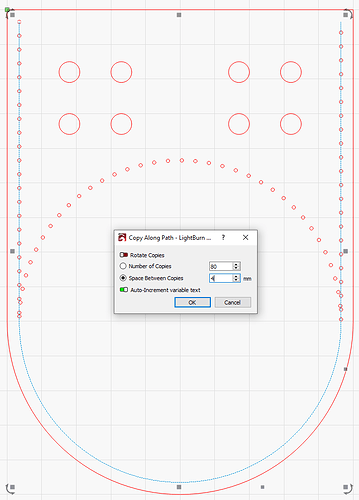
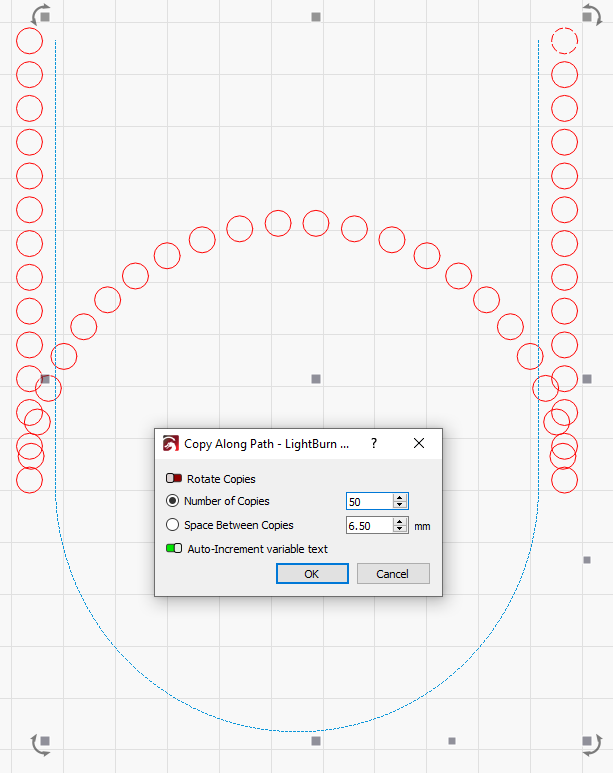
I created a rectangle 100mm x 140mm. I then put a radius of 50mm on the bottom 2 corners making a cup or shield sort of shape (rounded bottom of the bag). Then I created a tool layer (T2) by using the Offset Shapes tool and shrinking by 4 to create my stitch line. Using the Edit Nodes tool, I deleted the top line leaving a “U” shape as my stitch line.
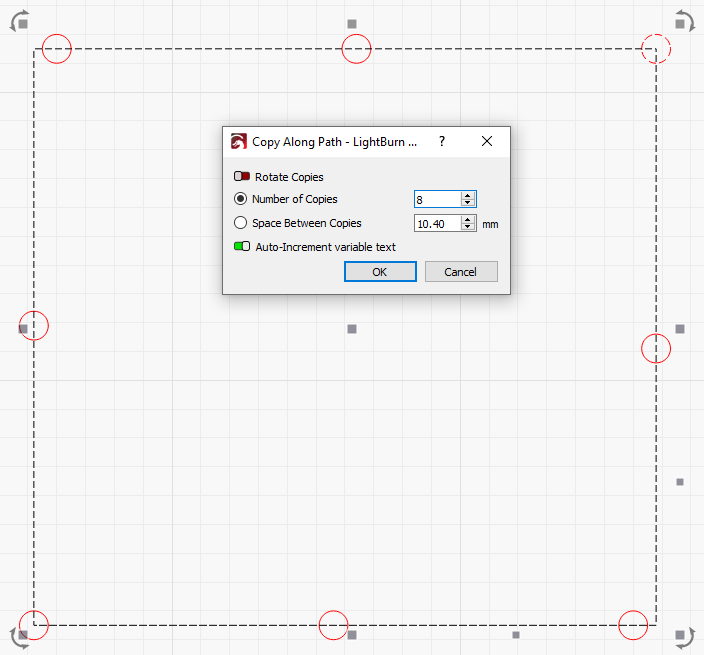
I create a 1mm circle and positioned it (centered) on the top left corner of the stitch line. I then selected the circle and the stitch line and did Arrange | Copy Along Path.
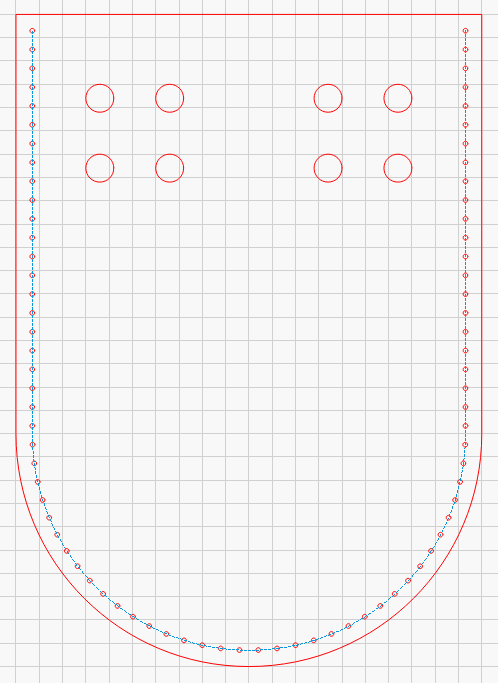
The result is roughly a “W” type shape of the 1mm holes. They go down the left side but then instead of following the curve of the bottom of the “U”, they curve upwards and over to the right vertical side. See pic below
Can you confirm that the entire length of the U is one continuous joined path? Rather than 3 separate line segments that happen to be aligned end to end?
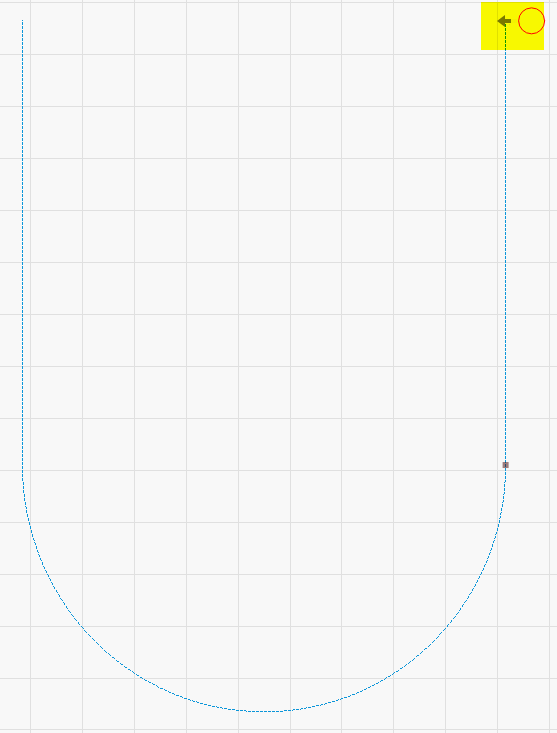
I think what’s going on is that the right side of the ‘U’ shape is the start of the shape. Move the starting circle to the top right and do a copy along from there. That seems to get what you expect. I misunderstood the nature of the initial problem and thought you had explicitly drawn the top of the circle as well.
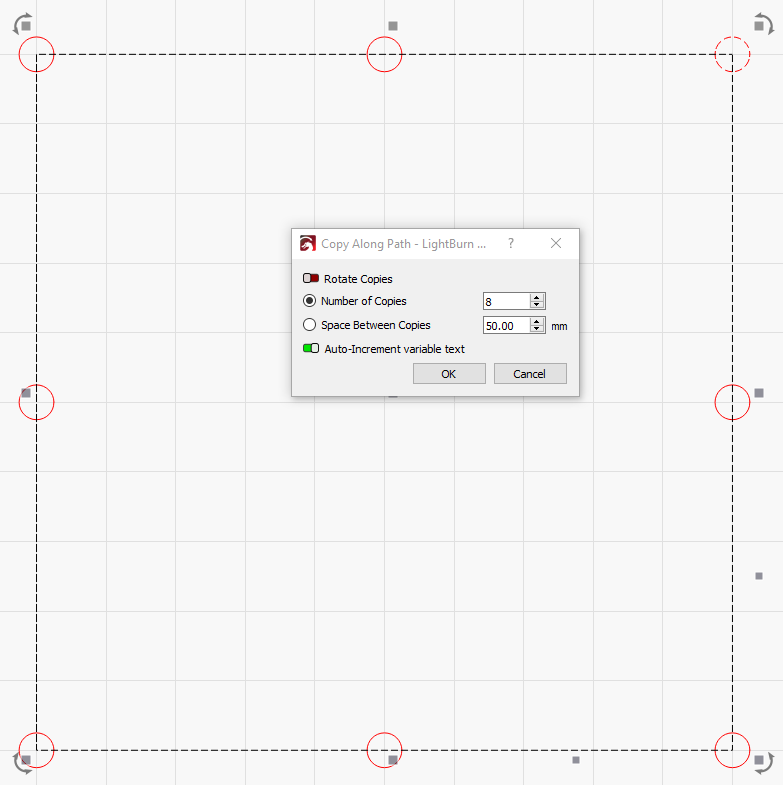
When I first used the tool I got a bunch of unexpected results. The two key bits that seem to be the most relevant:
The relative position of the object to be copied with respect to the path is relevant. You really want this positioned close to the “start” of the path.
The direction and “start” node are relevant in behavior.
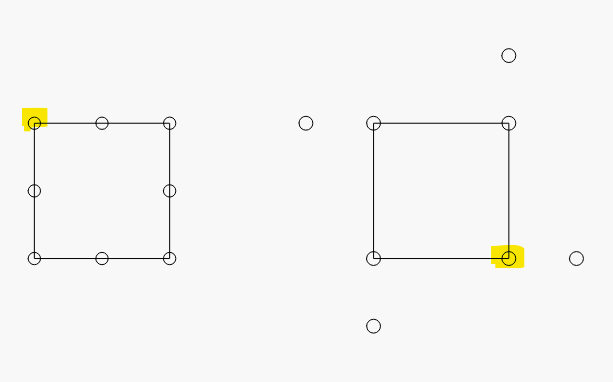
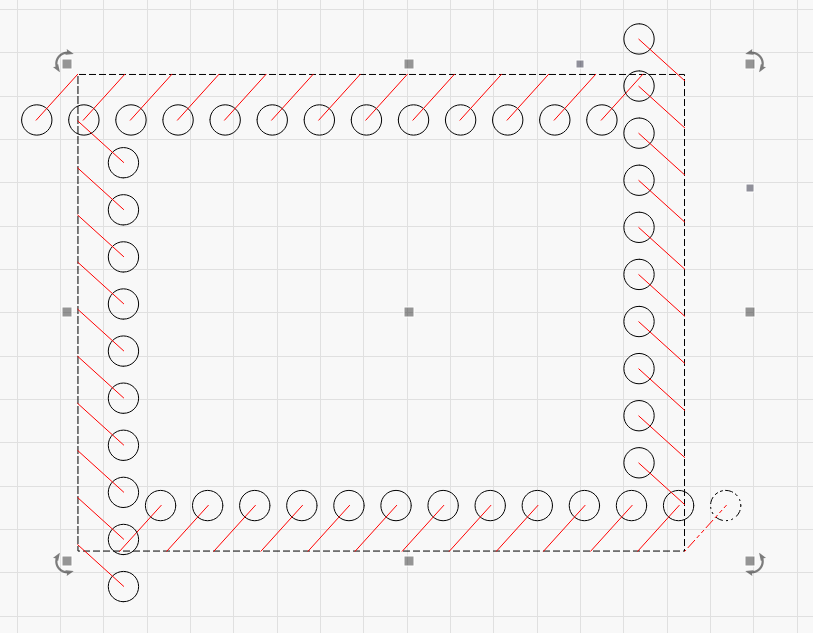
Check out these 2 examples. The left is where the circle was placed at the start node of the square (top-left). The right is where the circle was place on the lower-right node.
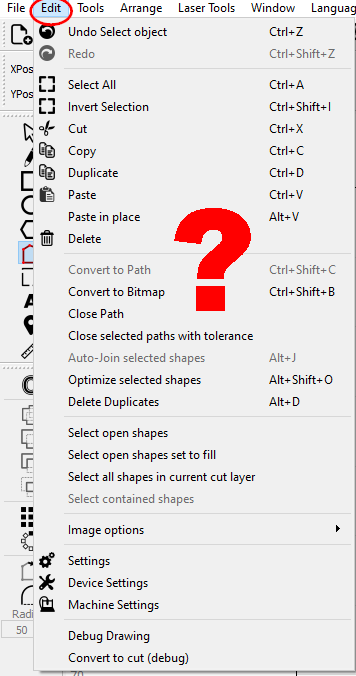
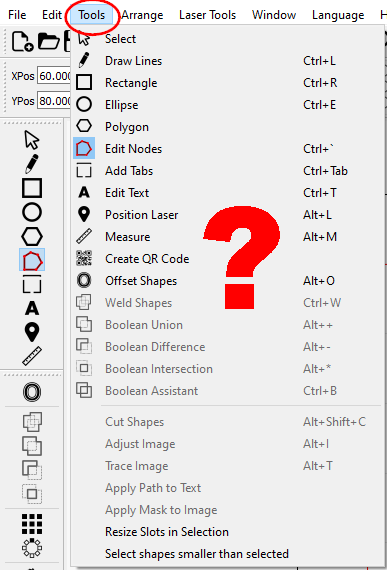
You can identify the start node and direction by using the “Set shape start point” tool.
I’ve heard rumors of this elusive and mystical “set shape start point” tool, but I’ve never found it. Can you give me a hint about where to look to uncover this rare and never-before-seen beast?
I’m also thoroughly confused about what happens when you aren’t at the start point of the shape. I would expect it to do something reasonable like offset the points by that much. So in my case, if I were at the left end of the “U” shape, it would draw down the left side and then make a “U” to the left of the shape. That would be because I’m “offset” by the width of the shape to the left. That would make sense.
Making just the bottom of the U curve up instead of down is completely outside my ability to comprehend. What is the algorithm that would generate that shape given the input parameters?
The same with your example of the square. The circle is offset by the width and height of the square, so why do the corner ones show up where they should be but the middles are just off in space? Shouldn’t the pattern of the circles be exactly the same, just offset from the lines? That’s what I’d expect.
And, BTW, how did you get the points to align with the middle of the sides and the corners? When I try to replicate this, my points are off by quite a bit. The only one that’s “right” is the corner opposite the start.
BTW, I searched the entire PDF of the manual for the words “set shape start point” and it doesn’t appear in the manual. Obviously I was searching for the wrong term.
Yeah. Sorry. I called it that because that’s what the tooltip lists but apparently it’s formally called “Start Point Editor”.
Is it possible that your rectangle isn’t a perfect square?
I think that’s the intent and works when the objects are sufficiently close. I suspect something is getting inverted when the path is reversed but not certain. I haven’t worked out the non-normal cases as they’re not generally useful for me. I suppose there could be some case where it gives a neat effect but unless it were very predictable I’m not sure my brain would even work that way to anticipate it.
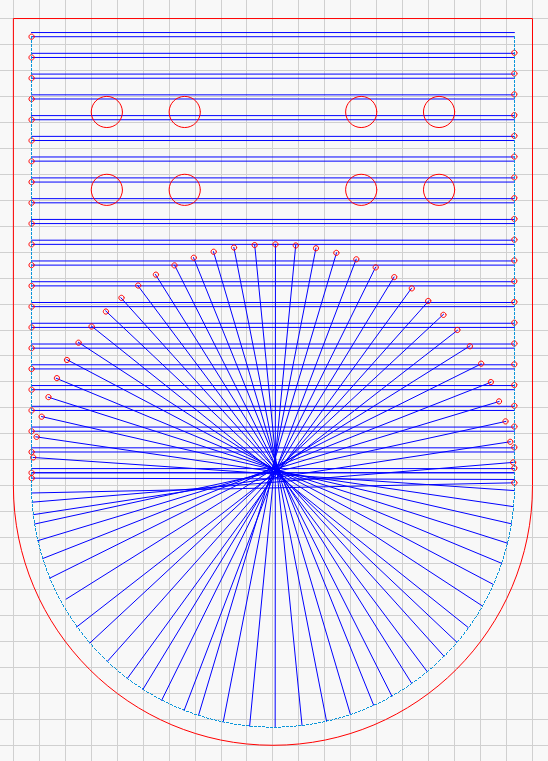
It’s not always easy to see, but the way it works is that the shape to be copied is copied along the path with the same relative offset from the start point (and direction) as the original.
If I make a small black circle, and place it outside the path by some amount, it maintains that relative position from the starting point all the way around - I’ve drawn a line from the shape to the start of the path so you can more easily see it:
I didn’t want to make any assumptions about where or how you wanted the artwork placed, and made it “manual” (up to the user) instead, because there isn’t really a way to make it behave predictably and consistently otherwise.
Thanks for jumping in. Good to understand it straight from the horse’s mouth so to speak.
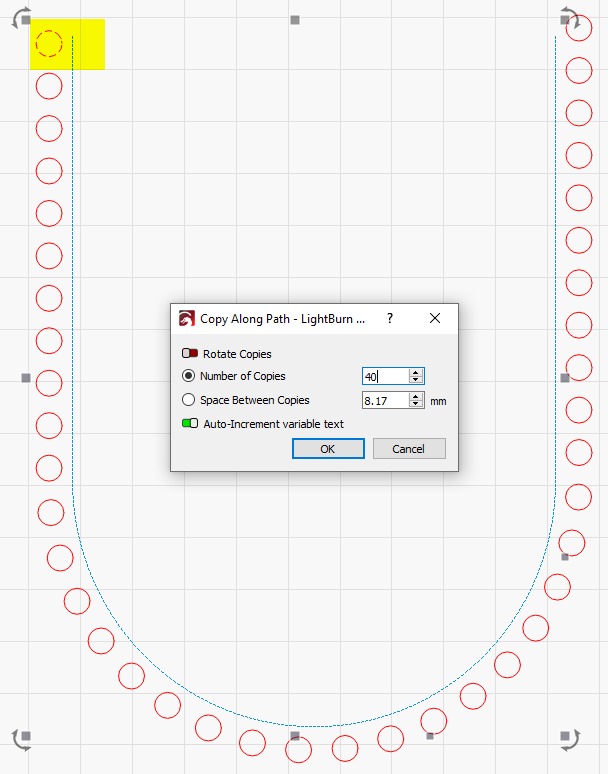
Can you help me understand the upward arc in my original post? I don’t understand why it followed the vertical lines but then inverted the curve at the bottom. It’s not at all what I would expect from your description.
So, essentially I was “left” of the origin by the width of the “U”. I would expect, from your description, to have a “U” shaped group of dots that was just completely left of the blue “U” line, not this behavior.
BTW, thanks for an amazing and incredibly inexpensive product for the functionality provided!
Based on Oz’s description I think this is what’s happening since the offset is consistent across the entire path. Keeping in mind that the start is on the top right…
Ok, I can kind of wrap my mind around that. It’s perpendicular to the tangent of the curve at the point where you place the dot. And the ones attached to the left side are on the right because it’s “upside down” at that point.
Thanks for the explanation.
So shouldn’t this one be all outside the arc then?
Yes. I would think so assuming that the start point was indeed on top right.
The left pointing arrow is interesting which in any case implies counter-clockwise direction. Can’t quite work out the path in that case but the direction is likely why still the inverted half circle.
I can’t quit reconcile this path. Again… going back to my comment yesterday that I’m not sure I could think through some of these cases in advance.
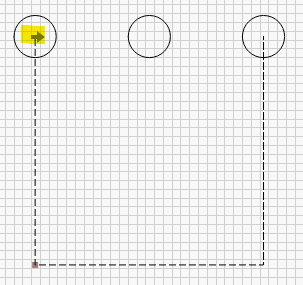
Check this out:
So clearly the copies are following the direction of the arrow… but didn’t expect to see the copy not need to be on the actual path.
I think the lower-left node is somehow involved in this but not certain.
[EDIT]
I suspect the node locations shown in the Start Point Editor screenshot may actually be a bug. I don’t think the lower-left node should be there. There should be 2 nodes, one at the start and one at the end of the path. I also don’t think the arrow should be pointing opposite the direction of the path.
Breaking apart and rejoining cleans this up and results in preditable path copies.