This is great… Very much appreciated.
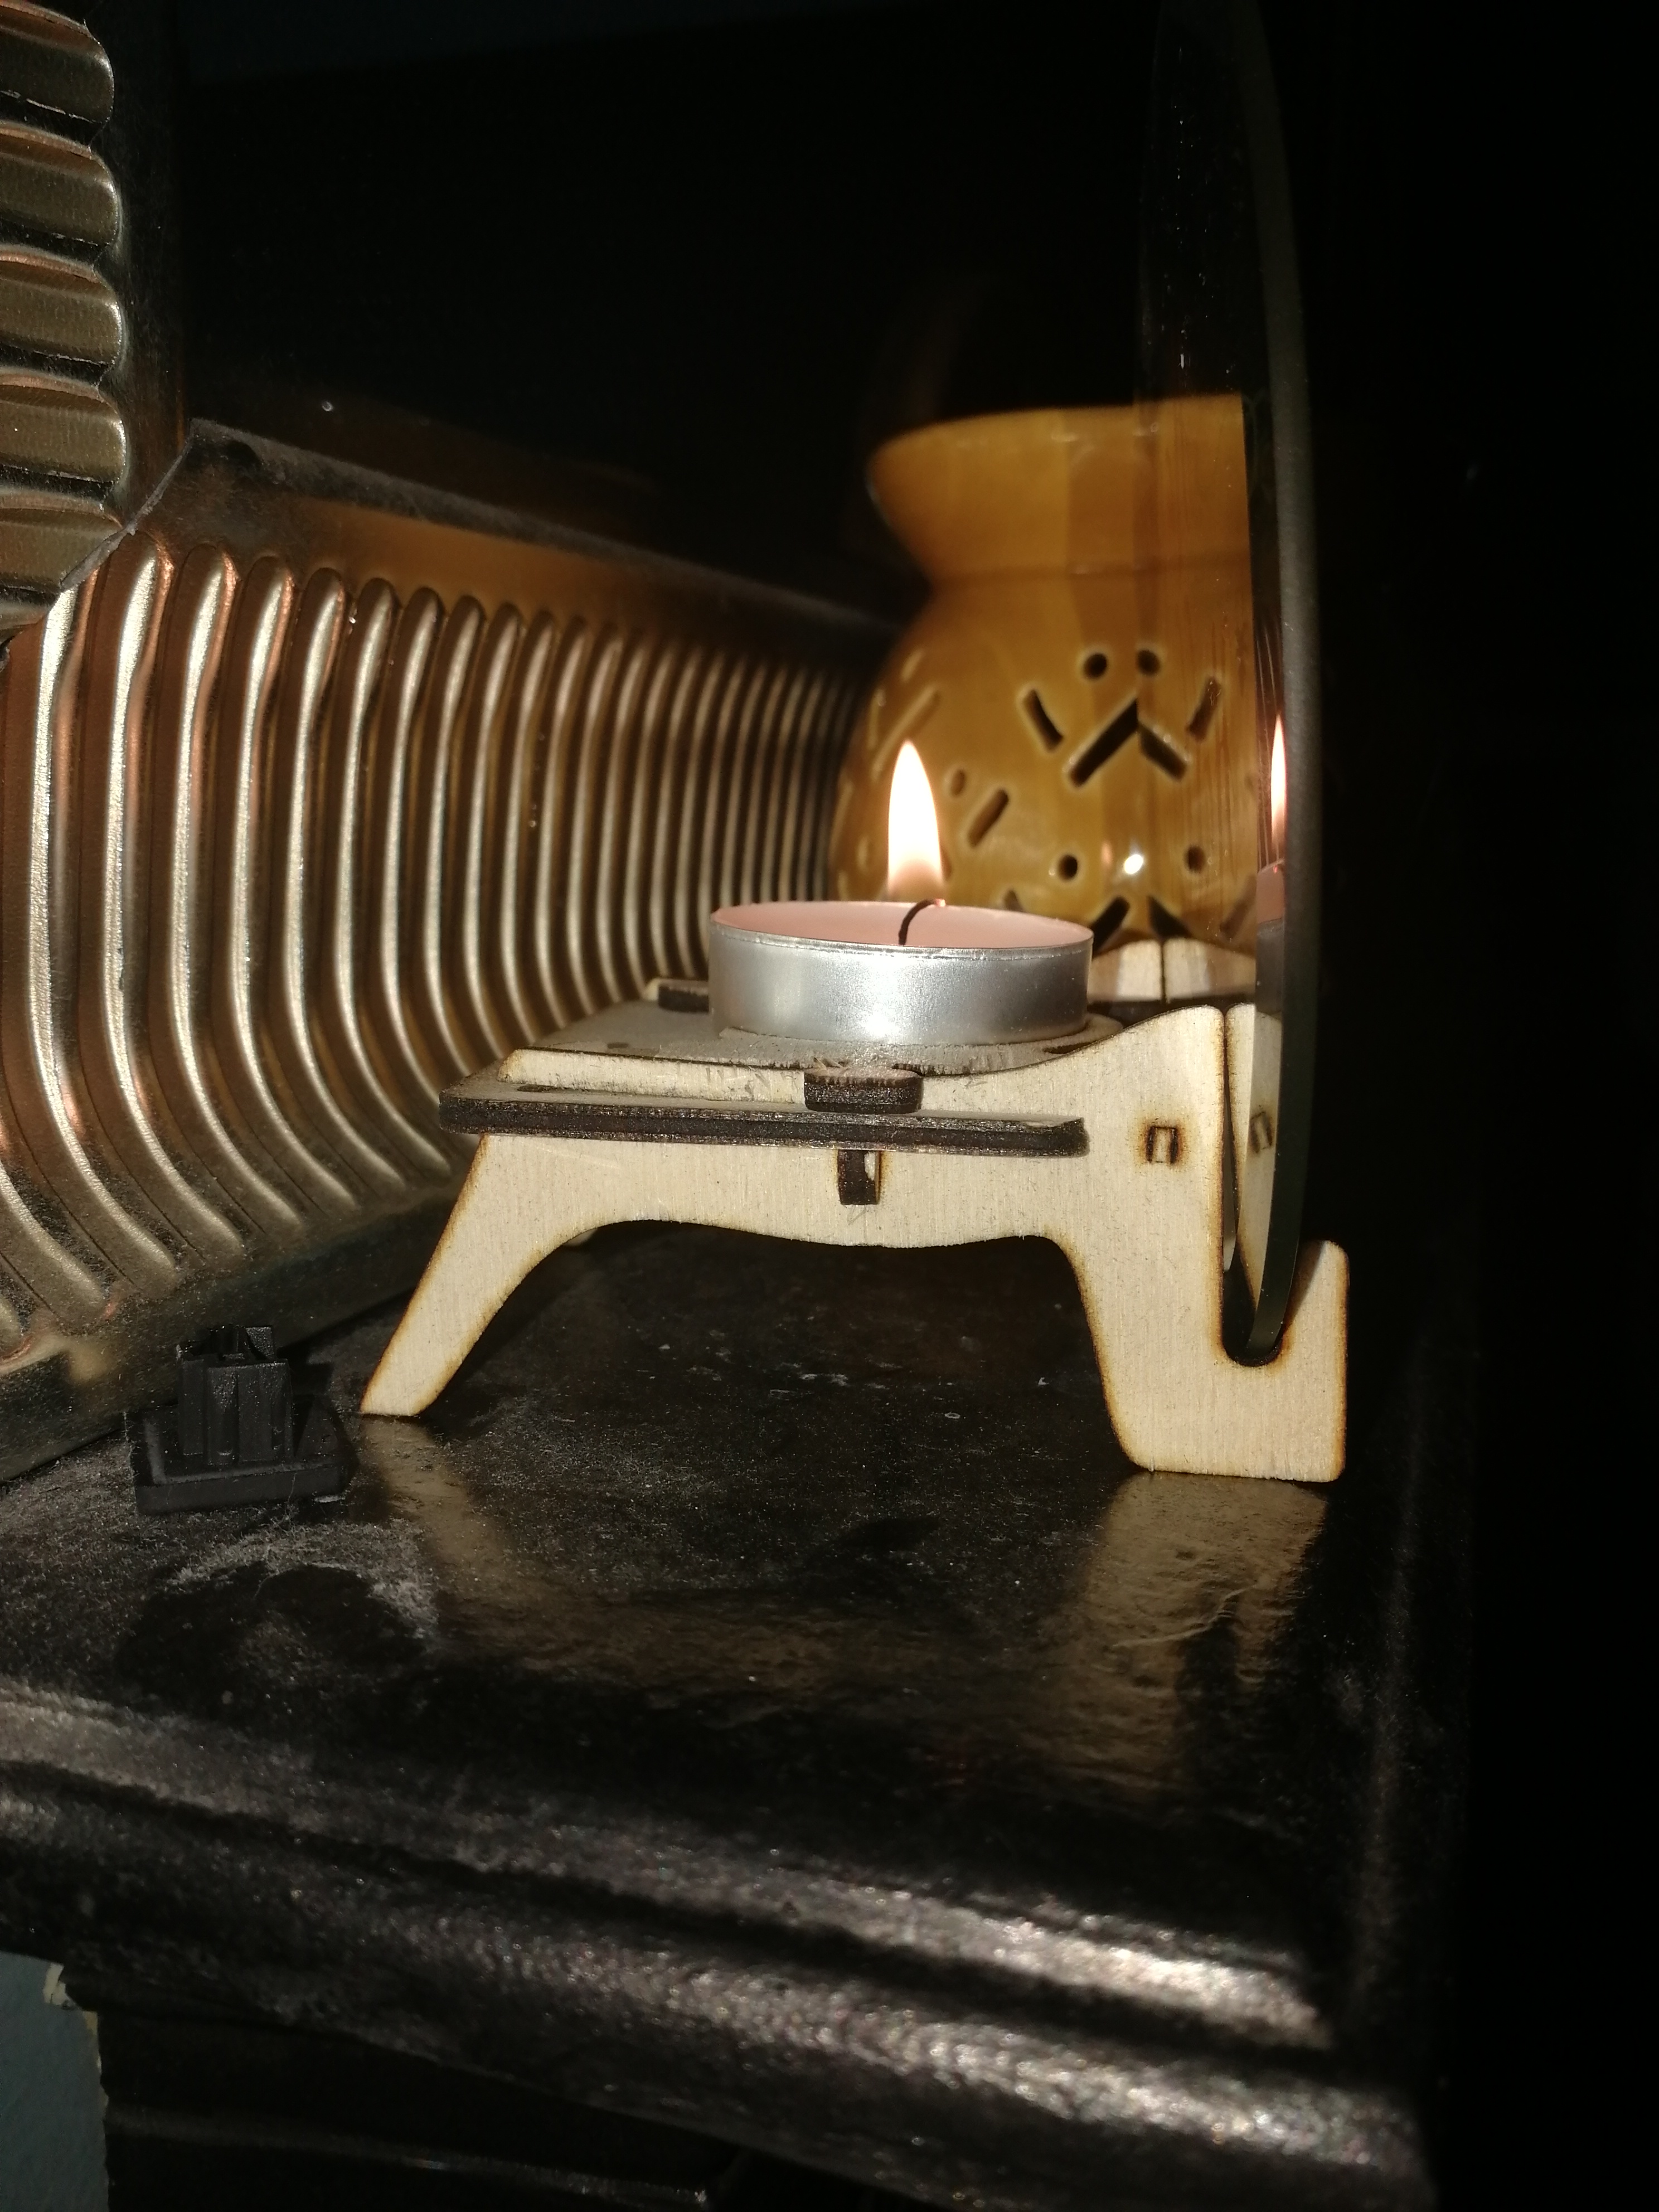
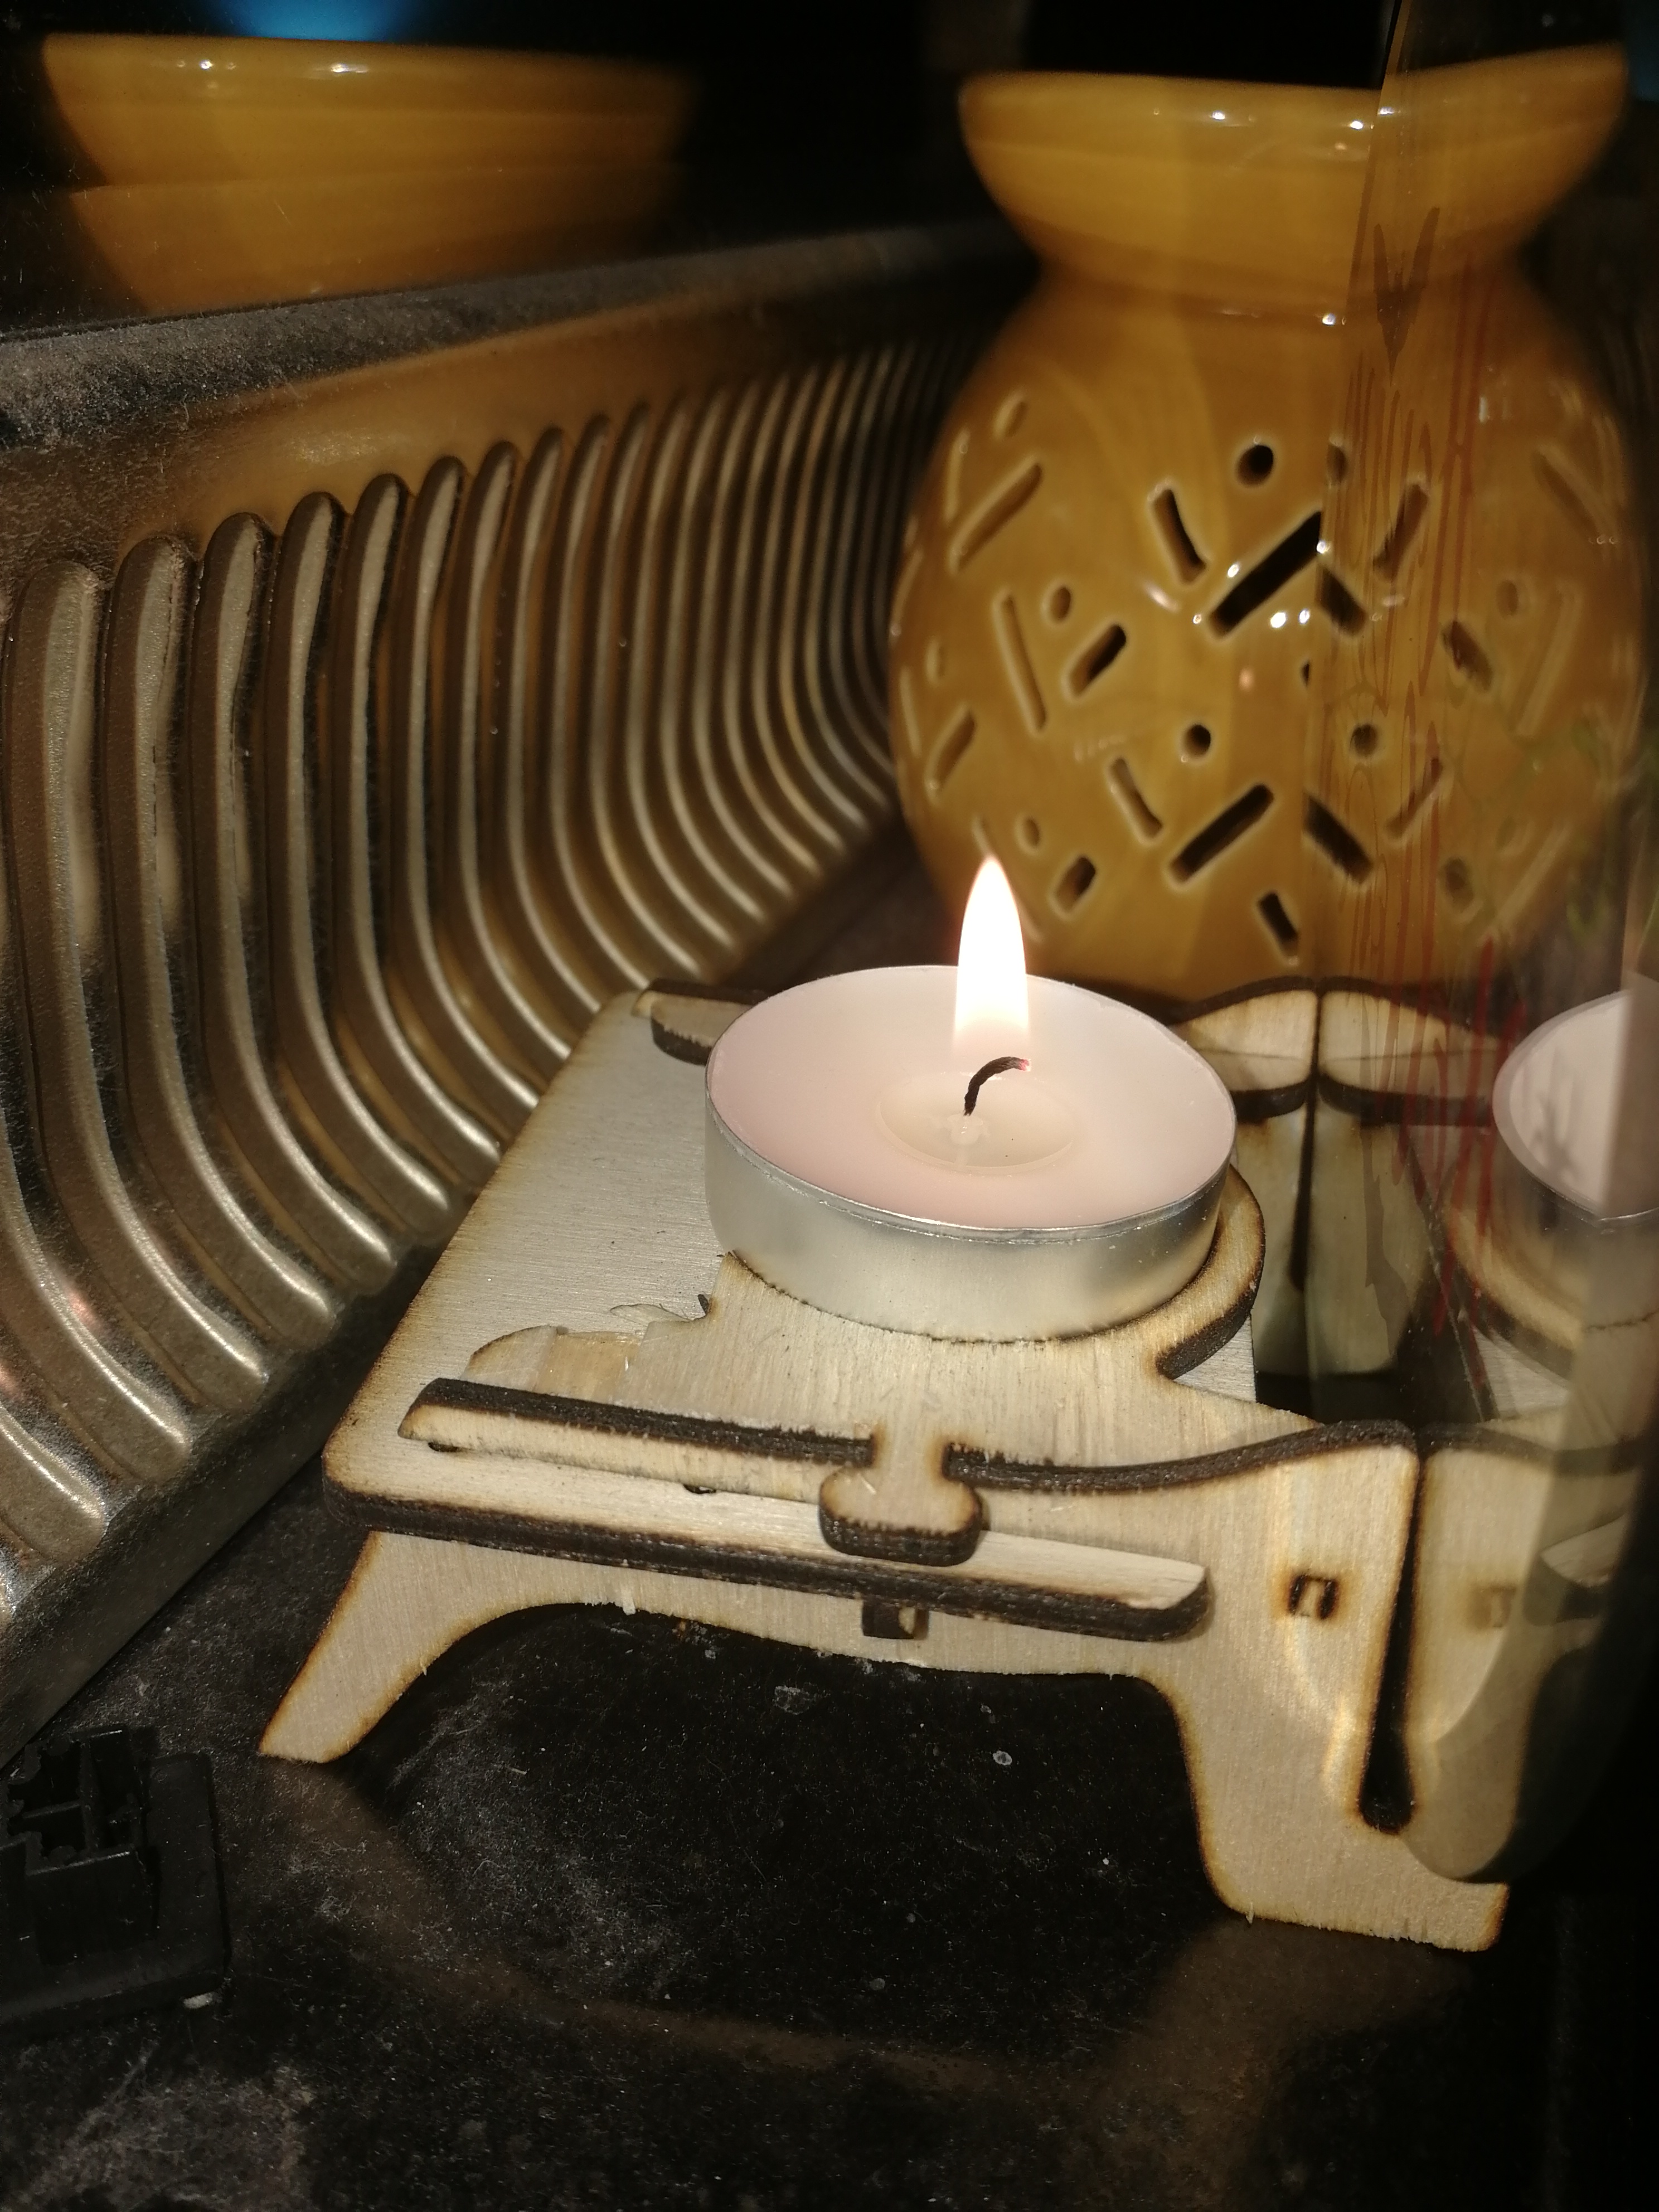
I can now finally get some tealights behind my mirrors
This is great… Very much appreciated.
I can now finally get some tealights behind my mirrors
Be sure to upload a pic when you have one built. I’d like to see first hand how they turned out
The tealight holder is ace.
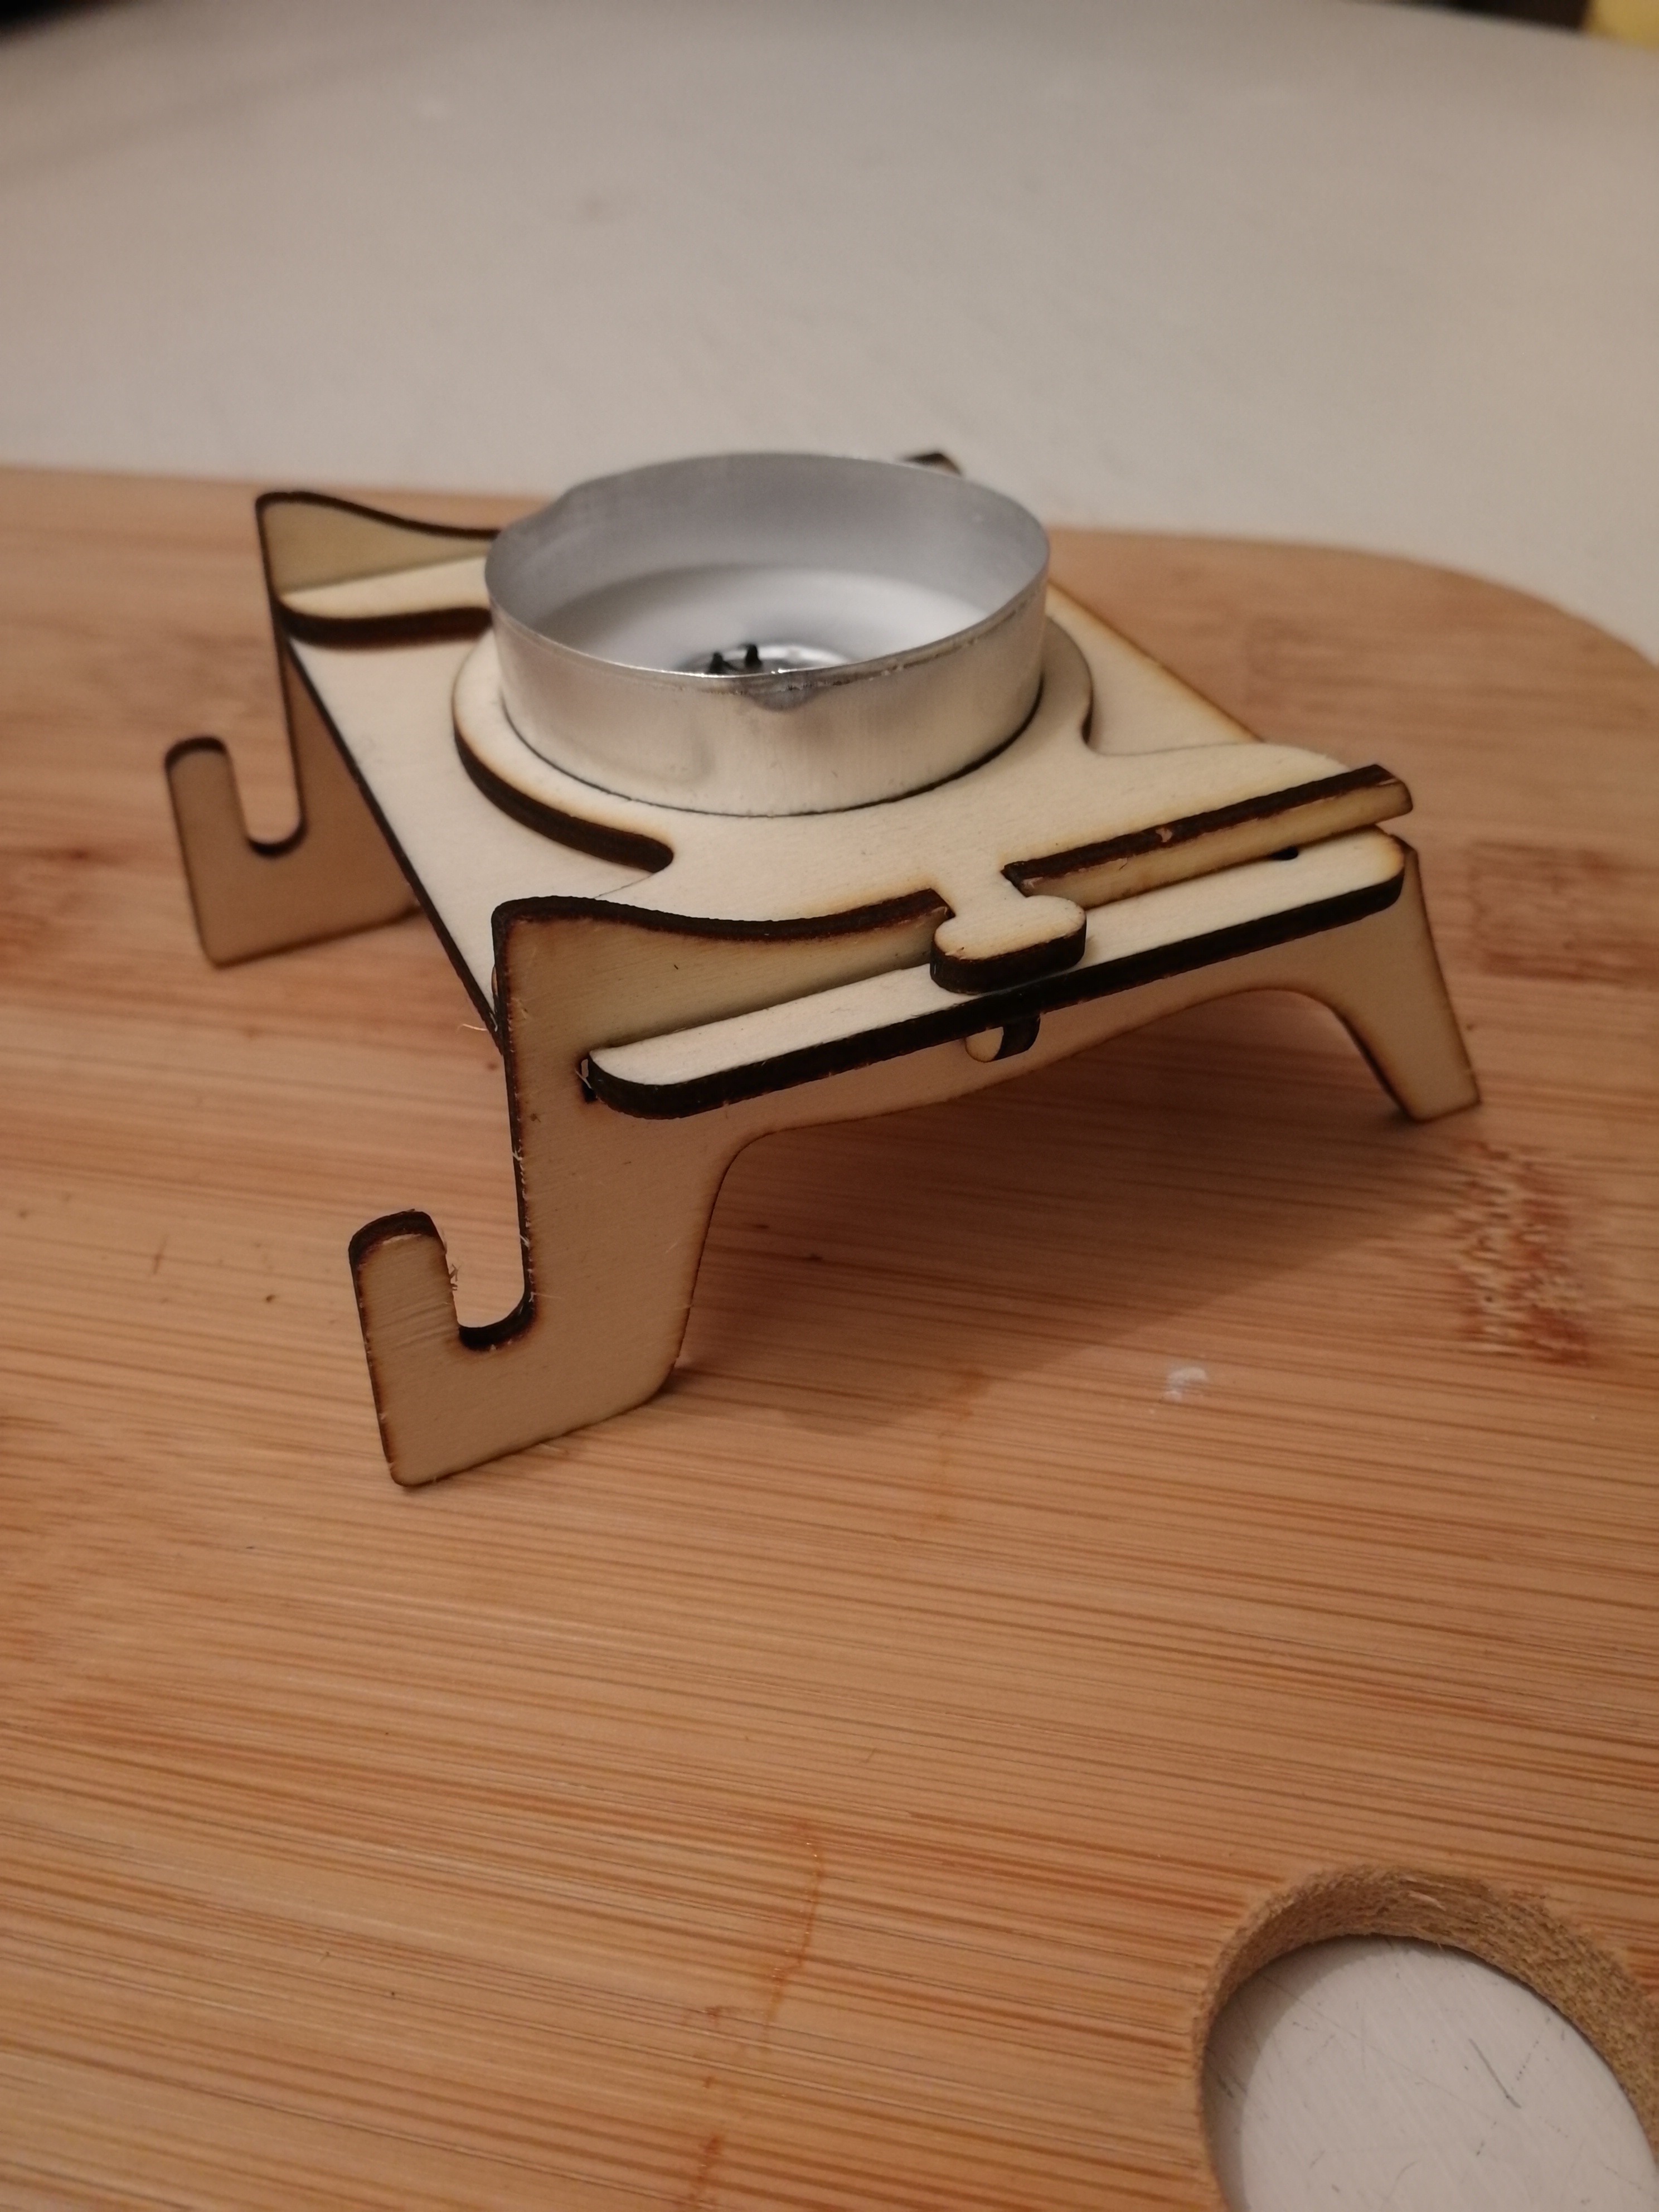
Unfortunately my diode is just too inconsistent to cut it… I managed the legs, cross beam and top but the circle was just a disaster…
Love the holder though.
Is there anyone out there who could cut say 20 of these for me… Happy to meet costs obviously???
I have now opted to cut this in 2mm ply as this is far easier for my diode to cope with!
How would I make the design for 2mm ply… I have tried to manipulate the file but I’m confusing myself…
The overall size of the design is fine but the slots are just slightly too wide to make a really rigid structure when joined together.
Joshua, is that your design? I really like it. There are some nice details in the little candle holder. 
Yes it is. I just added a few things I thought could be an improvement over the pictured version at the top of the thread. Designing files is what I like to do best.
Here is the updated file requested for 2mm. I just added the revised 2mm version to the original 3mm version so you can now have both files in one for convenience. Enjoy.
(DOWNLOAD) > Tea Light Stand 2mm+3mm
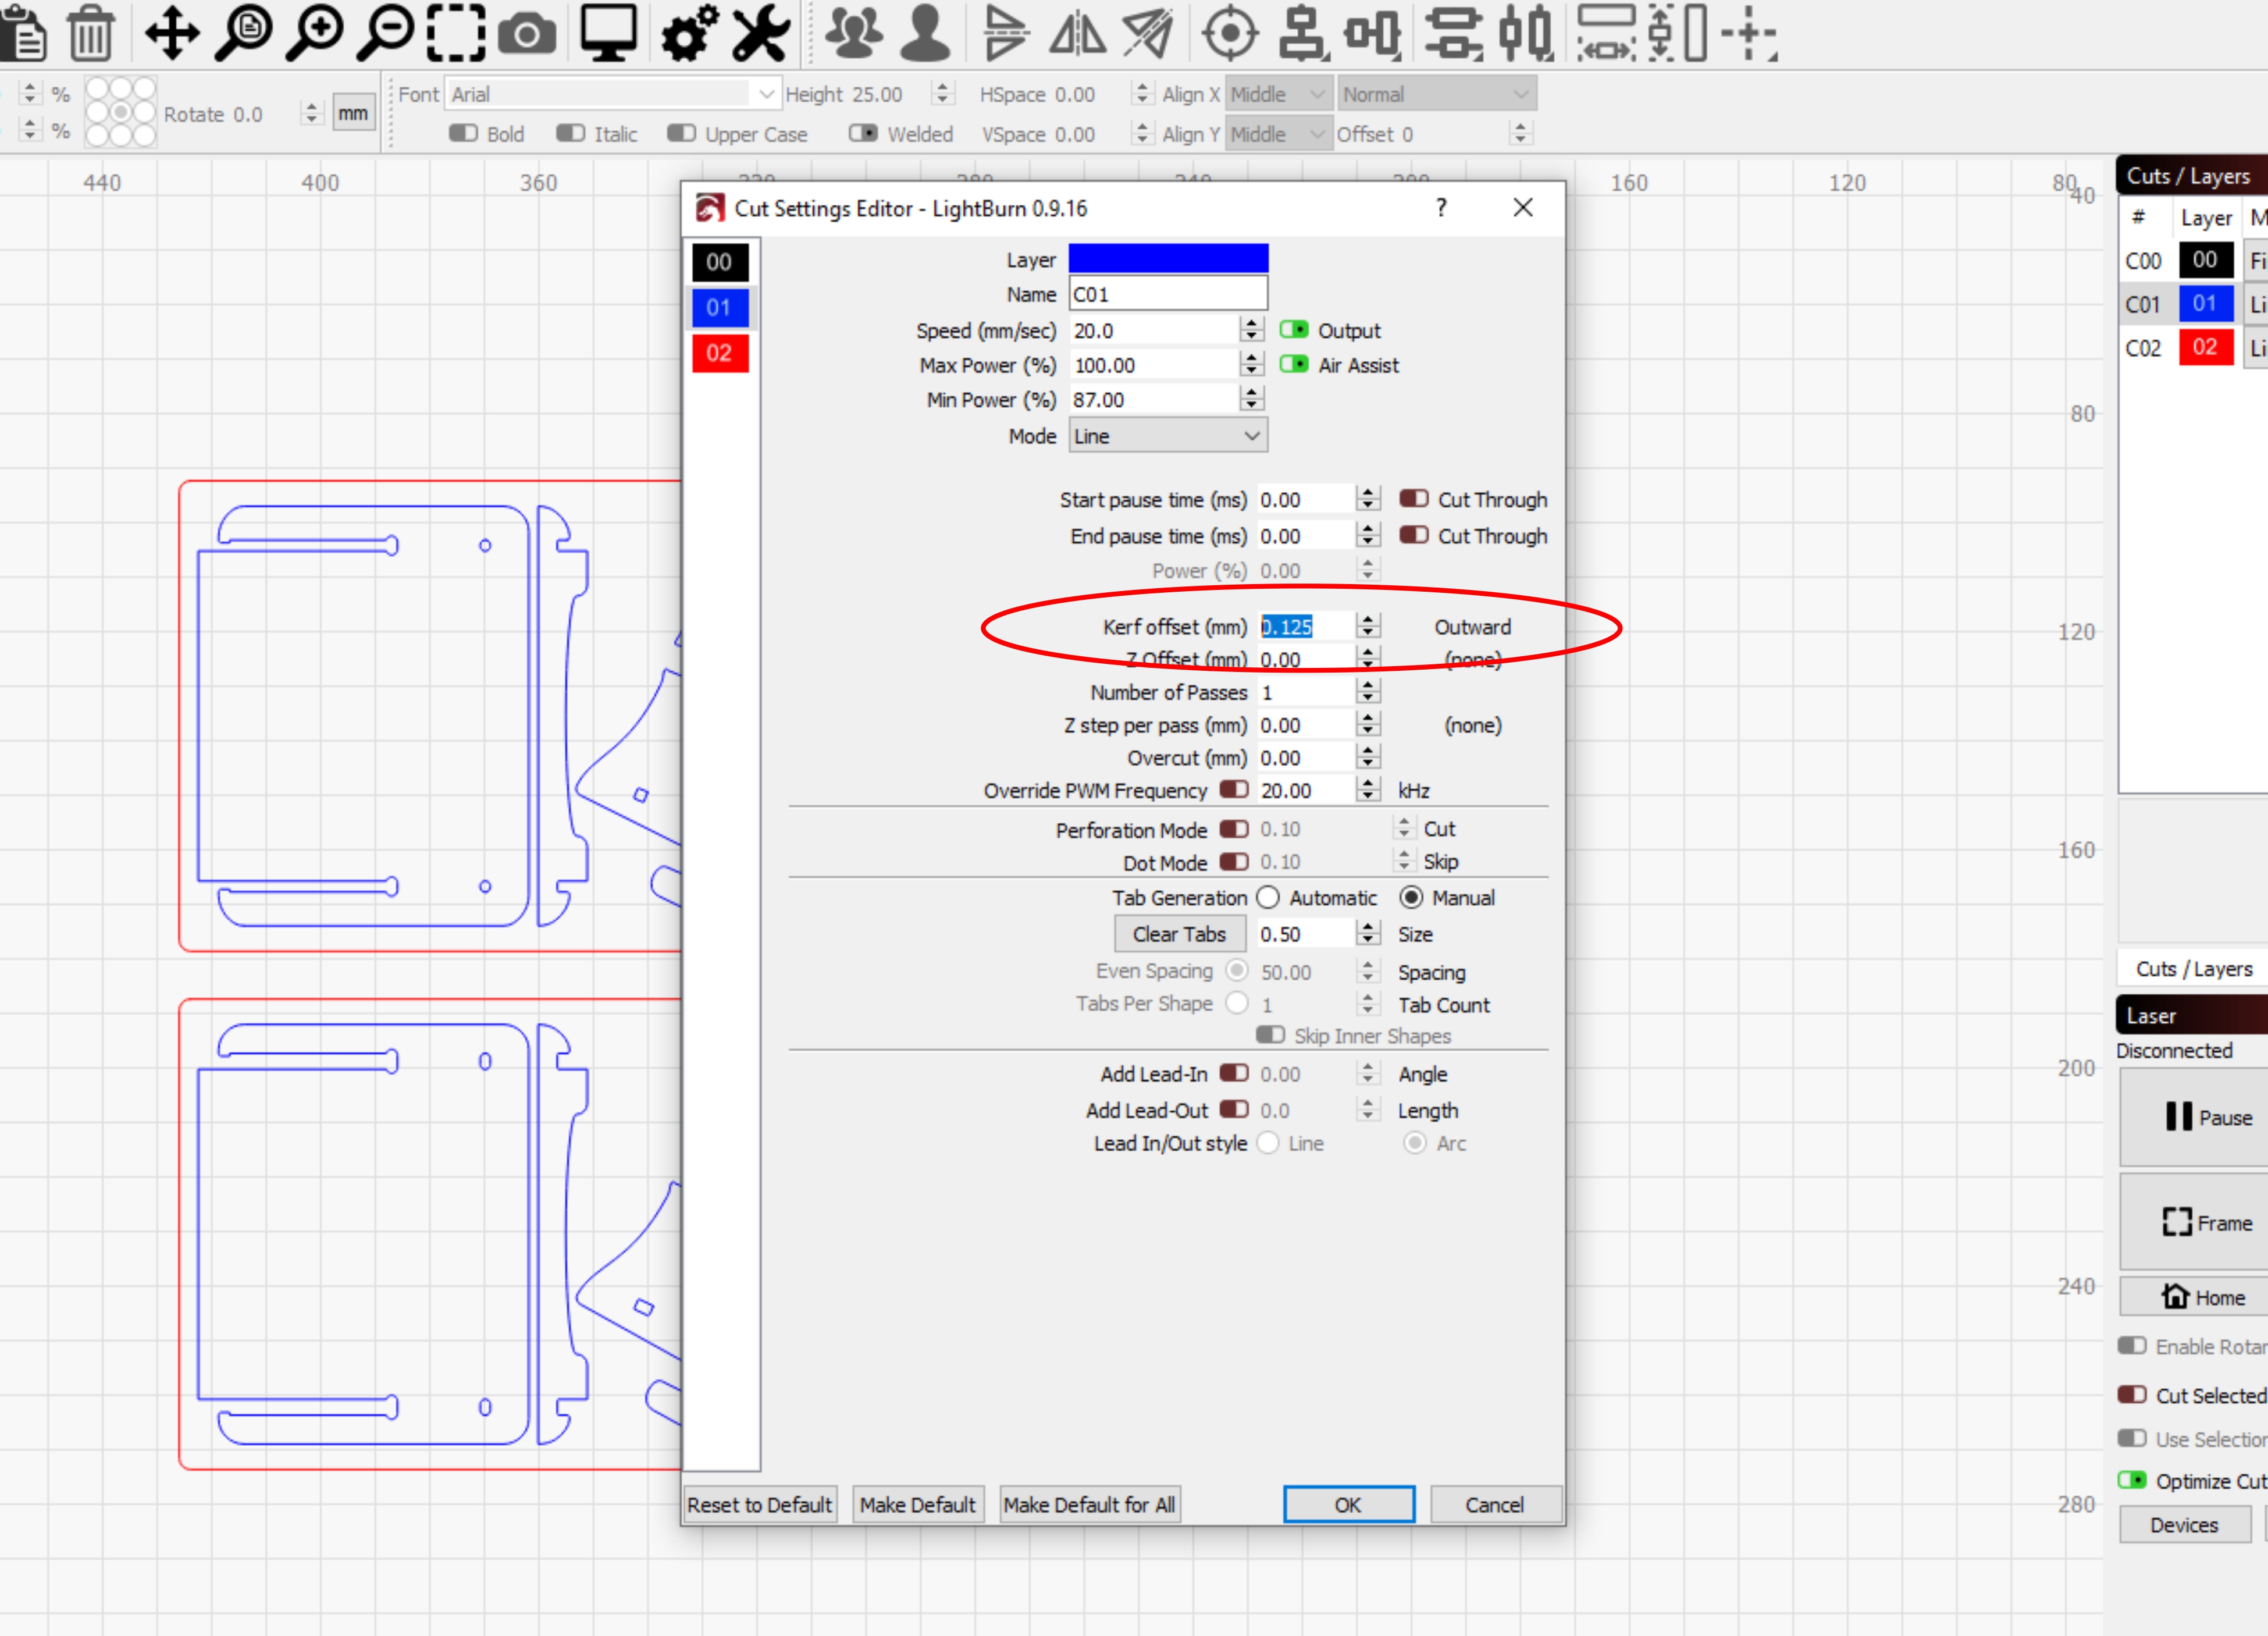
Are you aware that there is a “Kerf” setting in the job parameters setup? You can simply add the numbers to the Kerf box and it will cut inside the line radius by the amount you entered. If it is just slightly loose, you could ad say, 0.125mm of kerf and try that.
That’s is fantastic… Very much appreciated.
Can you explain ‘kerf’ to me… I have a diode laser so does this make any difference???
Instead of a saw like in the video above, you’re blade is a beam of light. A certain amount of excess is removed from outer points of the absolute center of your beam focus point.
IE. if your beam was 3mm lets say. (Which I know that is way larger, but easier to explain.)
When you cut through the material on a fine line, you are loosing 3mm total from the blade.
Considering you are cutting down the center of said line, this means you’re effectively going to loose 1.5mm on each side of the line. This is Kerf. To prevent this, you need to cut your parts with an outer kerf of half your beam size in order to prevent losing that true edge parameter.
NOTE- The down side to using this setting on something that has both inner and out cut lines like the tea light file has, you would be making the inner holes larger than they should be. So you would want to use an inner -Kerf in this instance to have the beam cut the holes or inner ports to a smaller diameter.
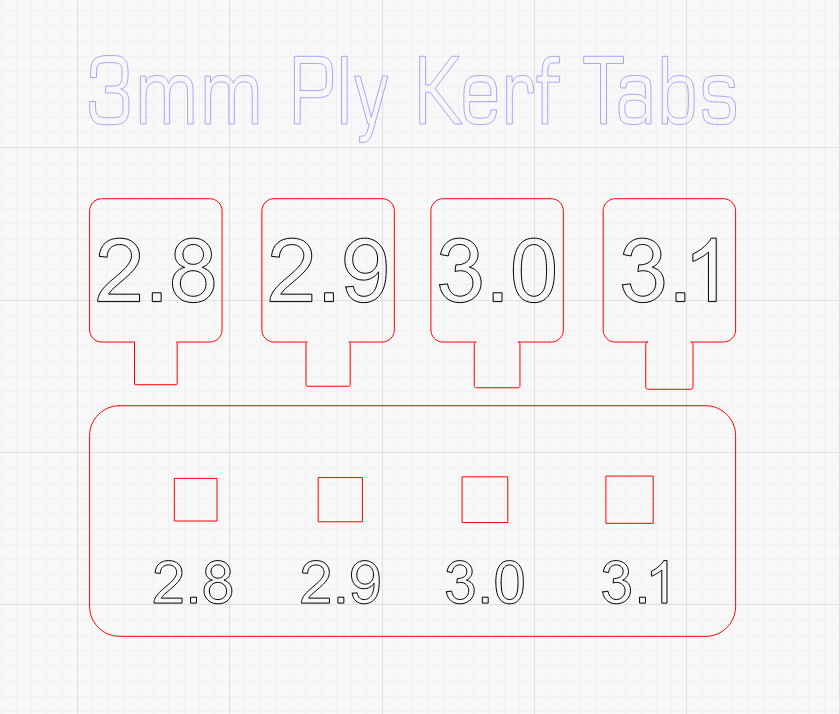
Here you go, try this file I made for you out. DOWNLOAD> 3mm Kerf Test File
Just etch or lightly vector mark the numbers and set the red lines to cut at the speed and power your laser requires to cut it out. Once it’s done, take those male tabs and see which one fits tightest without being to tight, then this will tell you roughly what your optimal Kerf adjustments are in 0.1 increments.