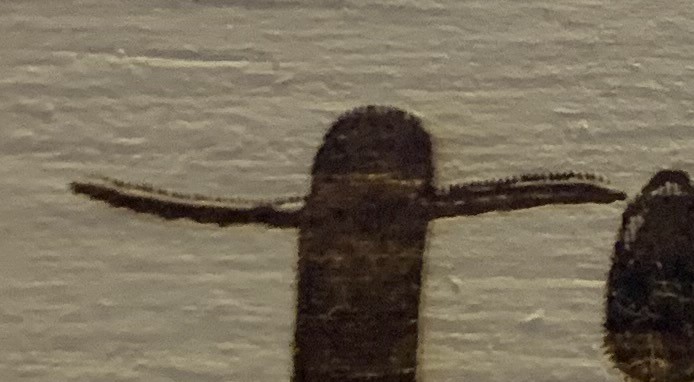
Most burning on the laser (it is an Ortur LM2) tends to happen solely on the x-axis, but obviously this causes it to start burning along the y-axis. Is this just a settings issue, or is this a hardware issue (loose belt or something)? Thanks.
Can you post your cut settings, and what is the size of the actual image we are looking at. It looks like the picture is a very close up of a project, but it is hard to tell if the mismatch is say 0.1mm or 1mm?
If I were to take a guess in the dark, I would guess a loose belt, or you need to turn on overscanning.
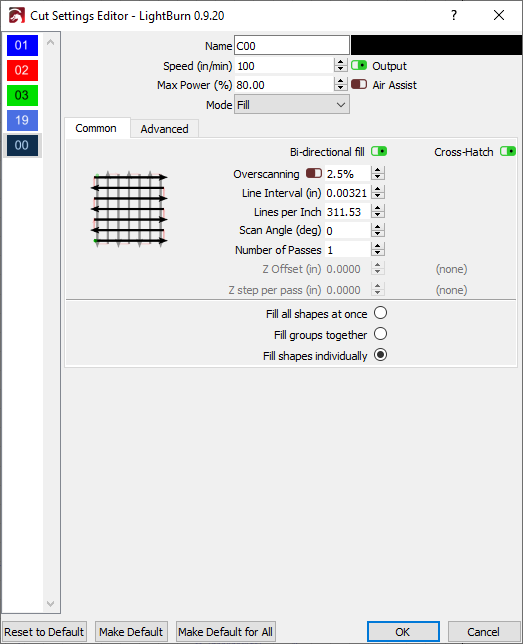
Thanks Tyler. I have included the settings below. Yes, it is a close-up so that I could show the detail. In this case, the letter “T” in question is actually about 3/4" big on the piece of wood. It is not the only letter to experience the issue, just one that was easily shown. Some of the others are bigger, some smaller. I can try over scanning if you think that will help. As for the belt, I can play with those, but I haven’t seen any instuctions on the best practice for tightening. If anyone knows of any for the Lasermaster 2 (not the other model), that would be great. Thanks!
Yes, try turning the overscanning on.
To tighten the belt, I grab the tail with pliers and rotate them up, so they rotate against the acrylic while tightening the screw. I can post an example picture if it is needed.
I did try overscanning at the default setting (2.5%) and that helped a little bit, but I still see some issues. As for the tightening, I think I get what you’re saying. If you don’t mind posting an example picture when you get a chance, I certainly would not mind.
I have mine housed in a box to contain the smoke and extract the smoke to outside, so it is hard to get a picture of the whole process, but I think this gets the point across without disassembling mine. This let’s me hold the tension where I want it while I lock it down with the screw. You don’t want the belt banjo tight. You should be able to push on the belt between the carriage rollers and the motor and get some deflection ( I run mine with about 3mm deflection).
Thanks again Tyler. I actually managed to get it working pretty well without tightening the belt. I used overscanning as we discussed, but then also changed the scan angle to -15 degrees. That made a huge difference. Finally, there was a tiny bit left that was barely noticeable, but being a perfectionist, I changed my setting to Fill & Line (instead of just Fill) and for the line setting I set the power and speed to be the same as fill, and the kerf setting to 0.00065 (outward) and had it do a few passes. This cleaned up any additional excess.
Very good. I think most of the issue is the vibration/flex from the direction change. Adding more overscanning may help to give them time to dissipate and get the laser up to speed before the laser fires on the return trip. I’m glad you have settled on a process that gives you the results you are after.