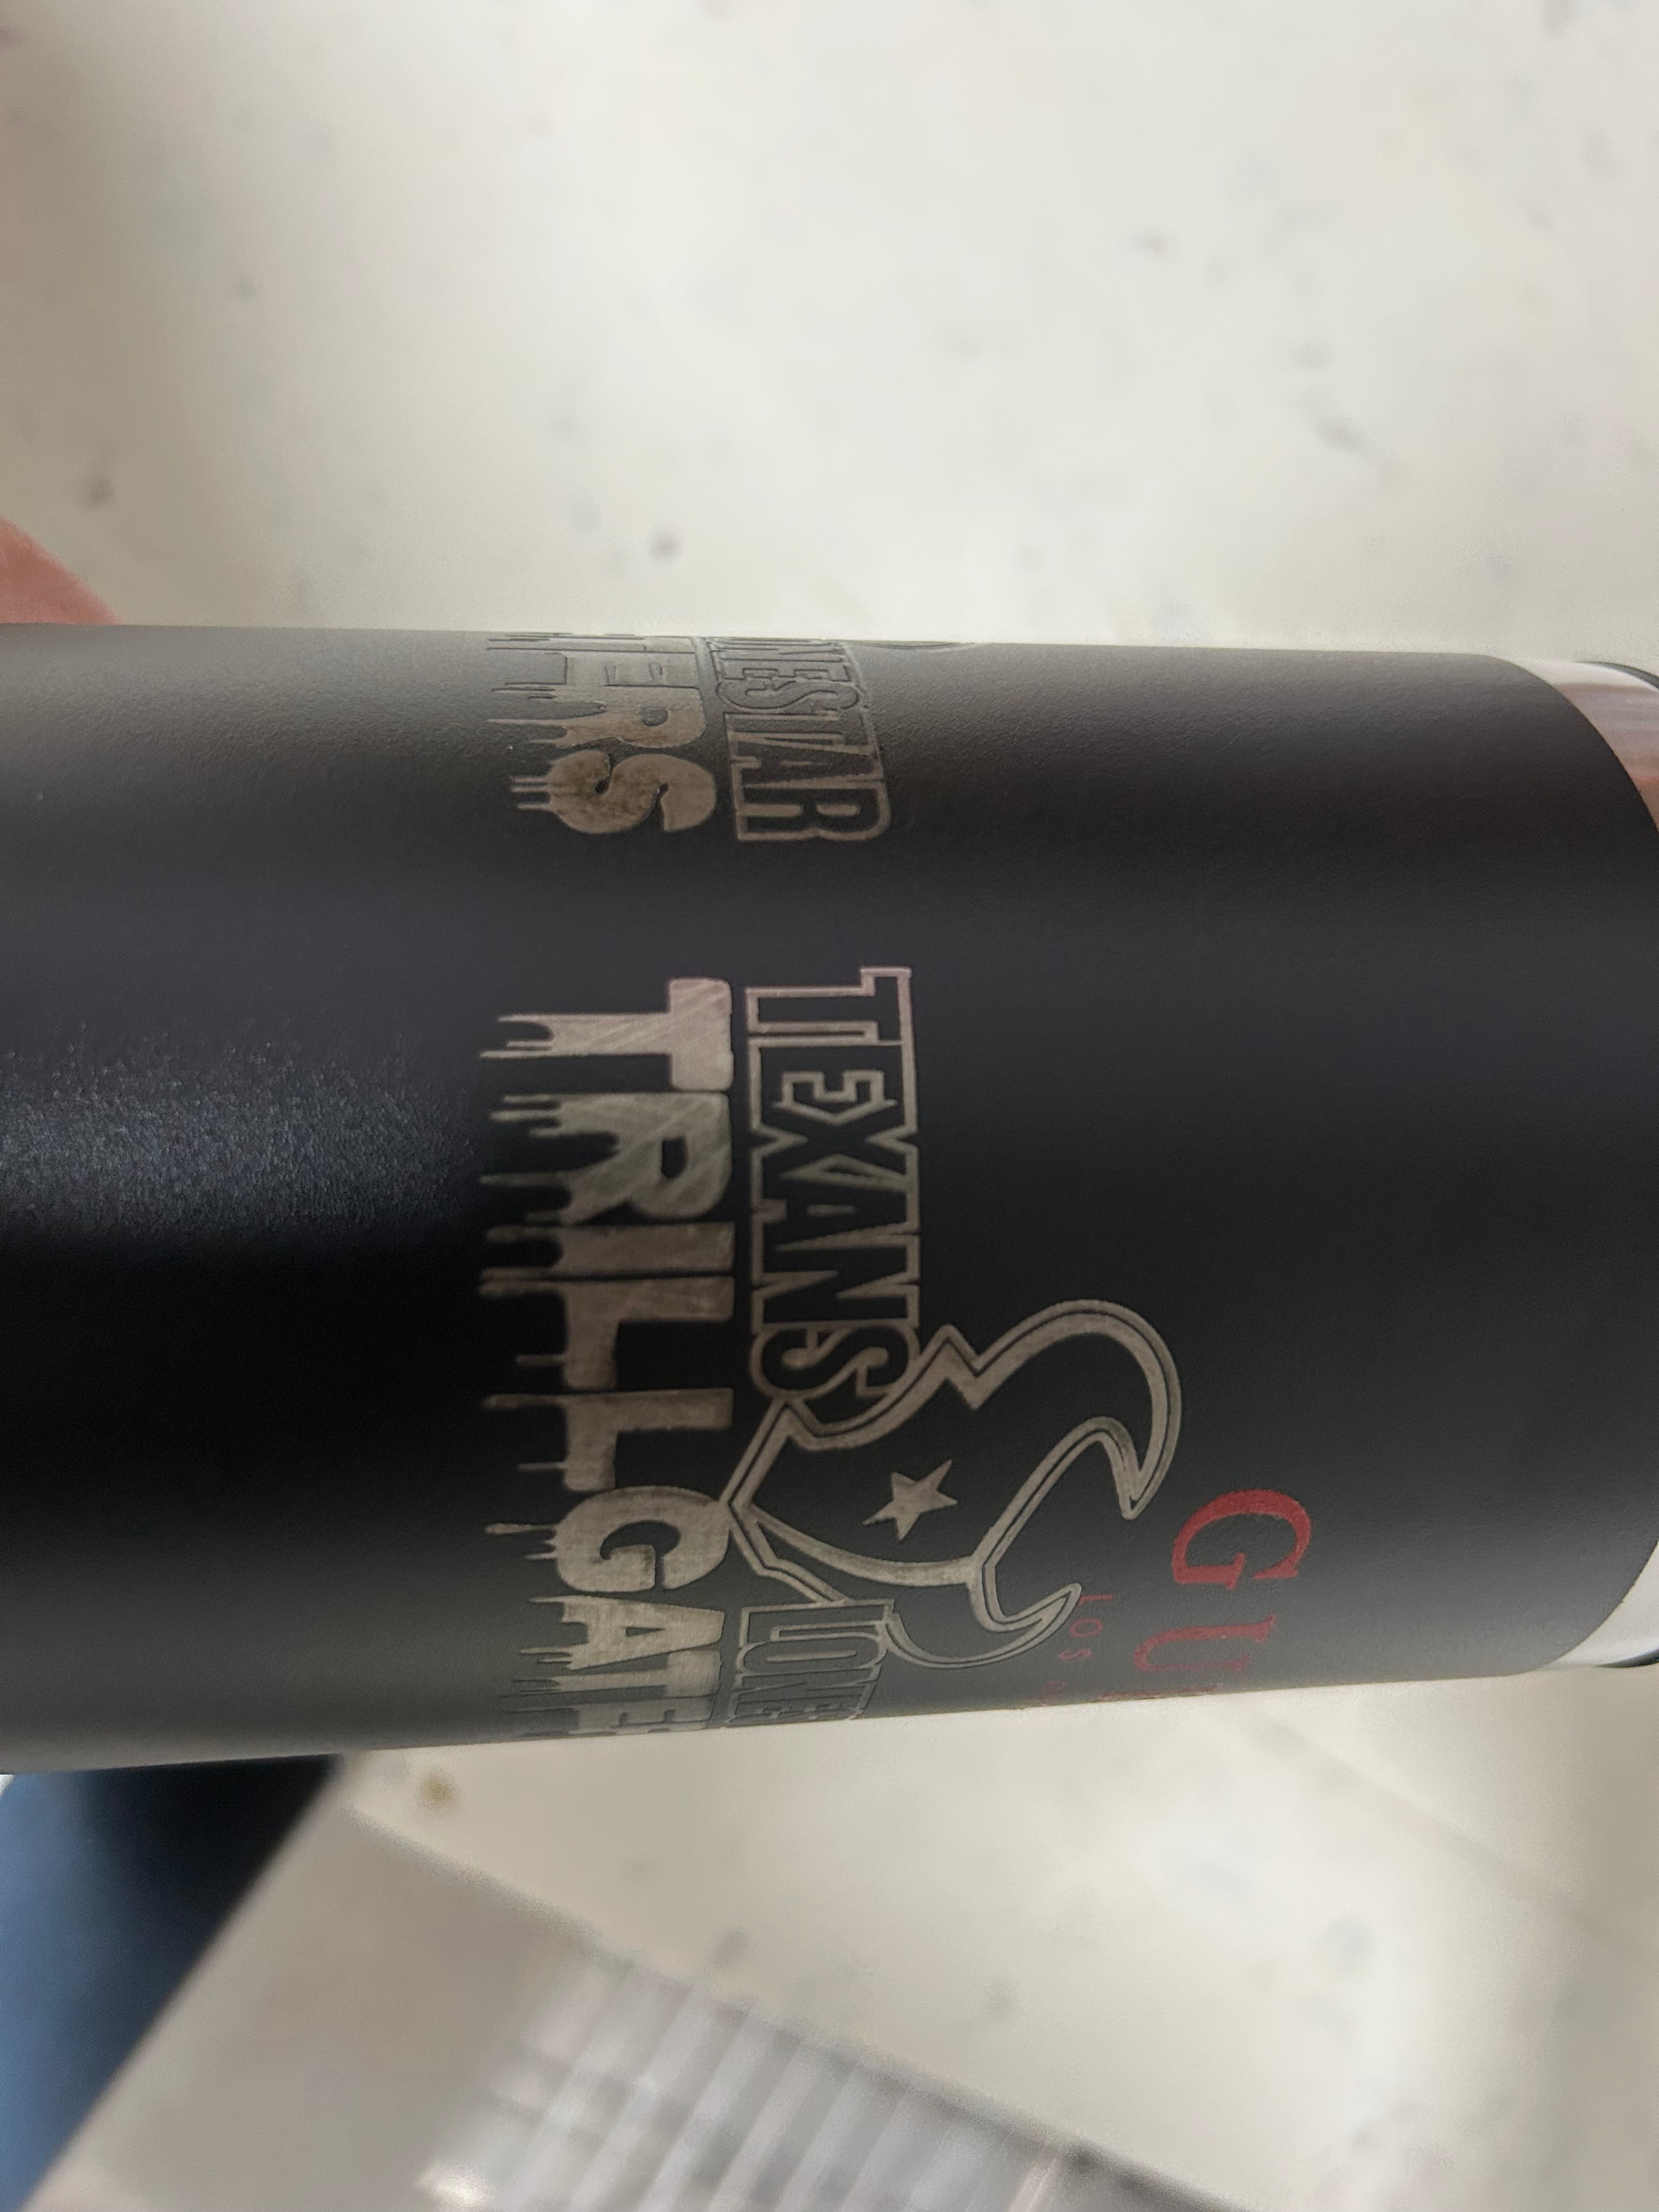
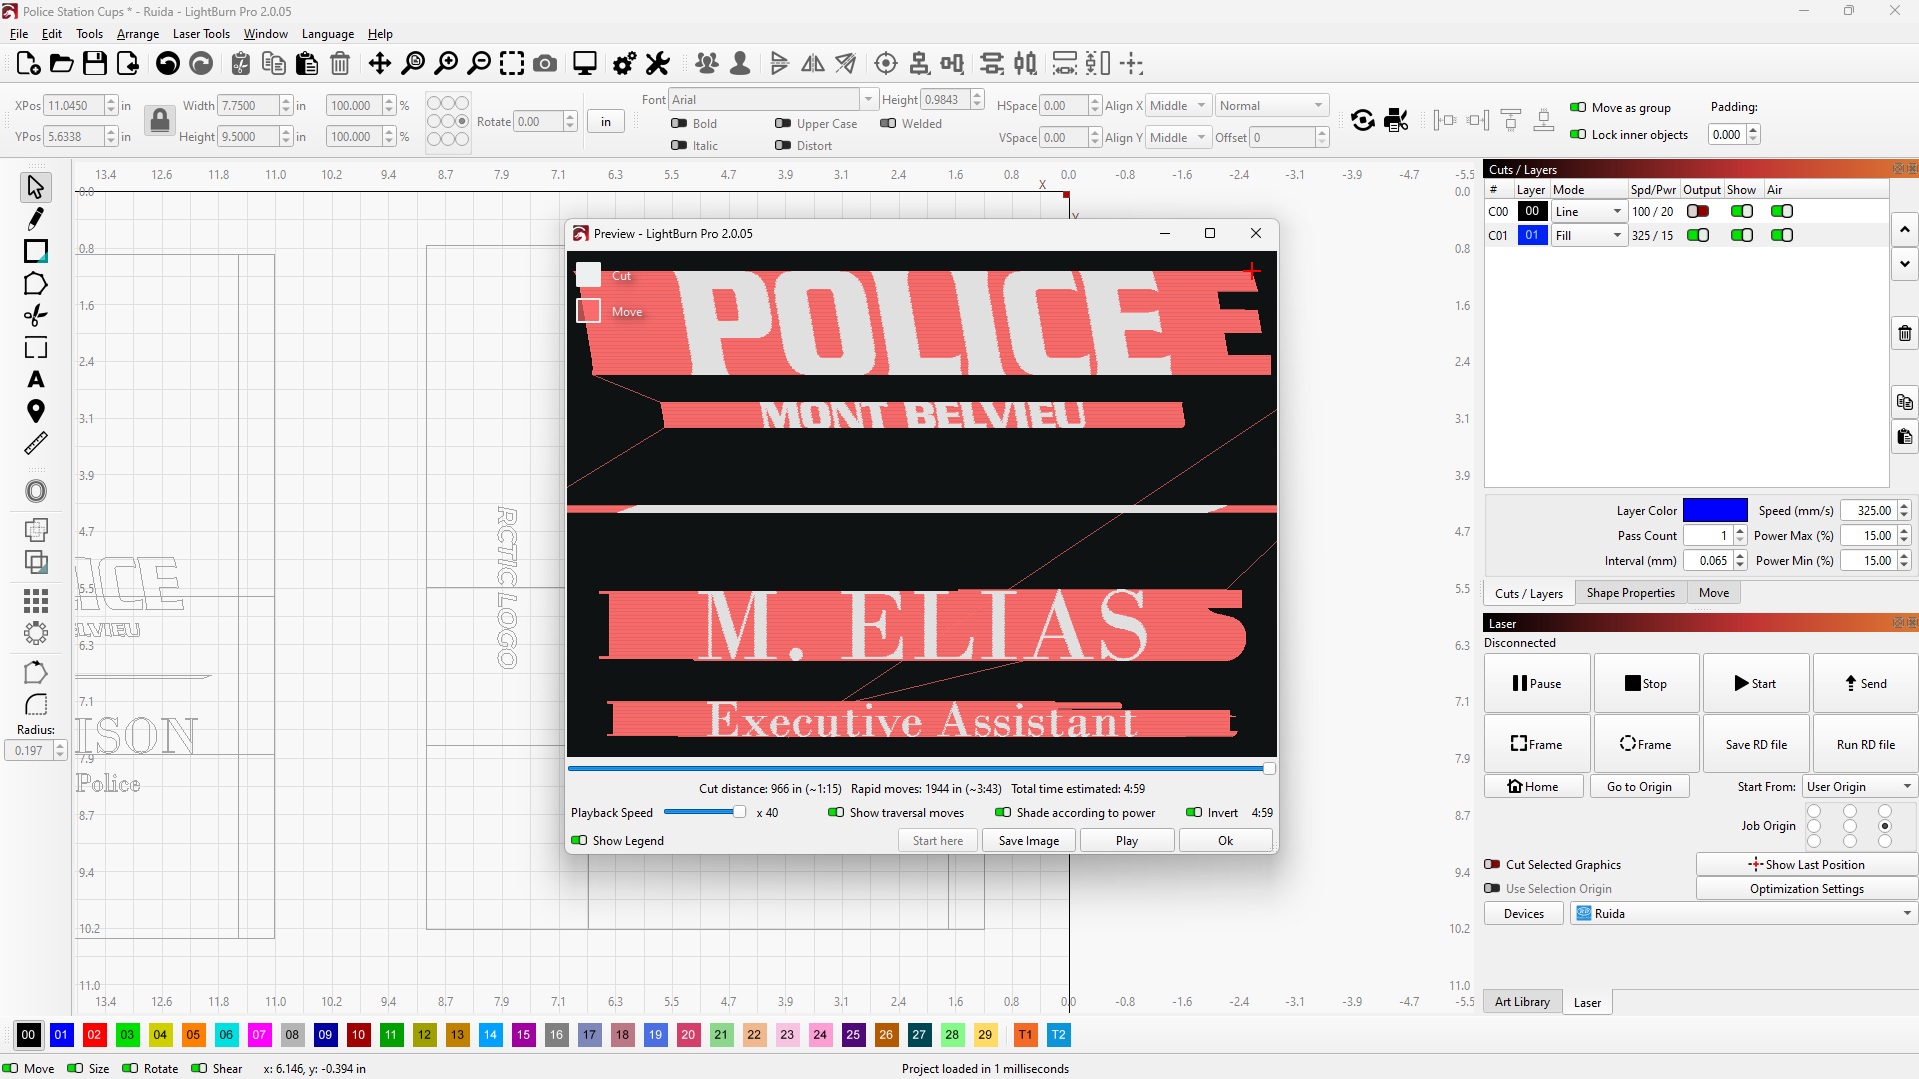
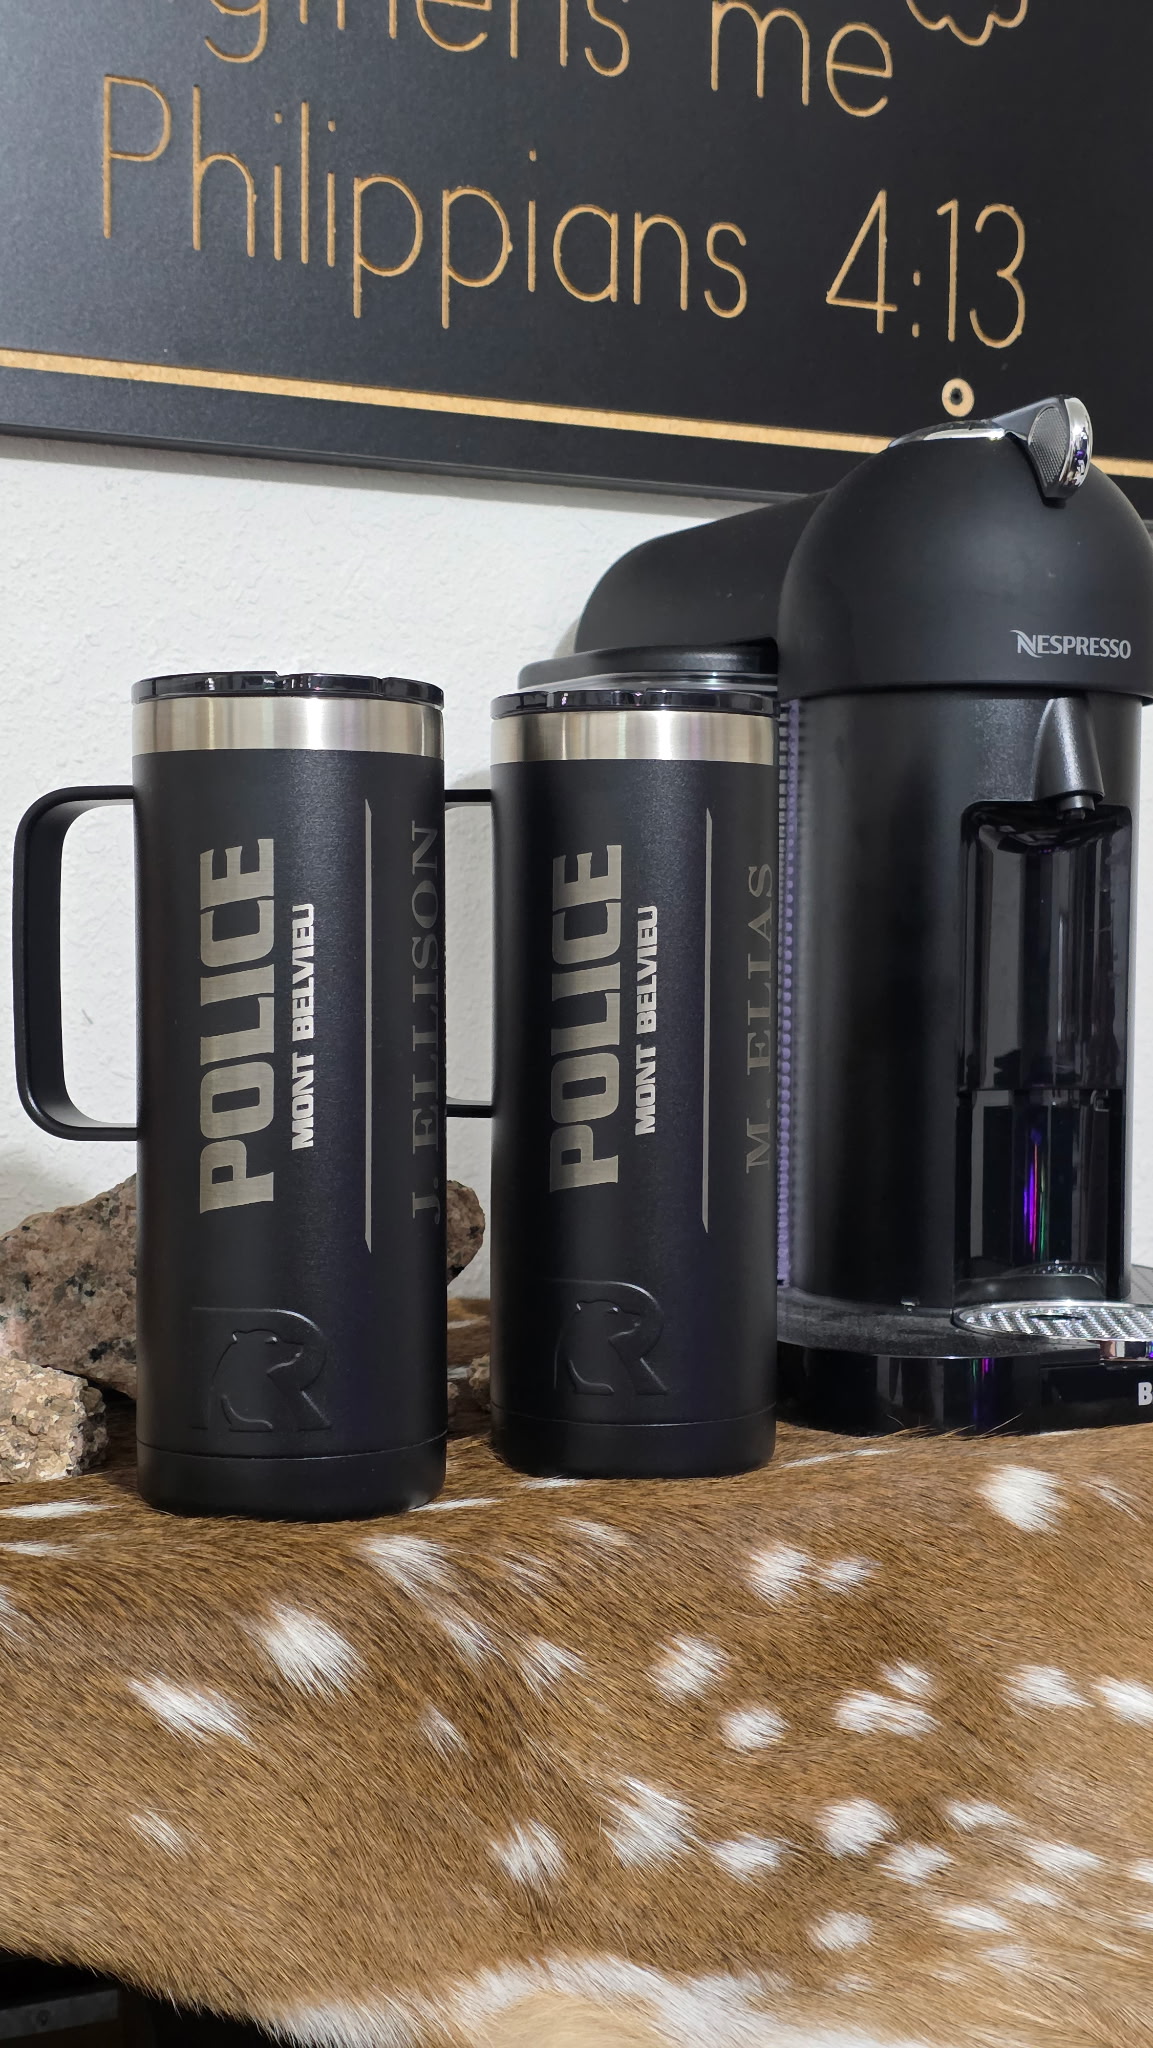
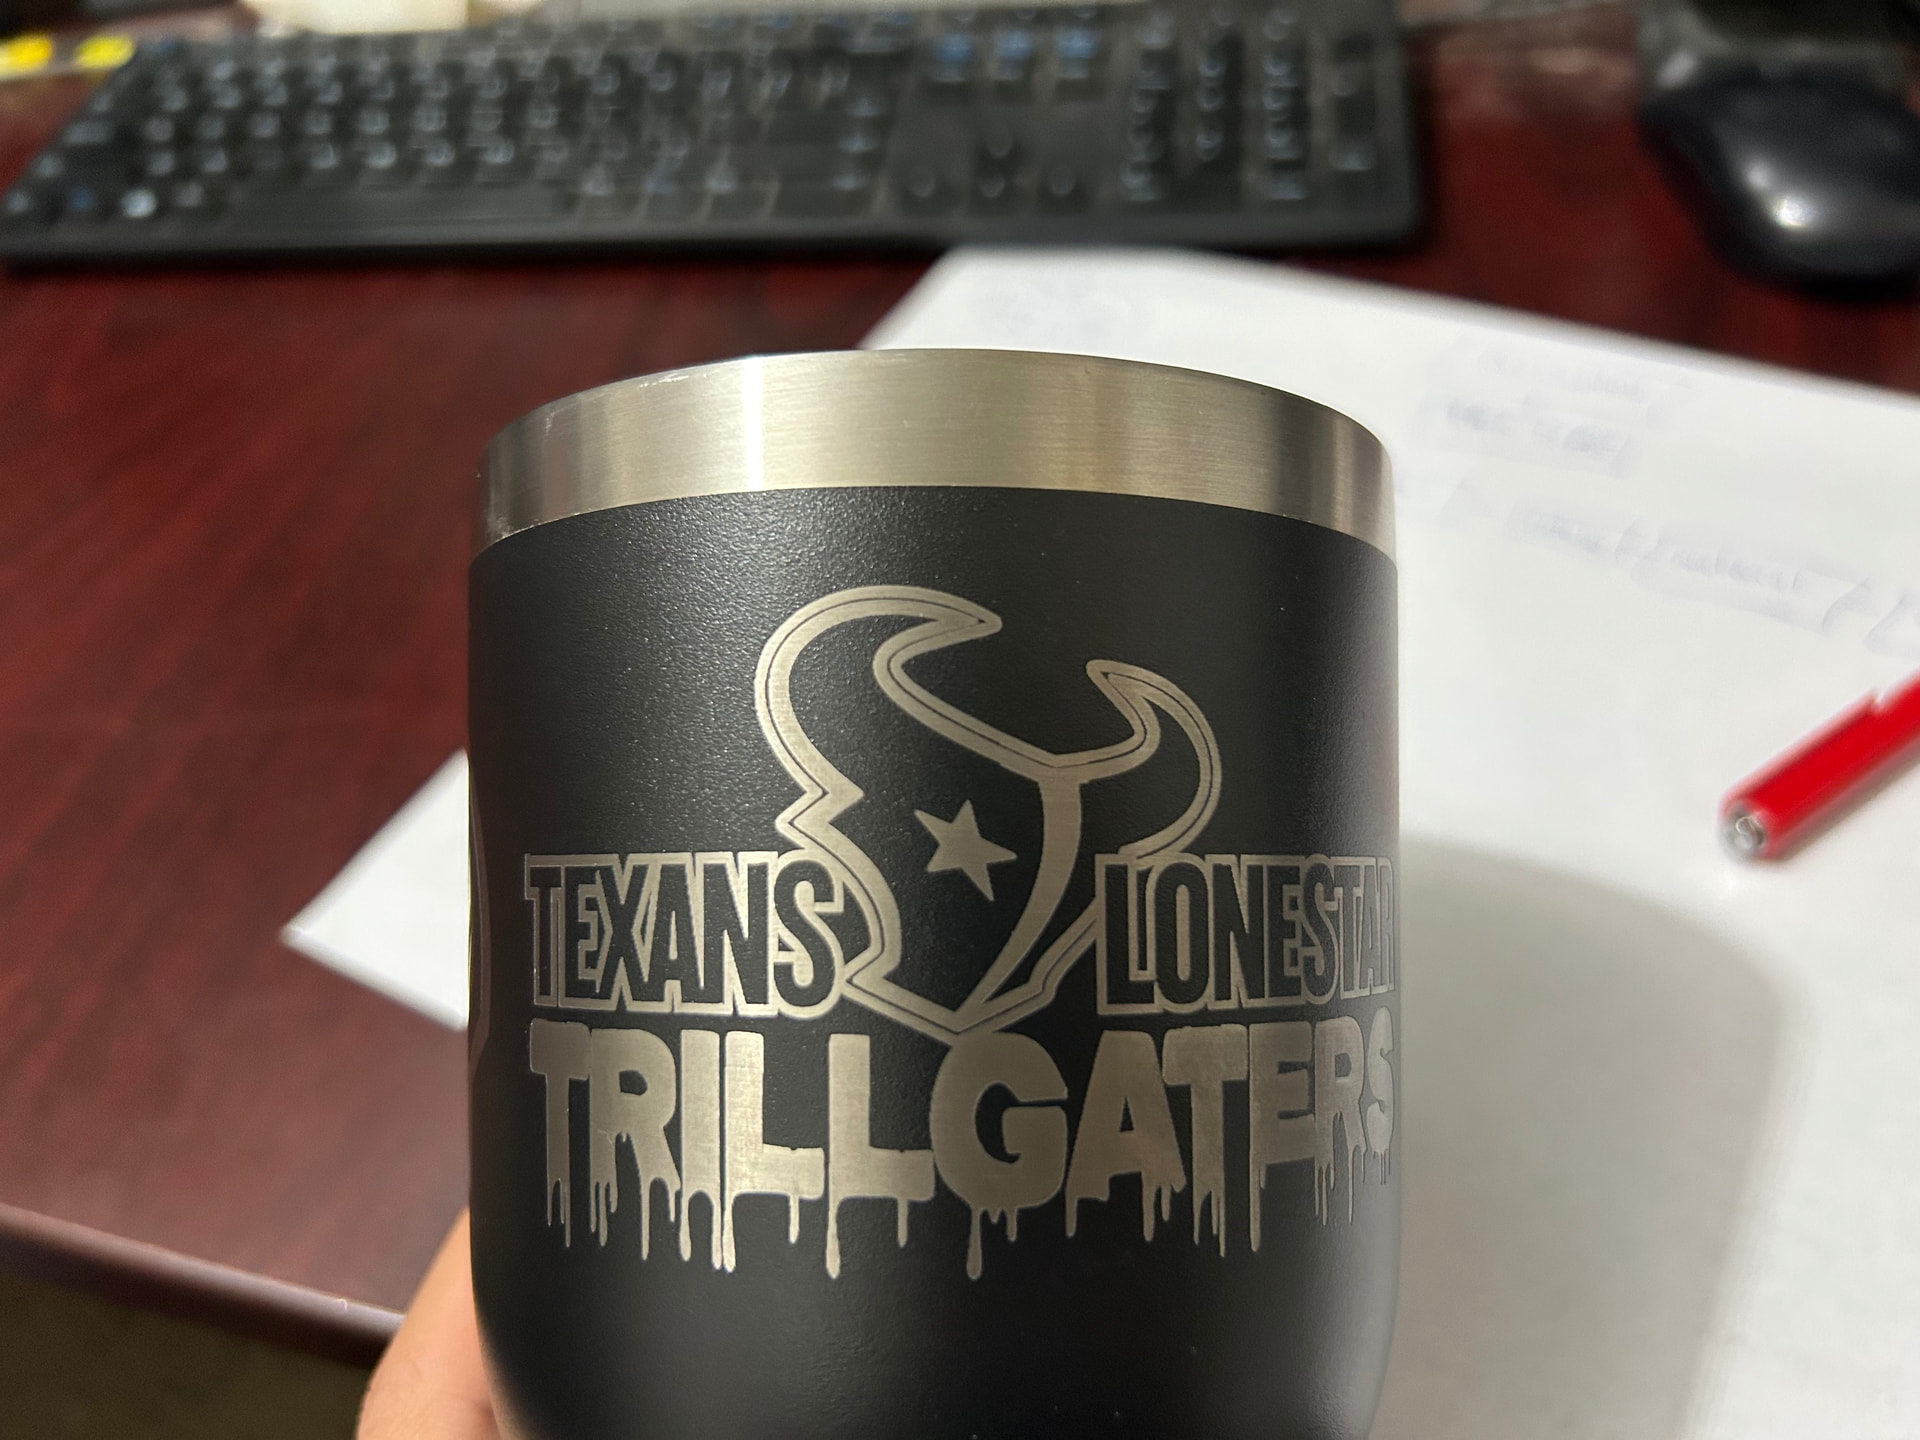
Hi, I’ve recently been lasering cups and I ran into a problem with the result of the design on the cup. I checked the software design to see if it was a problem on there, but I didn’t see anything that would’ve messed it up. I’m pretty sure it is a result of the change in extended traversal moves in the design, but don’t know how to fix it. It messed up the “T” in “TRILLGATERS” and left the lines very thin. A reason I’m confident that it is the change in extended traversal moves is because I’ve burned other cups with a different design and they came out flawless. This one for a police station came out great and I had zero problems.
I’d appreciate if someone can respond soon. Thanks in advance.
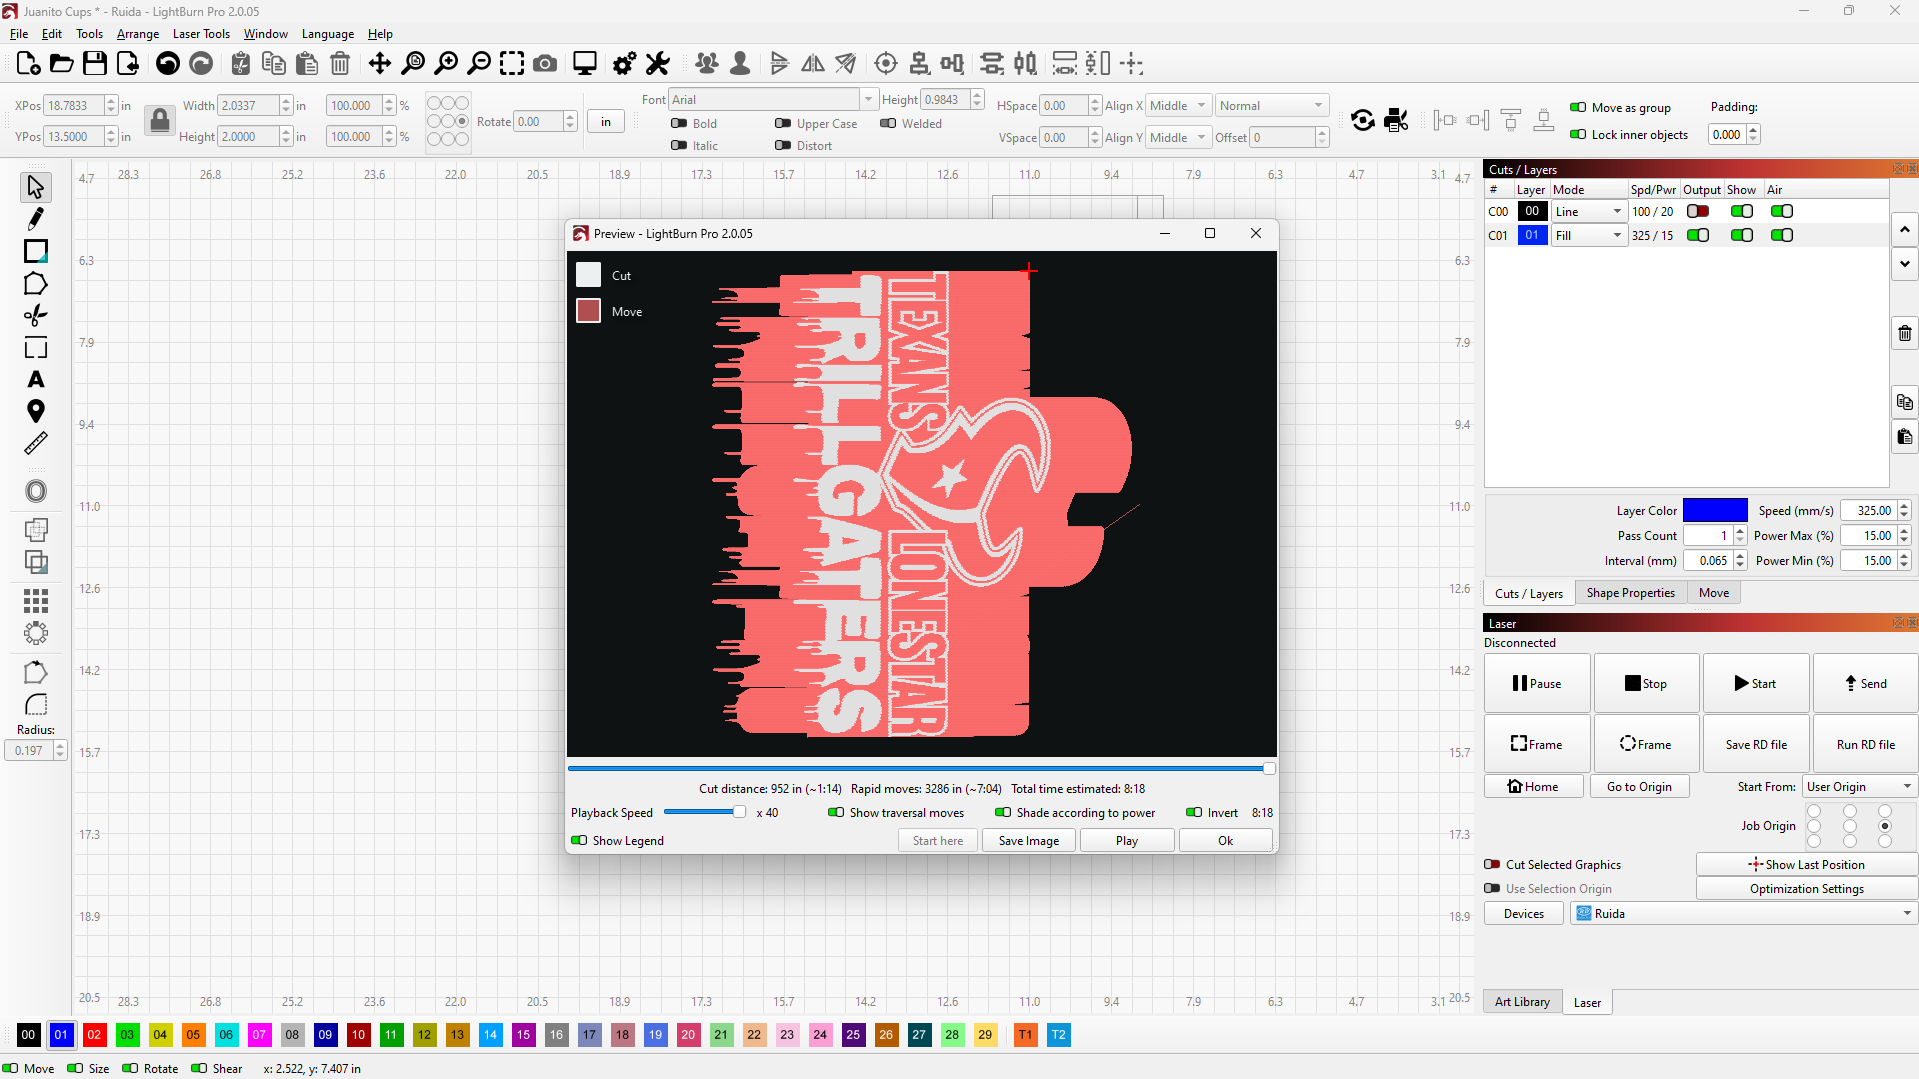
In the picture of the design in lightburn, the red is the traversal moves that it is doing on the cup. I’m thinking that whenever the traversal moves are a shorter length, it makes the laser move faster. As a result of that change, it leaves me with that different engraving according to the speed change. Let me know if you need more details.
The length of the traversal moves is determined by the speed of the engraving not the other way around. This is also calculated by the controller, not Lightburn on a Ruida controller.
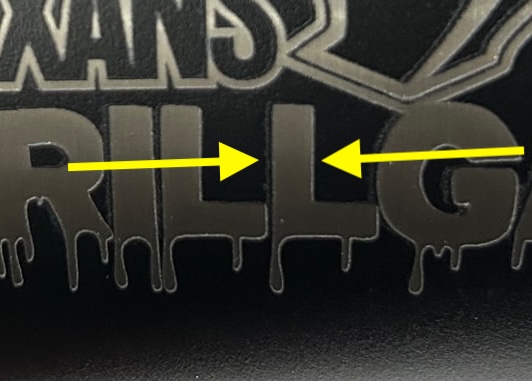
The reason they look longer is because of the font choice. On the Police cup the P is a straight line. The bottom of the font in your trillgaters is like dripping paint and the traversal lines reflect that.
Yes I understand that, but is there a way where I can make the traversal length the same throughout the whole burn so it won’t mess up the “T” in “TRILLGATERS” I’m trying to find a solution to why it burned my cup different to the design, and the change in speed (from the traversal length), is my theory as to why. If you have any other solutions, let me know
The traversal lines are the same length throughout. They are following the shape of the text. The only way to shange the traversal line length is to change your engraving speed.
You are attribituting the problem to something that is not the problem. Traversal lines are showing the amount of overscan required to give the laser head room to slow down, reverse direction and get back up to speed before firing the laser on the design. Nothing more.
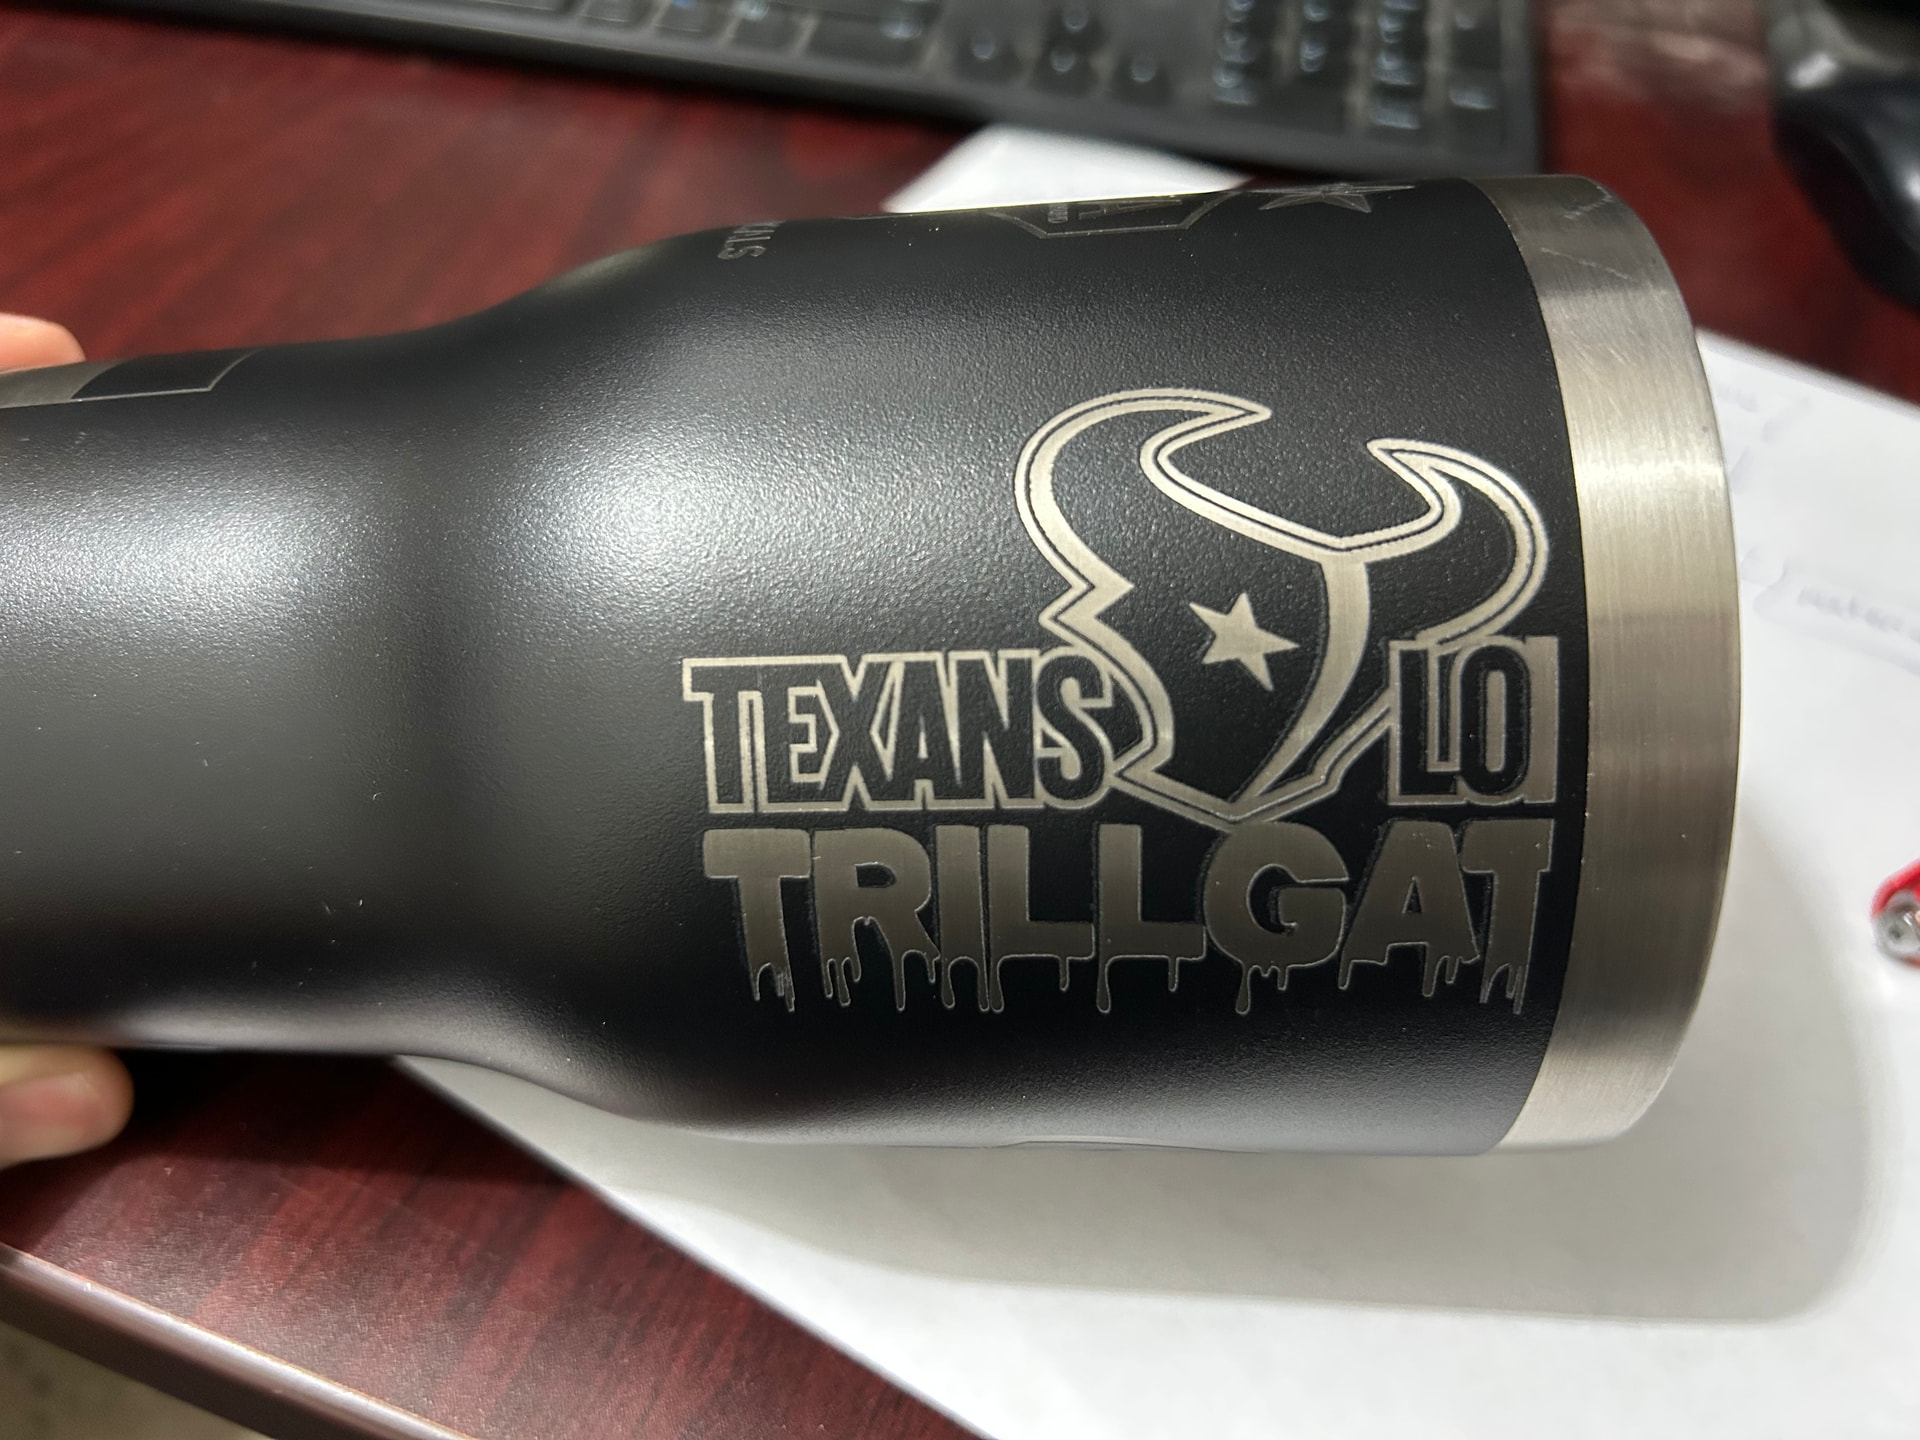
I’ve lowered the speed to 225 and the power to 10 and it solved most of the issues with the “T”, but there was still error in one particular area. The black line around the Texans logo was thin, and in one section, it seemed it was thinner than most of the line.
Sorry, the first photo I sent of the cup is not with the speed at 225 and power 15. It is with 325 speed and 15 power. I don’t have a photo of the one with 225 speed and 10 power.
Sorry, the first photo I sent of the cup is not with the speed at 225 and power 10. It is with 325 speed and 15 power. I don’t have a photo of the one with 225 speed and 10 power.
Notice the partial burning to the left of everything in this picture. It shouldn’t be like that. That is indicative of a mechanical issue. It’s probably “ghosting” from the laser beam reflecting off the cone. Was this done at the lower or higher speed? The other photos you posted aren’t a high enough resolution to soom in and see if the same issue is there.
Hey, I’m going to jump in and offer a tip that works for me but goes against the more common advice from the designers and the master Gurus. BTW I run a gantry table and a diode (10w)
When I am using Rotary (chuck type) I set the engrave angle 90 degrees. The tumbler rolls back and forth for the majority of the movement, and the laser head moves line by line up (or down) the image. This method works for me and my machine - give it a try on a scrap cup. Keep those failed cups for future test and experiments. FWIW, I don’t use the whole graphic while I am fine tuning the settings. I just use a small box, sometimes with a letter beside or inside, to check on burn penetration. Yes, you can overexpose a powder coated tumbler, which will turn the exposed metal darker.
I don’t really have anything else to offer except verify that your laser beam isn’t reflecting off the nozzle. Focus the laser to some scrap material and hit the pulse button. It should show a round spot only. If there is anything else, like a small crescent shape surrounding the spot you need to make adjustments.
This will not address your initial issue though. I think that’s speed related more than anything. If you want, you can upload the file and I will look at your settings and see if anything jumps out, but I doubt it.