Setup
90W Co2 laser
50% max power
25% min power
8mms travel
1/4" birch ply
In LB I draw a single line, and apply the above settings, it makes the cut about 1/16 below the surface at 9ma on digital readout. I set the laser with same settings, and it cuts through at 21ma on the digital readout. It will go to 30MA, but tube is rated for 24ma which I control through digital I/O
What drove me to the above test, I have been trying to cut out a detailed cut test with my new 90w co2 tube, using LB and noticeed I cant get above 11ma on a cut, making cutting 1/4" ply a challenge.
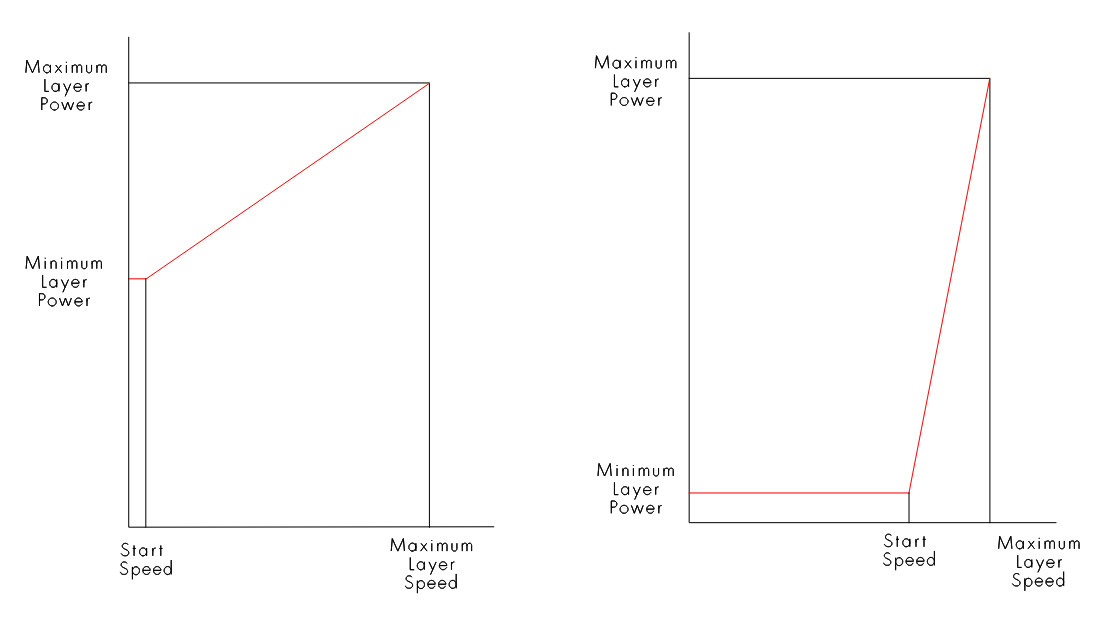
I have done some tests with different materials to find the right minimum power setting. With thin materials, you can clearly see the influence of min.power. Take a piece of cardboard, draw a 25x25 mm square and set speed for e.g. 200mm/s and power to 17%. (clear lines should be visible but they should not cut through) Minimum power must be found so that the corners are not overburnt but not open either. It is important to find the min of the tube. starting percentage, it is different from tube to tube, mine is at 8.75%, but others report that theirs is at 10% or more.
You can also see if there are small holes in the corners on the back, then you have to further screw down for mine. power.
Sometimes the workpiece does not fall out after cutting and only hangs in the corners, so the min.power needs to be increased a little more.
It is a bit like a brake, it must slow down (power), but must not block the wheels (turn off the laser).
note, it has nothing to do with the movement of the laser head, that (acceleration and deacceleration) is arranged by the controller.
The min speed in controller is set to 10mms, This explains why when my cut test was 10mms and above it started to cut through, anything below I had to change min power setting from 20 and set it close the max power setting
Thanks Bernd, mine min for fire is about 10%. Ok for engraving but not cutting, will need to find that sweet spot for min power in order to get clean edges