Just a quick note:
I had my laser head bump a piece of material and it tilted it on the X-axis..
So naturally I had to loosen the head and realign it vertically so the laser beam
would again cut properly…
While I was aligning the vertical beam (plumb)… close to material and then at distance, usually I use 50mm.
I started thinking about the last few straight pieces of acrylic I cut…
Some along the X axis, and some along the Y…
I used a straight 90deg angle sitting on the bed to plumb the laser nozzle, as most do…
I decided to test the angle by setting a 100mm x 10mm piece of acrylic on edge an setting power to 50% about 70w and cutting along the Y axis, back to front, I looked at the angle of the depth cut angle and noticed it was off just a bit.
so even tho I had plumed the laser head best I could, it was not Plumb as the
beam travels thru the laser tube…
So I adjusted the Laser cut angle to near 0 deg and cut a few long acrylic
pieces along the Y axis, back to front.
then I did the same test on the X axis and found there is also a very small angle
creating A cut angle, but this axis has no adjustment, as of yet..
I was an interesting task, as I assumed if I had the laser nozzle plumb the laser beam would also be plumb …
lesson learned, check the actual cut at depth to ensure the beam cut is plumb
and use the 90Angle to get the laser nozzle as close as possible as a starting point.
If I’m following you, I don’t know that’s there’s any more you could do to ensure it’s square.
The head that Russ Sadler designed has a box that you can hang off the lens tube, this allows you to be square off the head. Of course it doesn’t guarantee that the head is square to the table or anything else.
Thanks Jack…I like Russ’ design…watched most all his videos…
I just need to shim up the Y axis movement about .3mm
then in both directions it is plumb…
I try to keep the pulse spot on target at close and upto about 50mm off the material … this keeps it cutting square in the X and Y axis… almost there…
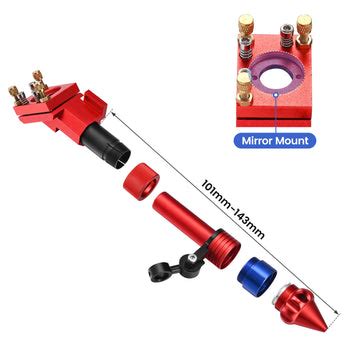
Just out of interest, Is that a pic of your monport head, and could the collision have compressed the threads at a weak spot…just by a fraction, but enough to show over distance.
I have actually, redesigned my head some… but yes that is the Monport head…
and it wasn’t a ‘crash’ so much as a bump…no damage just tilted the head enough
( a couple mm ) to require some attention…
I am cking the Y Axis today with some test cuts…at depth…
I know X axis is good from testing yesterday…
Tried not to make a big deal of this episode just stuff that happens when you get lazy…
happened to set a piece of material on the far side of the bed… BUMP !
Most of these I’ve worked with are really pretty dependable and tough. The original head I had was not really adjustable like the Monport sliding tube.
If you hit an anchor of some type holding down the material, that’s pretty understandable. I’ve knocked clamps or more specifically some pretty good magnets off mine. I have a metal table so they stick pretty well..
I wasn’t going 1000mm/s either, when this occurred. I’ve seen what people have done to this, both good and bad… so I’m convinced they are pretty tough.
I’d be surprised that it would move your head out of position, I don’t think that can happen with the head I have now.
For ordinary (less deep) cuts, the other side of the cut will probably have an equal bevel, because you’re looking at the beam profile: narrow at the focus point, wider above and below.
The vaporized acrylic also chews on both sides as it blows out of the kerf, making the top and bottom wider than the beam size would indicate.
Bonus: in really deep cuts, there’s no reason the vaporized acrylic must chew on just one side of the kerf …