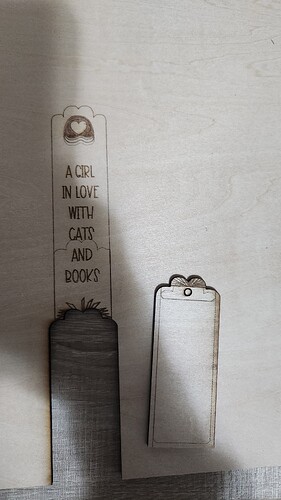
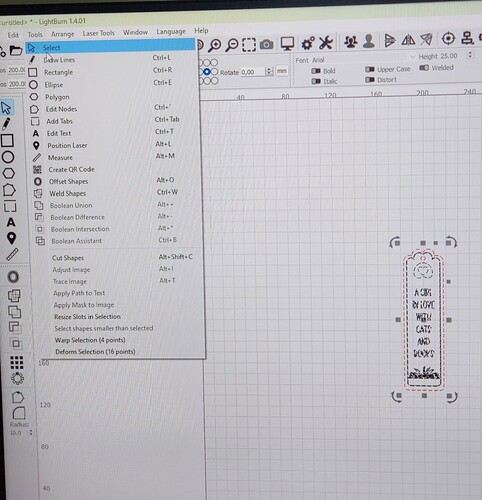
Hi. Very new to this. Have an Ortur LM3 LE. I tried a simple project to engrave then cut a bookmark. All looks good when i watch the preview. Machine then engraves and cuts in a completely different place. Ie. Instead of cutting around the bookmark, it cut off half the bottom and further.
The Trace mode in the Laser window will show where the laser will travel. You use it to make sure the item is properly located on the table. Do a CTRL-A to make sure there is nothing else outside what you are trying to burn.
I’ve checked and there is nothing else outside of what im trying to burn. It wont allow me to trace image though? Cannot select it?
Can you set your cut and engrave layers to output and click on the preview window button in the top center of the screen( little computer monitor icon). When you run your cut and engrave do you run them at the same time or do you run the engraving layer and then the cut layer separately If so do you have your start from set to absolute coordinates or is it set to run from the current position?
Yes. It is set to output. I do run engrave first, then cut. It is set to absolute coordinates. The preview shows it will cut in the correct place. But then it engraves in the correct place and cuts in a different place to the preview
Can anyone assist me?
This looks very much like a mechanical problem in the Y axis and, given the size of the error, is likely a very loose screw in a belt pulley attached to the Y axis motor.
Although this guide was written for Sculpfun lasers, you’ll recognize most of the parts. Follow the descriptions, check all the pieces, and you’ll almost certainly find at least one problem:
Thank you for this. Tried all of the above. Didnt find any issues but tightened to make sure. Still having the same issue. Do you think this could be a hardware issue/faulty device?
First, my apology. I have no idea why I wrote this.
Let us start over? Draw a 100mm circle, line mode, and locate it in the front left of your workspace. Draw another in the right rear of the workspace. Select both and Preview.
Now set your speed and power to just mark the target material, which can be anything that is flat and marks easily. Make sure it frames okay, then Run it. Take a picture of the result and post it here. Be sure to let us know where the home position is in the image.
Hardware issue is still on the table. We just need to figure out what. Based on what I saw above, it looks like the same thing that happened to mine. In my case, it was the Xaxis and not the Yaxis like I thought.
This topic was automatically closed 30 days after the last reply. New replies are no longer allowed.

