Hi can you please help me. I am trying to cut acrylic skeleton keys. If I cut one key alone it’s 2 minutes. But 10 keys is 60 minutes and 60 keys is 600 minutes (10 hours) . I need to cut 200 keys total. Is there a way I can array the keys and get the software to cut one key at a time so the total time is 200 x 2 minutes = 400 min instead of 600+ minutes?
thank you.
1 Like
i have tried grouping each key seperately and ordering by layer…
i have tried prioritizing each key. 1,2,3 etc and choosind “order by priority” the software still does pieces of each key instead of just finishing one key at a time.
1 Like
Make each key a separate color(layer)? im sure theres another easier way, but that’s just my quick idea…
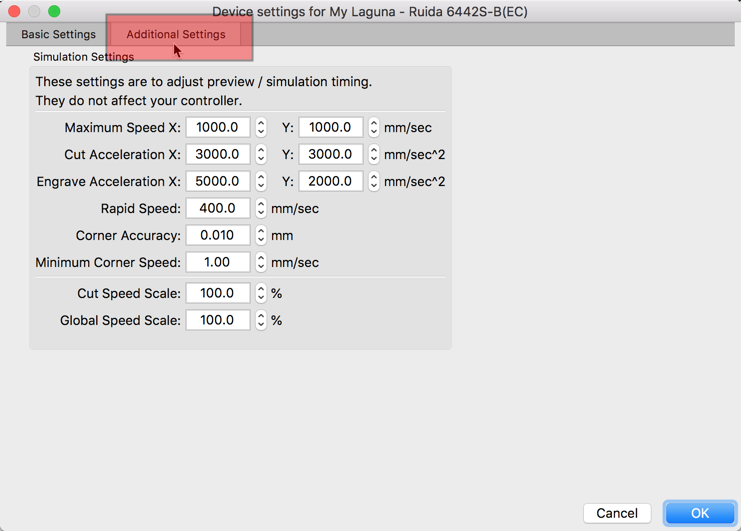
Yes, you can. But first, let’s address the timing of the job. The first thing I suggest, if you haven’t done so already, is you tune the setting to best match the true performance of your hardware. Click the ‘Spanner/Screwdriver’ icon near the center-top, then click the ‘Additional Settings’ tab. Adjust those settings to match your hardware settings. Doing so refines and more accurately estimates the true timing of the job in the ‘Preview’ window.
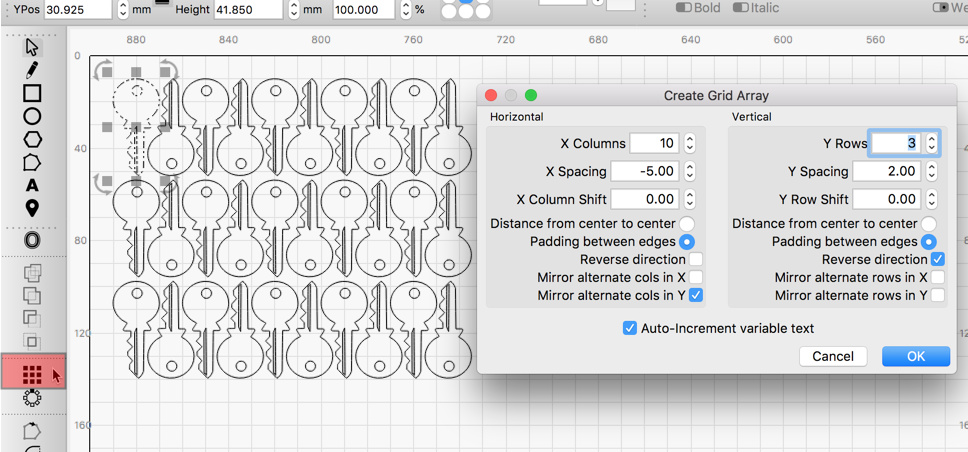
Next, make sure the “key” outline is a closed path and if it has other details, all elements that make up a single key are grouped into a single object. For this example, I am using a vector set to cut as ‘Line’. With this object selected, click the ‘Array’ tool, then adjust settings to build the array as desired.
Now the cut and optimization settings. With the layer set to 'Line with the Speed set to 100mm/s, my 'Preview is showing this single key is estimated to take 0:04 to cut.
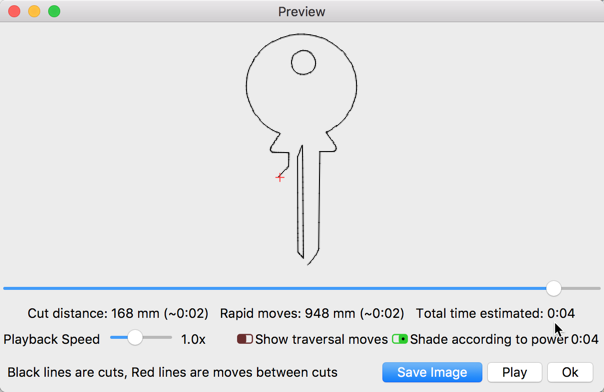
My estimate for the entire 30 object array is 1:20 (30 x 4).

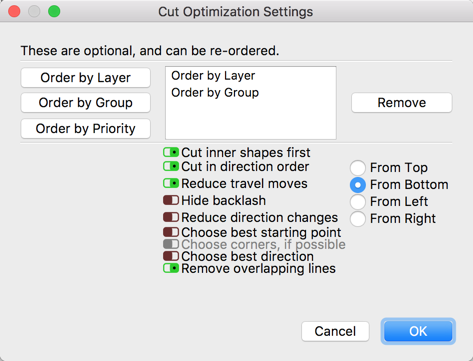
Here is how I have the ‘Cut Optimization Settings’ configured to produce this cut order.
D’oh - I just answered this via the support email, so I’ll repeat the answer here.
In this case, the key is a little more complex that Rick’s version, as it has a pattern engraved, a logo filled, and some text - the key design has 6 layers, so there are a few ways the time could be saved. One would be nesting the shapes tightly as Rick is showing above.
If you want to make sure each shape is cut to completion before moving to the next one, set ‘Order by Group’ as the first entry in the Optimization Settings, and make each key a group. Also set ‘Fill by Group’ on the fill layers instead of ‘Fill all shapes together’.
1 Like
We are all running around with this one. 
S’ok - it’s good content for the forum. 
1 Like
This topic was automatically closed 30 days after the last reply. New replies are no longer allowed.