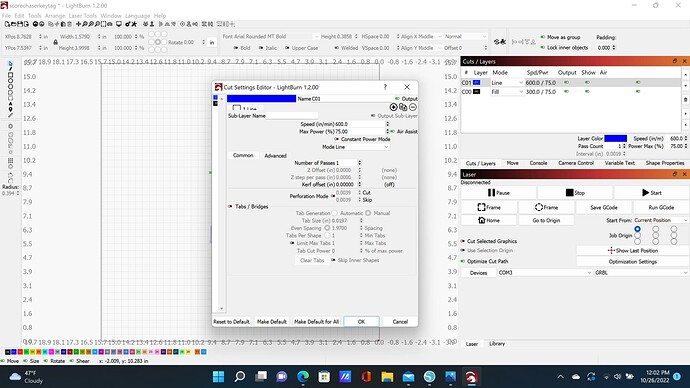
Hi. I’m trying to figure out what settings to use when cutting through leather. Ideally, it would be 4 oz leather. Im guessing multiple passes, but am having trouble when trying to turn my speed down below 140-if I go below that on speed, my laser “bogs down” and does like a flash with a bump and stays in one area. It wont travel to cut the design. At speeds 140 and above, it moves fine and travels correctly, but even with power at 95% and 5 passes, its not enough to cut through…ideas? Is my particular laser (a cheap one) just not powerful enough to do this? Attaching a screenshot to show current settings for just burning/engraving onto the leather.
Catelyn, what is the power output of your laser? and what is the laser model/brand? Does it have a Z-axis or fixed focus? To many variable to offer suggestions until we know more about your system/and power output. My 1.6Watt laser takes multiple passes compared to what my 10 Watt laser can handle.
What happens when you try 10 or even 15 passes? Your 5W laser is not paticularly powerful for cutting. Air assist would prolly help too.
Sorry, all of that is above my head lol. Attached is a picture of what I have. I bought it a while back just to make lasered patches that I put on custom leather awards. Sometimes the logos and lettering people want is too small for my hand carving tools. Anyway, I assume I’ll need several passes. I just dont know where to start because as mentioned, I tried one way with 5 passes and it wasnt enough. Wondering if folks would recommend more passes or a way to slow the speed. I am laser-illiterate ![]()
I do not know what z axis/fixed focus means but it says fixed focus.
Catelyn, hey, remember every journey starts with that first step. You will learn things in time. With a fixed-focus laser the height above the work surface sets whether the laser will be at its finest point (smallest beam width) what I do is start out at about 1000 mm/min speed and power at 30%, 1 pass. Then without moving the work surface I check to see what it looks like. If part of the image is fine, but others are light I turn off that items in LB and not output them and then run 1/2 more passes. There is no STANDARD power/speed settings unless the individual offering them has exactly the same laser as you. Once I find what works best for my setup I write it down in my laser notes book and then I can build up settings that work for my system.
leave your speed up and increase power 10% at a time, but don’t go over 70-80 percent to reduce wear on your laser and increase number of passes until you get the results you want. Make sure the laser is focused for the material you are using. My laser is fixed focus and has an aluminum block that spaces the laser at the correct working height.
I’ve just popped this post into the Community Laser Talk category, as the Hardware Compatibility category is more for connecting hardware to LightBurn, and it seems like you’re sorted there given able to run jobs.
Got it, thank you very much! I’ll keep fiddling with it with more passes.
I hadnt tried that many passes before, but I will now…thank you!
This topic was automatically closed 30 days after the last reply. New replies are no longer allowed.

