For all you newbies out there with a diode laser, I have made a step-by-step guide on creating a power scale to dial in your engraving burns. Unlike the tons of other videos out there who skip steps and explanations, this video will walk you through the entire process, start to finish.
Click the link on the video that says, watch on YouTube to see the description and the free file download. Included in the file download are baseline settings for quite a few materials.
I hope you enjoy it and it removes some of the frustration for the newbies!
Cool! Will it show me how to cut through 11 ga stainless steel with my 5W laser? That would be so AWESOME!
JK.
Good deal, a very desperately needed tutorial! I haven’t watched it yet, but certainly an important contribution!
Another great addition to the Learning Library! Thank you.
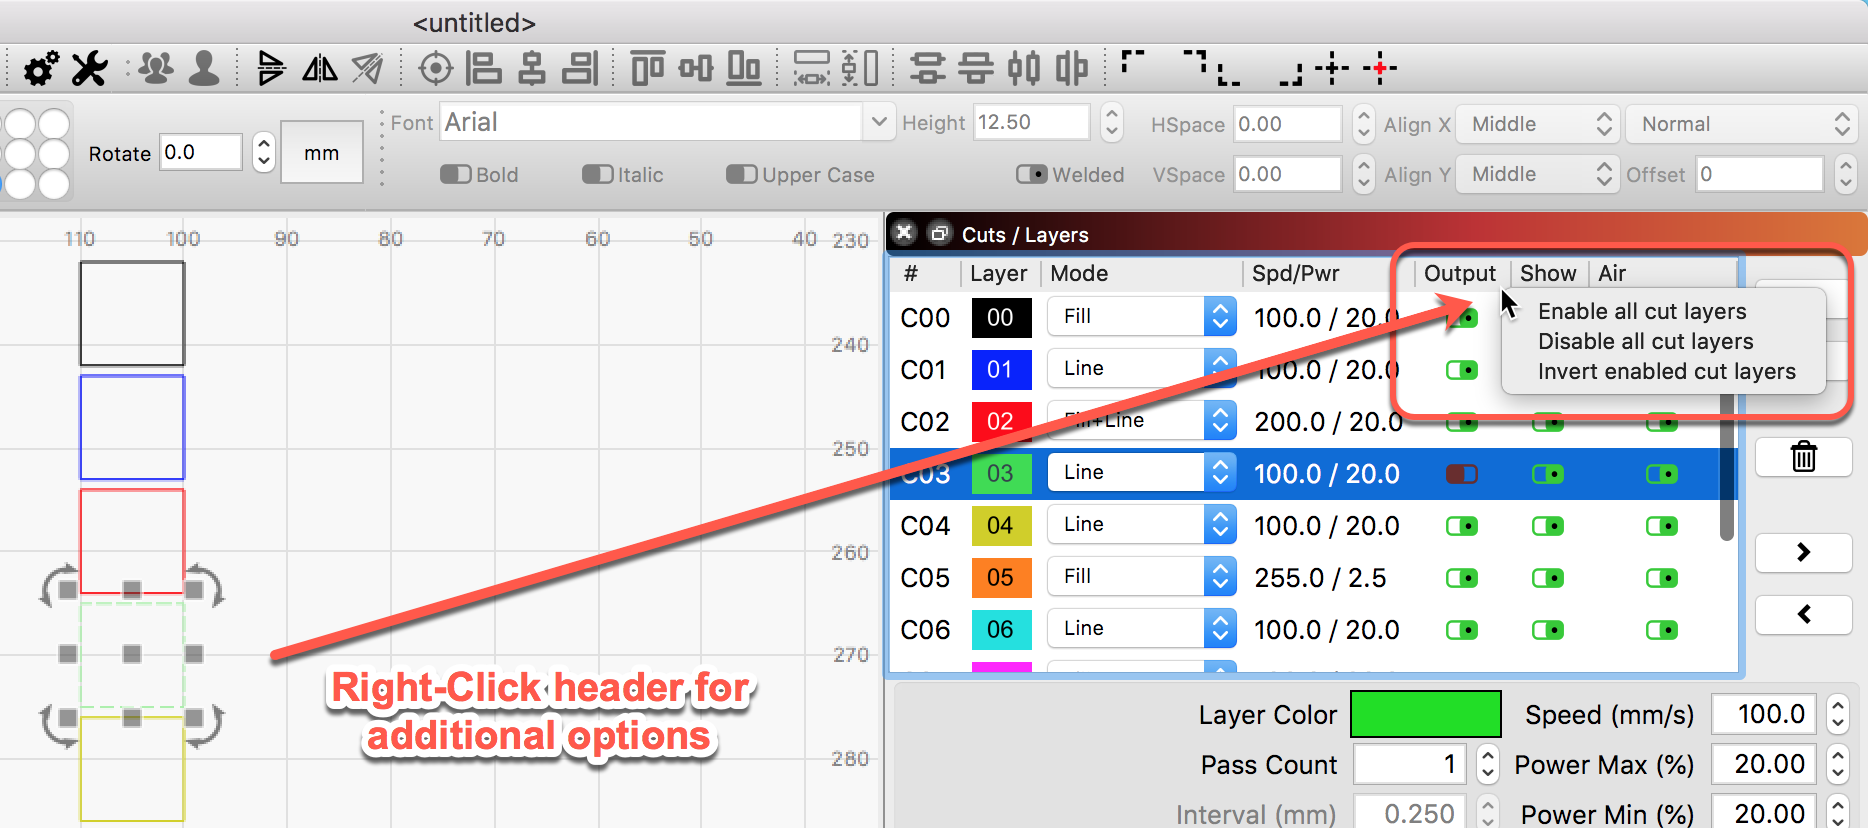
A fun side Quick Tip, I noticed you flipping the output switches in this demo, here is a “hidden” trick that might help. Right-click the header of the ‘Cuts / Layers’ window.
@Rick Nice, I’ve actually used it before, but not in my videos.
p.s., can I get a discount code for the software if you have any? I’m setting up a new forum with a Lightburn section.
Thank you for your inquiry on discounts. LightBurn does offer options for Resellers and Large-Volume purchases, think Educational and Maker/HackerSpace organizations. LightBurn is already priced as low as we possibly can afford so that as many people as possible can afford it. We are not able to offer any further discounts on a single key.
I can’t find the link: Click the link on the video that says, watch on YouTube to see the description and the free file download. Included in the file download are baseline settings for quite a few materials .
Speed 300 mm/min, Max Power 90, DPI 254, overscan 4.0% - Image Mode - Jarvis or Grayscale
And in your links you provide an Amazon link to precut 4mm Acrylic for 3D Edge lit blanks. Have you tried these settings and confirmed that they make a usable engrave for the 3D edge lit effect? Do you leave the paper on or off?
@TomWS Yes, I have done acrylic successfully many times, however, I have updated and fixed the mistakes in that note file. This is how it should read:
3mm Acrylic Image - Speed 150 mm/min, Max Power 90, DPI 254-318, overscan 4.0% - Image Mode - Jarvis or Grayscale - passes, 2-3. 3mm Acrylic Line/Vector - Speed 150 mm/min, Max Power 90 - 2 passes. 3mm Acrylic Cut, Orange, Black. Speed 100 mm/min, Power 100 - Constant Power mode, 9-14 passes. ALL acrylic needs to be focused 2mm BELOW the surface for cutting, and 1mm below for etching
The links to the Amazon acrylic are the ones I use. I spray paint the top side black and leave the paper on the bottom side. When I’m finished, I use nail polish remover (acetone) to remove the excess paint. They are also thinner than the LED base, so I have some thick double sided tape that I put on one side to make up the difference. The tape actually helps focus the light, and it’s below the top of the base, so you can’t see it.
If you leave it on it will frost the acrylic - ask me how I know. I do it in the sink with a paper towel quickly and run it under water. I use either acetone or mineral spirits. The correct way to do it is with a high grit sandpaper. I just got tired of spending 15 minutes sanding. You can also safely use hexane or kerosene.