
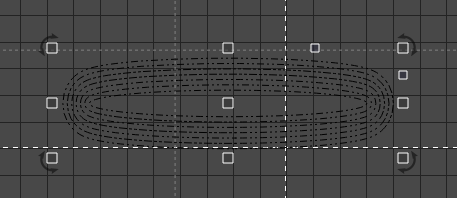
In the picture is a horse racing game. The one above has diamonds evenly spaced out in each lane. The lower oval track picture is where I need to place the diamond shapes in each lane. I want them evenly distributed like the top track. How do I do this in the oval track?
Change the images to objects (trace). Put the race track on a different layer. Make a copy of your top object, set aside.
Overlay the top and bottom objects - then use BOOLEAN tools to merge them together.
About 45 seconds to do when you understand the logic. About 4 days to do if you dont…
I used the offset to create the lower track. Do I convert it to a bitmap?
No, just be sure that you are using two objects (vector items) rather than a picture (image)
Hi Jim,
Can you provide a step-by-step from a blank screen? I used the circle tool to create the corners and joined them in the center with a square, then I welded the shapes, creating the outer line. I then used the offset tool to create 11 lanes. That’s where I’m at now. What next?
DO NOT USE IMAGES (that is what I use TRACE for, to copy an image into an object…)- they do not interact cleanly with objects.
Stand by a minute
Not make an image. Check.
Track update.lbrn2 (489.4 KB)
Here’s the file
race track as vector (object)
upper part as an object, copied on red and green level for easy viewing
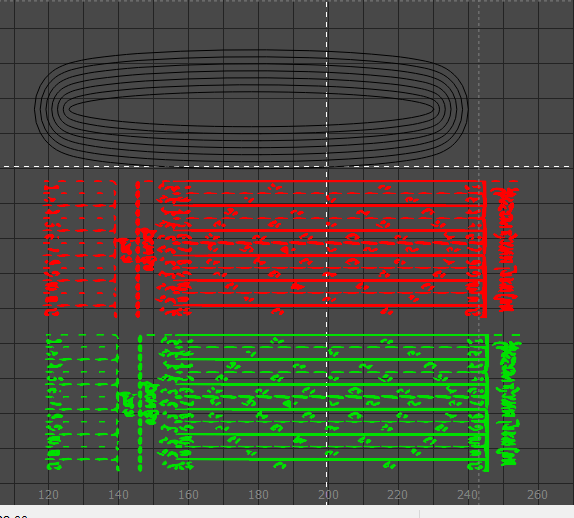
Red over black - I dont have a good copy of the upper part, so it is ugly but will serve to illustrate
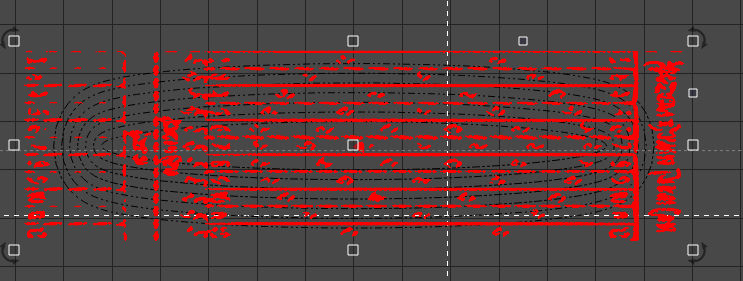
CTRL+B opens Boolean tool set. You will make a “hole” through the black layer with the red layer - think of cookie dough shapes cutout - then lay the green layer exactly over the holes left behind


CTRL+Z = go back one step. It is my most used command.
1 Like
The boolean doesn’t open
Make sure your stuff is grouped by color. Black is one group. Red is one group. Green is one group.
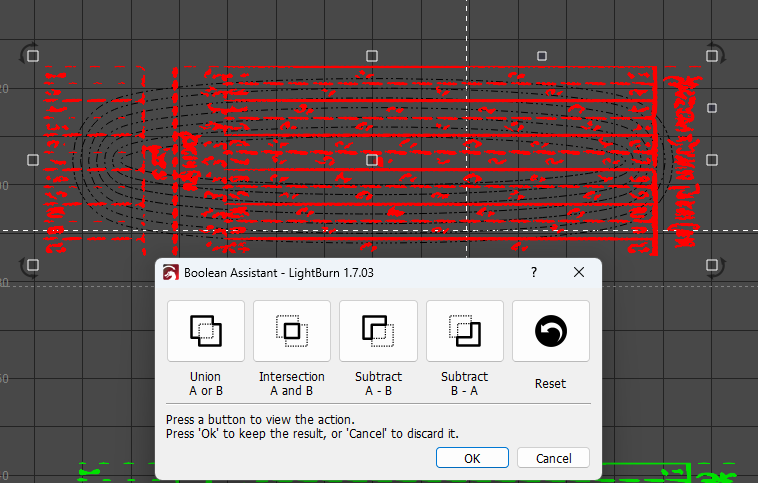
I have the Boolean open. Which do I select? The two groups merge into a single item when I select the four choices. I’m assuming “subtract B from A” where A is the oval track, is the one to choose. Is that correct?
It depends… on order of selection, or layer order in the cut list.
In my example above, the black layer had the red layer cut out - AND - it turned it all red. You need to try every combination to see what effect you like. On the cut selections, it will cut one from the other on the first execution (cut @2 from #1), then CTRL+Z, cut again to cut #1 from #2.
For my work, I usually use offset at .2mm outer shape only and delete the original to make the cutout just slightly larger than the part I will put back in.
You have the basics - play with it for a bit to see if you can stumble on to the correct sequence.
Give a man a fish vs. show him how to begin to catch fish…
Another hint - learn the logic on simple shapes before you try the really hard stuff.
1 Like
Thanks. Here we go.
1 Like
I figured out how to use the path tool. I selected the box I wanted on the path, then the line (path), and went to Arrange, then Copy Along Path. I determined how many squares I needed on each path, set it to rotate on the path and hit enter. I repeated this for all paths.
This achieved what I was trying to do easily after many hours trying to complete the previous assistance instructions. This was faster and easier for me.
1 Like