Thank you, Travis.
If I knew who you were, I wouldn’t have asked about the COM port! ![]()
Nice channel! https://www.youtube.com/@diyfiberlaser
We have received your separate support request, and our developers are looking into it.
Thank you, Travis.
If I knew who you were, I wouldn’t have asked about the COM port! ![]()
Nice channel! https://www.youtube.com/@diyfiberlaser
We have received your separate support request, and our developers are looking into it.
Ha! Thanks for your help Aaron
Mine is reported as:
Windows Driver: BJJCZ Laser Mark Control Board DLC Version 1
EzCad About HW:
I also tested the Z-Jog buttons:
Very Very nice and thanks for the clarification. I’m more than happy to cover STL to Depth Maps and it will be good to see how to mix and match these with a live Z-Axis to keep the laser in focus.
FWIW - I not only do direct coin engraving (where stair stepping is an issue currently), but also create Dies for metal stamping and this would be ideal as it will help reduce the amount of polishing that is needed.
One idea for using Depth Maps on a live Z-Axis, would be to let the user input the desired Z-depth movement for the engrave and use that to calculate the required Z-Steps (or even inputting a start / end point for the Z-Axis) instead of asking the user how many Z-Steps per layer(s).
That way you could use a Depth Map and simple ask Lightburn to advance the Z-Axis down .5mm, 5mm or whatever.
Of course you would need a profile that ablated at the same rate on that particular material, but this is not that hard to work out IRL. You simply load up a test image of a cylinder, run it on some scrap, and then measure how accurate the hole is. Adjust speed / power (etc) till it is correct an you have your profile. I’ve already got profiles for:
…and have a bunch of sample pucks for another dozen or so alloys.
That said, these are EzCad profiles, and I will need to convert them over (and would be happy to share). One thing I’ve found with EzCad is setting like Hatch Pattern makes an enormous difference in speed / quality and while I’ve no experience with LightBurn, I have the time and patience to work it out…and will post the profiles.
Yup I do (being a Lightburn newbie) ![]()
Thanks
Nathan
Also, if it helps from my HW Z Axis setup in ExCad I see:
…so it looks like I have a:
…and that gives me a potential 0.39um (0.00039mm) step size.
This docs page will help achieve the same result in LightBurn.
Yes, but to use LightBurn, you’ll need to swap the driver with Zadig, as explained here:
To switch to EZCAD3, simply uninstall the driver in the Windows Device Manager and power-cycle the laser to reinstall the correct driver.
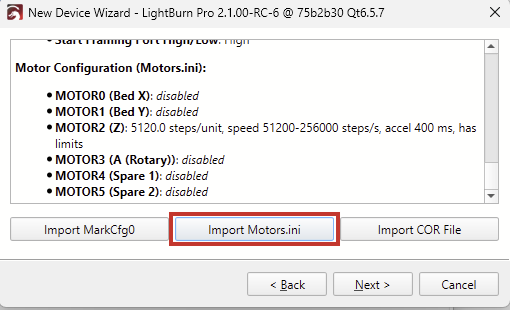
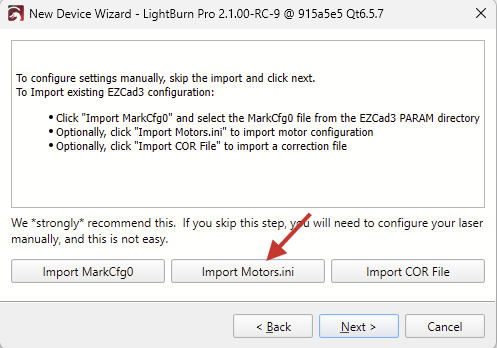
Preferably, these three files mentioned in the Wizard:
You can probably wait for the upcoming RC-8. It includes a fix for some Z Axis control toggles on some controllers.
But feel free to give the current one a try, and let us know: Index of /LightBurn/RC/LightBurn-v2.1.00-RC-9/
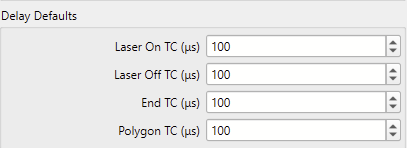
One thing that comes to mind is that many config files don’t hold any Delay Defaults and therefore, LightBurn defaults to 100μs
You’ve probably already seen these values in EZ3, and you can enter them manually later. Because calibrating accurate galvo timings isn’t exactly fun ![]()
But it is exciting. Check out this thread for example.
@Aaron.F Thanks for the comprehensive response. I’ll have a read and get going ![]()
I’ve installed RC6 and imported the 3 different machine files without issue successfully setting up LB.
I’ve issues with the driver however:
Thanks @parsec - I might wait for RC8.
I see that RC9 is out so I’ll give that a test. One thing that caught my Eye, is RC9 is almost twice the size of RC6… would that be normal?
Correct. ![]()
Good news, is that with RC9 the driver installs and LB can see my Laser so I can test it!
Apologies if I have missed something obvious (being new to LB), though in my quick test I found the following.
LB seems to work for controlling functions like:
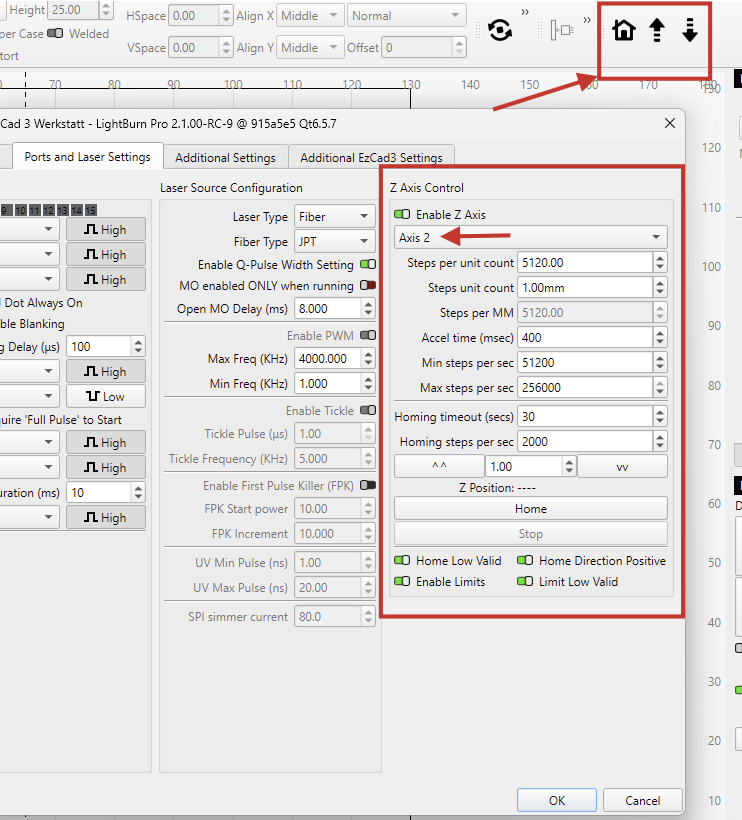
…however, the manual Z-Axis adjustment buttons do not seem to work at all:
Also, from a “feature” POV, I did not notice any way of specifying what “0” is (eg -500mm from Home to the top of the table), or what height of the work piece on the table is (eg +10mm over the table) so that the Z-Axis will be automatically brought into focus.
Did you import the Motors.ini config file when you added the device?
That’s correct. Until recently, Z-axis control was not possible at all with galvo scanners.
From the 2.1 Release notes:
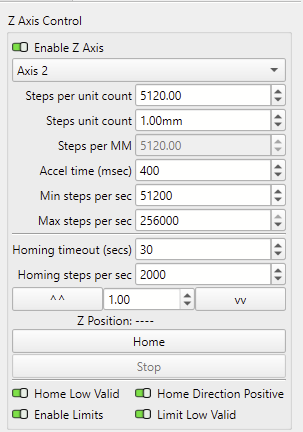
Did you select the correct axis in the Device Settings here, and can you confirm that homing and jogging are working with these buttons?