I have a file for a dollhouse roof that has a pattern on it for roofing tiles. Lightburn shows the pattern in red, but it covered up almost completely in red by horizontal lines very close together. I see the roof correctly in Vectric Aspire 11 but not in Lightburn. Any ideas how to fix this is appreciated. I am very new to this and trying to learn Lightburn. Thanks.
Can you upload the .lbrn file here? Else a full screenshot of LightBurn showing the design please.
If in the preview screen, you can turn off the ‘red’ which is where the head is moving but not ‘burning’.
‘Show Transversal Moves’

It sounds like you’re burning the roof texture as a raster image which, depending on the size of your dollhouse, might take some time. The preview window will give an estimate of job time.
As an alternative, and depending on how many dollhouses you intend to make, it might be worth recreating the roof texture as discrete lines to etch. If it’s something like a slate pattern this could work well.
Or, again depending on the texture, converting it from a bitmap to discrete lines using image trace might give good results. Here’s a video:

I am sorry but I don’t see where to upload screeshots here.
It is not in the preview window. I turned transversal moves off but it shows up in the static screen as soon as the file is loaded. It is also there in the preview screen with transversal off.
You can drag and drop images to the post edit window. Else push the up arrow looking icon.
Please show us what you see. 


I’m not sure exactly what’s going on there but there seems to be a general rendering issue going on. Notice the corruption in the screen where you have part of the UI being drawn through the tabs.
I’m curious if both of the issues are related in some way.
Try resetting the UI in Window->Reset to Default Layout to see if the corruption goes away.
The other thing possibly is that your graphics driver needs to be updated.
If you are able to share the file someone else can check if the red smear marks are reproducible. If you can’t share with a broader group then try sending to support@lightburnsoftware.com and ask them to review the file. You’ll probably want to reference this topic.
Thanks. I will try your suggestions and see where it goes.
Fantasy Mansion 5 of 5.lbrn2 (1.6 MB)
Here is the file. Since it works in Aspire without any red streaks, it isn’t the graphics card. Hopefully someone can reproduce the problem on their computer so I will know it isn’t my computer doing this. As I stated, it is only doing this bon the roof. I wonder if it can be orientation in the x and y?
Definitely not a graphics driver issue after seeing it. Seems like some sort of importation issue or a DXF issue.
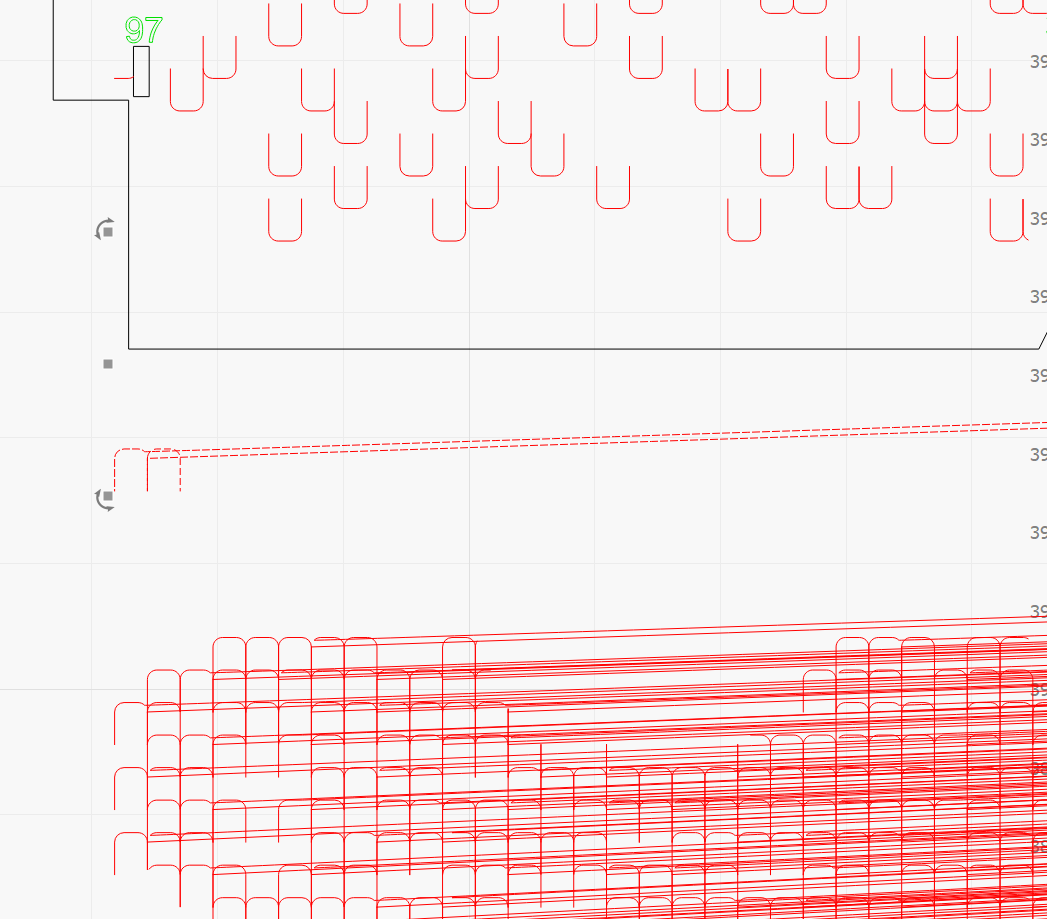
Looks like one part of the tile is located completely in a different place so is creating the long line. This is repeated for hundreds of tiles.
How are you generating the DXF? Do you have any other format options? Or different versions of DXF?
@RalphU Do you think the auto-close tolerance value could affect the location of the errant nodes? I don’t work with DXF frequently enough. My understanding was that even with this setting “wrong” you could potentially have paths left unclosed but nodes would otherwise be located where expected.
At first I didn’t see how this could cause the problem but I think what’s happening is that because of the proximity of the tiles, LightBurn is interpreting some of the lines as continuous sections and then connecting them in an incorrect way. Rinse and repeat hundreds of times and the effect here is seen.
This may be an inherently difficult issue to solve for while using DXF. It seems LightBurn is using the tolerance value to auto-join line segments, not just for closing paths. Does this mean that importing with a tolerance set to 0 would leave “curved” lines as disjointed sections?
Do you think a ‘tact’ would be to draw it originally much larger and reduce it in lightburn after it’s drawn?
Possibly depending on what exactly in the drawing is causing the issue.
In either case I think avoiding DXF entirely might be better. Looks like Vectric Aspire can export to AI format. Assuming they preserve curves in the AI export this would probably be preferable to DXF in this case.
This morning I tried opening the file in Aspire and exporting as an AI file. Opened Lightburn and imported it in. It worked perfectly. The problem I have in Lightburn now is the file is way bigger than the area on the screen. How do I get this to fit? Thanks for all the previous suggestions.
Is the design in LightBurn bigger than the planned design? Or just bigger than your available workspace?
It’s trivially easy to resize the design but for some people the dimensional consistency is important.
To resize, select all objects (ctrl-a), then use the corner handles that appear to resize. Alternatively you can use the numeric edits controls to resize:
Click the lock symbol if you want to preserve the aspect ratio when changing W or H.
You have been a tremendous help. Thank you so much for your time helping me learn.