Ellipse Size - 6mm is not 6mm?

I swear I am losing my mind.
Background: I am doing acrylic designs for display cases. Everything is in 3mm clear, cast acrylic EXCEPT the bases, which are 6mm black cast acrylic. I have been working for almost 1 month with the clear and I can whip stuff out no issues. I just started with the 6mm black this weekend and I can’t even get one design to come out correctly.

I tend to do the design on my primary PC inside. Custom, but it runs windows, Intel processor, and NVidia graphics. Then I save to Onedrive, go out to the garage, and load up the design to the mini PC that runs my printers and lasers. ( ACEMAGICIAN M1 Mini PC AMD Ryzen 7 7735HS 24GB LPDDR5 512GB PCle SSD Mini Computers(8C/16T, up to 4.75GHz), Windows 11 Pro Radeon 680M 4K Triple Display Desktop Computer 3.2Type-C/LAN 2.5G/BT5.2/WiFi6)

Laser is a Monport Reno 45. Running Lightburn Core, 2.1.02 - I have no clue what firmware or controller this thing uses & Monport doesn’t even have a correct start guide, I had to learn how to connect it from someone else online. But it runs and cuts fine.

For 6mm black cast acrylic, I ran material tests for settings. I am cutting at 4mmps, 72% power. I ran a kerf test, offset is set at .112. The Reno 45 has a spring loaded foot that retracts when you reach the correct focal distance, but I am doubnle checking with the manual focal tool as well.

The issue is: My design has 6mm holes for Lego studs to fit into. When I cut the design, the studs do not fit, the hole is too small. HOWEVER, if I then use the ellipse tool to draw a 6mm hole on the exact same panel, moving nothing, not adjusting anything on the laser or in Lightburn, and then cut that hole? Booom, Lego fits right in snug.

I have checked the design a dozen times. The holes say 6mm. They are not when they cut. But add test holes and those are magically 6mm.

Could transferring from my inside PC to the garage PC do something to the file to make the hole the incorrect size? I have tried deleting them and re-adding, but they always cut small. And yet adding a 6mm hole on the same file gets me a 6mm hole.

What hapens if you remove the kerf offset on the original file? Does the hole get bigger or smaller?Sometimes the kerf offset does just the opposite of what you expect it to, depending on the design. Without seeing your design I cannot offer any other advice.

I swear I am losing my mind.
Background: I am doing acrylic designs for display cases. Everything is in 3mm clear, cast acrylic EXCEPT the bases, which are 6mm black cast acrylic. I have been working for almost 1 month with the clear and I can whip stuff out no issues. I just started with the 6mm black this weekend and I can’t even get one design to come out correctly.

I tend to do the design on my primary PC inside. Custom, but it runs windows, Intel processor, and NVidia graphics. Then I save to Onedrive, go out to the garage, and load up the design to the mini PC that runs my printers and lasers. ( ACEMAGICIAN M1 Mini PC AMD Ryzen 7 7735HS 24GB LPDDR5 512GB PCle SSD Mini Computers(8C/16T, up to 4.75GHz), Windows 11 Pro Radeon 680M 4K Triple Display Desktop Computer 3.2Type-C/LAN 2.5G/BT5.2/WiFi6)

Laser is a Monport Reno 45. Running Lightburn Core, 2.1.02 - I have no clue what firmware or controller this thing uses & Monport doesn’t even have a correct start guide, I had to learn how to connect it from someone else online. But it runs and cuts fine.

For 6mm black cast acrylic, I ran material tests for settings. I am cutting at 4mmps, 72% power. I ran a kerf test, offset is set at .112. The Reno 45 has a spring loaded foot that retracts when you reach the correct focal distance, but I am doubnle checking with the manual focal tool as well.

The issue is: My design has 6mm holes for Lego studs to fit into. When I cut the design, the studs do not fit, the hole is too small. HOWEVER, if I then use the ellipse tool to draw a 6mm hole on the exact same panel, moving nothing, not adjusting anything on the laser or in Lightburn, and then cut that hole? Booom, Lego fits right in snug.

I have checked the design a dozen times. The holes say 6mm. They are not when they cut. But add test holes and those are magically 6mm.

Could transferring from my inside PC to the garage PC do something to the file to make the hole the incorrect size? I have tried deleting them and re-adding, but they always cut small. And yet adding a 6mm hole on the same file gets me a 6mm hole.



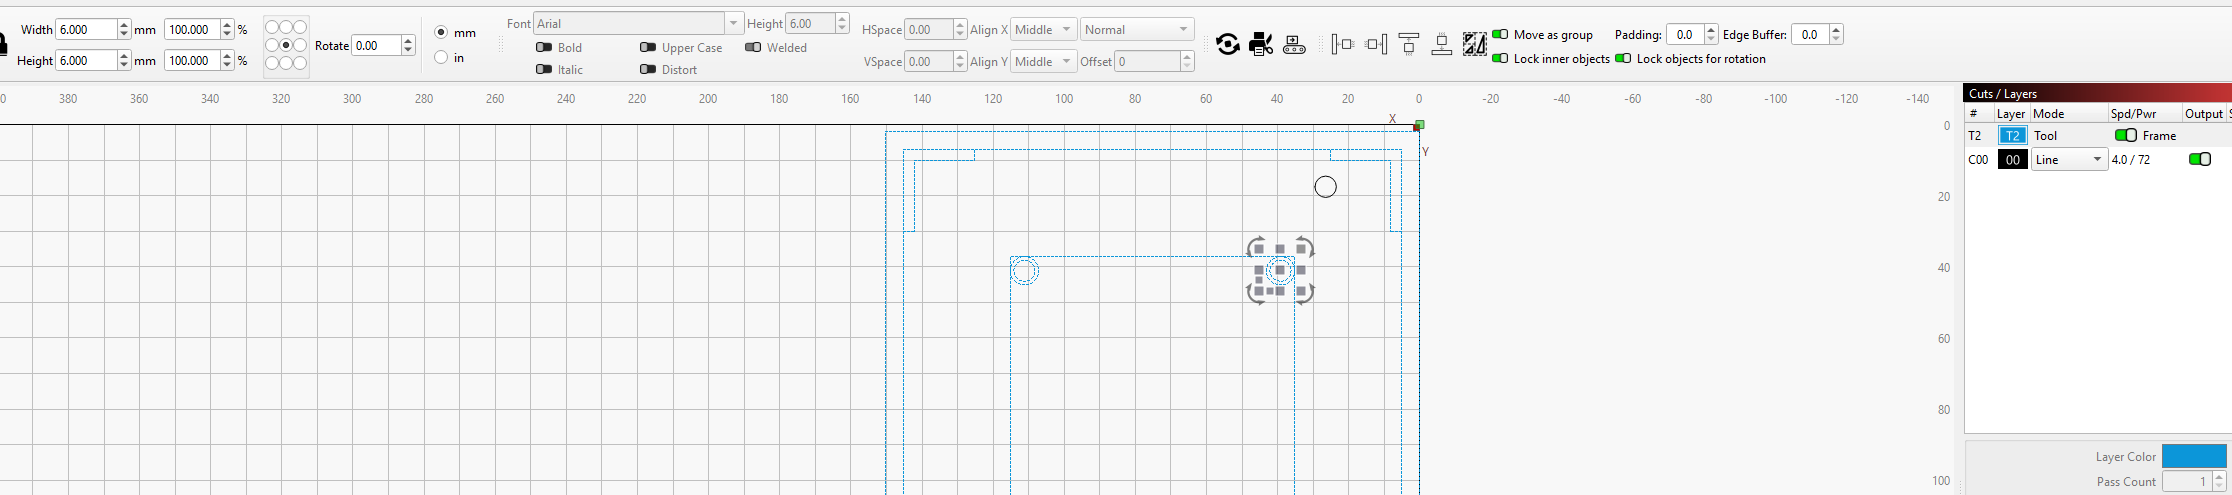
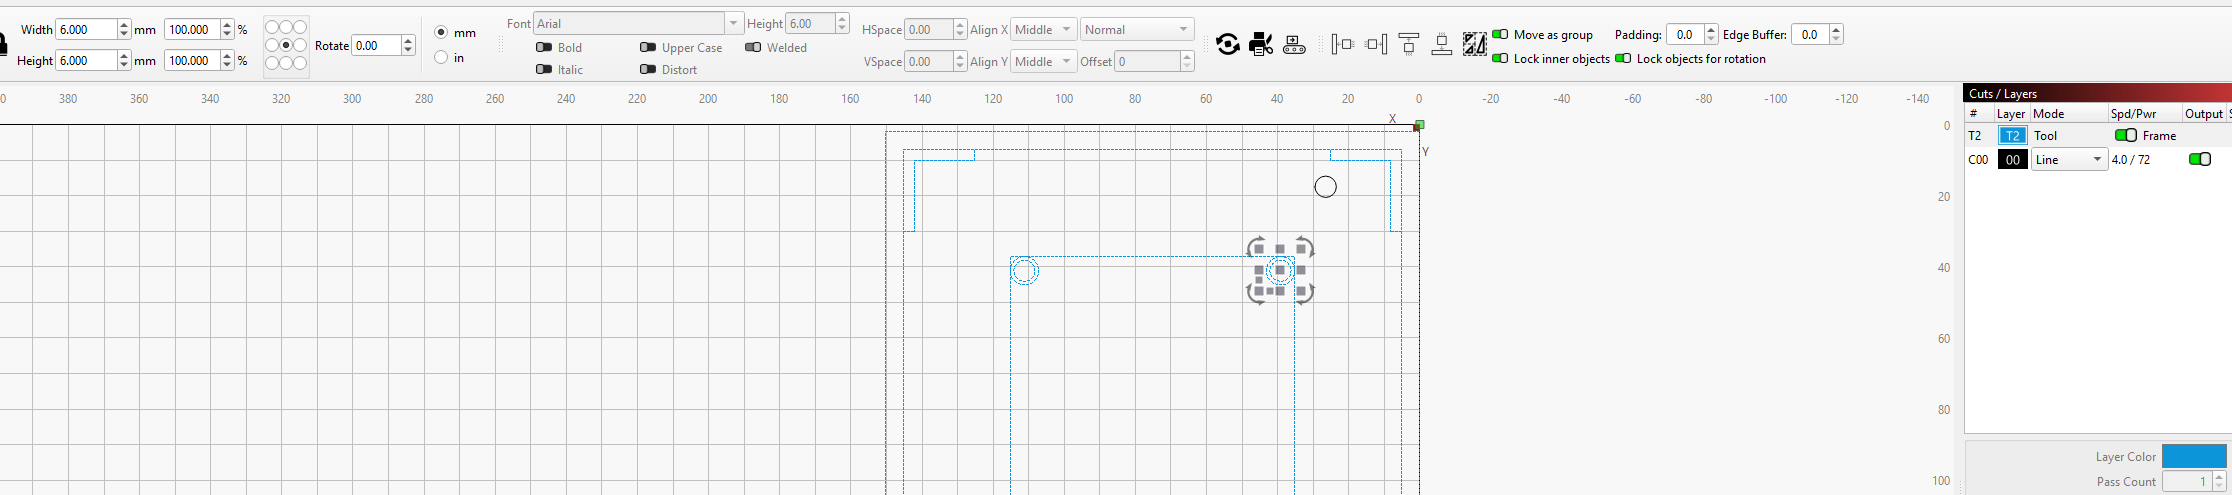
(The second screen I made everything a tool layer so it wouldn’t try to re-cut while I tested the hole. )

After seeing your design, I can almost say with certainty the kerf offset is doing the opposite of what you want. Place the holes on a separate layer by themselves and the ker f offset should behave as expected.

I will try that, thank you! Should I chop cuts into different layers by default depending on the type? (Hole vs Slot vs outside cut)

I will try that, thank you! Should I chop cuts into different layers by default depending on the type? (Hole vs Slot vs outside cut)
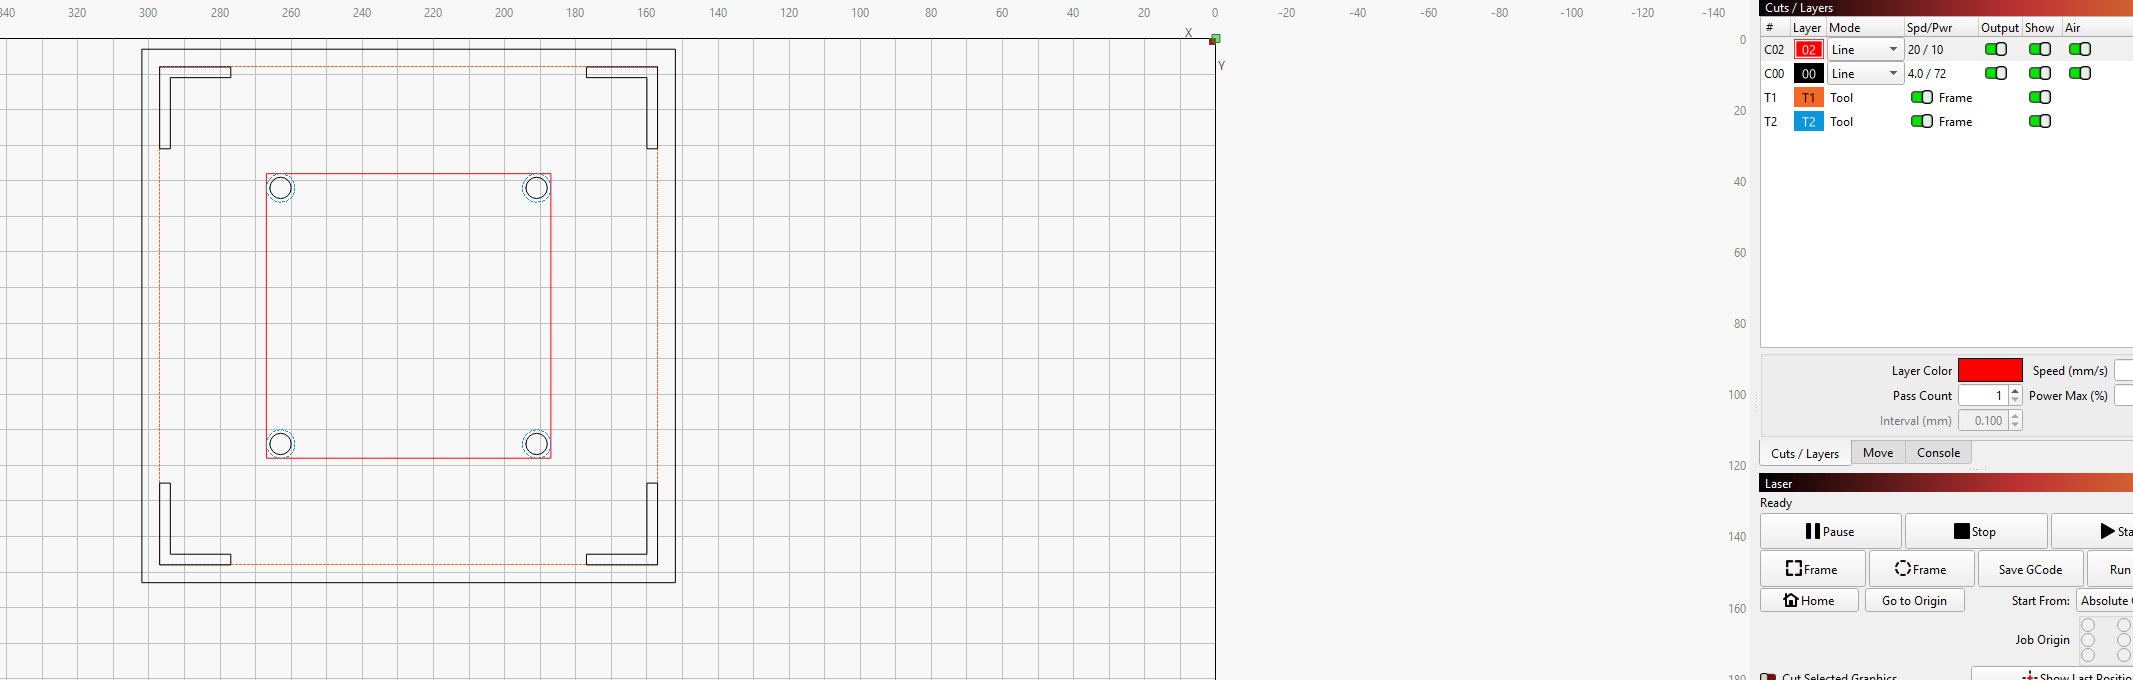
This is what they typically look like, I just separate engraved lines from cut lines from tool lines.


This is what it looked like before I just made it all tool lines.

When you have a kerf offset applied, if the part you want offset is inside another part, the offset will move inward rather than outward. The same as how fill layers invert every time one is placed inside another. Since you probably don’t need an offset applied to everything, just place the holes on a layer with the offset.

That was it, sir, worked a charm. Thank you so much!

Keep in mind a Ruida has a start speed, this sets where it starts to increase to maximum power, as speed increases.

Realized this is a grbl machine, so my additional comment can be ignored…

Good luck – have fun.

:grinning_cat: