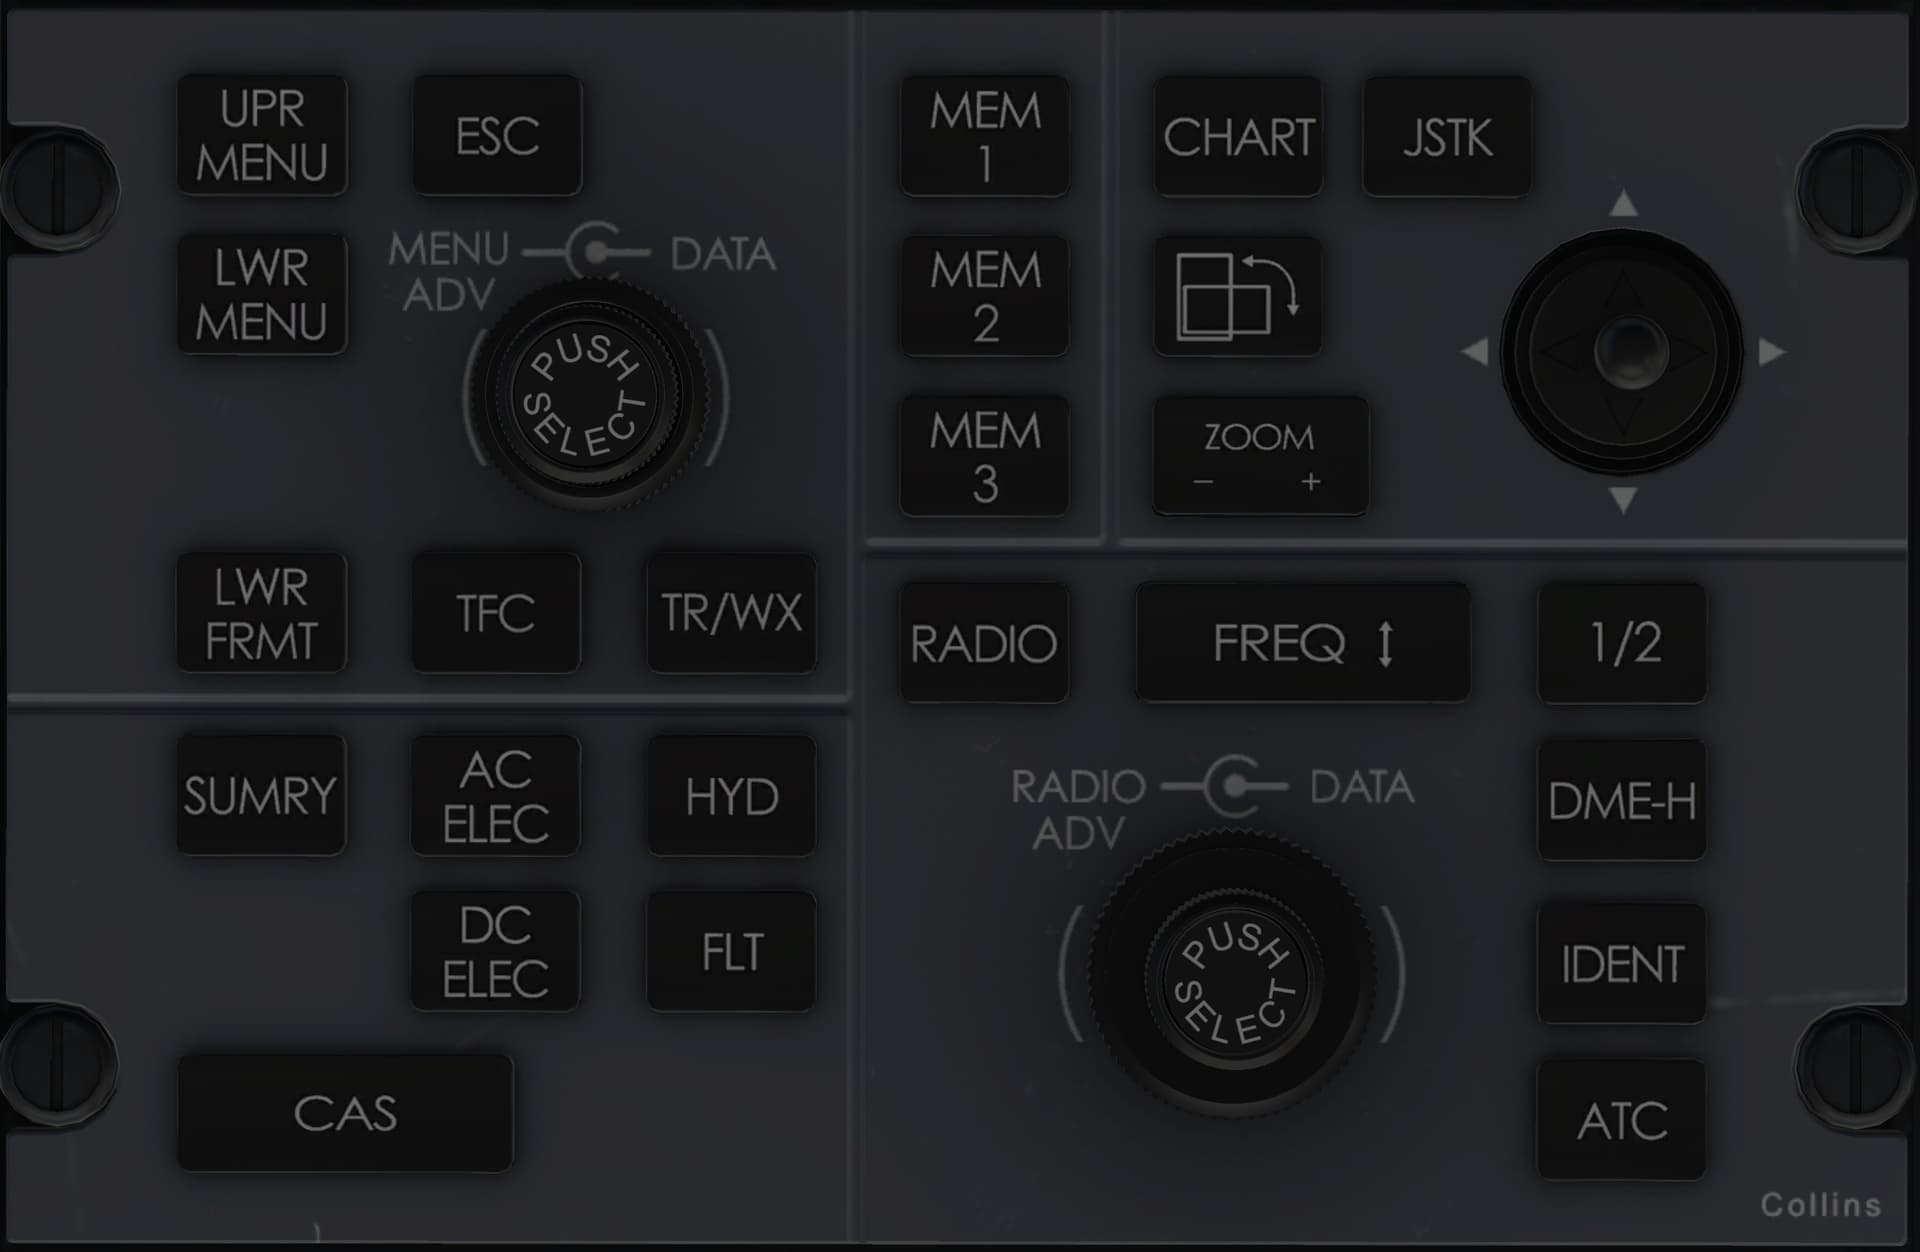
Without wasting too much material in experimentation, does anybody have a suggestion on how to engrave a modestly deep groove in an acrylic panel? I’m engraving panels for a flight simulator using the standard “paint the panel then engrave through the paint”. A few of the panels, though, have pretty deep grooves in them to use a visual separators.
(Example attached). The groove are sort of V-shaped on the real panels, but I’m not hung up on replicating that look – I just want to create a similar visual separator. Any ideas?
I’m not sure if I’m understanding the question. I may be missing something.
How is this anything more than drawing rectangular pieces for the grooves? You could potentially use the ramp feature for fills as a hack to simulate the v-shaped groove if you wanted to try it.
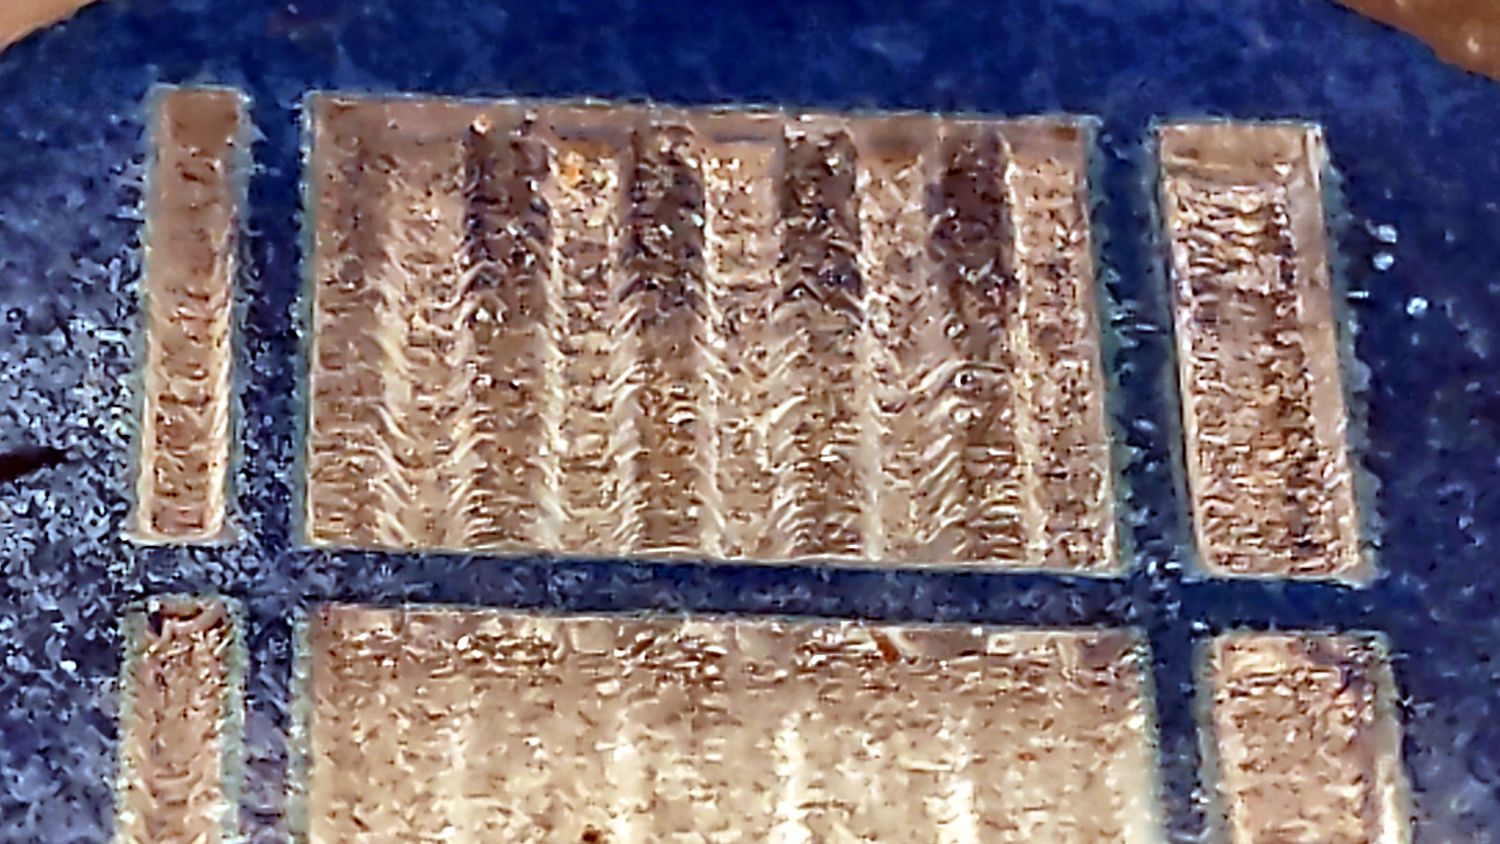
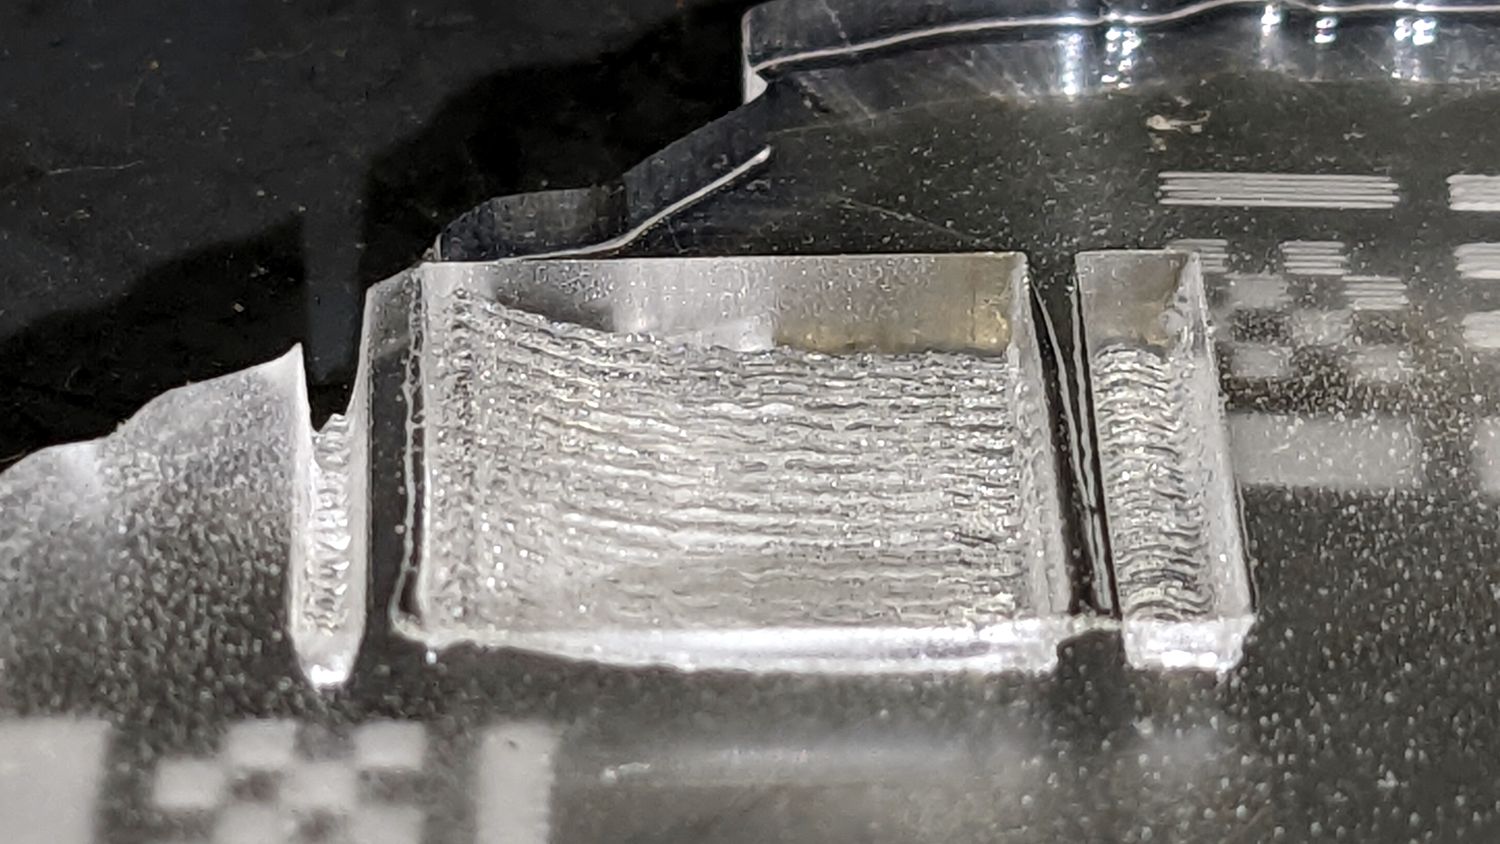
Sorry, should have been more clear. The grooves are much deeper than I’ve ever done before – usually, I’m cutting all the through or just engraving a few hundredths of mm through paint to expose the unpainted acrylic. The grooves on these panels are probable .25 mm deep (and about 1mm wide). Is it as simple as drawing narrow rectangles and doing a fill (maybe a multi-pass fill) to get the depth I want?
I bet you will find it trivially easy… maybe too easy to get to the depth that you want. Limiting depth may be a challenge.
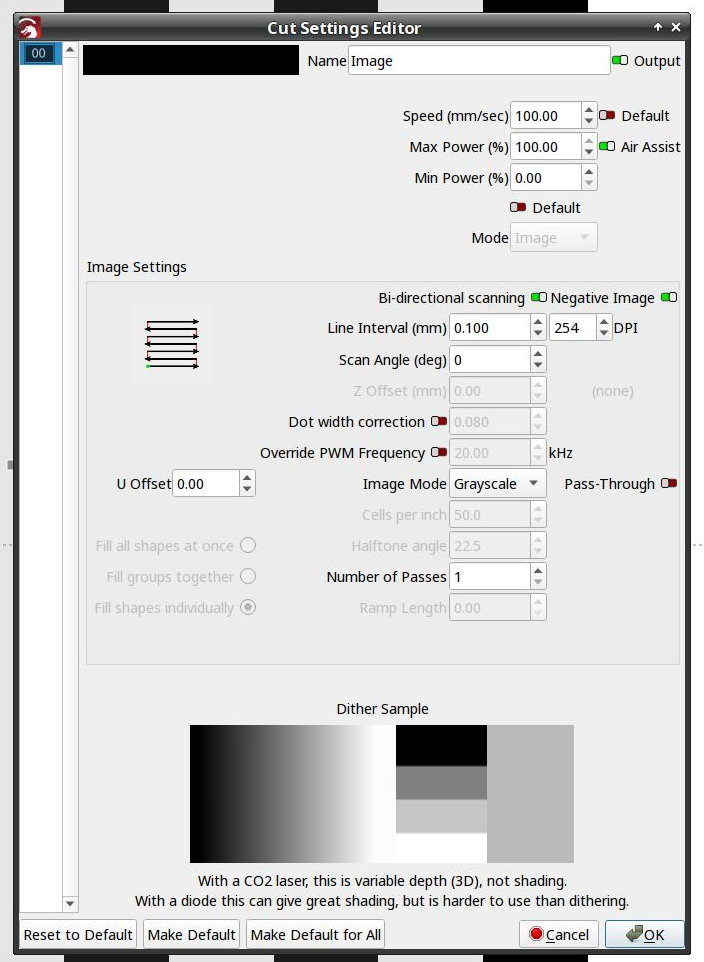
Draw the rectangle to match the width of the groove. Set layer mode to fill. Depth of groove will be determined by speed and cut settings.
What size tube do you have? What settings are you using now to remove the paint layer?
I have an 80W tube. To get to .25 mm I would estimate something like 250 mm/s at 12-13% power for my laser going through the outer protection paper that comes with the acrylic. If you don’t have a lot of material to test with then start conservatively. If you don’t get the depth you want, then go back again. I think you could easily get a .25 mm deep groove with a single pass so wouldn’t count on multiple passes.
It’s possible the paint could require some laser time to get through so you’ll have to account for that.
I’ll be using an 80W CO2 Rabbit laser at my makerspace for the cuts and grooves, so I can start with your settings and go from there. The grooves will actually be done before I paint. That was the other new thing for me on this particular panel. The real aircraft panel – made from aluminum – clearly has grooves milled with a something like a V-bit before it was painted. I do my cuts on the “big” laser, the bring them to my home workshop for painting and engraving (I have a small, 5W Ortur diode laser for panel and button engraving).
Acrylic is not like a natural material it is constant.
If you know what power to cut with, as I usually barely cut through, I can take 1/2 of that power to make a grove that is approximately 1/2 the depth of the material… Not an exact science but pretty close… and gets you very near…
There are other options, such as a de-focused beam … try it on some scrap and see how it works…