We just upgraded our laser cutter from a Leetro controller to a Ruida RDC6445GT5 (so we could use LightBurn), and we’re having issues getting it working properly.
The biggest issue is that in Fill engrave mode, it is very dimensionally inaccurate, and strangely the dimensions vary proportionally to the engraving speed setting. Even though cutting the same shape works fine. (Tested with several simple test files, both made on LightBurn and imported from elsewhere.)
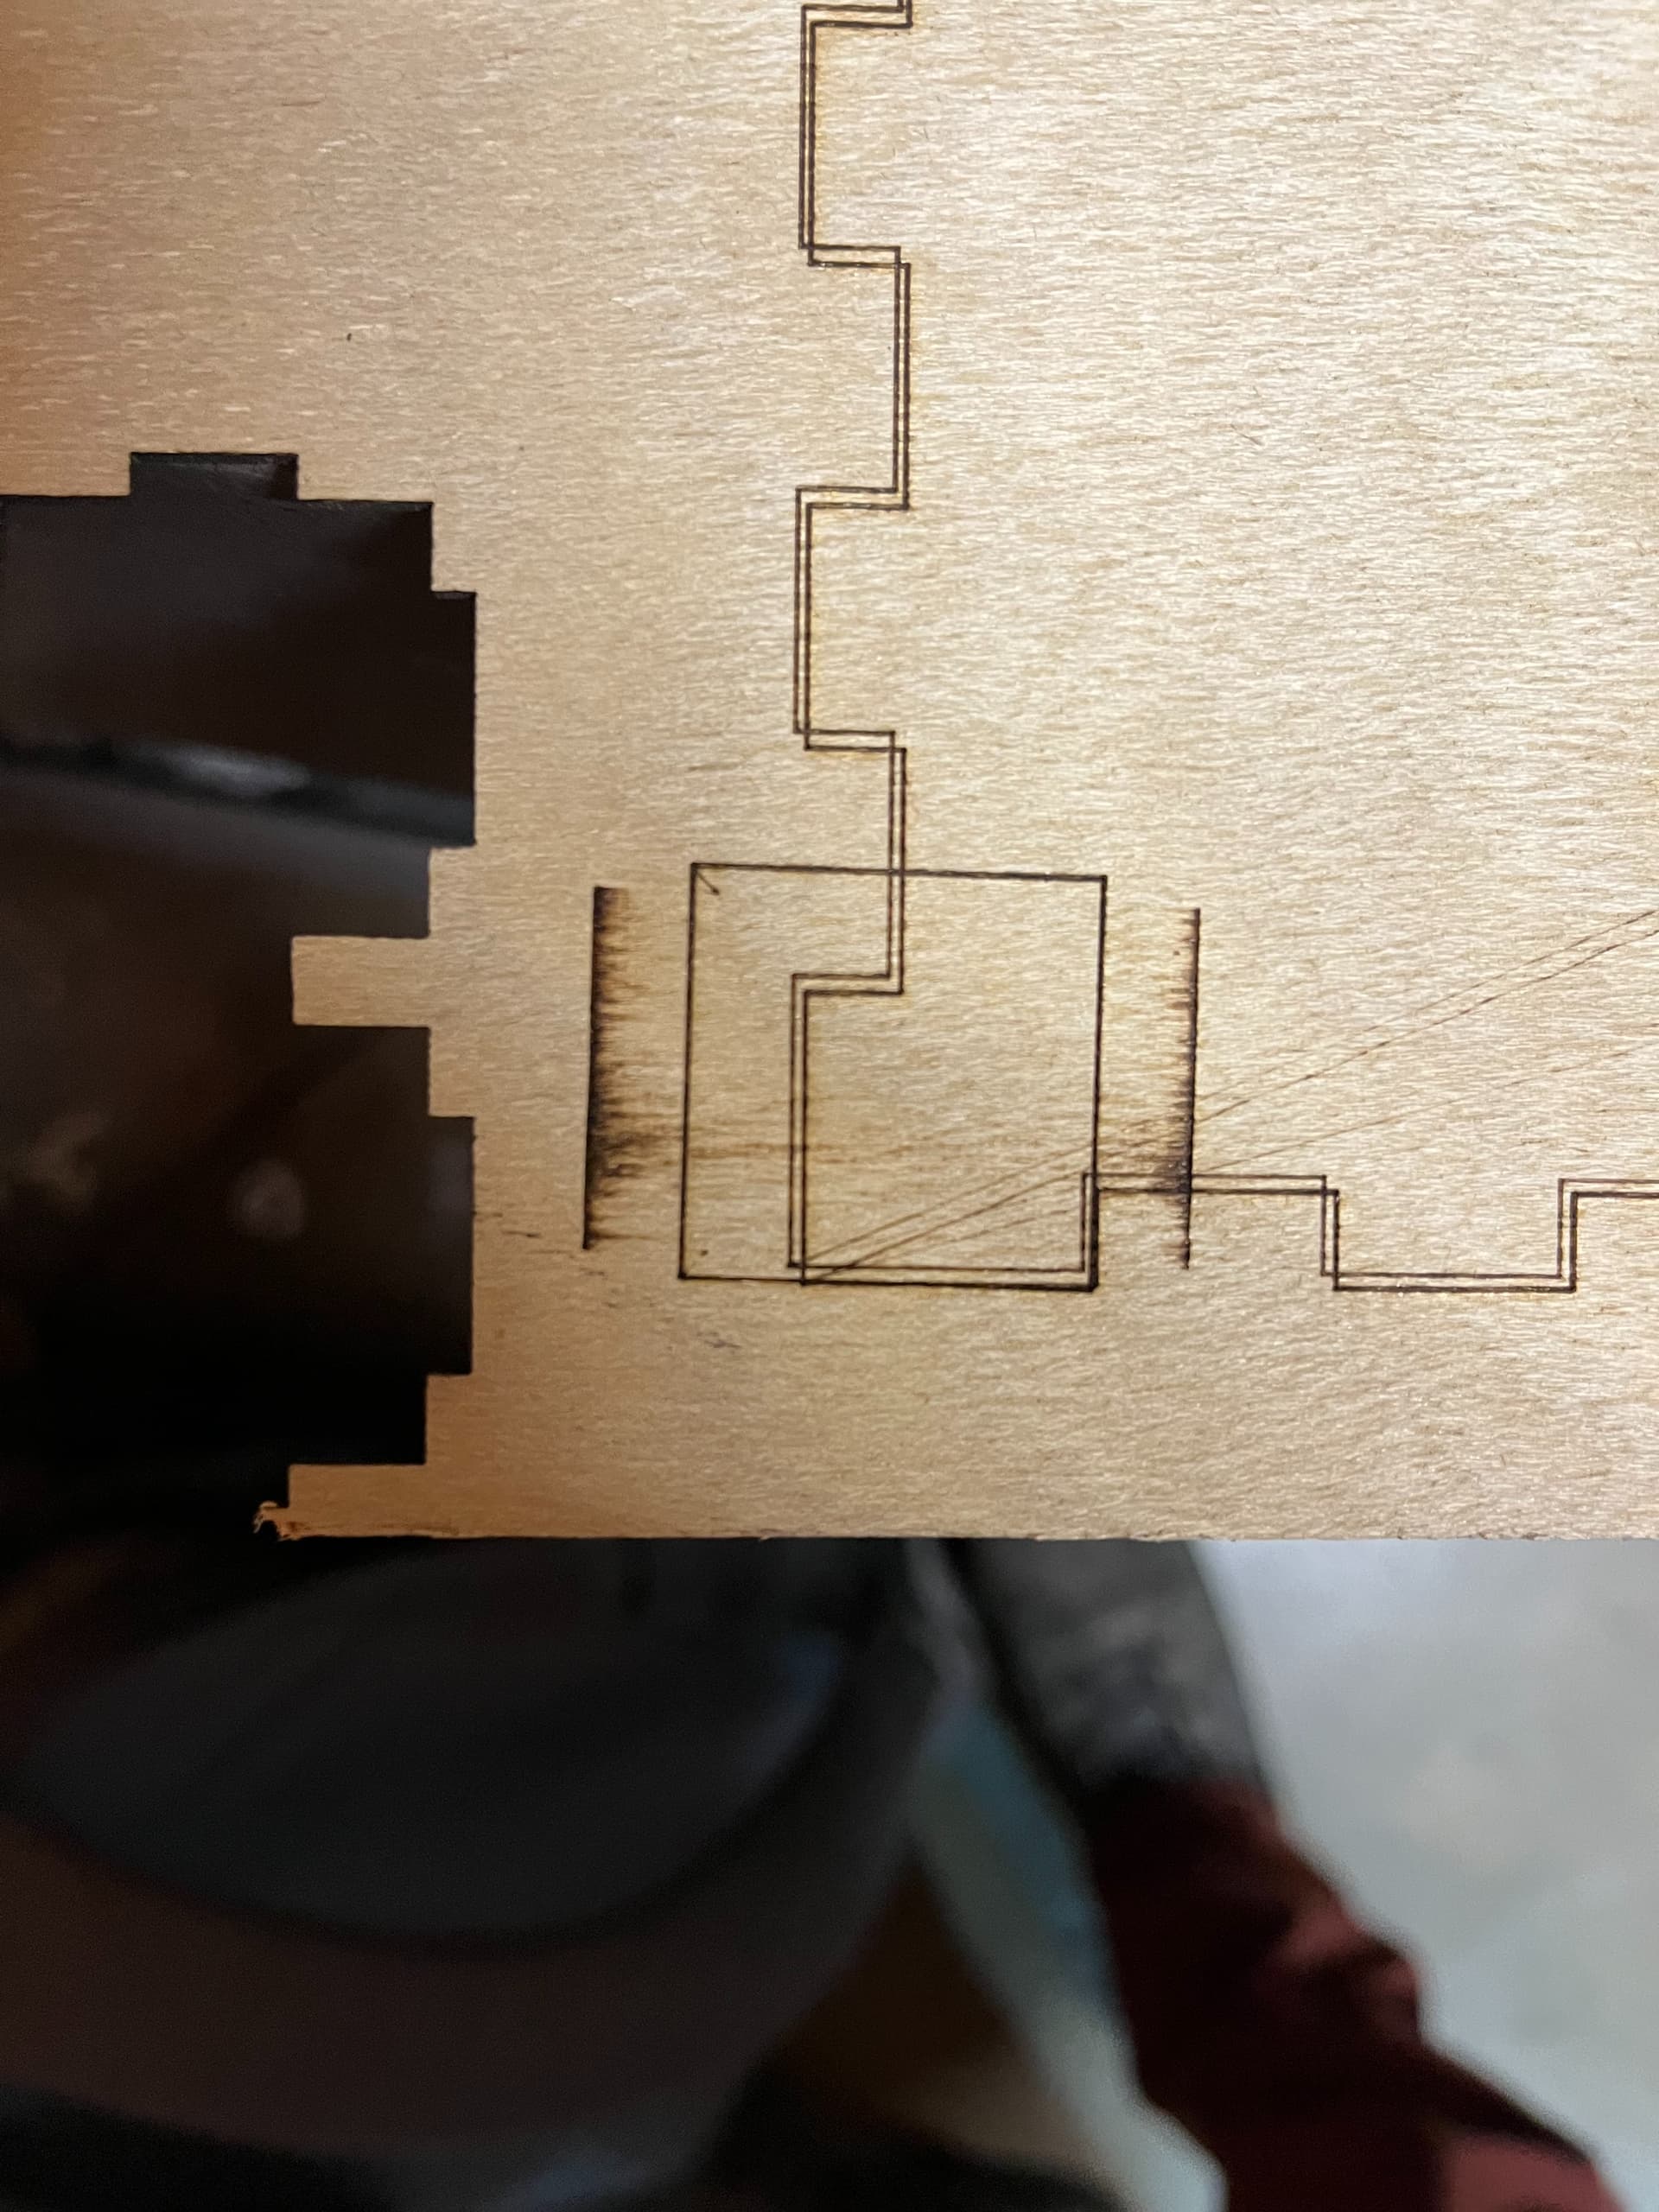
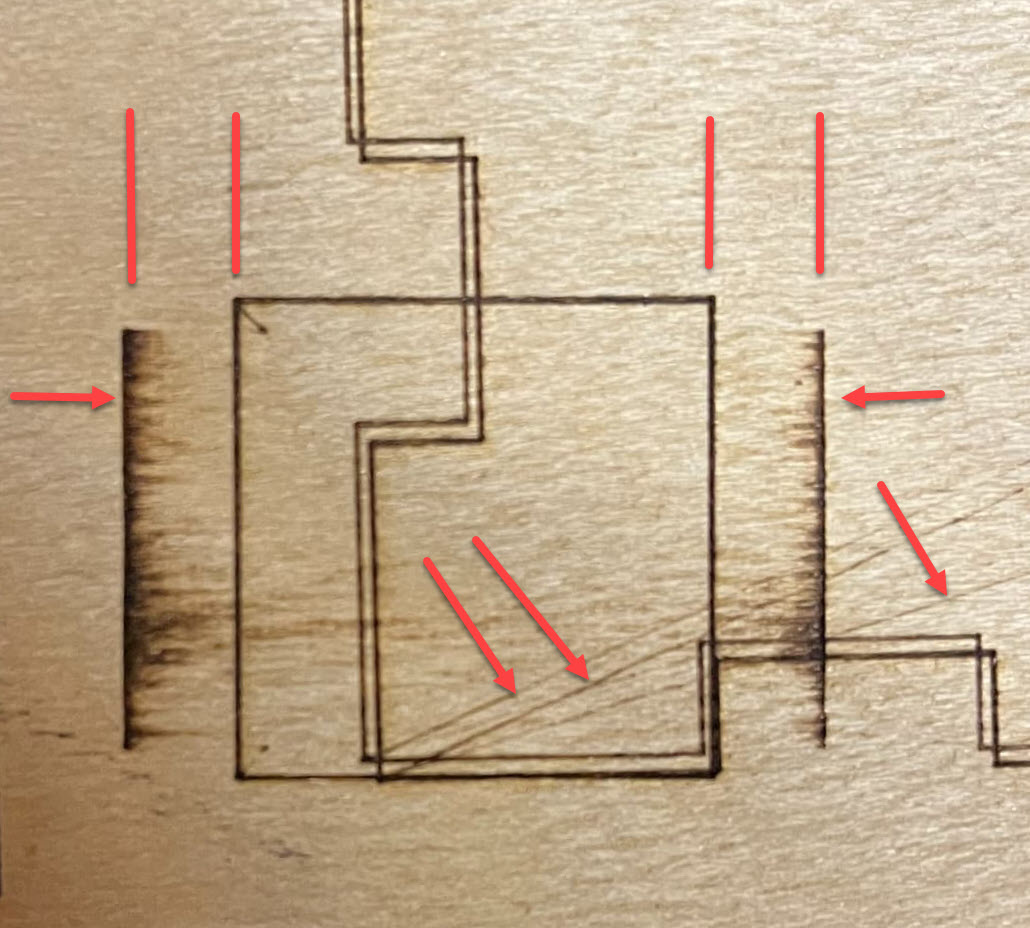
For example, this first image was supposed to be a 1" square cut, with a 0.9" square fill centered inside of it. The cut went fine and was accurate, but then the engrave (at speed 100 / power 50) produced a square closer to 1.5". If I upped the speed to 400, it would produce a square closer to 6". (It also only seemed to fire the laser at the start/end of each line, but we had unrelated laser power issues at the time so I’m not sure if it’s related.)
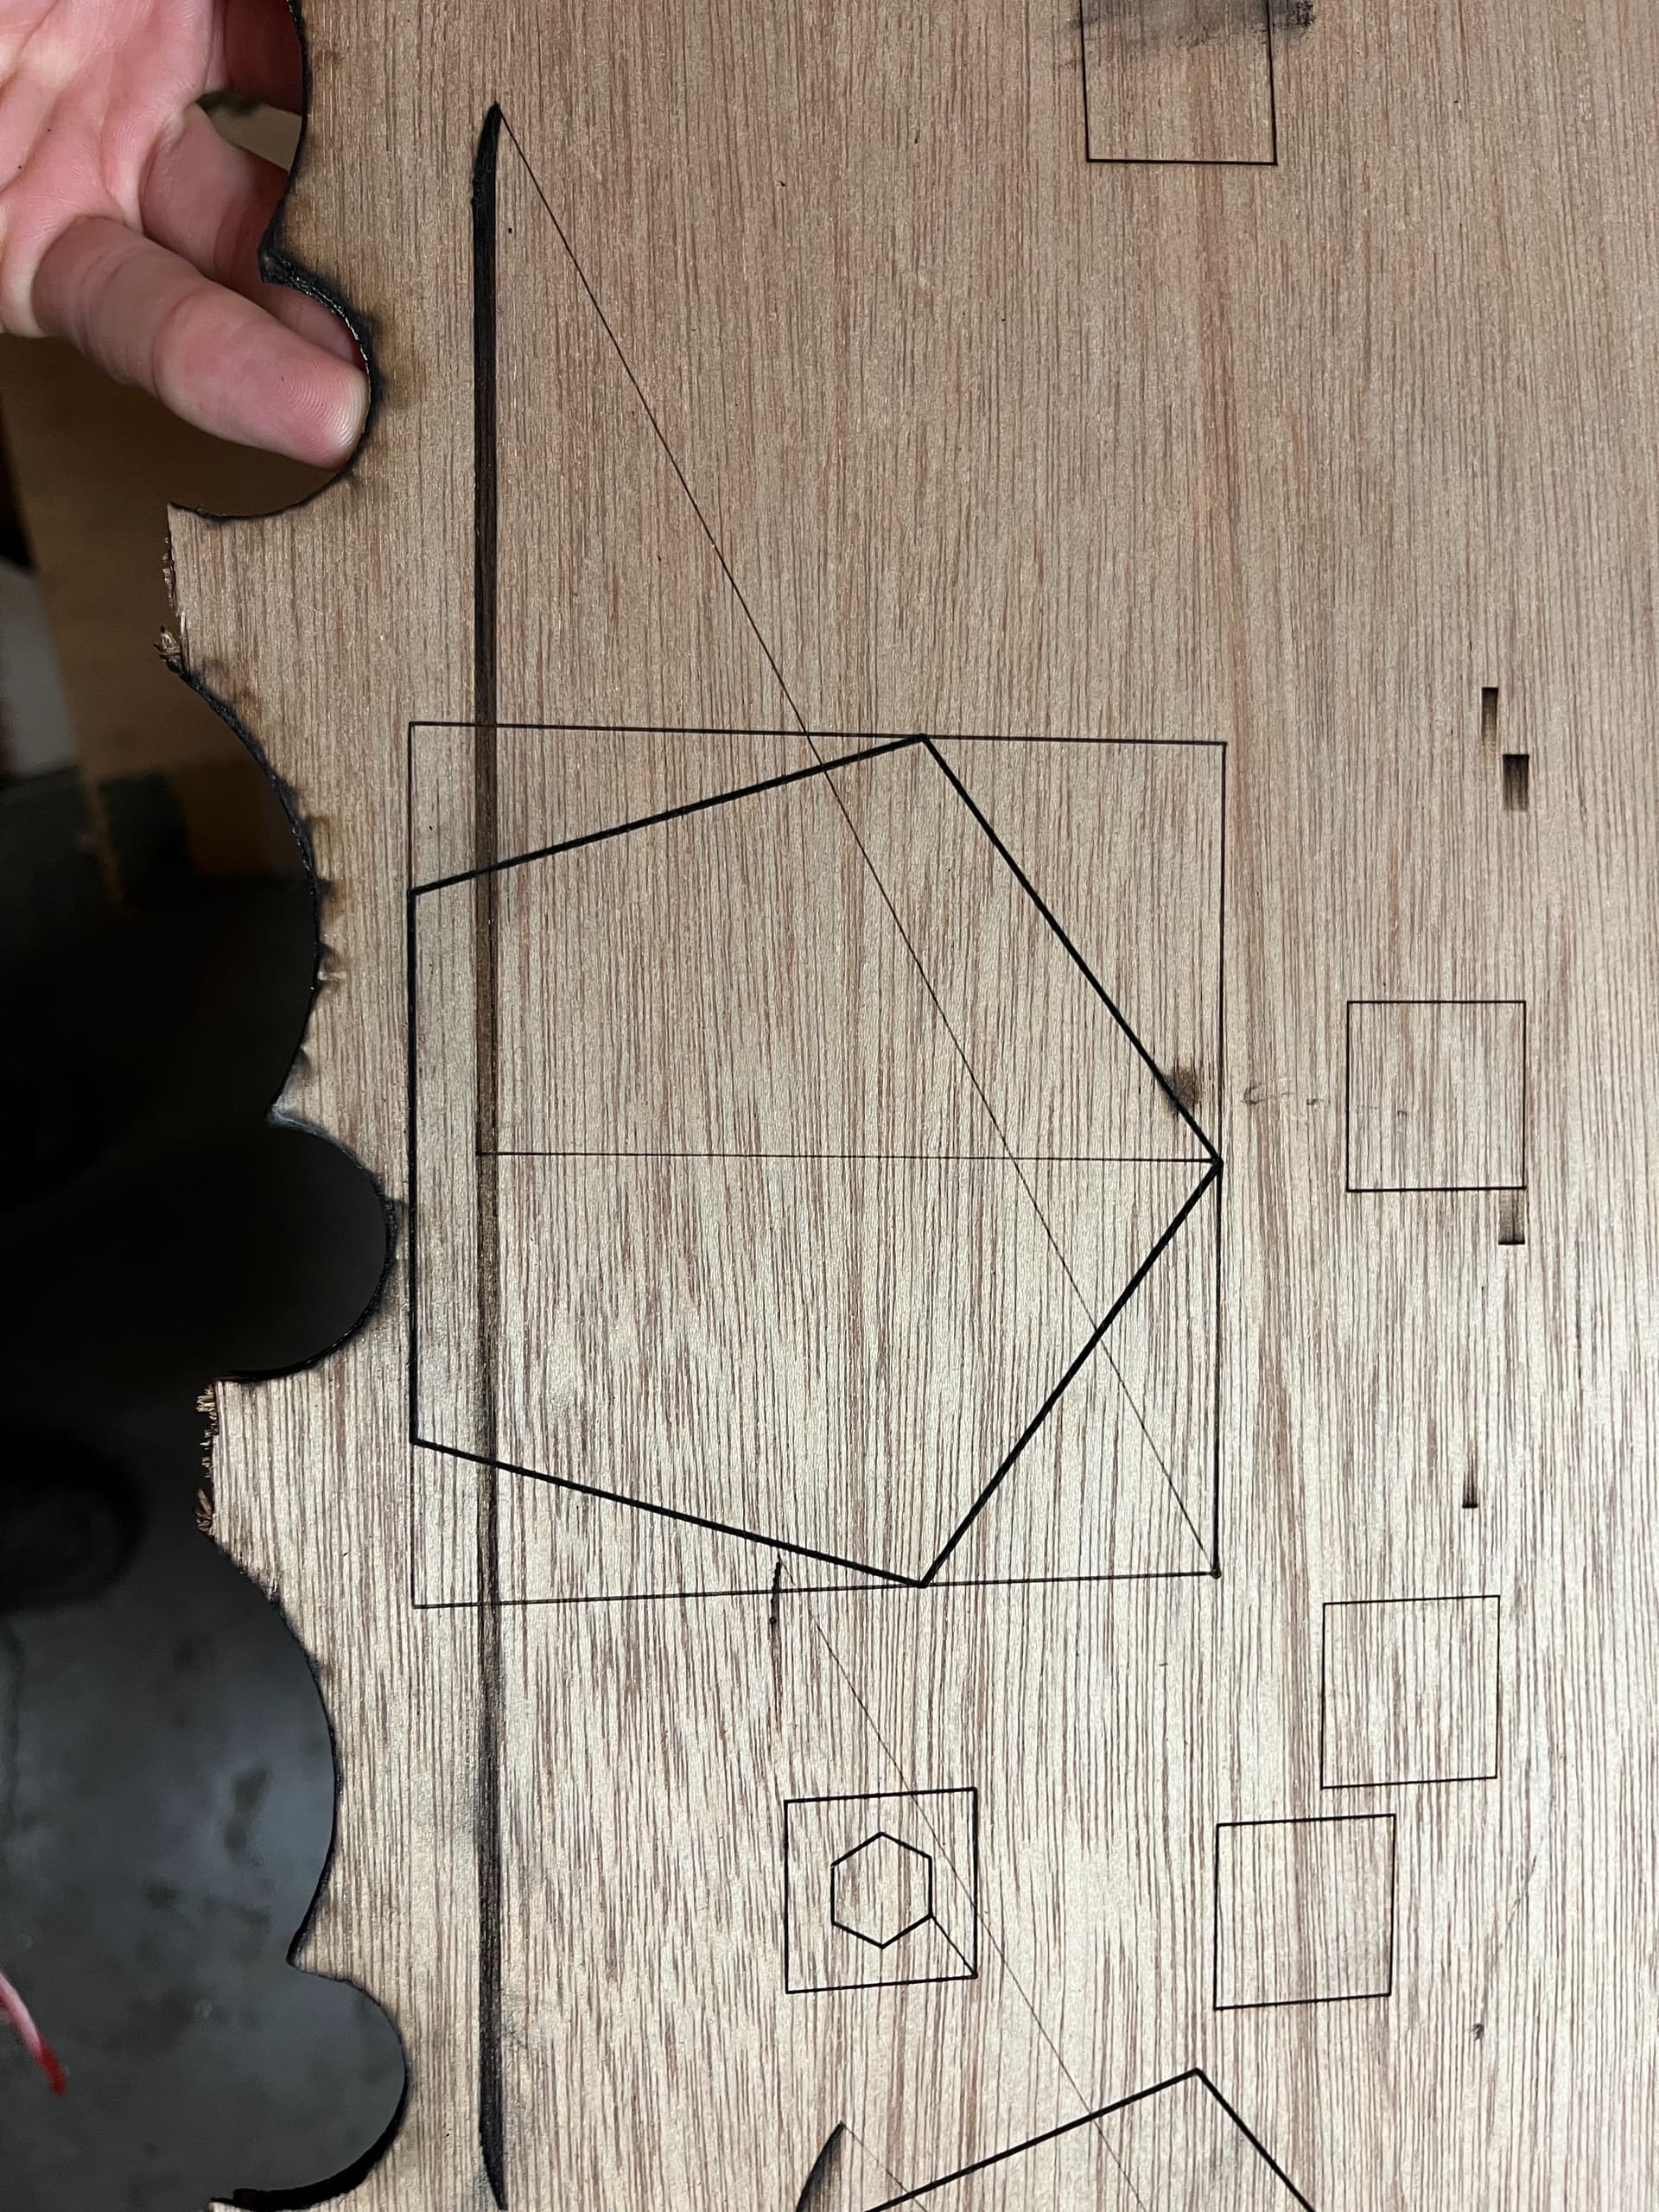
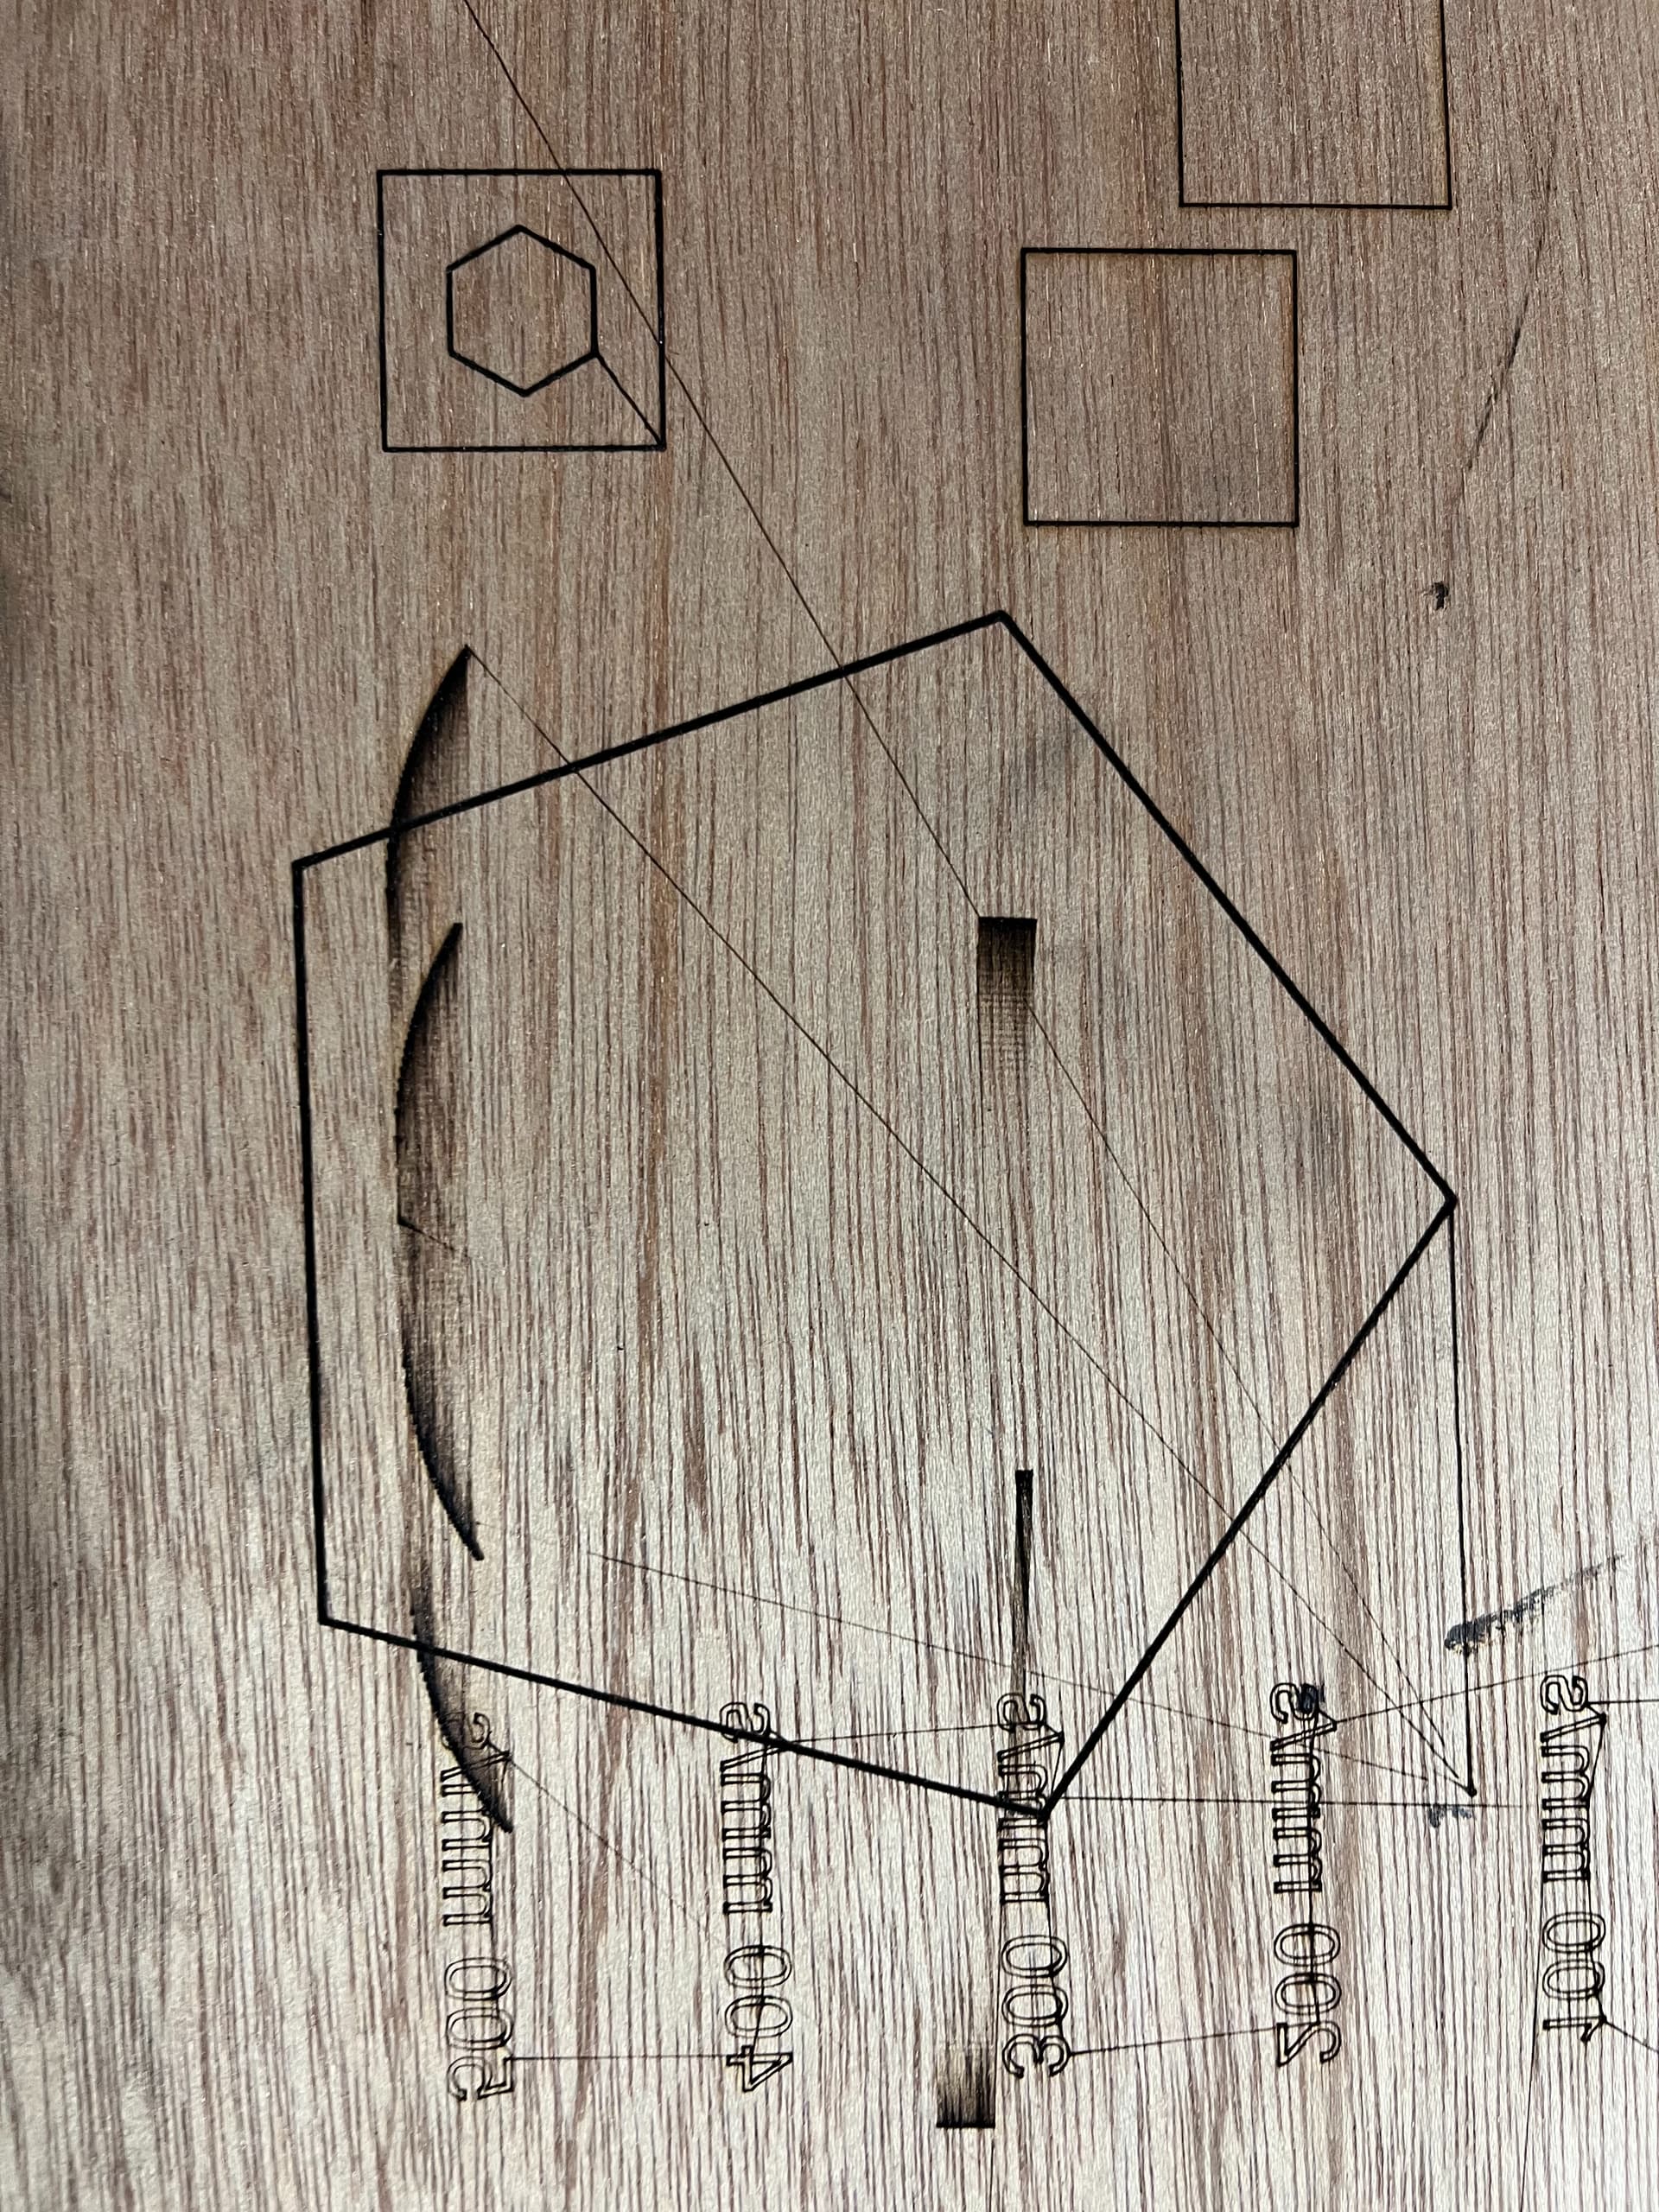
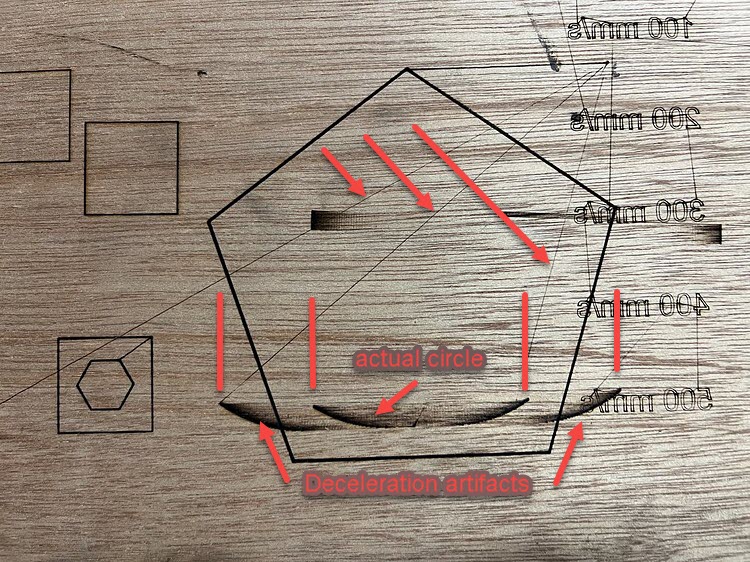
Or, this second image was supposed to be a pentagon cut with a filled circle inscribed inside of it. As you can see, I started at speed 400, and the circle was enormous - at least 4x the proper size (I stopped it early because it would’ve taken forever). I tried the same design with lower engraving speeds 200 and 100, and it made proportionally smaller circles (see third image).
Most of the lines look excellent. The mechanism is tight and all under control. You’re off to a great start.
I see a few things that may be simple settings.
I believe the square in the first image is showing an artifact on each side that is related to the deceleration of the laser head as it scans. The artifact is produced when the laser is slow (or stopped and changing directions). This seems to be some unanticipated output from the laser tube - likely from the power supply. It would have to be significantly lower power than what is being called for when engraving the square at the requested speed and power because of the deceleration to zero speed.
The diagonal lines, pointed out with diagonal arrows, are showing me that the tube is firing when it should be off. This would also create the artifact around the square.
The traverse speed is usually set much higher than the engrave speed. To leave any mark while traversing the tube would normally have to be at or near it’s upper limit. If the engrave and traverse speeds are set similarly for your engraver with it’s new controller this typical diagnostic point isn’t valid here.
Slow traverse and low level tube output while traversing explains both behaviours. I would look at the wiring between the Ruida and the High Voltage Power Supply First. Then I would look for steady sources of false-firing signals (power supply noise, fan motor noise, water pump noise, chiller noise) that could be steadily triggering the High Voltage supply unintentionally. Third, I would look for weak, loose or missing grounds. It’s possible that the steady low power firing is caused by an unintentional controller setting, but intuitively I’m thinking machine noise.
The third image with the Broken Filled Circle returns and restarts instead of completing the task. Because it’s filling the circle, we’re likely seeing the same artifact that we saw on the square. Breaking and restarting can be a machine noise or communication issue - unless of course you just cancelled the job.
To supplement @JohnJohn suggestions, it might help to …
Run a job that has the issue and then re-run it. If it has the same aberrations it’s probably not some kind of interference. I’d expect more of a random effect from interference… since they should be asynchronous.
Check for the wiring actually being screwed down if it’s a suspected interference issue. I’ve seen a number of them that the wires were in place, but not screwed down… only the layer of glue held it until it became intermittent… It’s easy to ‘gently’ tug on the wires and ensure they are secured by the screw.
I can’t remember any interference problems with Ruida controllers, the control signals are fairly low impedance, so it’s hard to induce enough current to switch them…
If the lps is firing when it shouldn’t, that’s more difficult to check, but can probably be done with a scope and the appropriate probes.
Thank you so so much for the help, both of you! You were right on the money - we swapped a wire between the controller and the power supply. It cuts great now.
We were so caught up in how far the head was moving that we weren’t really considering the other part, which was laser power. I still think it’s moving a little dramatically (i.e. the overshoot and slowdown make each scan line take a while), but that’s an issue I’m sure we can solve by tweaking the deceleration settings and etc. Thanks again, we’re so excited to have our new controller working!
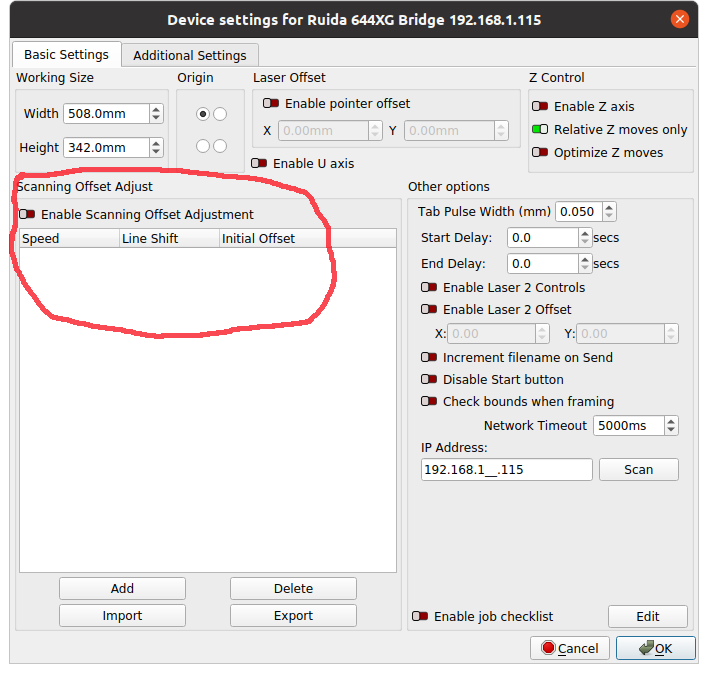
This is overscan and you can make certain adjustments to how it operates. Most of the overscan is really handled by the Ruida, but Lightburn allows for adjustments for belt slap or correction under Device settings…
Thanks for the extra info, Jack! That makes sense. Now that we’re starting to use it for actual production jobs, we’re also seeing intermittent and occasional issues that seem more motor/belt related (i.e. it cut a diagonal line occasionally when it was supposed to turn a tight corner). I’m guessing those same settings might be related, so we probably need to play with them a bit…
And I accidentally swapped the power beam control (L-AN1) and ground it’s an old machine with very little labeling. I think that explains a whole lot of power issues!