I’m working on a project in which I’m engraving across three pieces of wood. They are single long wooden cubes about 1/2 inch thick and 6 inches long. The hope is to be able to turn them after engraving on one side and then engrave on the next side. But I’m finding that the first engrave kinda burns into the small spaces between the three pieces and when I turn them, hoping for three more clean sides to work with, there’s some burn marks. I’m curious as to whether I should somehow create some kind of ‘erasure line’ with light burn that would go the full length of the drawing and therefore not burn that very small minimal section between the pieces. How would I do this in Lightburn? OR… do you have other suggestions? Thanks
If I read your posting right, you are engraving but marking the sides at the junction of the pieces.
If this is a continuous image across all the parts, I am not sure I have a solution for you, other than lightly sand the edges.
If it is not one continuous image, simply make sure your burn never reaches the edges.
The laser never erases, it burns material away, leaving a charred area (wood)… If you are thinking of turning the laser off, would that not leave a gap in your image?
Without an image of your work, it will be hard to offer any more suggestions.
1 Like
I’m also having trouble picturing what you’ve described.
If you are engraving an image, you could try applying a sliver of an image mask to help keep the edges in between clean?
I would suggest that you make a jig hold the items where you want, and adjust the image to burn one block at a time.
Free recycling cardboard (Amazon boxes) makes a fine jig material. I staple as many layers as I need to a piece of wood (carving board from my reject pile) and then I outline the project piece about .5 mm larger in all dimensions to make a slot for the work piece.
Can you post a photo of your attempt and maybe even a lightburn file? There may be more ways to achieve your goals
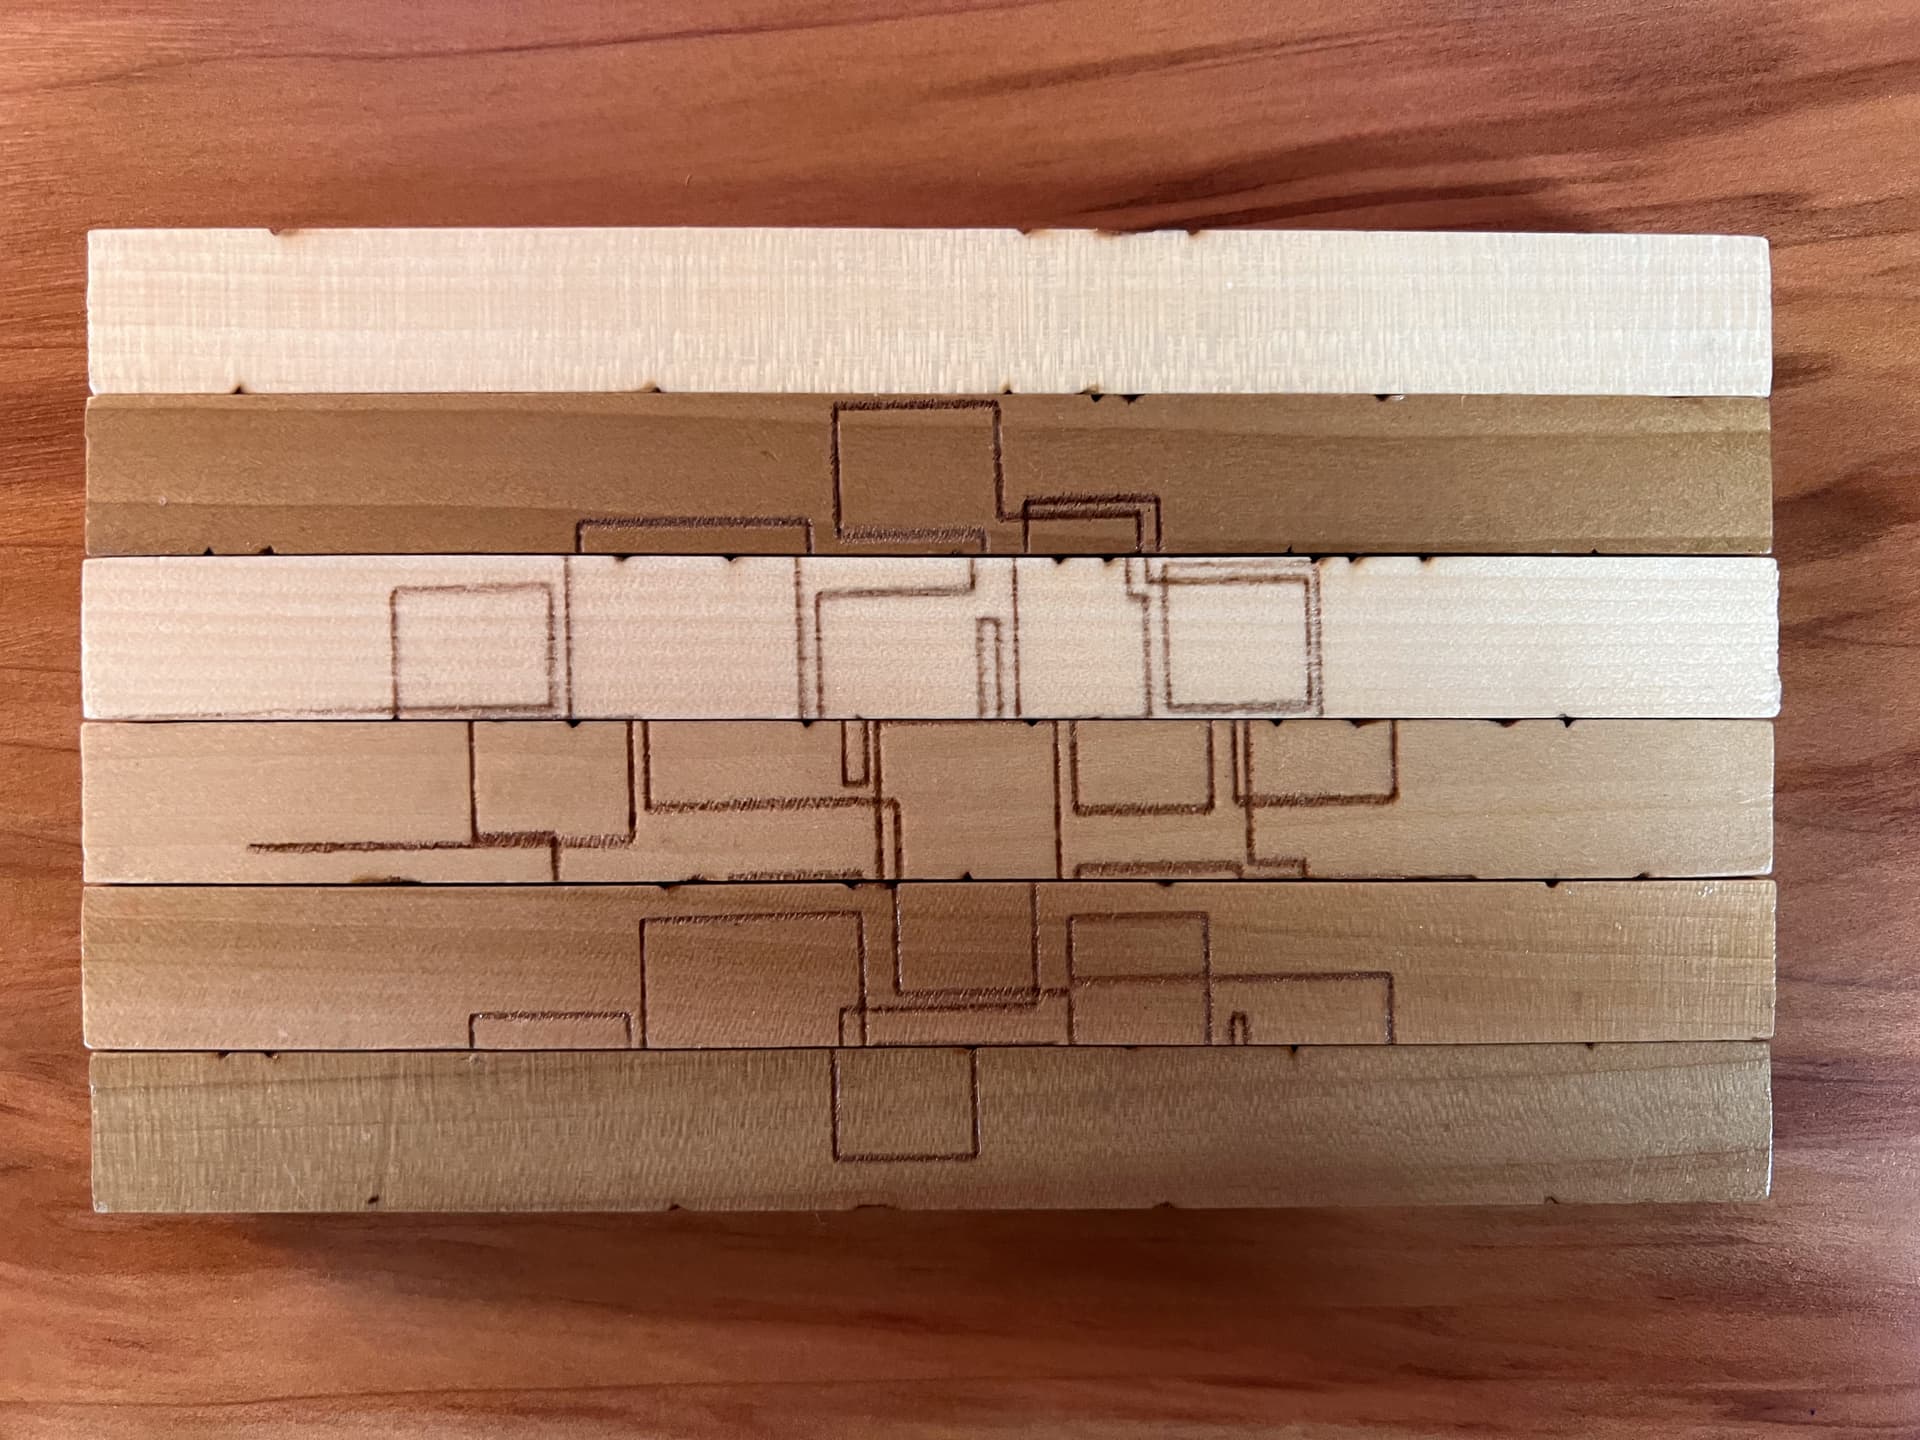
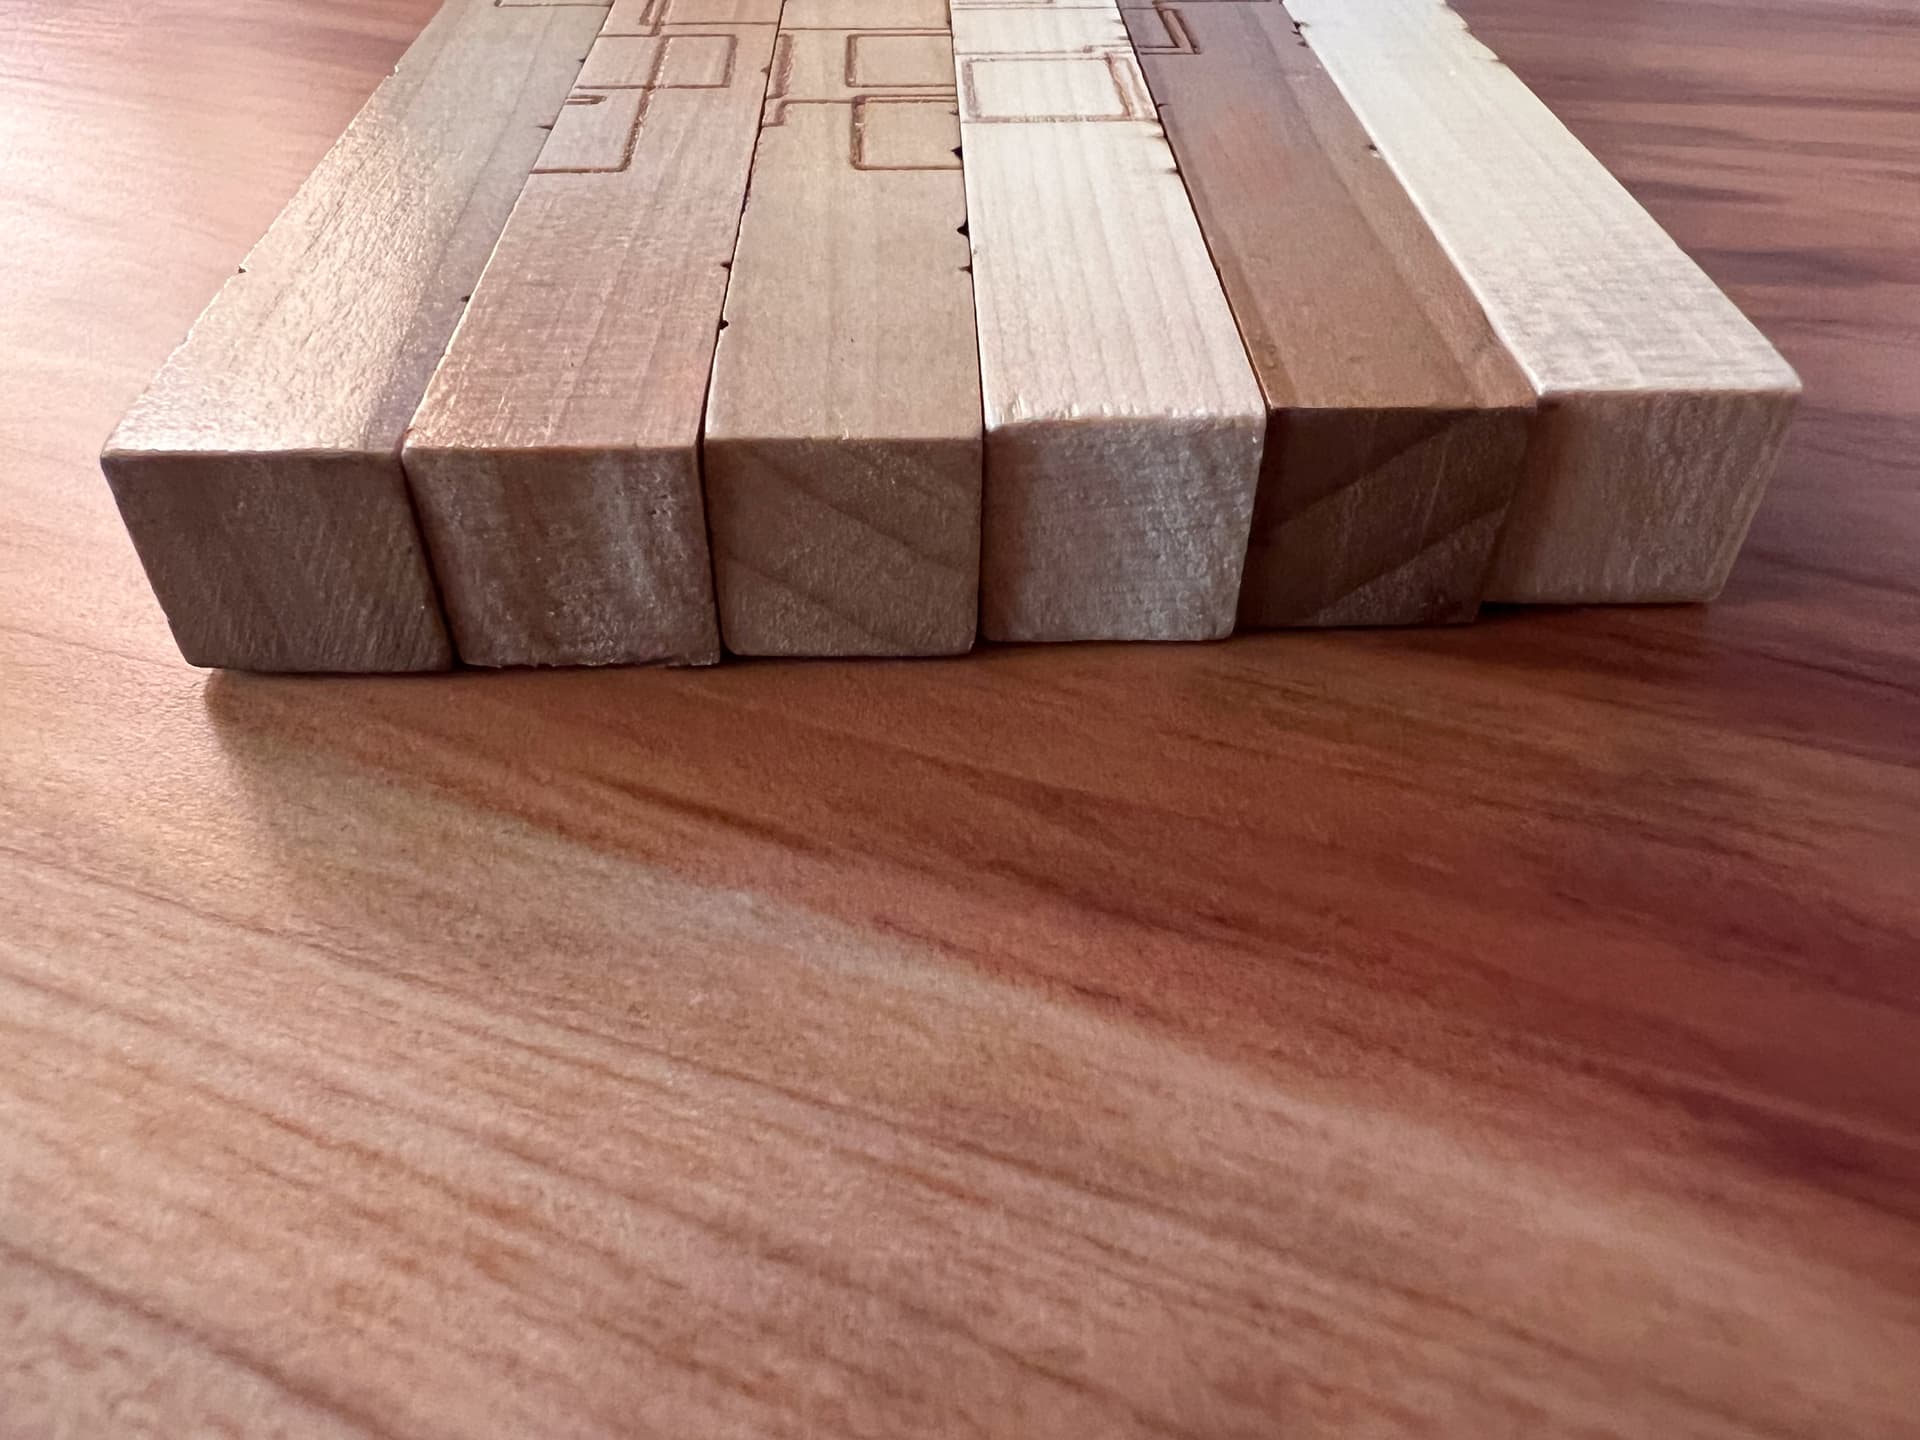
Thank ya’ll for getting back to me. I’m attaching three images to help get a better understanding of the situation. I originally engraved these within a jig that tightly held the six pieces together, but as you’ll see, the laser naturally burned in between the cracks as it passed over each piece. The suggestion to sand down that overburn isn’t very possible as it will begin to destroy the picture that’s burned into that side of the wood. This is a puzzle with a different image on each of the four sides of the wood. Don’t get confused in trying to decipher the second image as the pieces are not in the proper order.
But what I do want you to see is what shows when simple turning the pieces one turn from that first image. You can see about 45 spots on one picture and about 18 on the other where there is overburn from the other side of the wood. I hope I’m making sense. So since sanding isn’t an option, I began wondering if I could perhaps try to line up my image in LB with the image of the six pieces of wood which show from the laser camera, and somehow draw some kind of ‘delete line’ down through the image in LB in order to prevent the overburn. I’m very concerned that if I do so the lines won’t properly connect as desired when the puzzle picture is put together. It’s a vision I have but I’m not able to fulfill it. Again, any suggestions are appreciated.

I made 5 boxes 1mm tall (I made them this tall so they show up in the screenshot but you can make them whatever size you need) and longer than needed and used the cut shapes tool to remove the section where the blocks meet. You could then burn your image and they would stop short of the breaks between the blocks.
As long as your blocks are the same size and fixed in position on the laser bed.
1 Like
I’m so thankful. Didn’t know there was a cut shapes tool. I’ll find it and put it into practice. That’s just what I was hoping for. Thank you again and again.
1 Like
Here’s a video I made in response to your Private Message.

1 Like
Tim, your videos are outstanding!
In my opinion, they should be linked in the Docs as helpful resources.
![]()
2 Likes
Thank you so much.
2 Likes
Tim, you are indeed a blessing, my friend. What a blessing! I’ve been sick and on a few more meds than usual, but I can’t wait to be well enough to go out to my garage and do this. And yes, I will eventually send you an example. You explained it so clearly. Thank you so so so much. I have discovered I’ll also need to make two more lines (one for each of the outside edges so there will be no burn down the outside). I can’t wait to finally practice on these. But it’s gonna be awhile before I can. Thank you thank you thank you.
You didn’t have to take the time to do all this. But as a caring individual… you did! God bless you big time.
1 Like
Your words are too kind, thank you. I truly enjoy helping people in this forum.
1 Like
I know you have made several excellent videos. A YouTube search only provides Image Settings and Optimization Modes. A Google search is even worse.
Can you provide a list of links to all your Lightburn related YouTube videos? Or where we can find them?
1 Like
I was away on vacation and didn’t have internet. Here is a link to my Lightburn tutorials Playlist.
3 Likes
Just now checked the URL out. You have been busier than I realized!
Thanks!
I have been striving to post a new video every Saturday and occasionally a second video during the week.
You shooting for a Guinness Record? ![]()
1 Like