I’m sure this is a setting issues, but just switched to light burn from K40 whisperer. The only issue i’m having has to do with Acrylic Engraving. When doing it in k40 with the same settings there are two differences. 1st. with the same power / speed on k40 i would get i light graze of the acrylic. You could feel it, but it was very shallow (what i need for this). With Light Burn small lines like parts of the ears are correct, but the edge of the shirt are nearly 1 mm deep, while the center of the shirt is closer to what i expect. Can someone point me to what i’m missing in the settings?
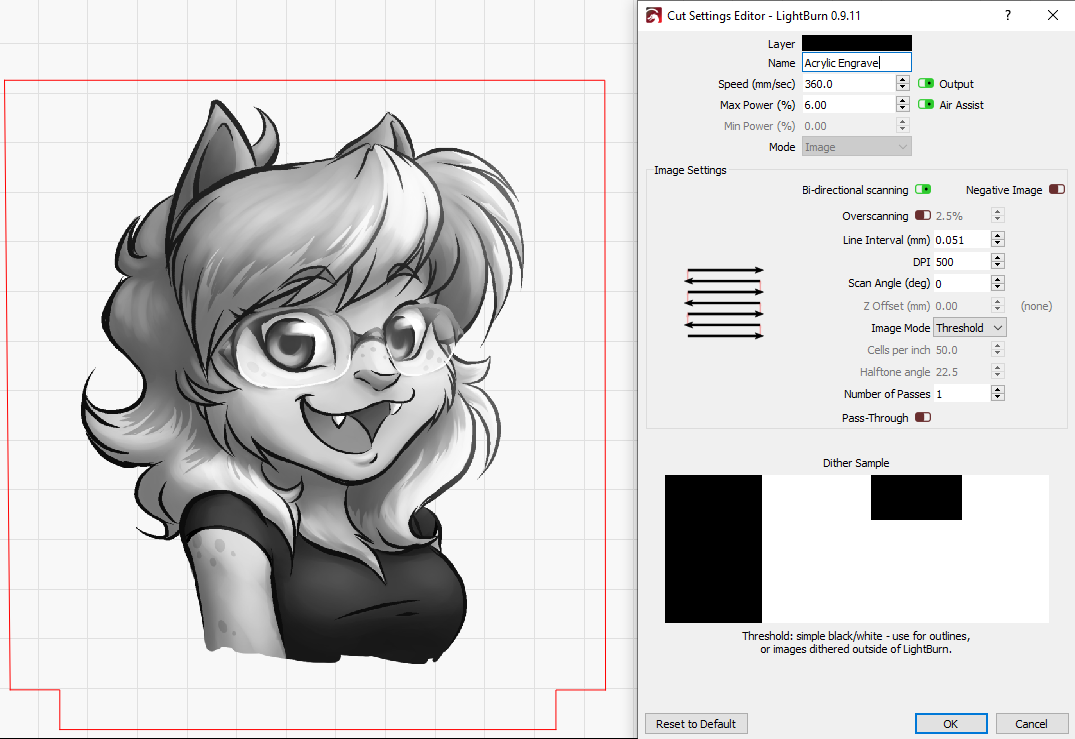
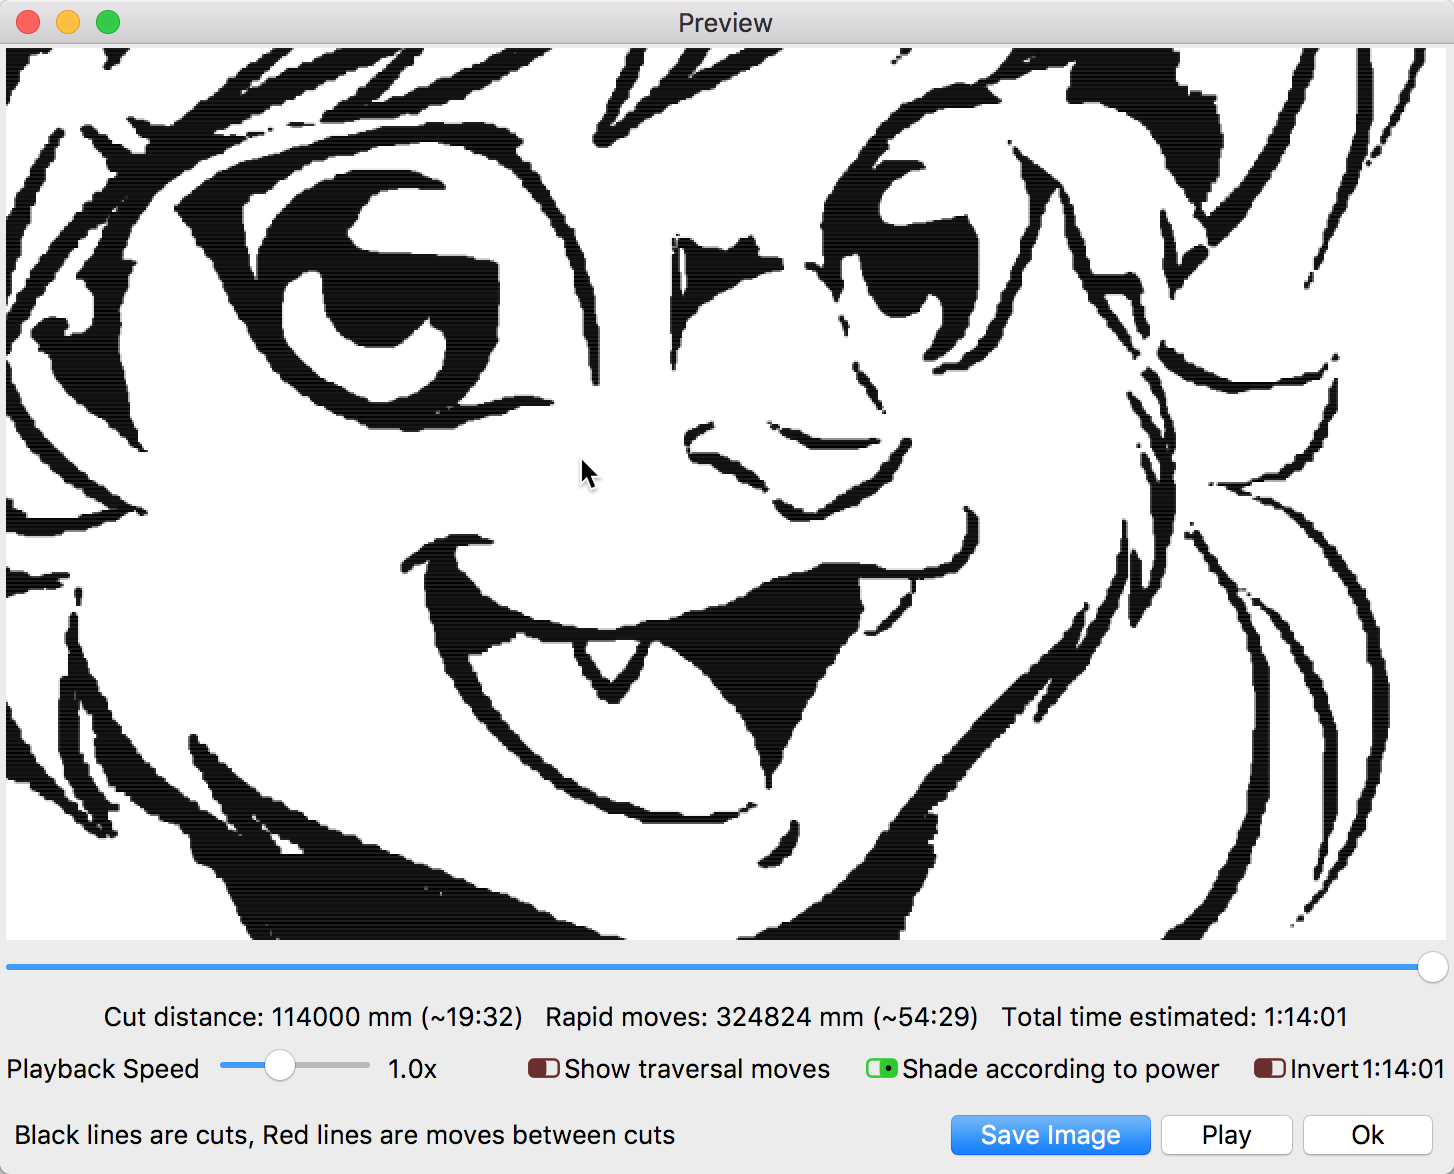
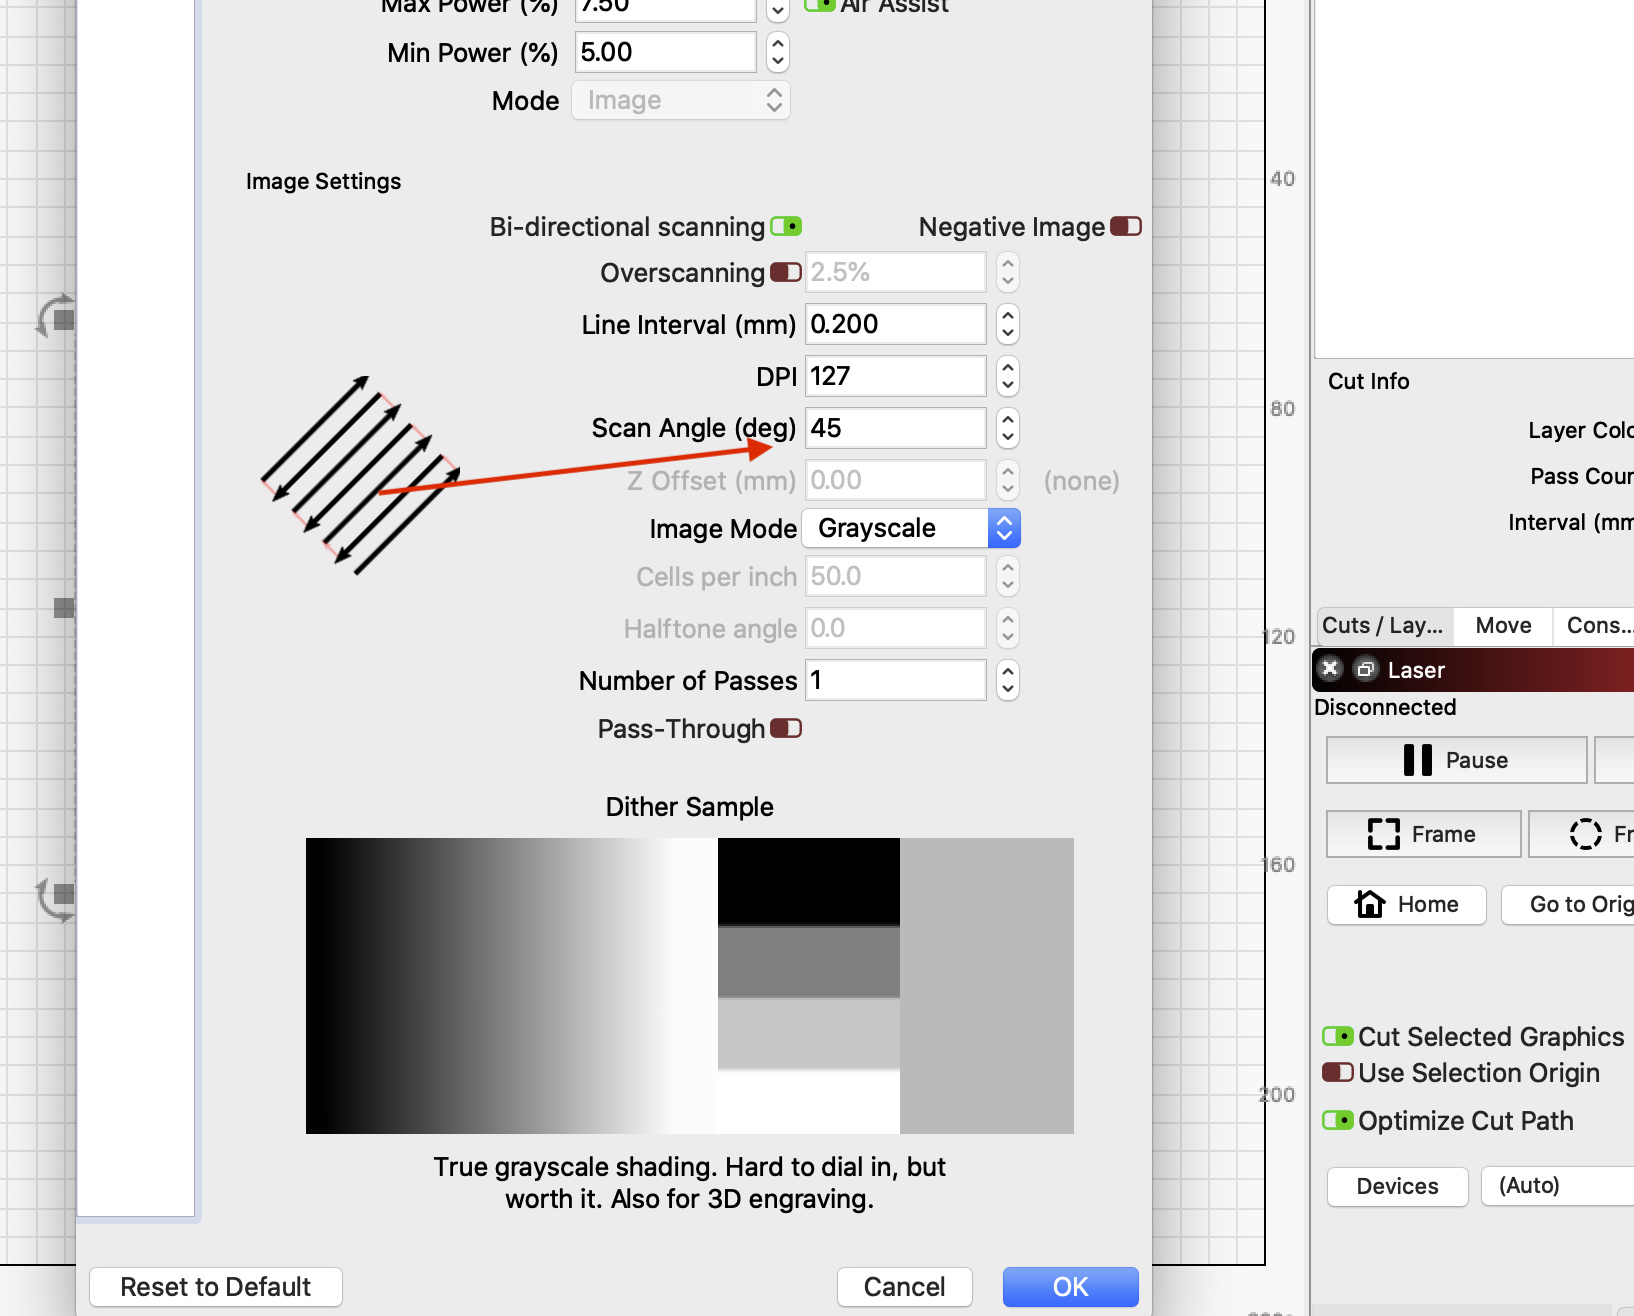
Welcome and thanks for the questions. Let me offer an observation. I will use a copy of your image in my examples. I see that you have this image to output using the ‘Threshold’ setting which is described as follows and the result in ‘Preview’:

If you change this setting to one of the other options you will start to produce the mid-tones.
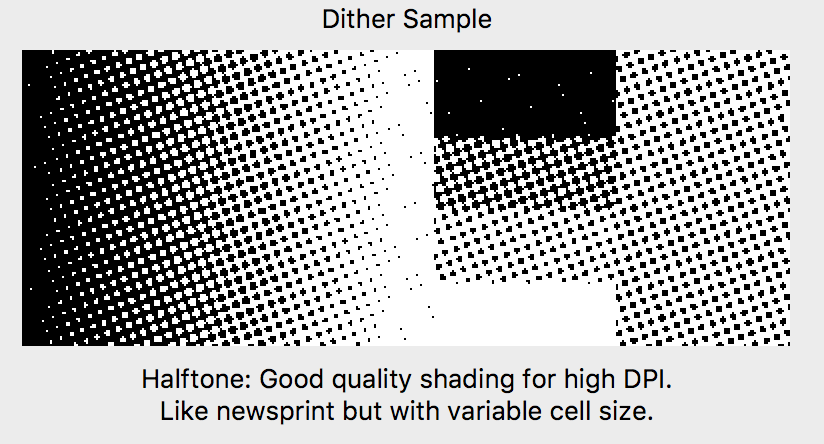
Here is an example of ‘Halftone’:

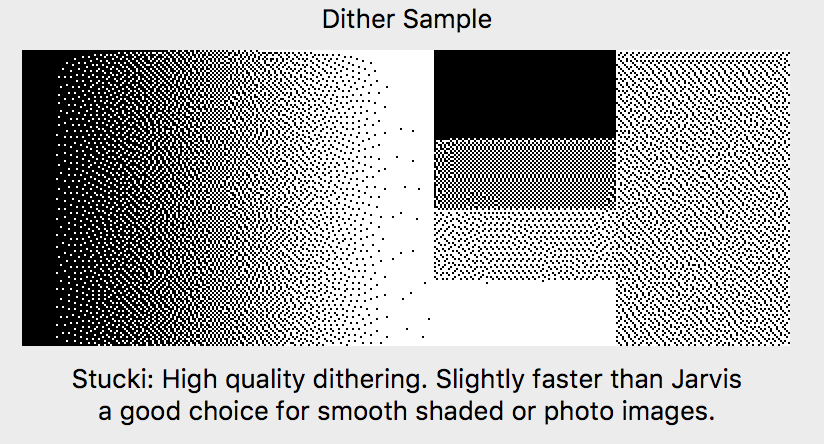
And 'Stucki":

Play with these different image settings and remember, ‘Preview’ is your friend and can hel a lot when testing to achieve your desired results.
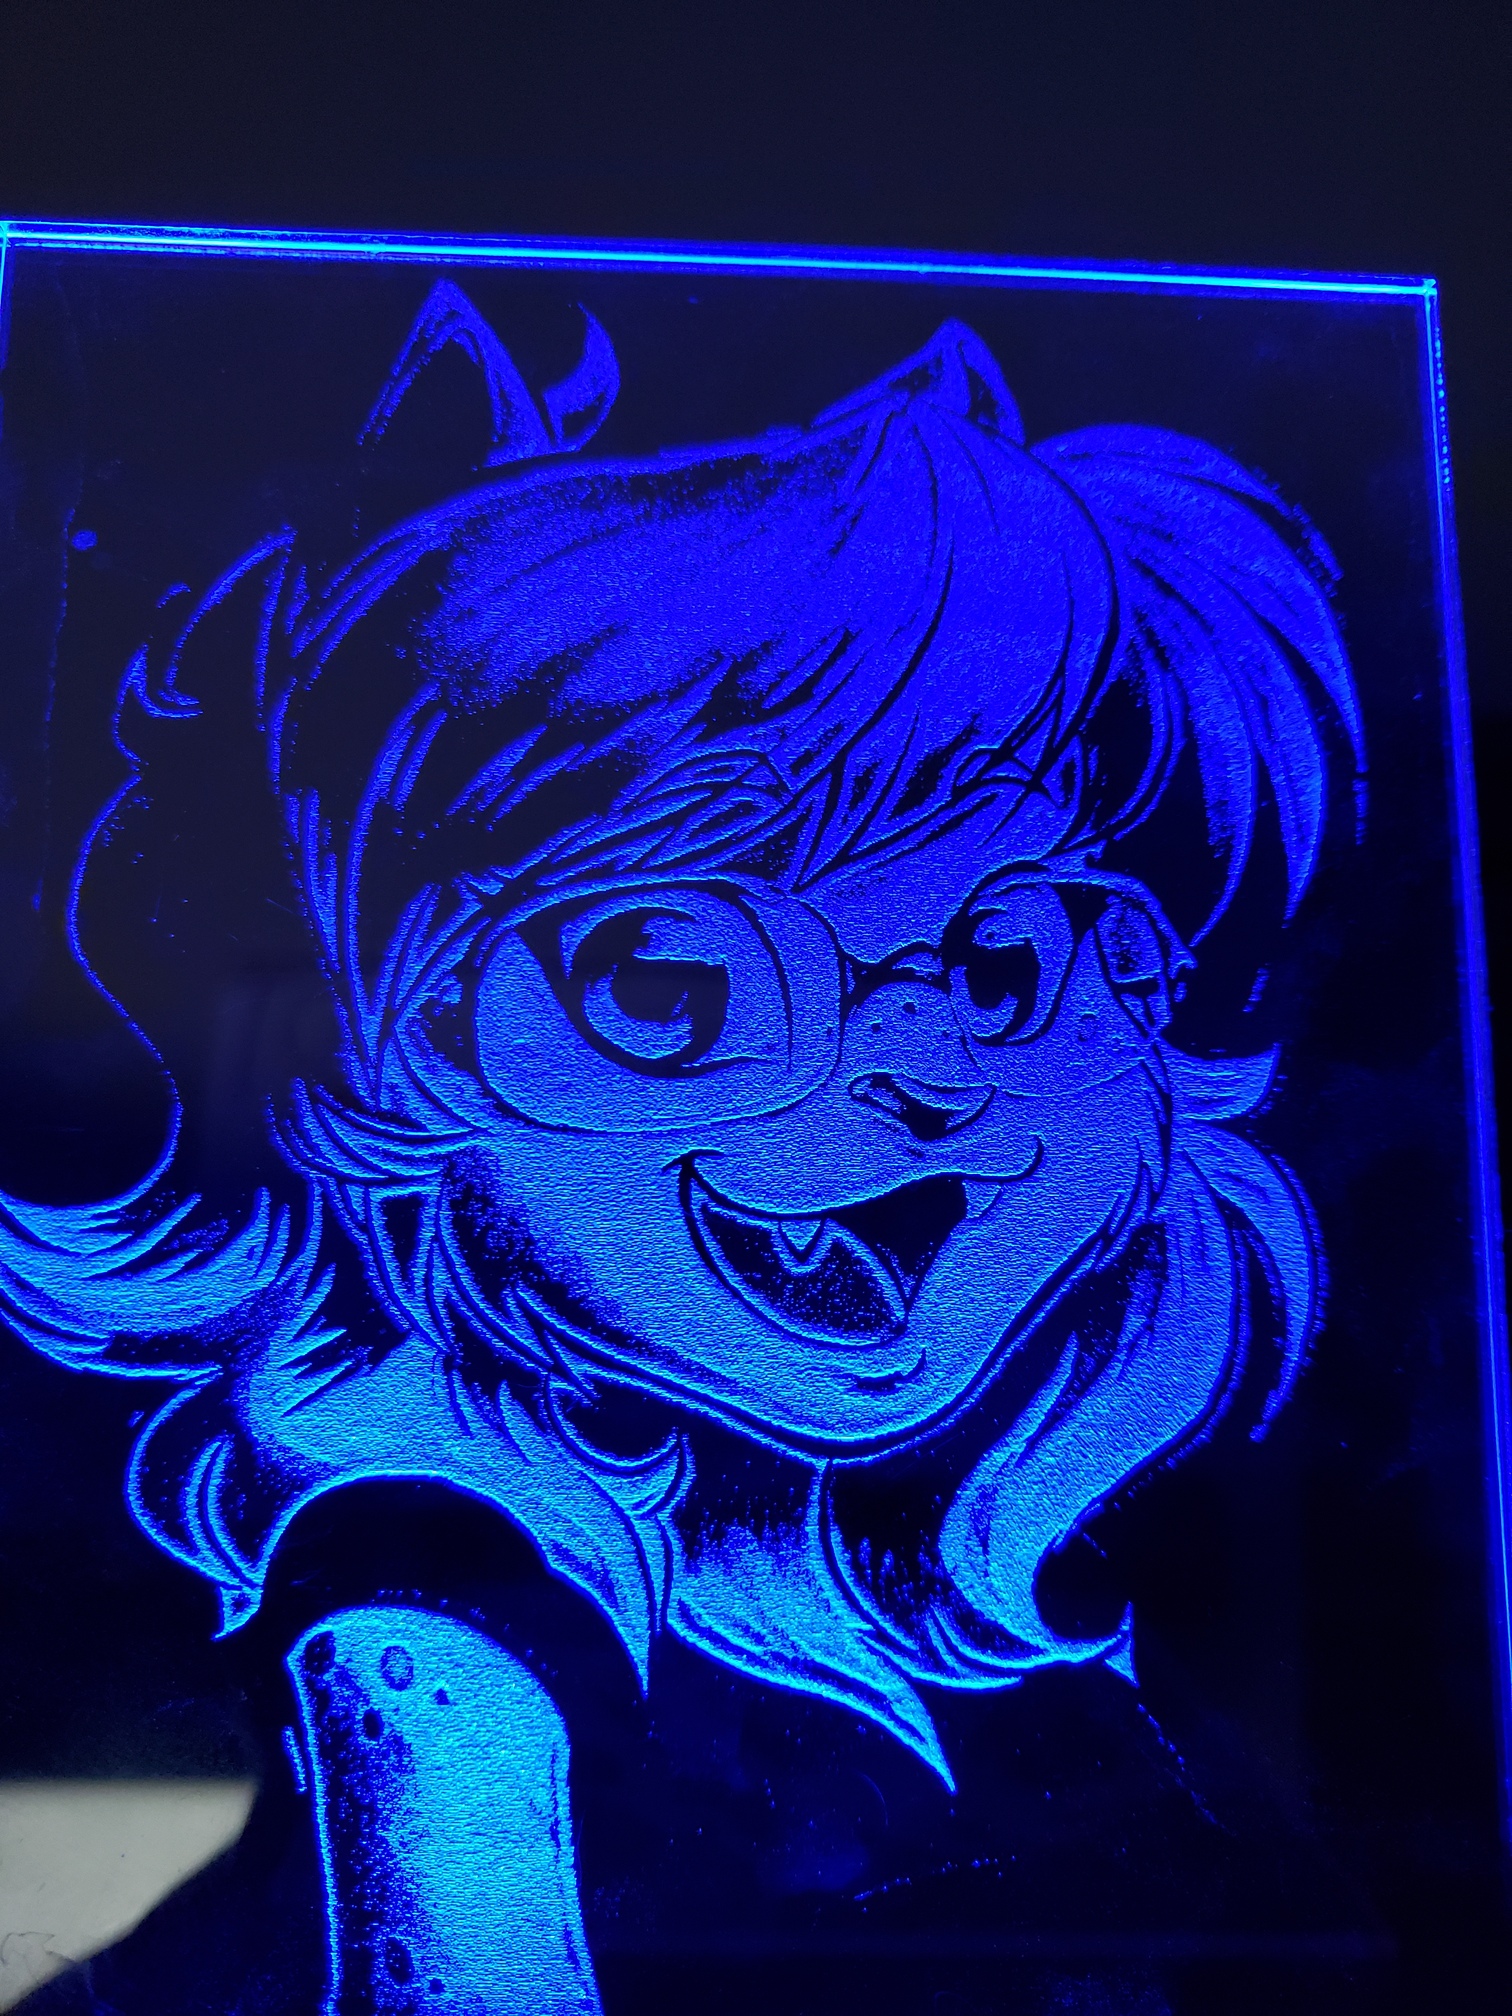
I think I’ve got the first issue figured out. I had to turn on over-scan to stop it from gouging out the edges of the image. Now that that’s done it’s much better, but there are these horizontal lines that show up in the image when you place it in the LED base.
Sample from the old software
Sample from LightBurn
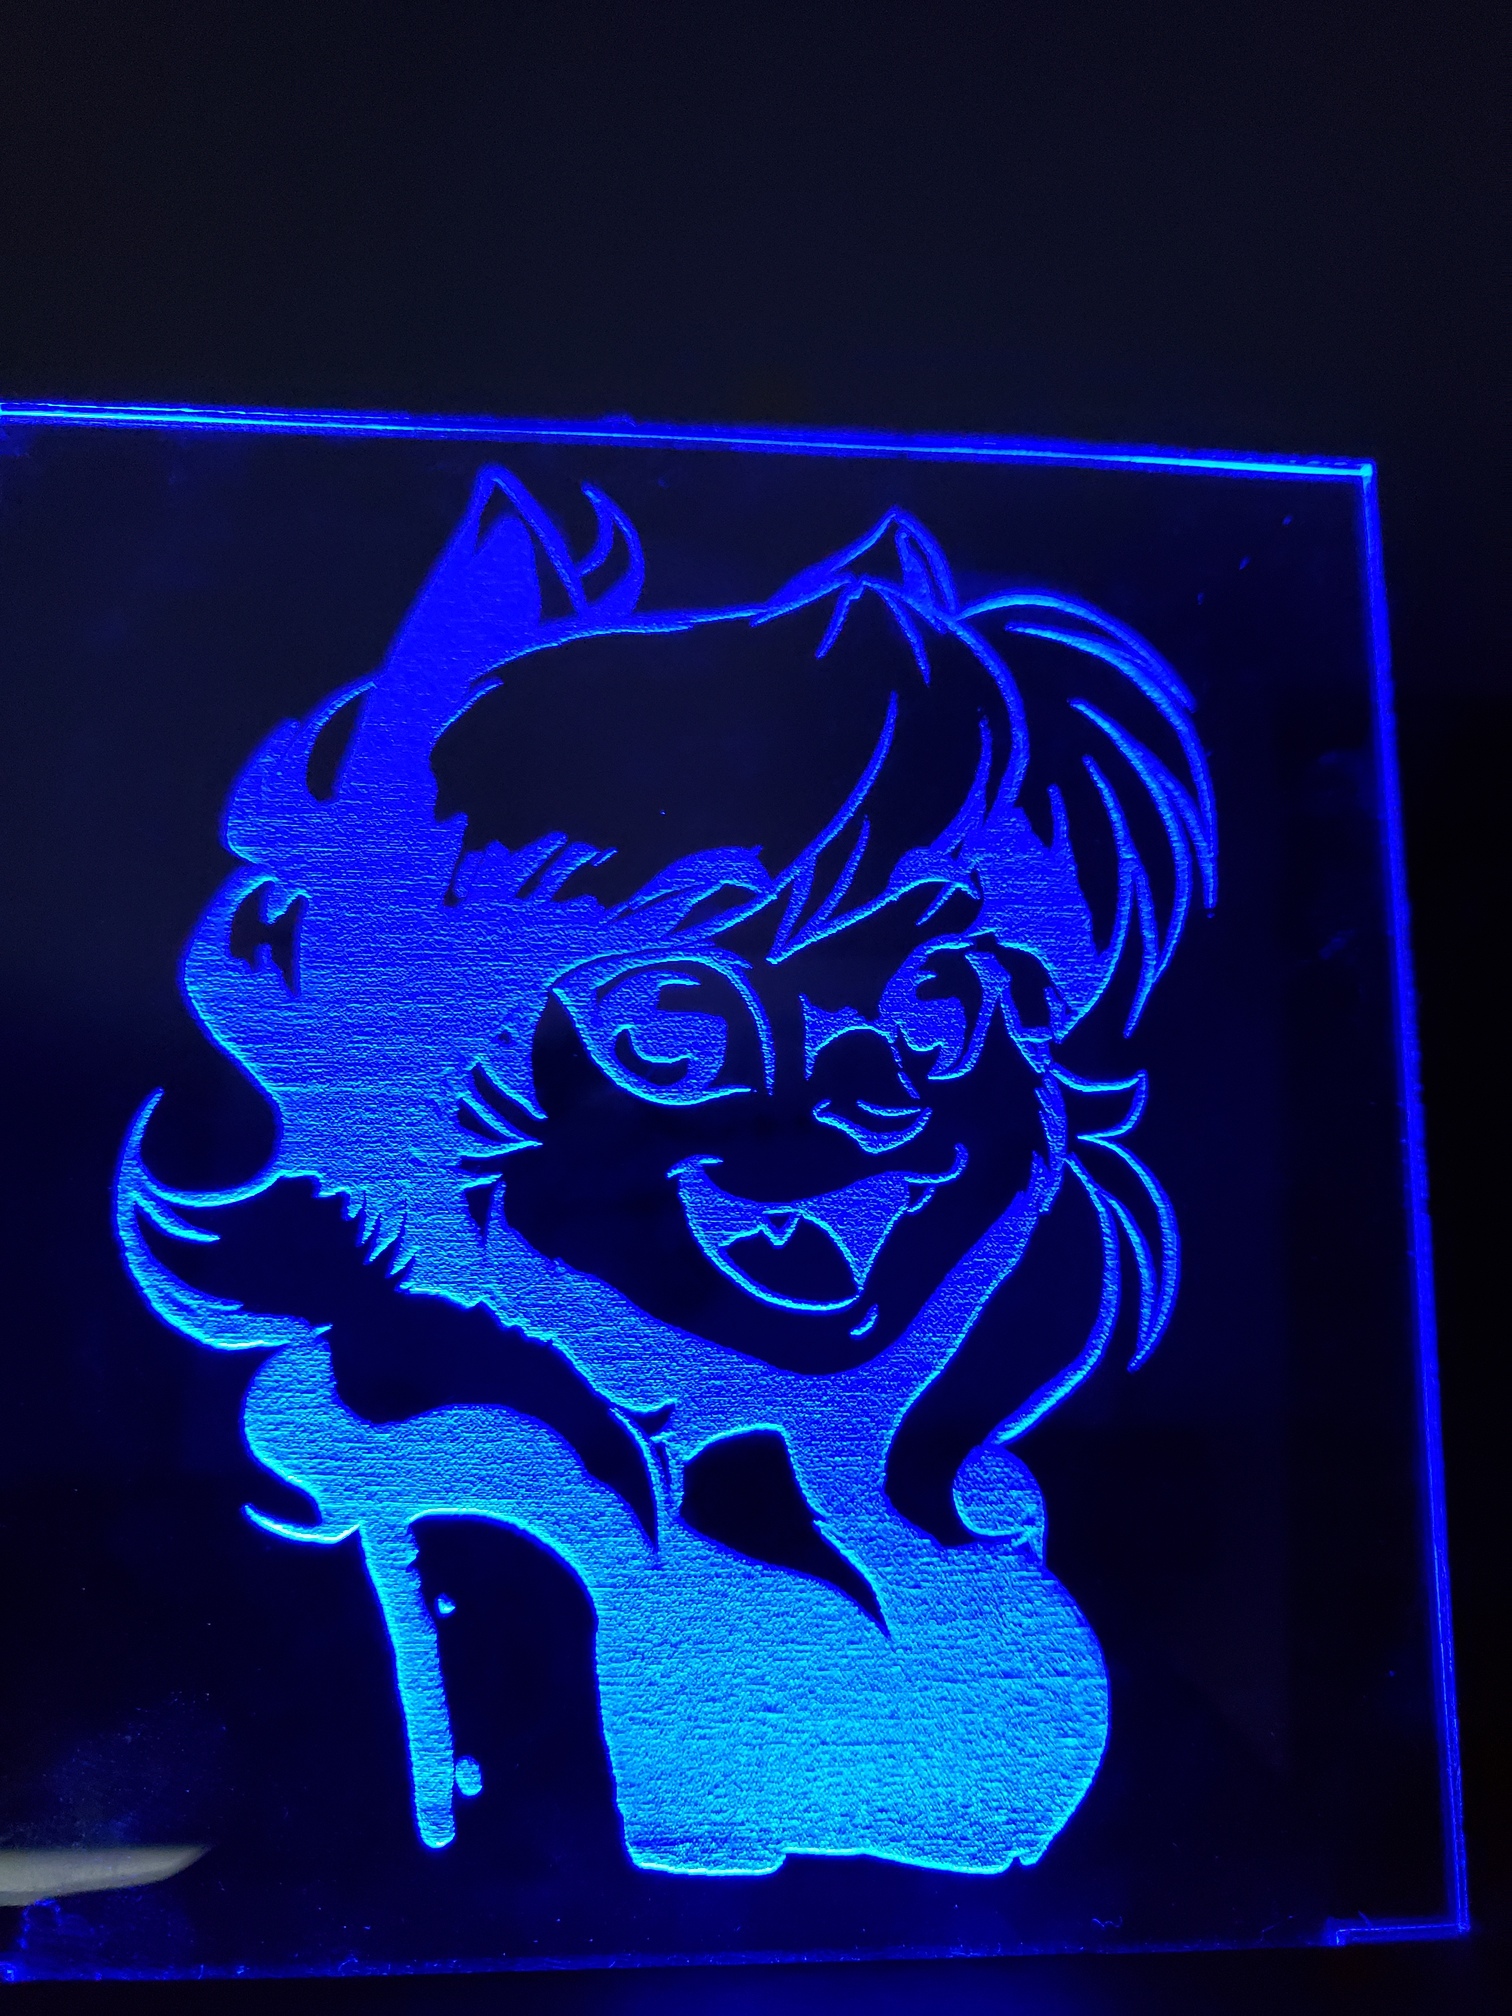
The horizontal lines are kind of what i’m seeing. Not sure if power is still too high or something else.
Thanks
Your DPI is likely too high for acrylic - because it melts, it will bleed shading dots together. Lower DPI, or using a clustered shading method like Newsprint or Halftone will help
You also need ‘Negative Image’ to flip the shading so the bright areas are engraved, and the black ones left transparent instead of the other way around.
Thanks I hadn’t considered DPI. I’ll play around with that. Does anyone have a recommendation for removing background of an image?
Also here’s a tip to make scan lines almost disappear.
Rotate the image 90 degrees before engraving it that way the horizontal lines will then be vertical.
When the light shines up the image it will be along the lines. The image will look much better.
You can also do that, I find it easier to just rotate 90 degrees. It also keeps the rapid movements along the X axis, witch I think is better for engraving.
This topic was automatically closed 30 days after the last reply. New replies are no longer allowed.