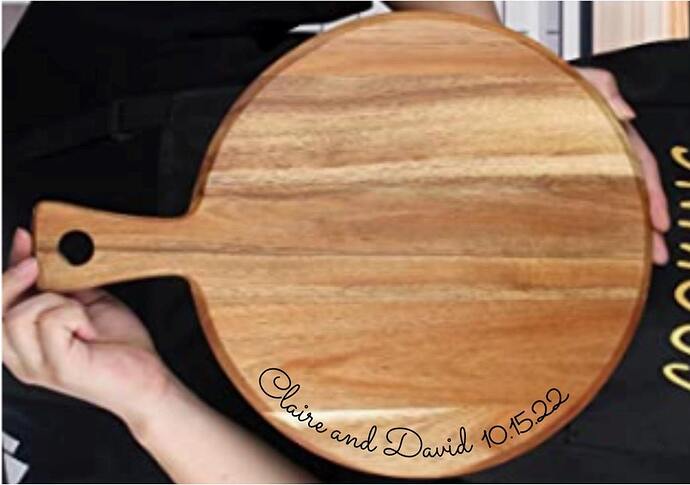
I am trying to engrave a Pizza Peel (round board with a handle) and I want to curve the text along the edge. I am a graphic designer, so I know how to work with the fonts. What I need is advice on lining up the engrave along the curved edge of the board.
Can anyone help with tips and tricks to do this, please?
Depending on the shape of the edge take a look at either:
- Curved Text
- Path to Text
You can read about them here:
Text & Fonts - LightBurn Software Documentation
Thanks for your response. I should have been clearer in my question. I am a graphic designer and know how to work with the fonts. The design is done.
What I’m looking for is what to do next to line up the engrave along the curved edge of the board.
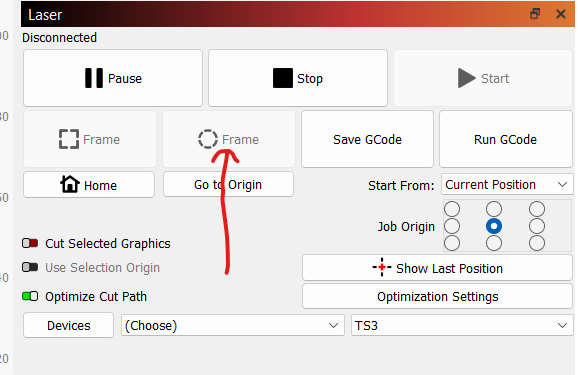
try this framing.

I take this to mean you’re trying to work out the actual work material alignment for the burn?
Without seeing the actual work material or design I’ll offer some general advice. I assume the design is sufficiently complex or awkward to align with square or rubberband frame.
If that is the case, then try one of the following:
- Make a duplicate of the design and put it on a layer with frame like speed/power settings. Then simply run just that layer to get you an exact placement onto the work material.
- Alternatively, you can optimize this further if you create an outline of just the outer portion of the design. Then use the same technique of putting on a special framing layer. This will give you enough of the design to frame but not spend a lot of time on the internal components that won’t help with alignment.
- If you don’t want to work with a duplicate of the design, just change the cut settings directly and revert back when done
If you’d like more specific advice then a photo of the work material and a screenshot of the design would be helpful.
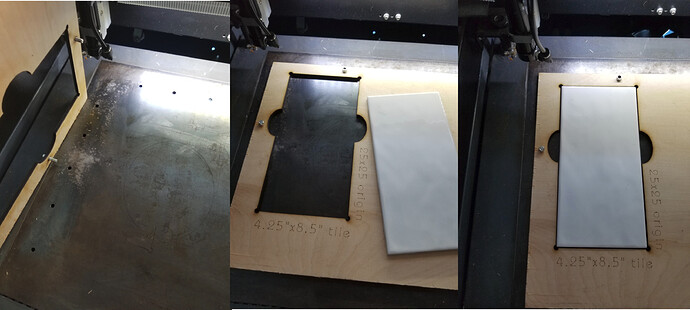
The common way to do this in industry is via a ‘fixture’ or ‘jig’ to hold/position your work at a known location on the worktable. Generally this is used for production.
Here are a couple of mine, maybe the pictures will help you set something up …
Another option is using the ‘frame’ and your ‘head’ led laser as a guide… Since I don’t have an led on my machine, can’t help you there…
You may be able to work out something with the ‘cut and print’ option using to align it to a couple of points on the handle. This example shows how to recover a job, but the idea is similar.
Do you have a camera on your machine? That can also be used to align your object …
Good luck
![]()
Do you have a red laser on your machine? If so, the approach I listed above should work for you, but just set power to 0% or disable the laser while running the job. I initially thought you were working with a diode laser but the approach still works.
Alternatively, you could make a jig to do this:
- This will be easiest in Absolute Coords but you could adjust using User Origin or even Current Position with some care. Assume the steps below are for Absolute Coords.
- Make a peel shaped object with the dimensions of the actual peel in LightBurn and position it on your workspace.
- Setup a sacrificial material that will serve as the jig and secure it to the laser. It should not move from that point. Run the job to cut out the shape.
- Place the peel into the jig.
- In LightBurn position your design over the appropriate location on the peel shaped object.
- Run the engraving.
You could take some shortcuts as well with this. For example, you wouldn’t need to necessarily create a full-sized jig. You could just get the lower half of the jig if that would be easier. If you had to do this more than once the jig approach is fast and repeatable.
If this was a one-off I’d probably just use the strategy described in the previous post or an even simplified version of it given the simplicity of the layout.
- create a circle in LightBurn the exact dimensions of the circular portion of the peel.
- Run the job with no laser power and using just the red light with the peel underneath.
- Readjust peel to match red laser.
- Repeat the job until red laser perfectly traces the outside of the peel
- Align your design to circle and run the engraving.
Another alternative approach: LightBurn has a circle center finder that can be used to position the work material. This approach assumes you have your primary design setup with a center point that aligns to center of peel.
- Place peel in laser
- Use Laser Tools->Center Finder tool to locate the center of the circular portion of the peel and move the laser to that position
- Switch Start From to Current Position and set Job Origin to center dot
- Engrave your design
This topic was automatically closed 30 days after the last reply. New replies are no longer allowed.


