Engraving coasters (If only I could)

I have been trying for quite a few days to get a decent image printed of various Australian native animals onto mdf for testing, and then onto maple timber.

I have so far failed almost entirely. The results ranging from Horrible burnt mess, to what the hell is that?

Is anybody able to show me the right direction please

Tasmanian Tiger.lbrn2 (650.7 KB)

I had a quick look at your file, I’m no expert but the image mode for the tassie tiger would work better as a “dither” not Newsprint. Try Jarvis and also up the resolution to 246dpi/0.1mm interval - and decrease the power to 10%. That should tell you something. Cheers.

Also cover the front with application/transfer tape - or even masking tape. This will get rid of any burnt residue around the image & text.

1 Like

Thanks for that stixstudios. I will go and give that a try right now - not sure if the laser will fire at 10% though. Soon find out though. :grinning:

Well that was heaps better. I was correct that the machine wouldn’t lase below 20%, but apart from that it is almost acceptable. It looks as though it will just need a few minor tweaks now to get a little more definition.

I would show my previous attempts, but you may be eating.

Not too bad, but I would think you should be able to get better than that. But maybe you just have too much power and won’t be able to dial it down regardless.

I have a 40watt and did some experimentation and “proof of concept” testing a while back. Even though the image is small (45mm wide) and low resolution, it doesn’t look too bad from a distance and would probably look reasonable on a coaster:

This was engraved on 3mm MDF.

Also, that Thylacine image could be run through a filter to give it a bit more contrast - which would improve the definition. Worthwhile trying.

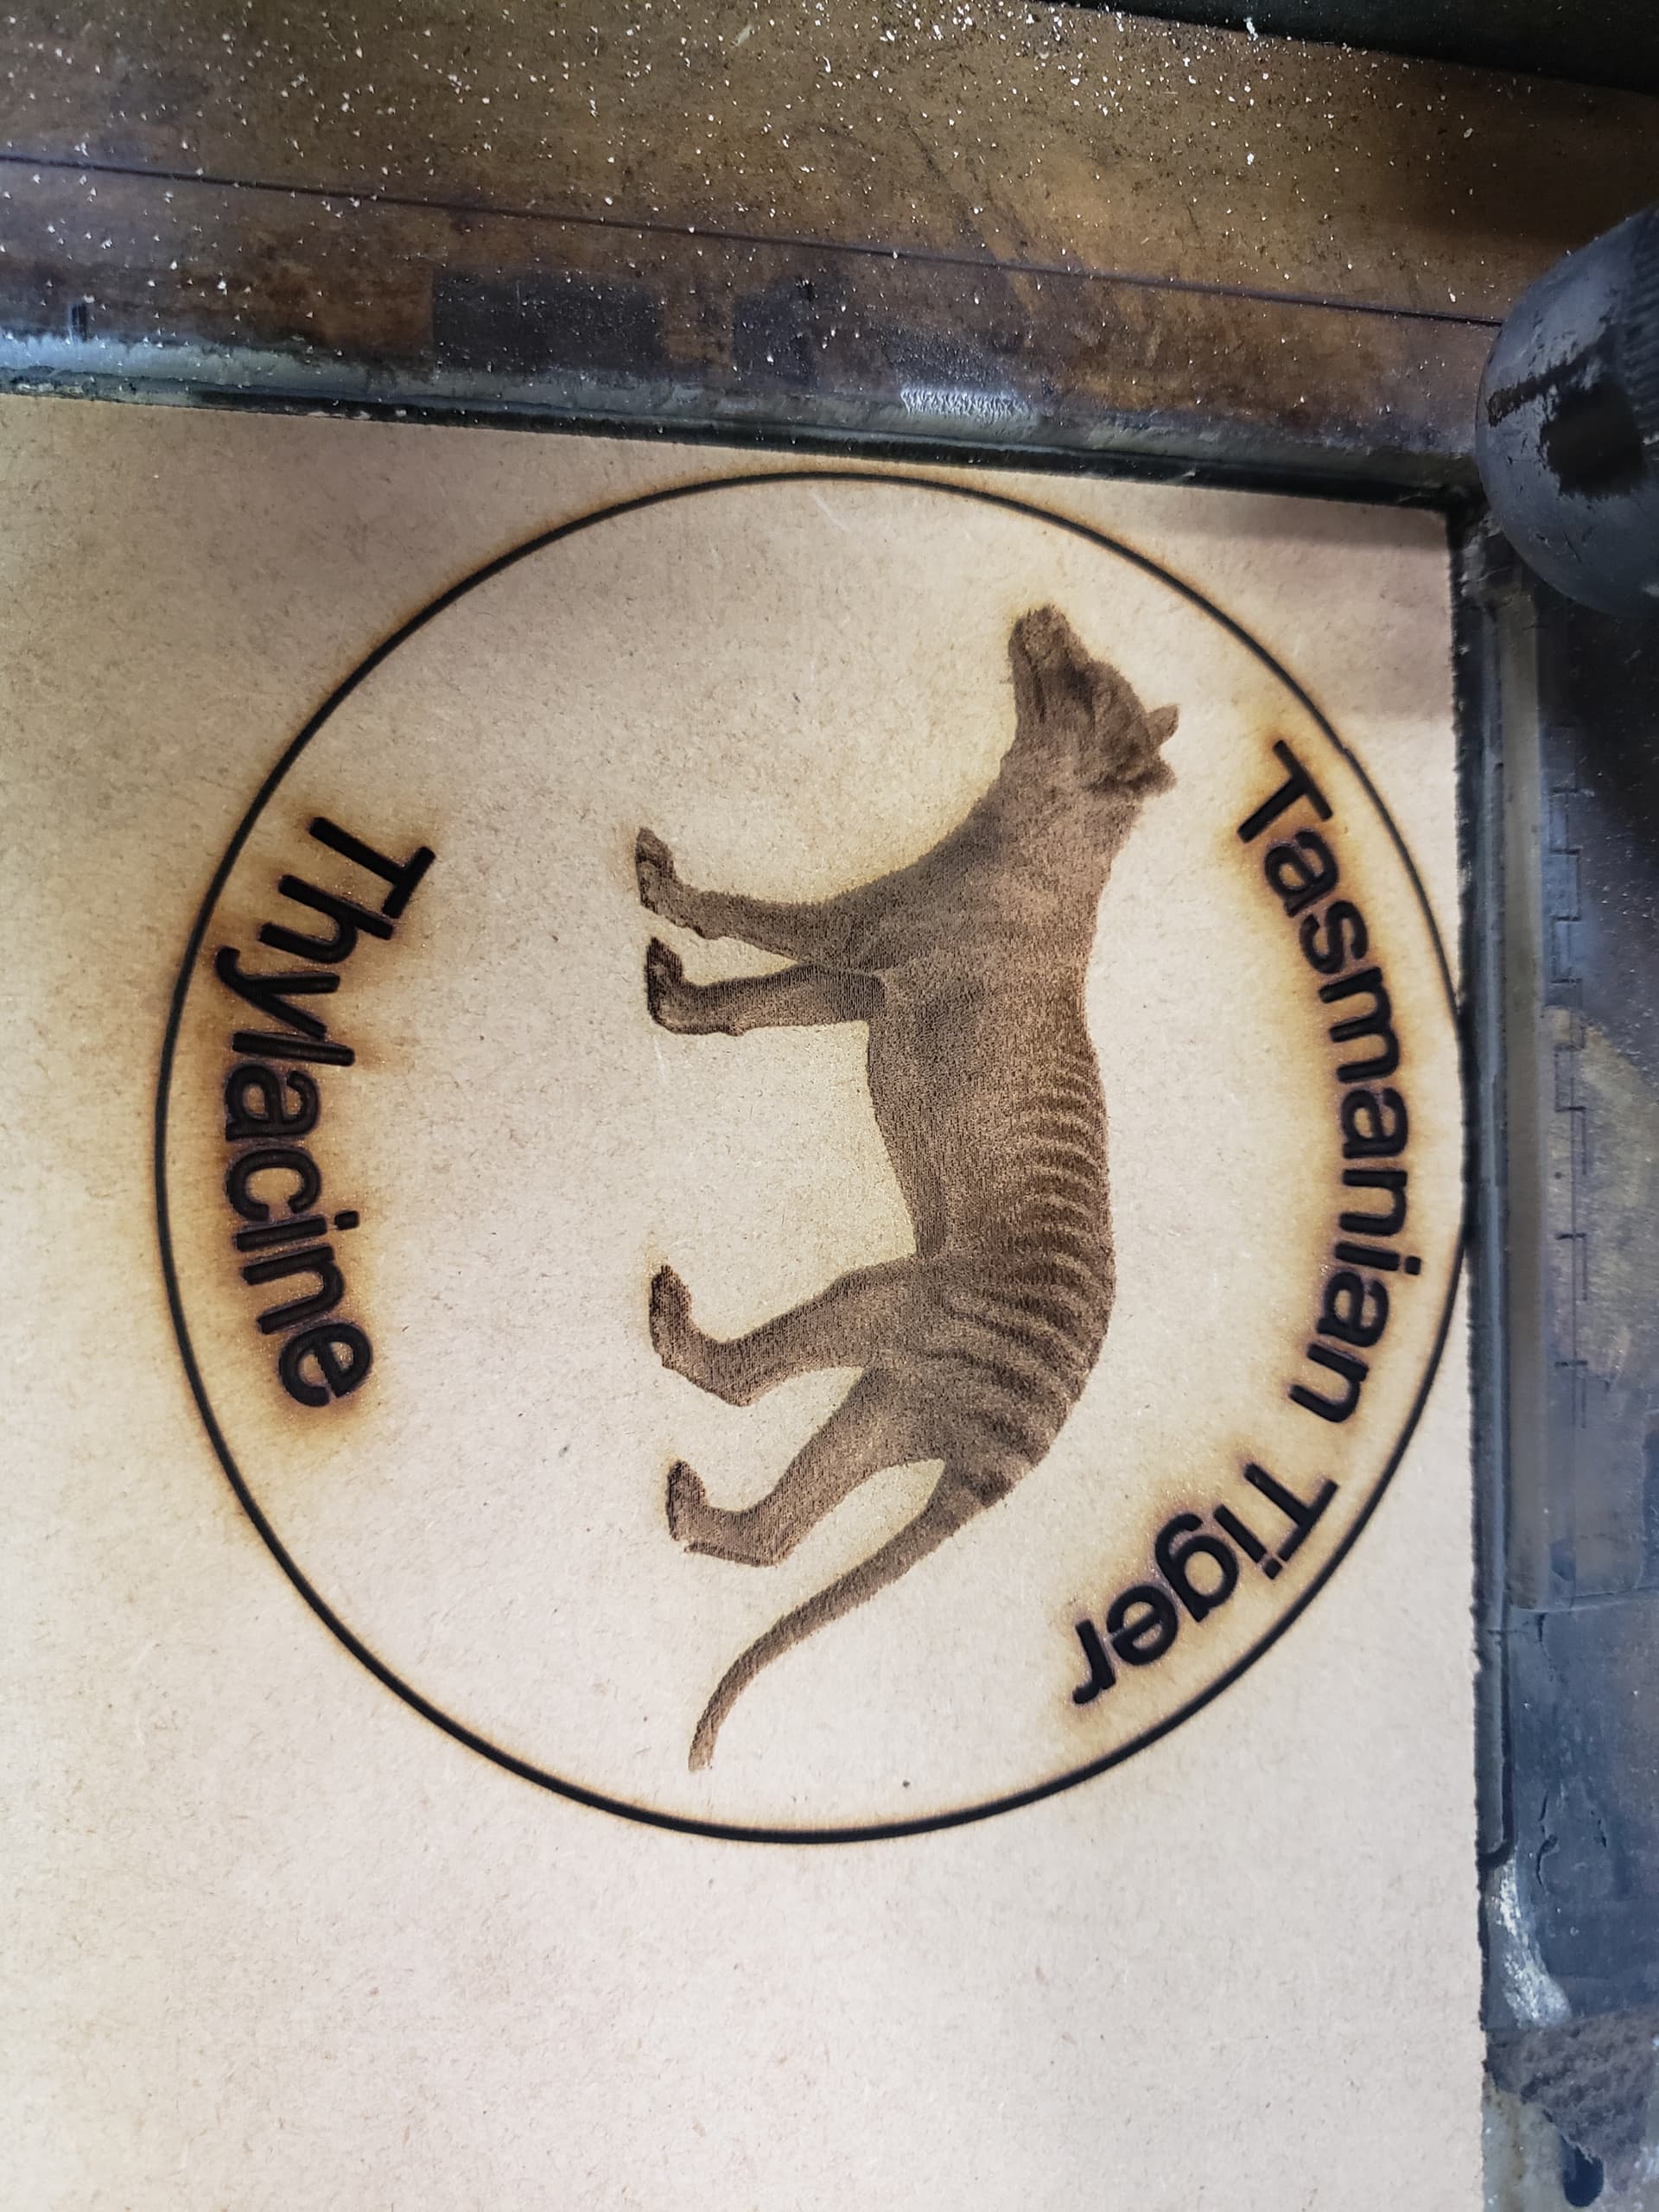
Nice image… Probably one that will be tough to reproduce without some work. The size also complicates the ability to reproduce it with any great detail.

I’ve struggled with this on glass, back of mirror, tile (TiO2) and other materials. You didn’t mention which laser you are using, the 50 or 80.

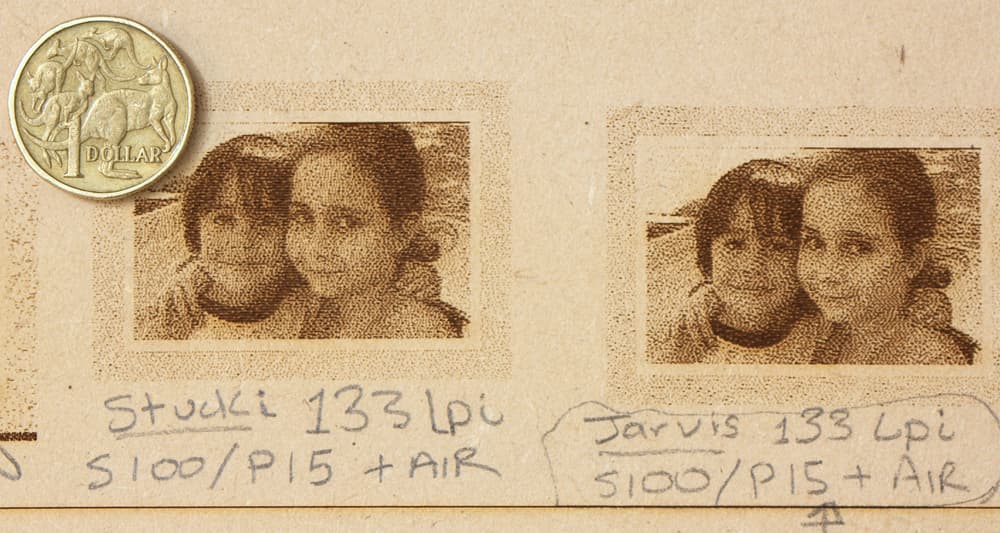
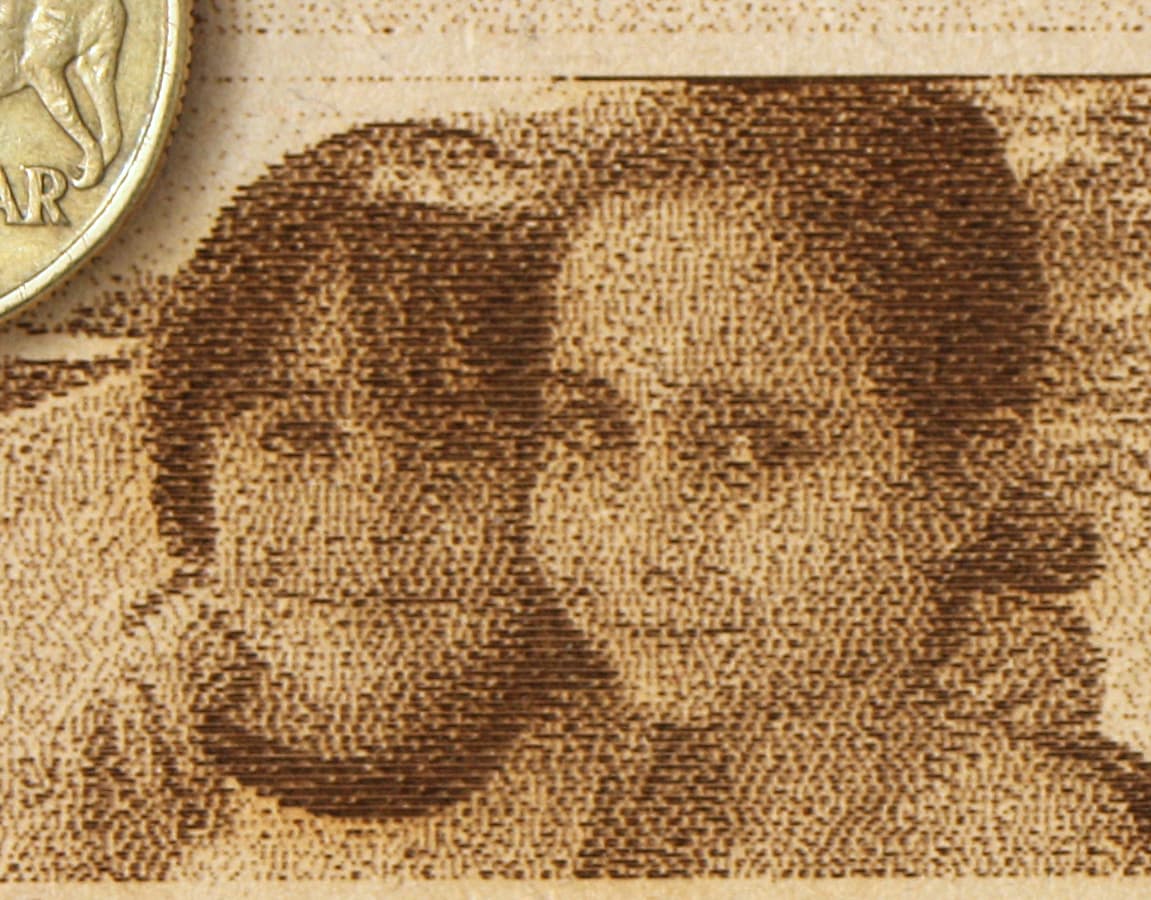
I generally find that an image mode of ‘Stucki’ seems to work the best on most materials.

I’ve found the Image-R site is good for preprocessing of photographs. They allow you to choose the type of laser the techniques, such as Norton and materials. When you use one of their preprocessed images, run the layer in passthrough…


I agree with @stixstudios that you need a lower power. Understood, you can’t …

Your laser is the only one that I’ve heard of that won’t lase below 20%. Most seem to go down to around 10%. The lower the temperature the lower mine will lase. I can get down to around 9.5…

I wonder is this in itself is cause to question why such a low lase level?


I am also wondering if your speed could be exacerbating the issue.

These lps are specified as 90% voltage <= 1mS, for those with a published specification.

At minimum of 1mS you have a response time of 1s/1000 = 1mS.

500mm/s = 19.6 inches/s @ 98dpi * 19.6 inches/s = 1889 dpi/s.

You can do 1s/1000, but are asking for 1s/1889. The lps response time would have to be 0.53mS, can yours do that?


I think you’re between the rock and a hard space. I’d suggest using the 50 watt, if possible.

Good luck

:smile_cat:

As suggested, lower wattage lasers have benefits when it comes to engraving.

Why not start with just simple text and graphic elements - then move on to images.

Simpler to do, then you will get an understanding of where you are at. That understanding will be your “own”, with your “own” machine. Tests, tests and more testing and keep testing.

This was engraved on bamboo ply:

Not that great, but simple and effective I think. No photo images here. A work in progress and many hard learned paths to go down.

1 Like

Hi Jack, thanks for your interest.
I am using the 50 for this, because the 80 just burnt the crap out of everything.
I will look at the machine settings and see if I can adjust the power down at all.
I will also look at the Image-R site and see what they can do to help me.
What does passthrough do?
I do not understand what you are trying to tell me about the speed. Are you saying that I need to go faster and with less power?
There is something else as well, the laser just refuses to cut through the 3mm MDF. I have set it to 5mm per second at 80% power, then run the layer about 6 times, but it just does not cut through.
The setup is perfect. I spent about a week making sure that both lasers were absolutely spot on.
The only thing that I can think of is that the MDF is using a different sort of glue – Sounds ridiculous.

That looks great Steve. Where do you get the bamboo from? I have looked all over, but failed to find anything like that.
The coasters are being made at the request of a man who helped me after the floods in Brisbane earlier this year. The water rose just enough to cover each of my machines except for the lasers which were on wheels and so I managed to remove them to a higher place. There was at least $60K of damage and I am still waiting to see what the insurers are going to do.

→ :crazy_face:

In machine settings, you can check to see what the maximum/minimum power limits are on the controller. It’s the last entry under vendor settings, I believe.

You should be aware of the ‘start speed’, which is where the controller will start ramping up from minimum power on a layer. Anything at or below the ‘start speed’ setting will deliver only minimum layer power.

This is probably the real culprit in this issue. It’s out of focus or there is something obstructing the optical path. Probably why you are having such difficulties with the coasters.

I use my 50 watt China Blue to cut 3mm mdf at 20mm/s @ 70% power, single pass, with air assist. Nice clean cut, so you have issues.

If this thing is focused properly, you need to check the alignment. Make sure there are no obstructions in the optical path. I would actually start the alignment at m1 and ensure for a good TEM0 state… :crazy_face:

If possible, look closely at the beam path in the mdf. Can you determine if the beam is cutting vertical or at an angle to the surface of the mdf…?

Good luck

:smile_cat:

I got the bamboo from:

More expensive than 3mm MDF, but it sure does look a lot nicer.

If you get it right, it almost looks professional :slight_smile:

btw. make sure you don’t finish it off with bees wax. Well, not like the way I did. Too harsh.

Yep.

@ Jeremy: Do a ramp test. Make sure your focus is correct before doing other tests. Otherwise you are just chasing your tail.

Hi Steve and Jack
I did a ramp test - no problem.
I changed the lens to make certain that it was not a problem - no problem.
Checked the mirrors … ehhh, they were a little dirty so I cleaned them all up.
I made certain that the machine would allow 100% of 85% power at whatever percentage of that I set it to. No problem
I did a scan to engrave the tiger and the words - no problem 100mms and 22.5% power - turned out quite nicely thanks to you two.
I then tried to cut out the 3mm MDF circle - big problems. 5mms x 70% power, barely dented the MDF even after many reburns
So, having semi failed at that, I decided to try it on a piece of 3mm plastic. Engraved quite well, failed to cut out, even though I set it to go round the outside 12 times at 90% (of 85%) at 5mms.
Eventually, it ALMOST cut through and I decided that that was close enough as my electricity bill was soaring, so I pressed the coaster out of the sheet material and broke a large chip out of the rear of the coaster. Savage application of a grinder failed to make it look any better, although it did make it slightly rounder and less lethal due to removal of sharp edges.
Is it possible that the tube is starting to fail and losing power?
With my new-found hope, I will once again try on the 80W and see if I can get a result that isn’t toast.
PS forgot to mention that the blue was drawing 20ma for the cutting and about 3~6 for the engraving.

That sounds weird Jeremy.

I’m newly into this myself so I can’t really offer any real solutions.
As a general comparison, my 40 watt machine cuts 3mm MDF at 10 mm/sec @ 40% power.

But I did have an issue before that. One day I tried 80% power, then it stopped cutting. I thought I’d screwed up the tube.

But after doing a simple test with mirrors 1 & 2, I realised that somehow mirror 3 had become misaligned. Maybe via too much heat or it was just loose.? So I pulled off the head and saw a lot of grey smoke covering the mirror - not sure if it was already there anyways - but cleaned it all off, re-aligned the mirror and bingo!! It now cuts better than ever.

So all I can suggest is to check your mirrors and alignment starting at mirror 1. That way you’ll get a good idea if it’s the tube or not.

Cheers.

What you are telling me does not make sense. That laser should work if it’s aligned properly and with a correct focus.

Something that you are telling us is not what is in our ‘minds’.

It would be nice to ‘see’ what you determine as ‘turned out quite nicely’ with your engraving since you have something more serious going on.

Did you do this? A photo would be good…

Good luck

:smile_cat:

Now I know that this is far below what you might consider ‘good’ but it is far superior to anything else that I have managed to do so far. And that outer circle has been burnt 12 times and achieved a depth of about half a mm.

I made one of those little test gadgets that Russel made with the four corner holes and one central hole. In each case, the laser landed EXACTLY in the middle of the hole.

I will go downstairs right now and do another test and show it to you. I will also set up targets for each mirror.

Please believe me when I tell you than any burns that aren’t right on the centre are because of my placement of the targets rather than misalignment.

The nozzle test really says it all. The setup is pretty bloody good. Certainly more than good enough to allow a cutting beam to go through the centre of the nozzle.

The top green target is mirror 1, immediately below that is mirror 2, both at top left and also at bottom left. The yellow target is at top right and the one to the left of it is bottom right. The target just above the word TEST is from the top of the firing tube.

I hope that is clear. There doesn’t seem to be any problem with the setup that I can see/understand.

One thing I did notice while I had the rear cover open is that the date on the tube is 2014. But, given that the tube is still engraving more or less properly, do you still think that may be the problem?

A ‘hole’ doesn’t tell me anything about your beams operating mode. You need low enough power to be able to see the power distribution across the beam. Not a black hole. How can you align a machine using this much power?


This is from m2, two shots, near & far. Just one shot is all you need on m1…

My targets ‘fit’ in the hole, the cross hairs are centered.

Why go to the trouble to cut them out if they don’t show center? I’m probably just confused on how you do it.


There is a major difference from your m1 burn to the m2 burn. Look at the size/shape difference between the two.


All the beam output from tubes that I’ve dealt with are at least a few mm in diameter and some manufacturers state a beam size of 6mm. So I’m wondering about yours.


You tube is generating getting enough power to engrave, not up to par but won’t cut at a reasonable speed/power. If the tube is operating properly, then it has to be an alignment issue.

I don’t know how you can align a machine to any degree when you burn the center out of the target. I’m not convinced on your alignment or the photographic proof of it’s accuracy. sorry…

:smile_cat:

OK, I will do it again tomorrow.

Looks like the primary issue is focus.
Tasmanian Tiger.lbrn2 (673.3 KB)


Could even reduce power or up the speed quite a bit on the text. Also this cut 3mm MDF in one pass. Parameters on in the lbrn file. 40Watt omtech.

This topic was automatically closed 30 days after the last reply. New replies are no longer allowed.