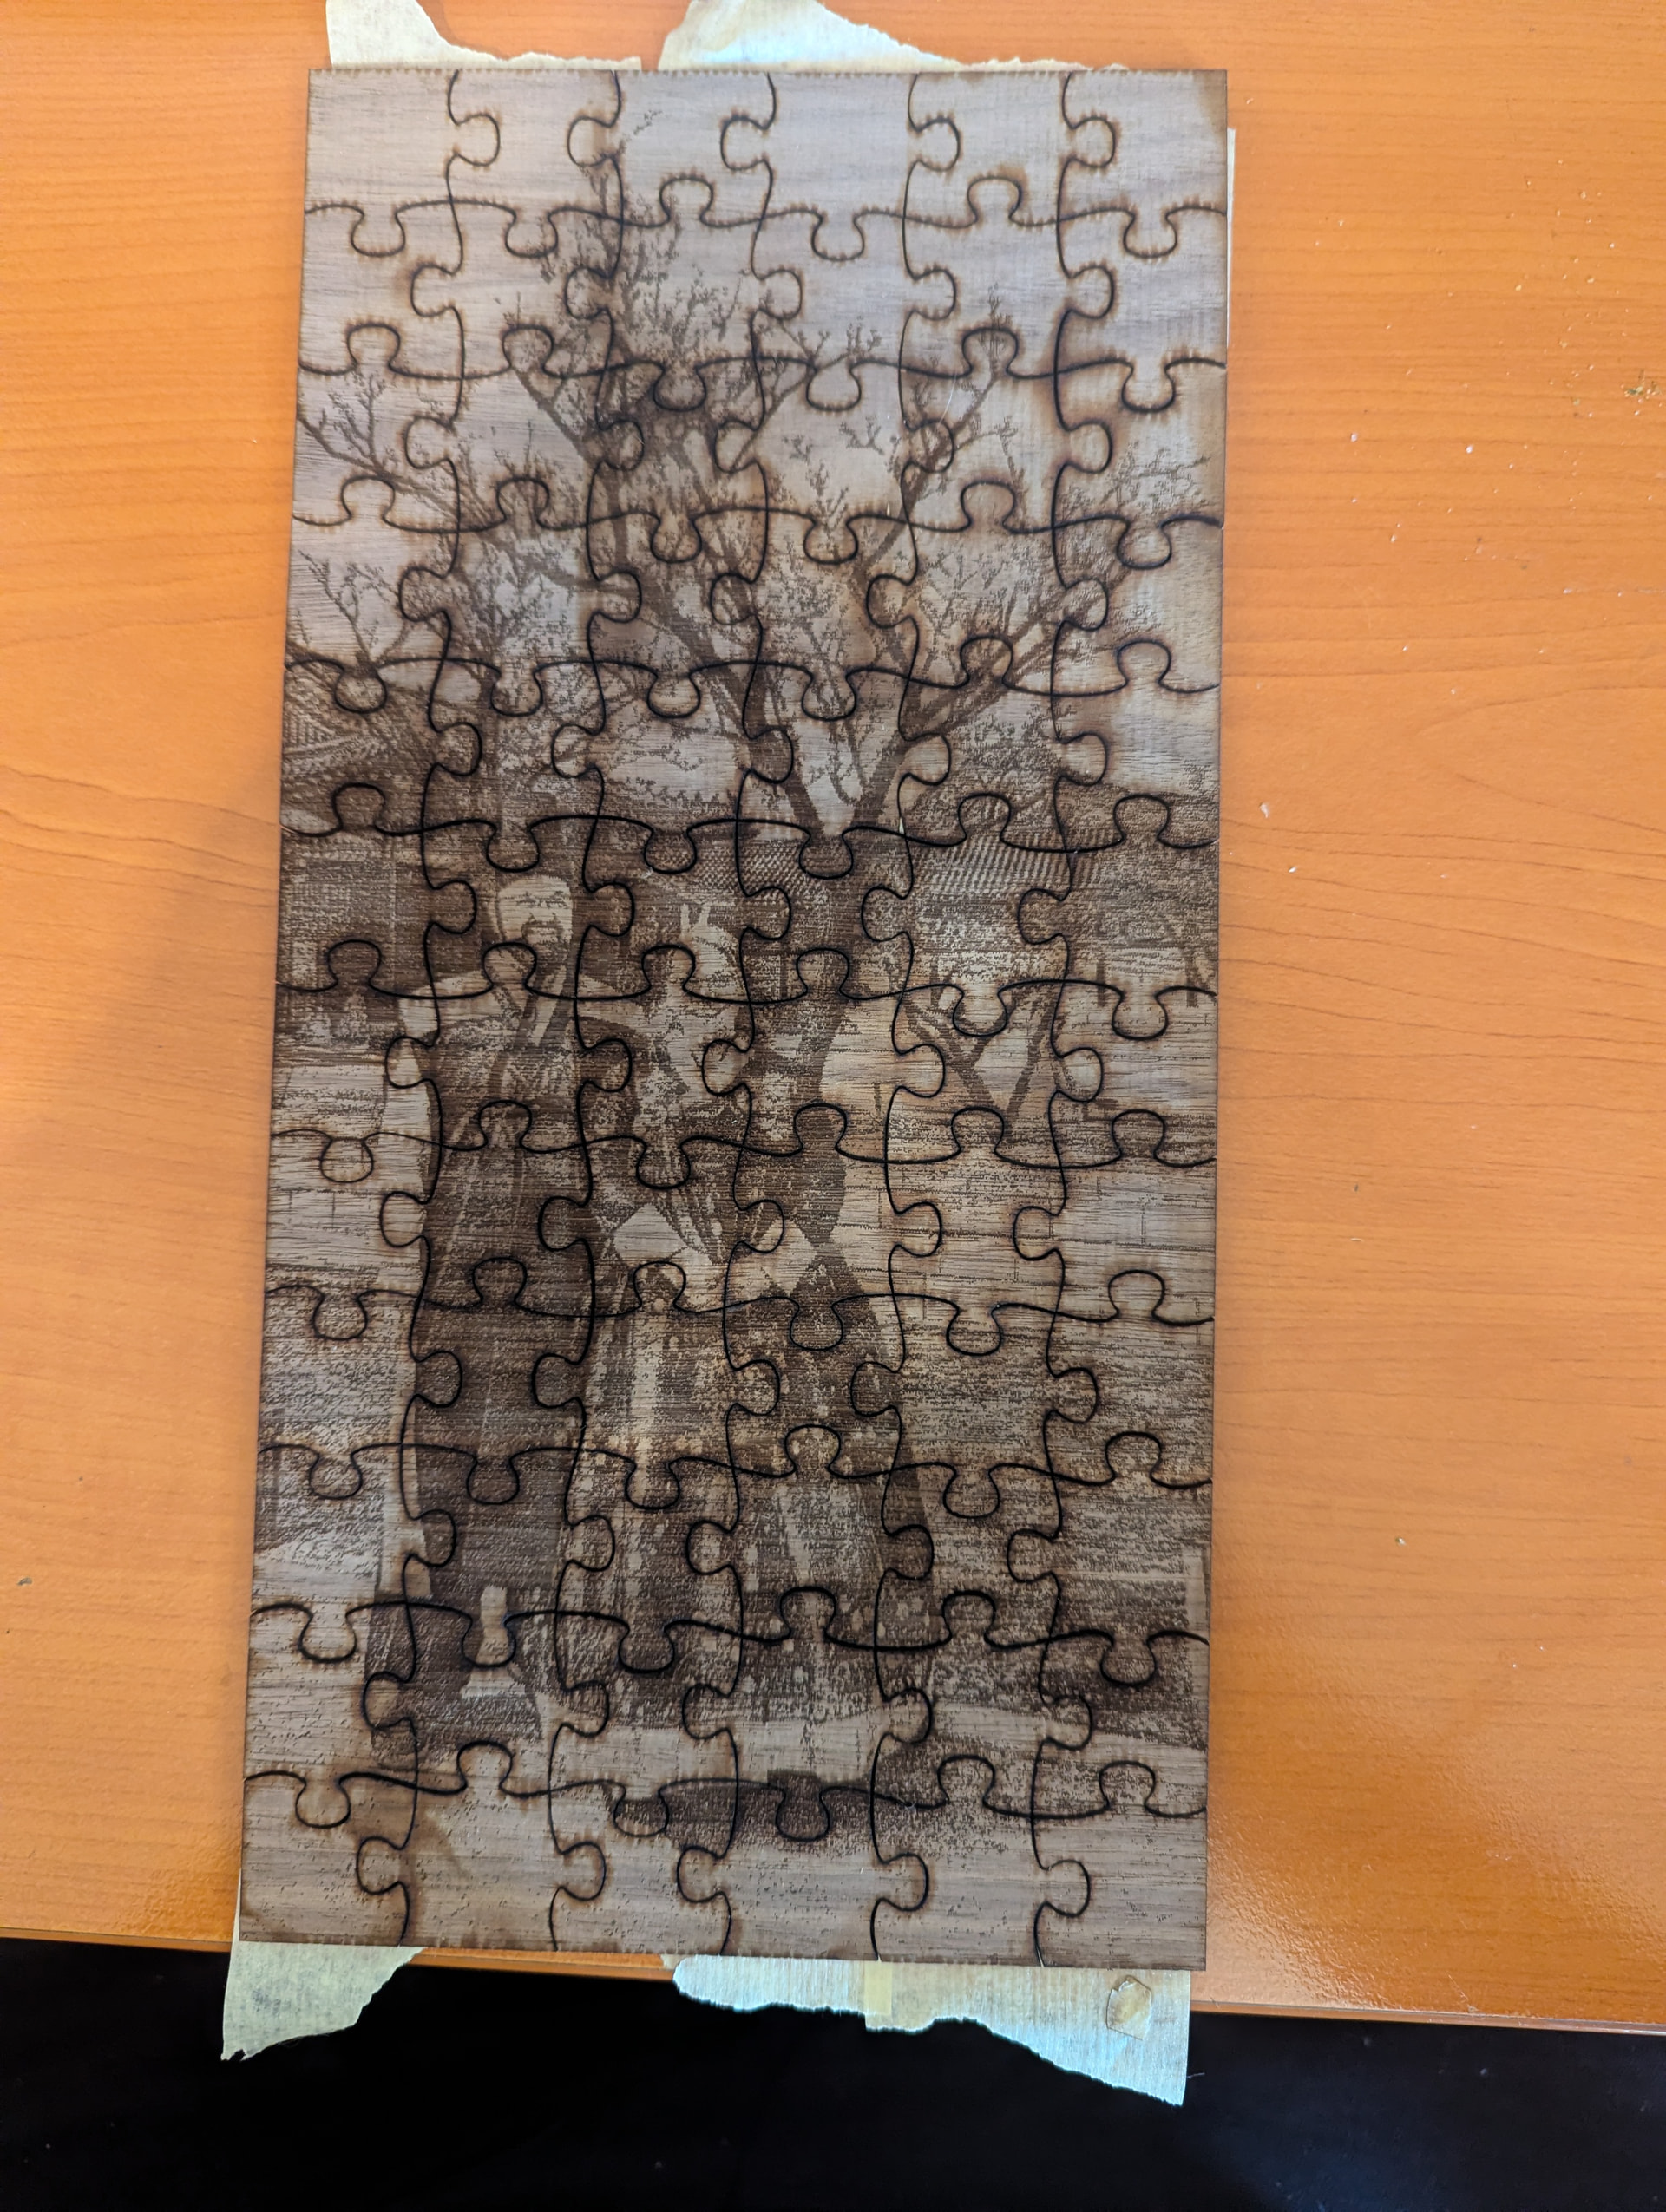
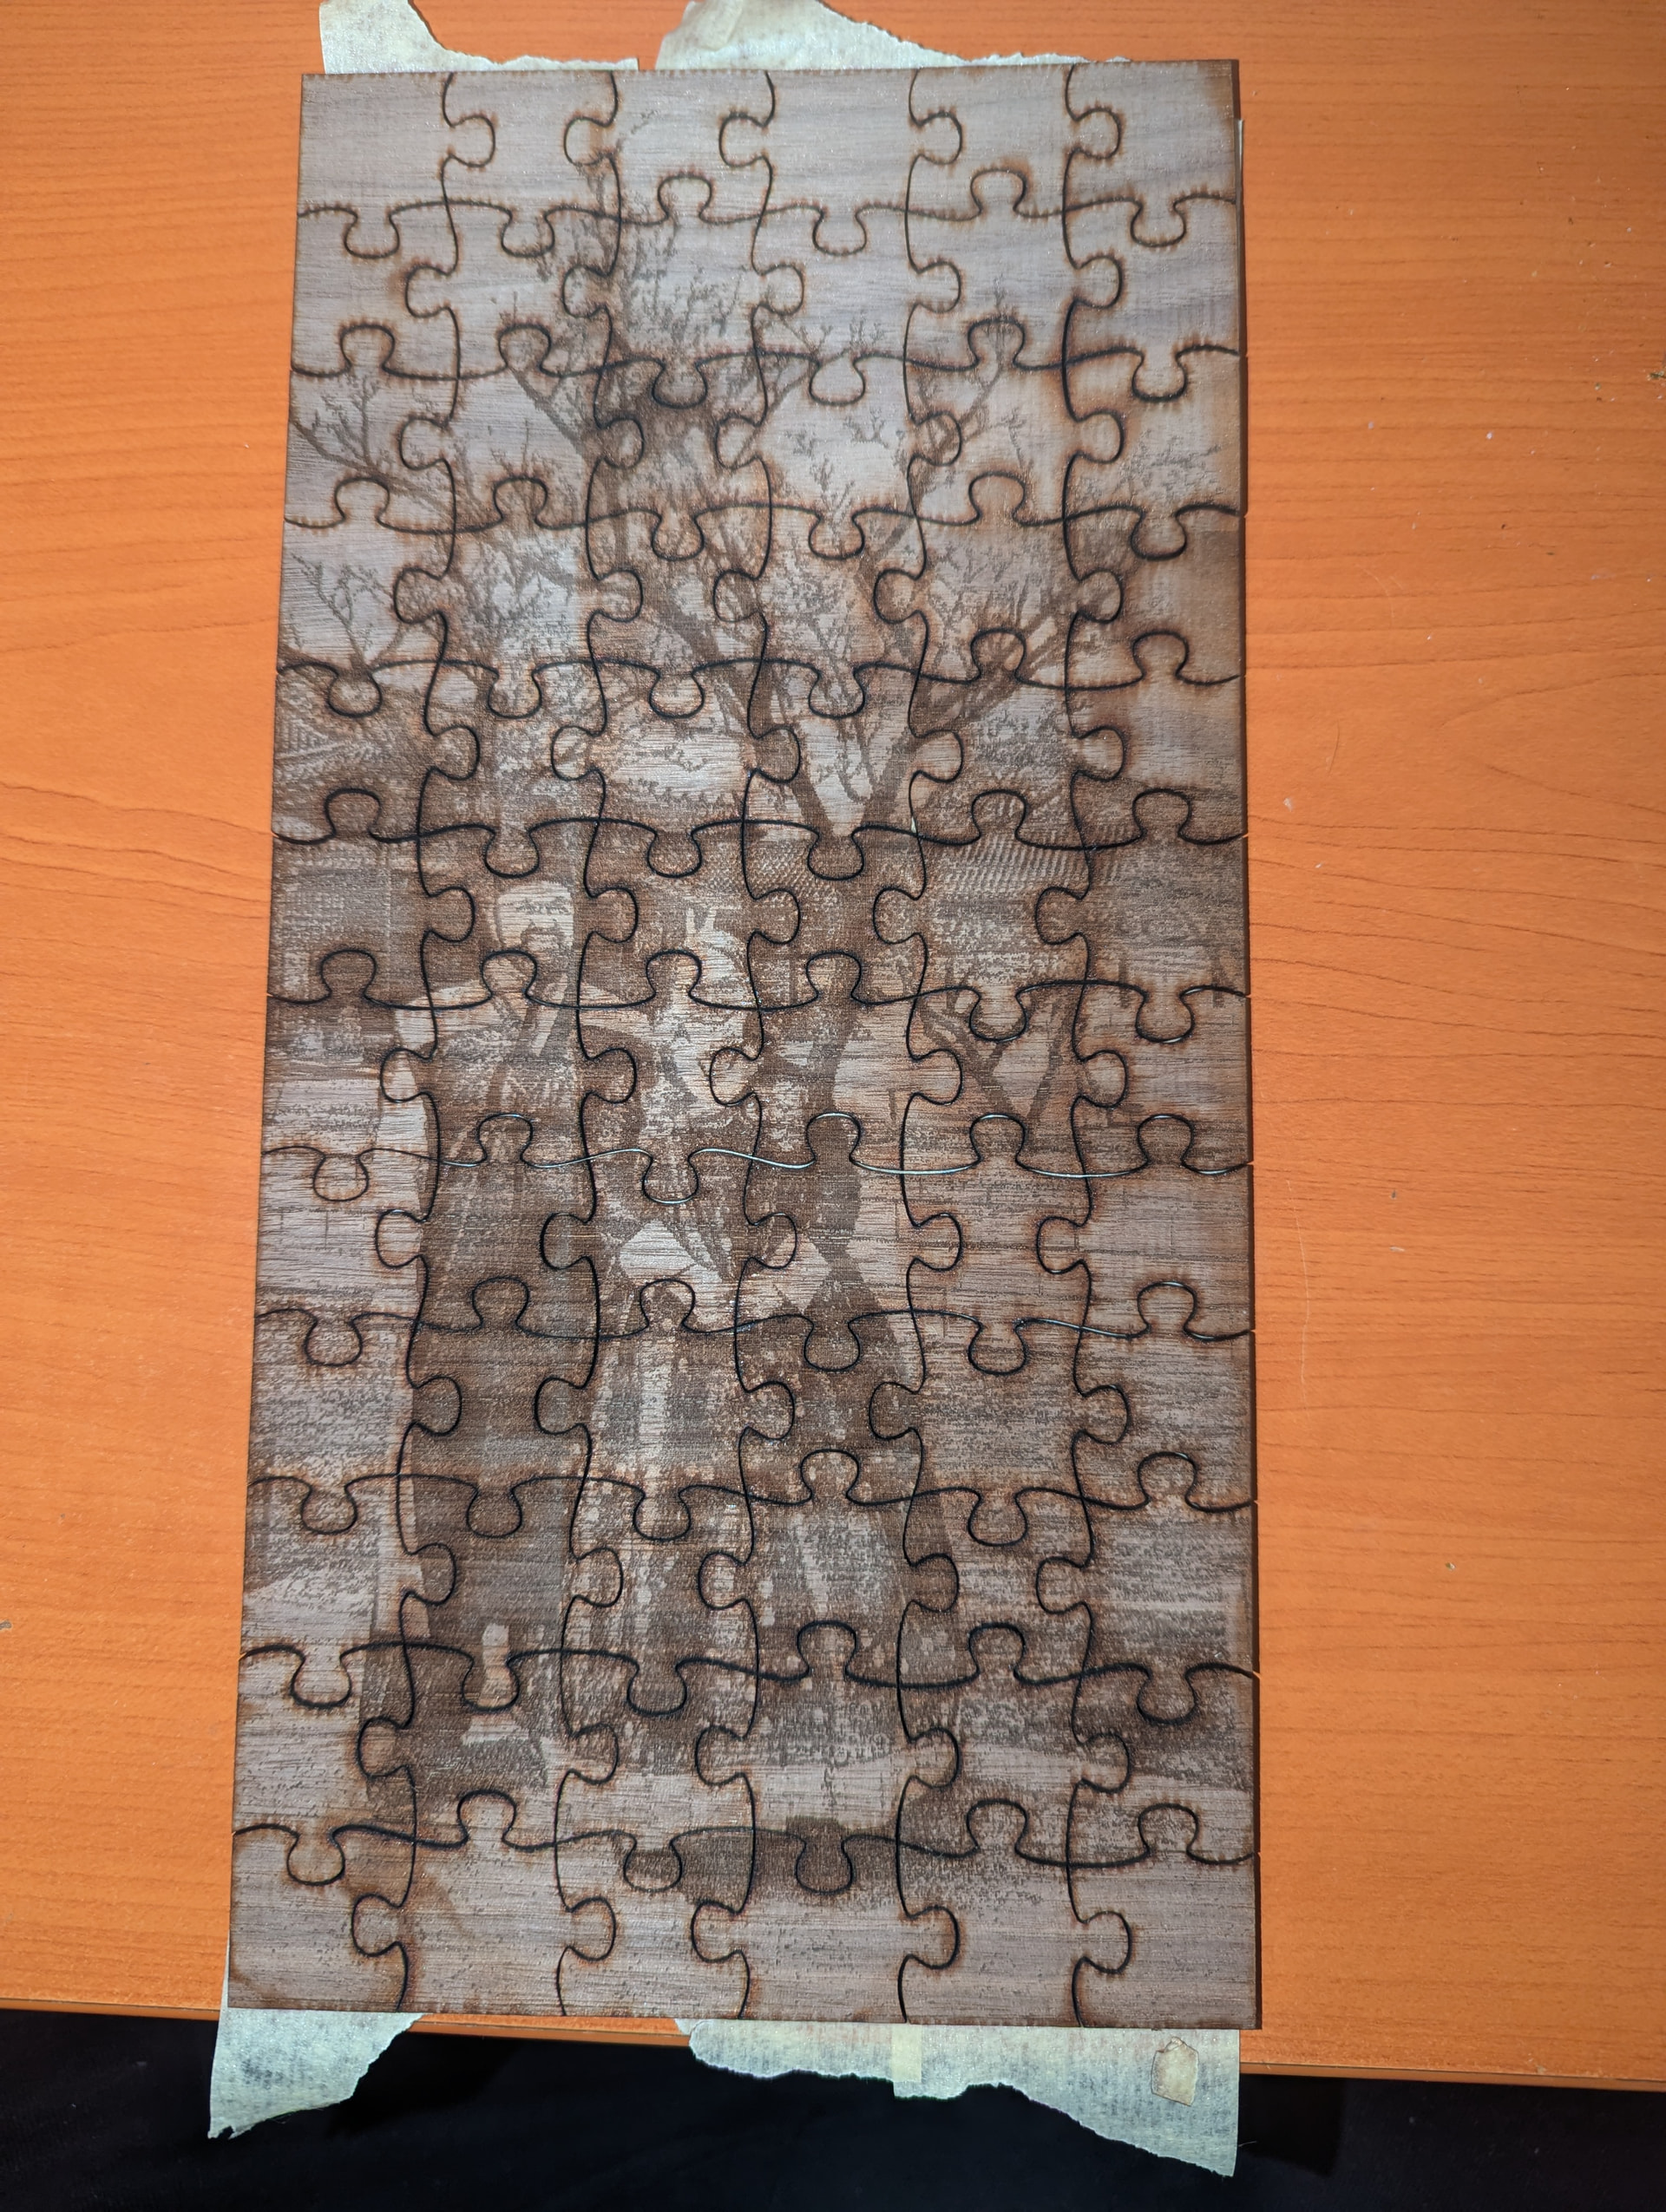
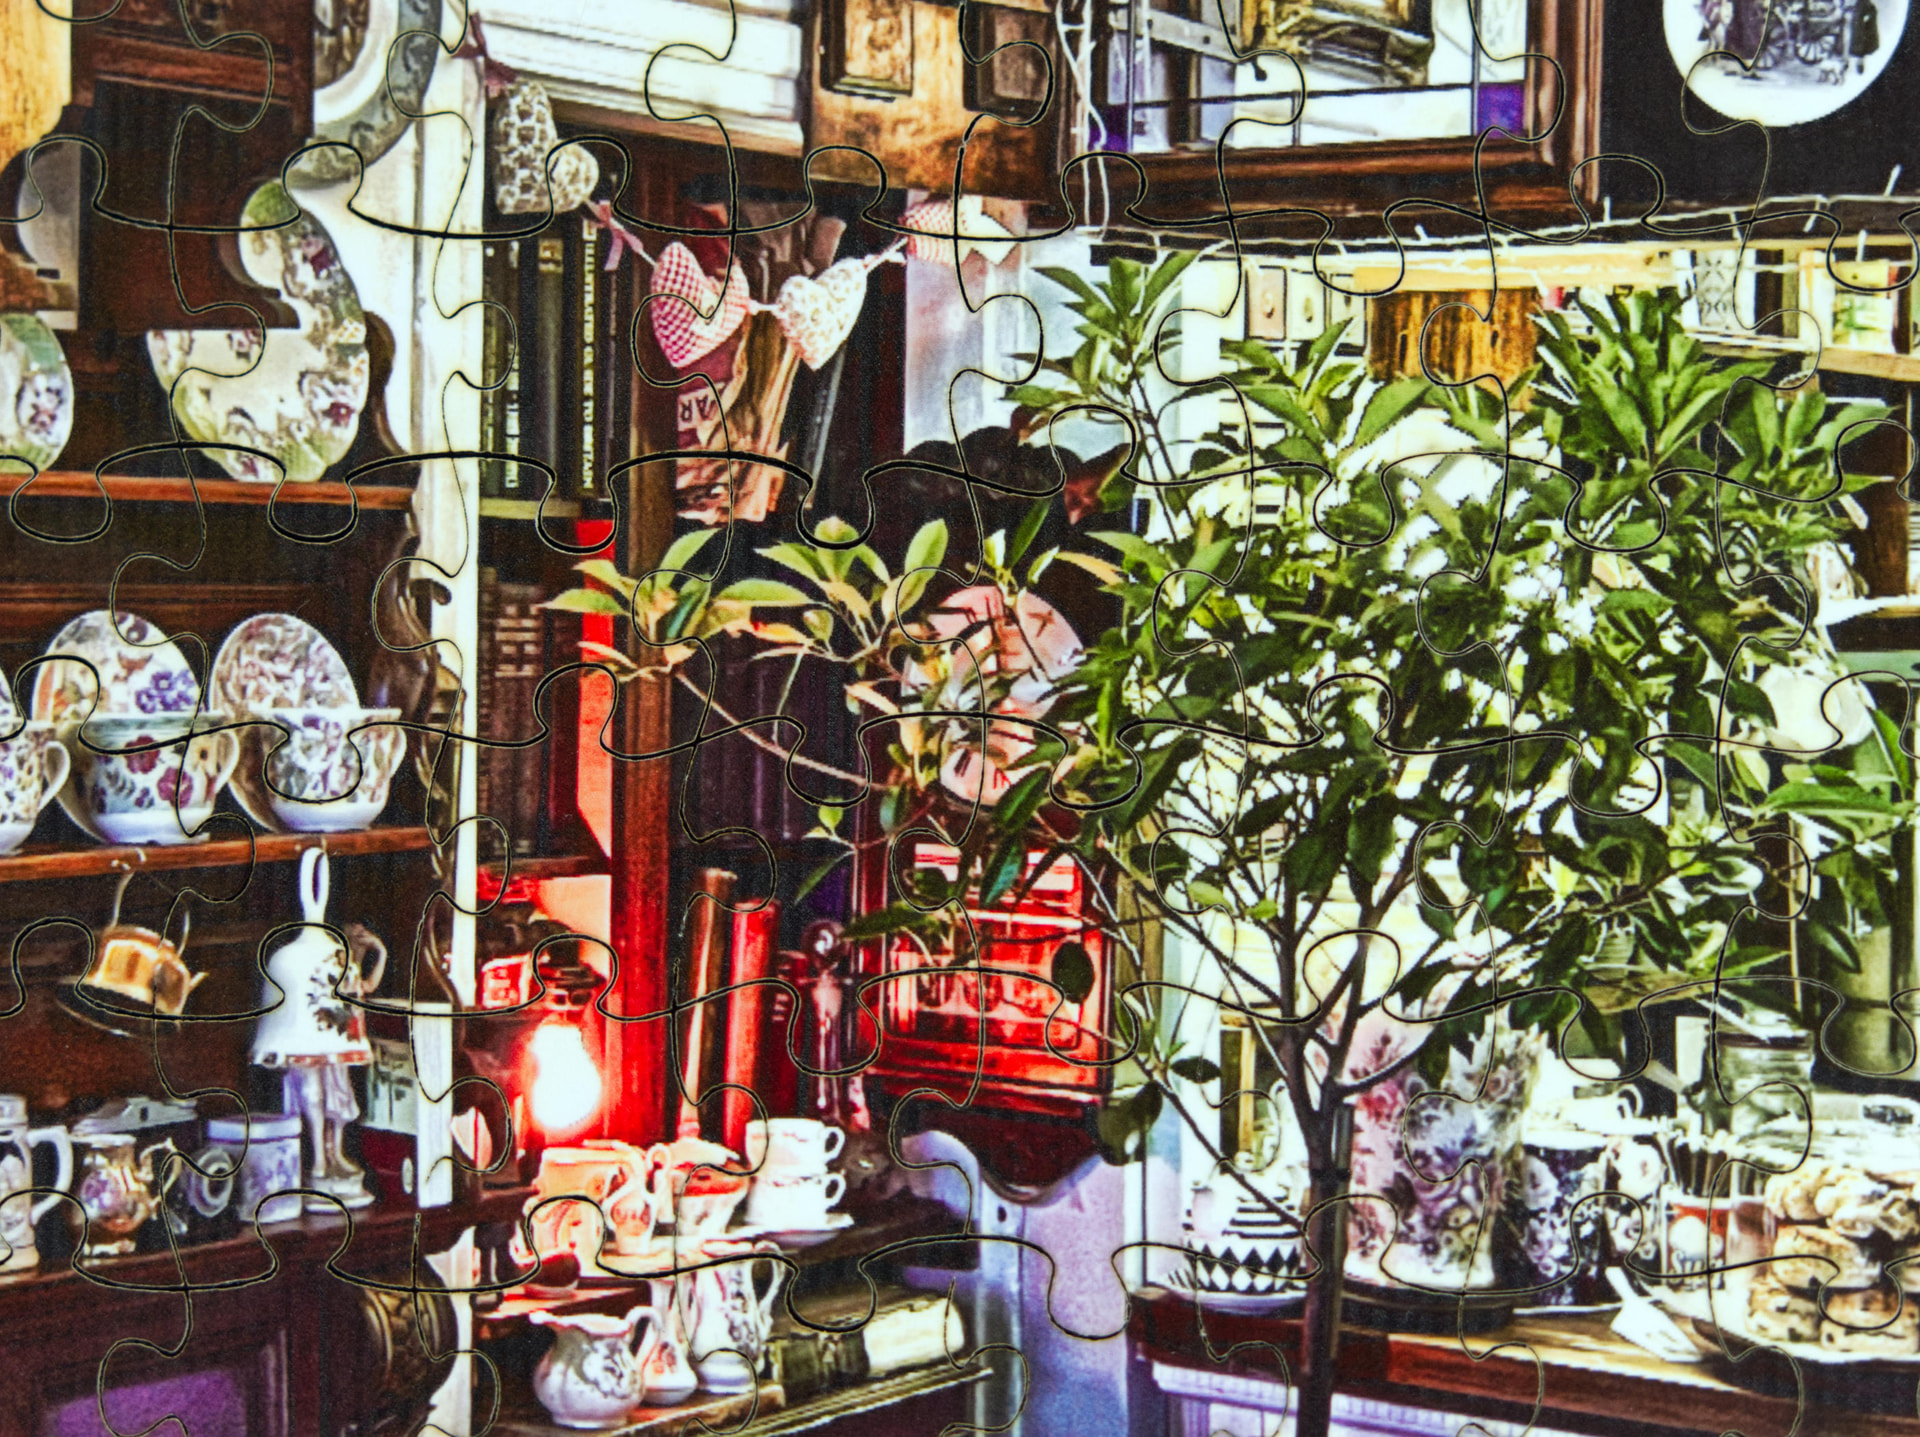
I’m mostly a beginner but have learned things such as “apply masking tape before cutting” and “use air assist” and “do not cut construction plywood”. Having said that, I have been attempting to make a jigsaw puzzle out of a photograph, which I have first desaturated in GIMP and then dithered with Vectordaddy’s dithering engine, and then tested a section of multiple times until I have been happy with the test.
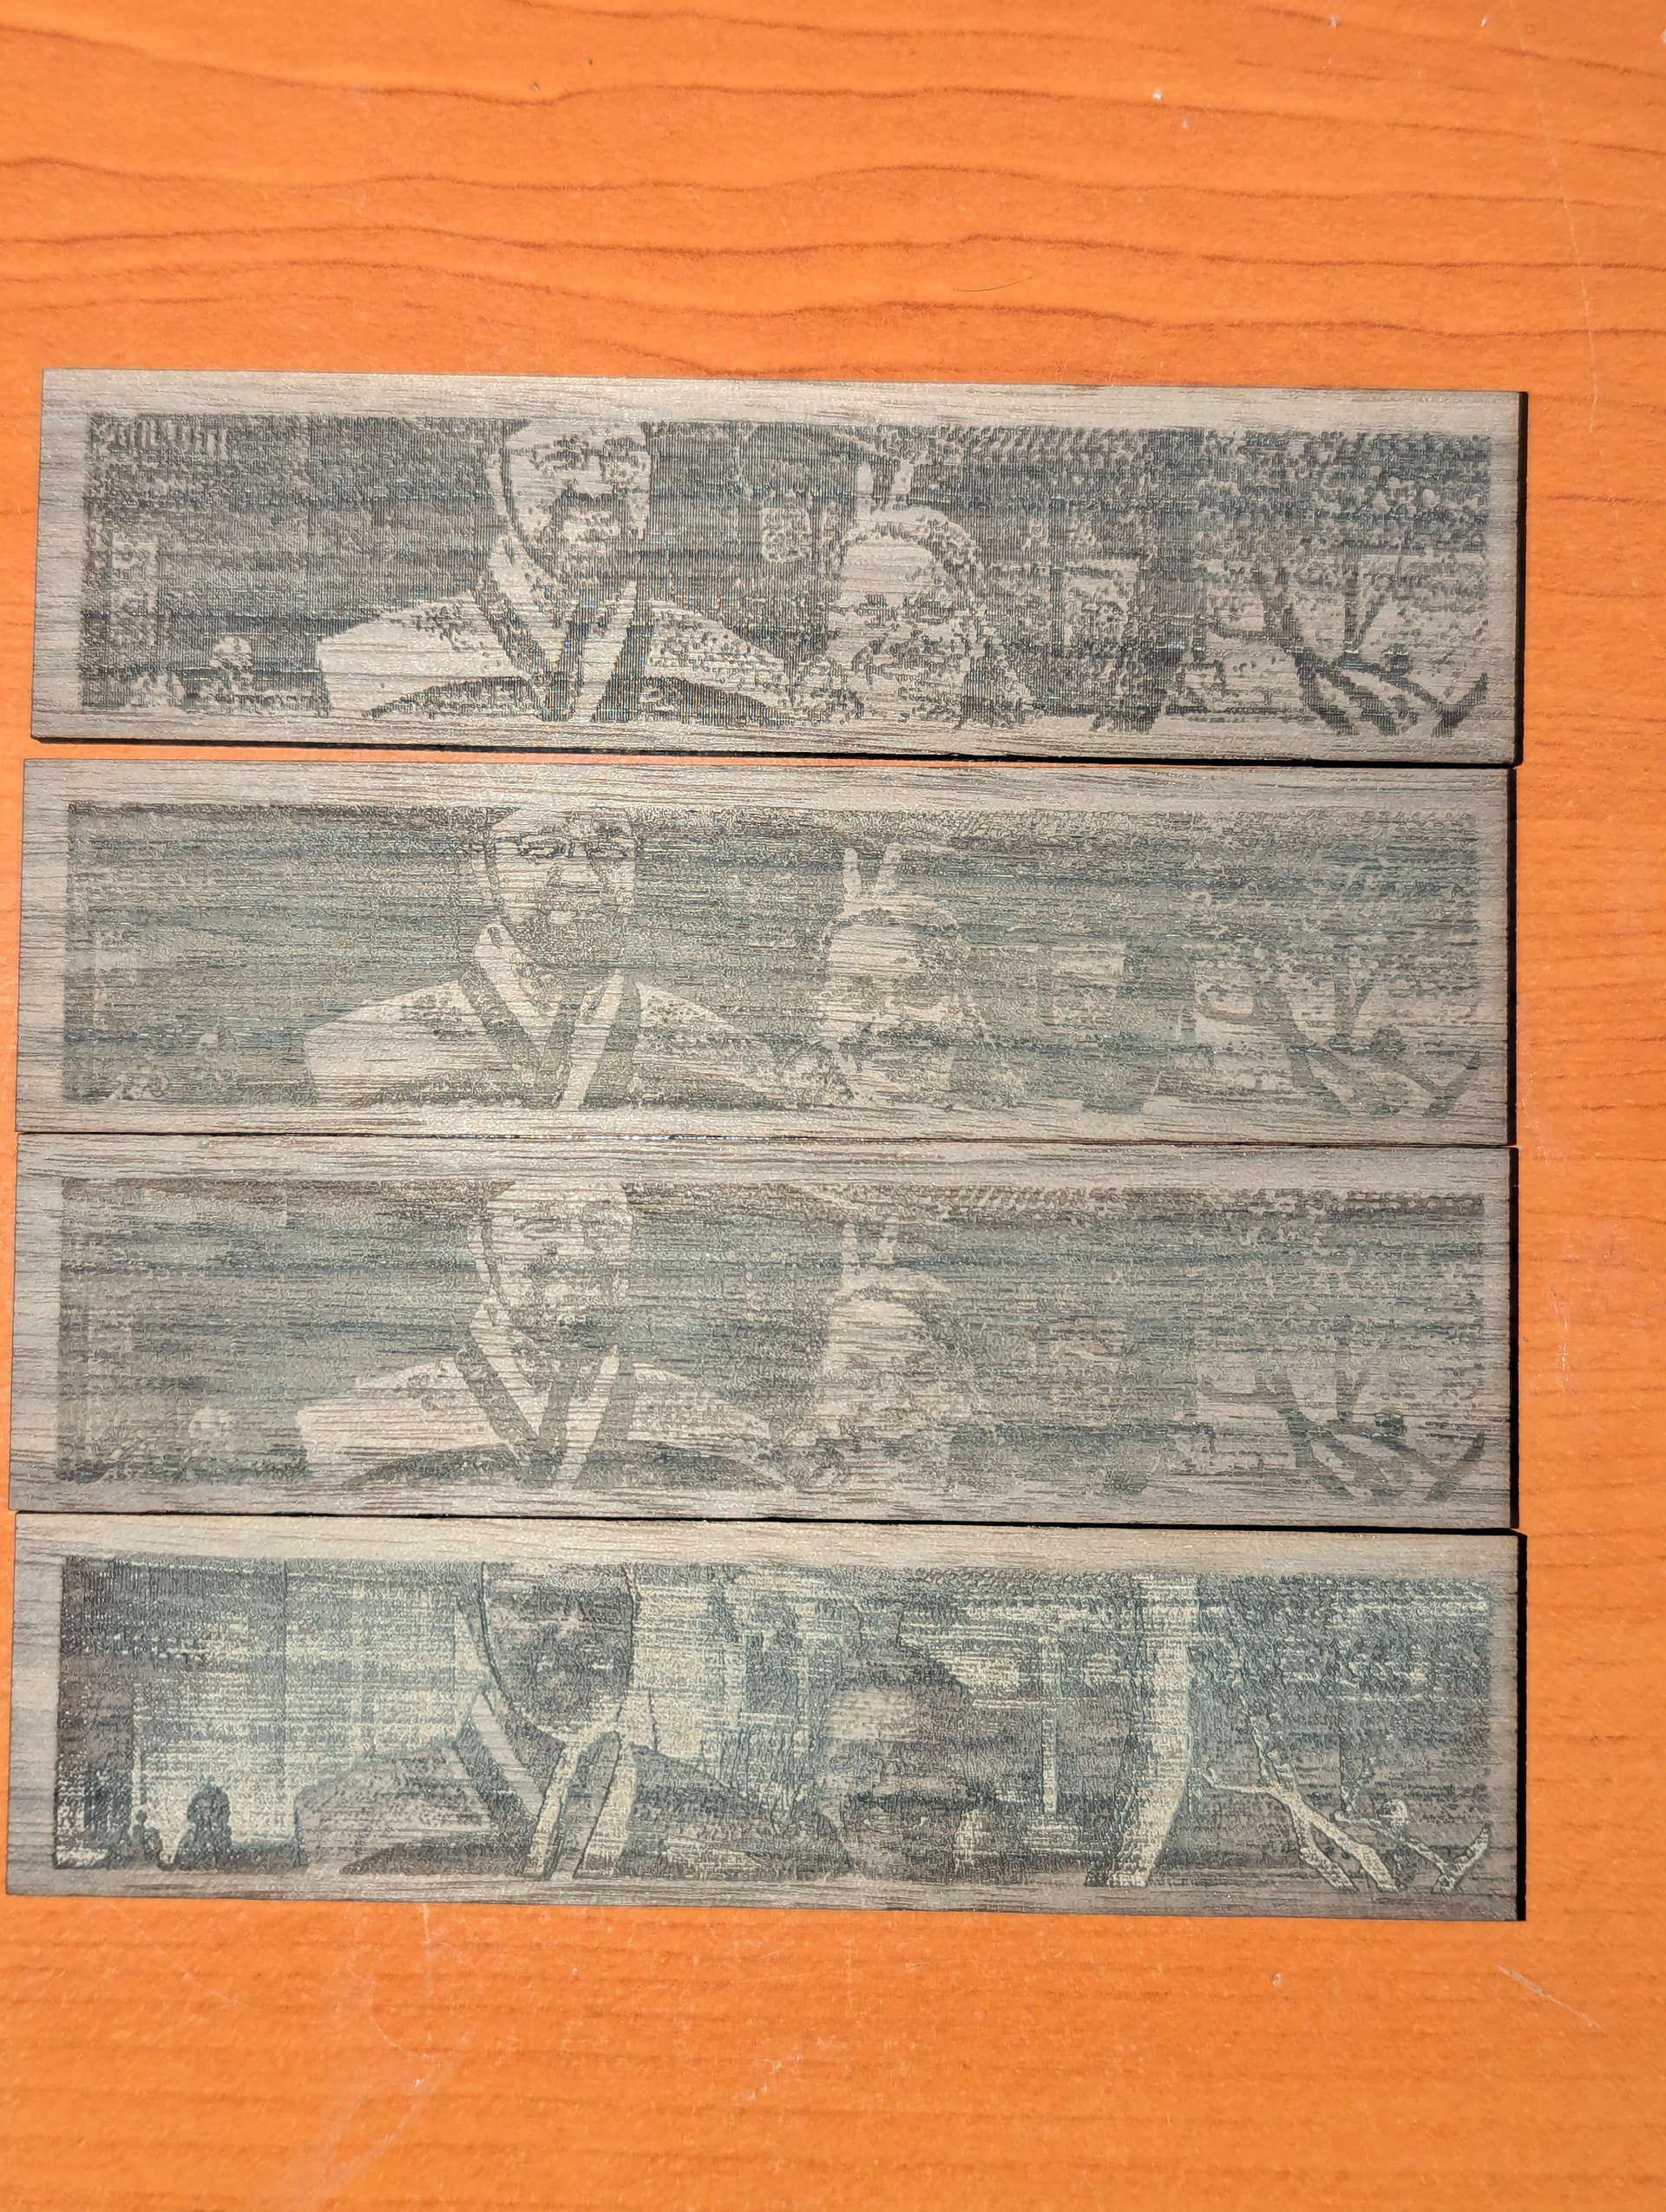
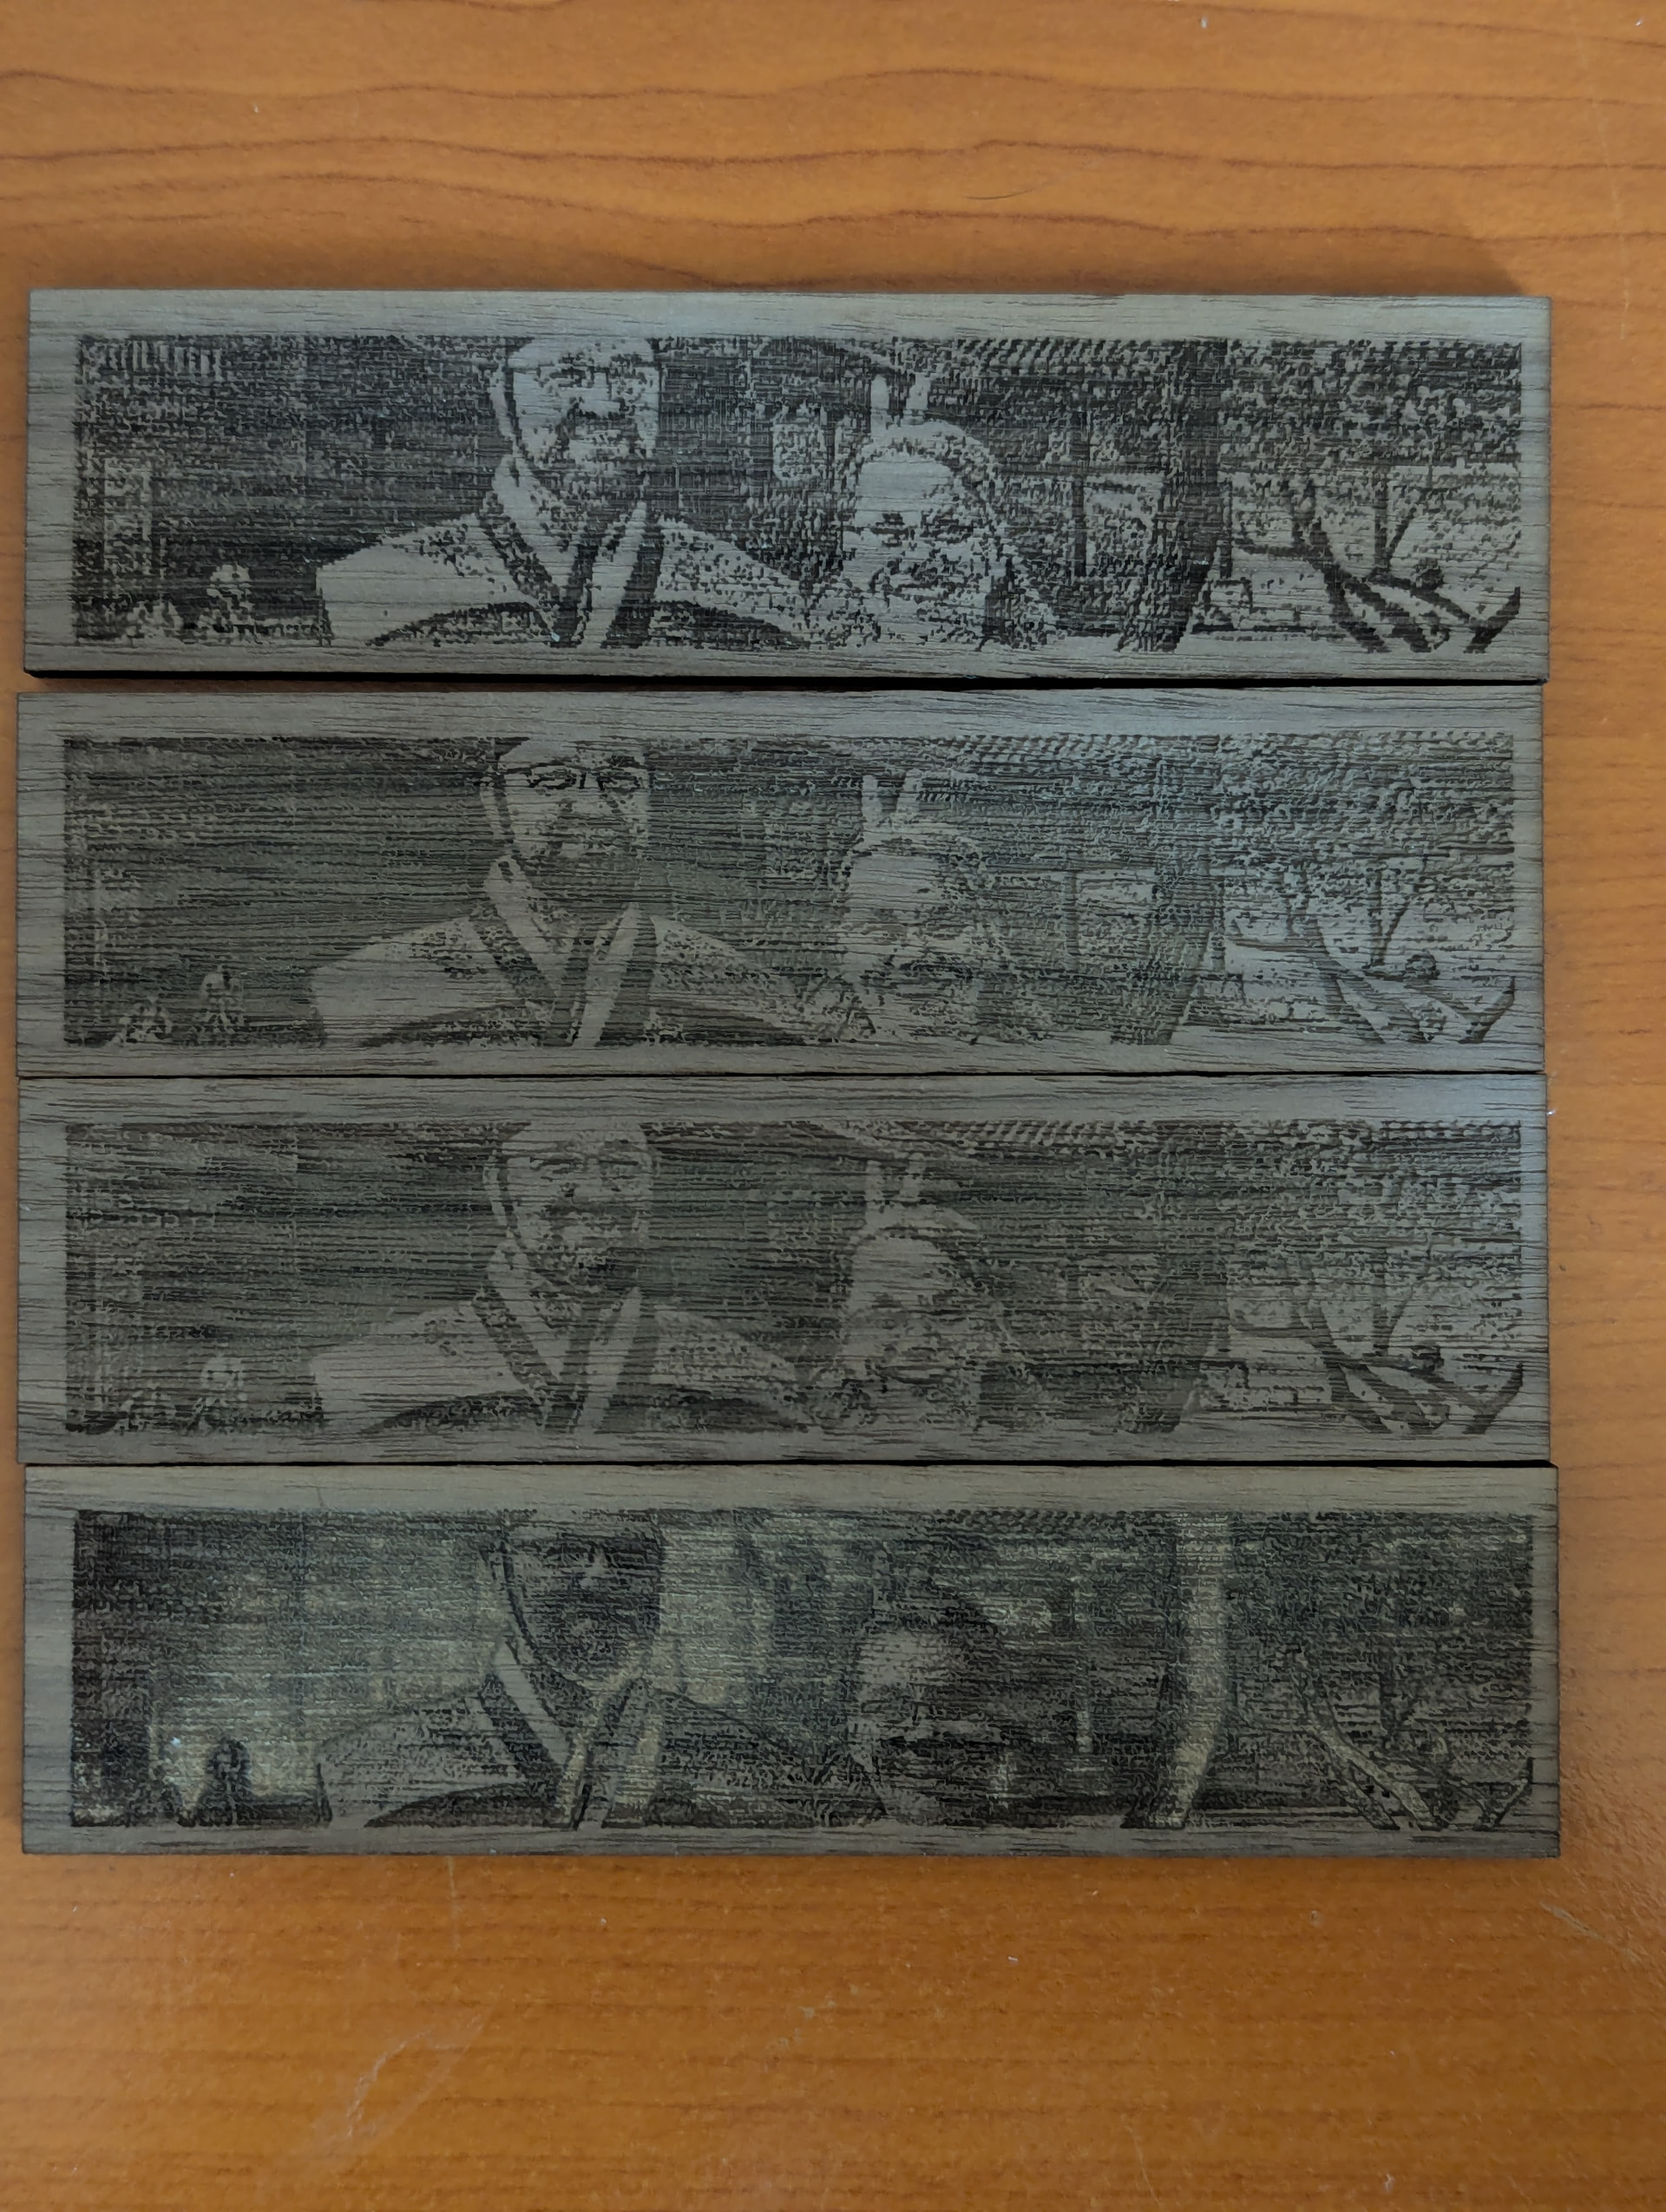
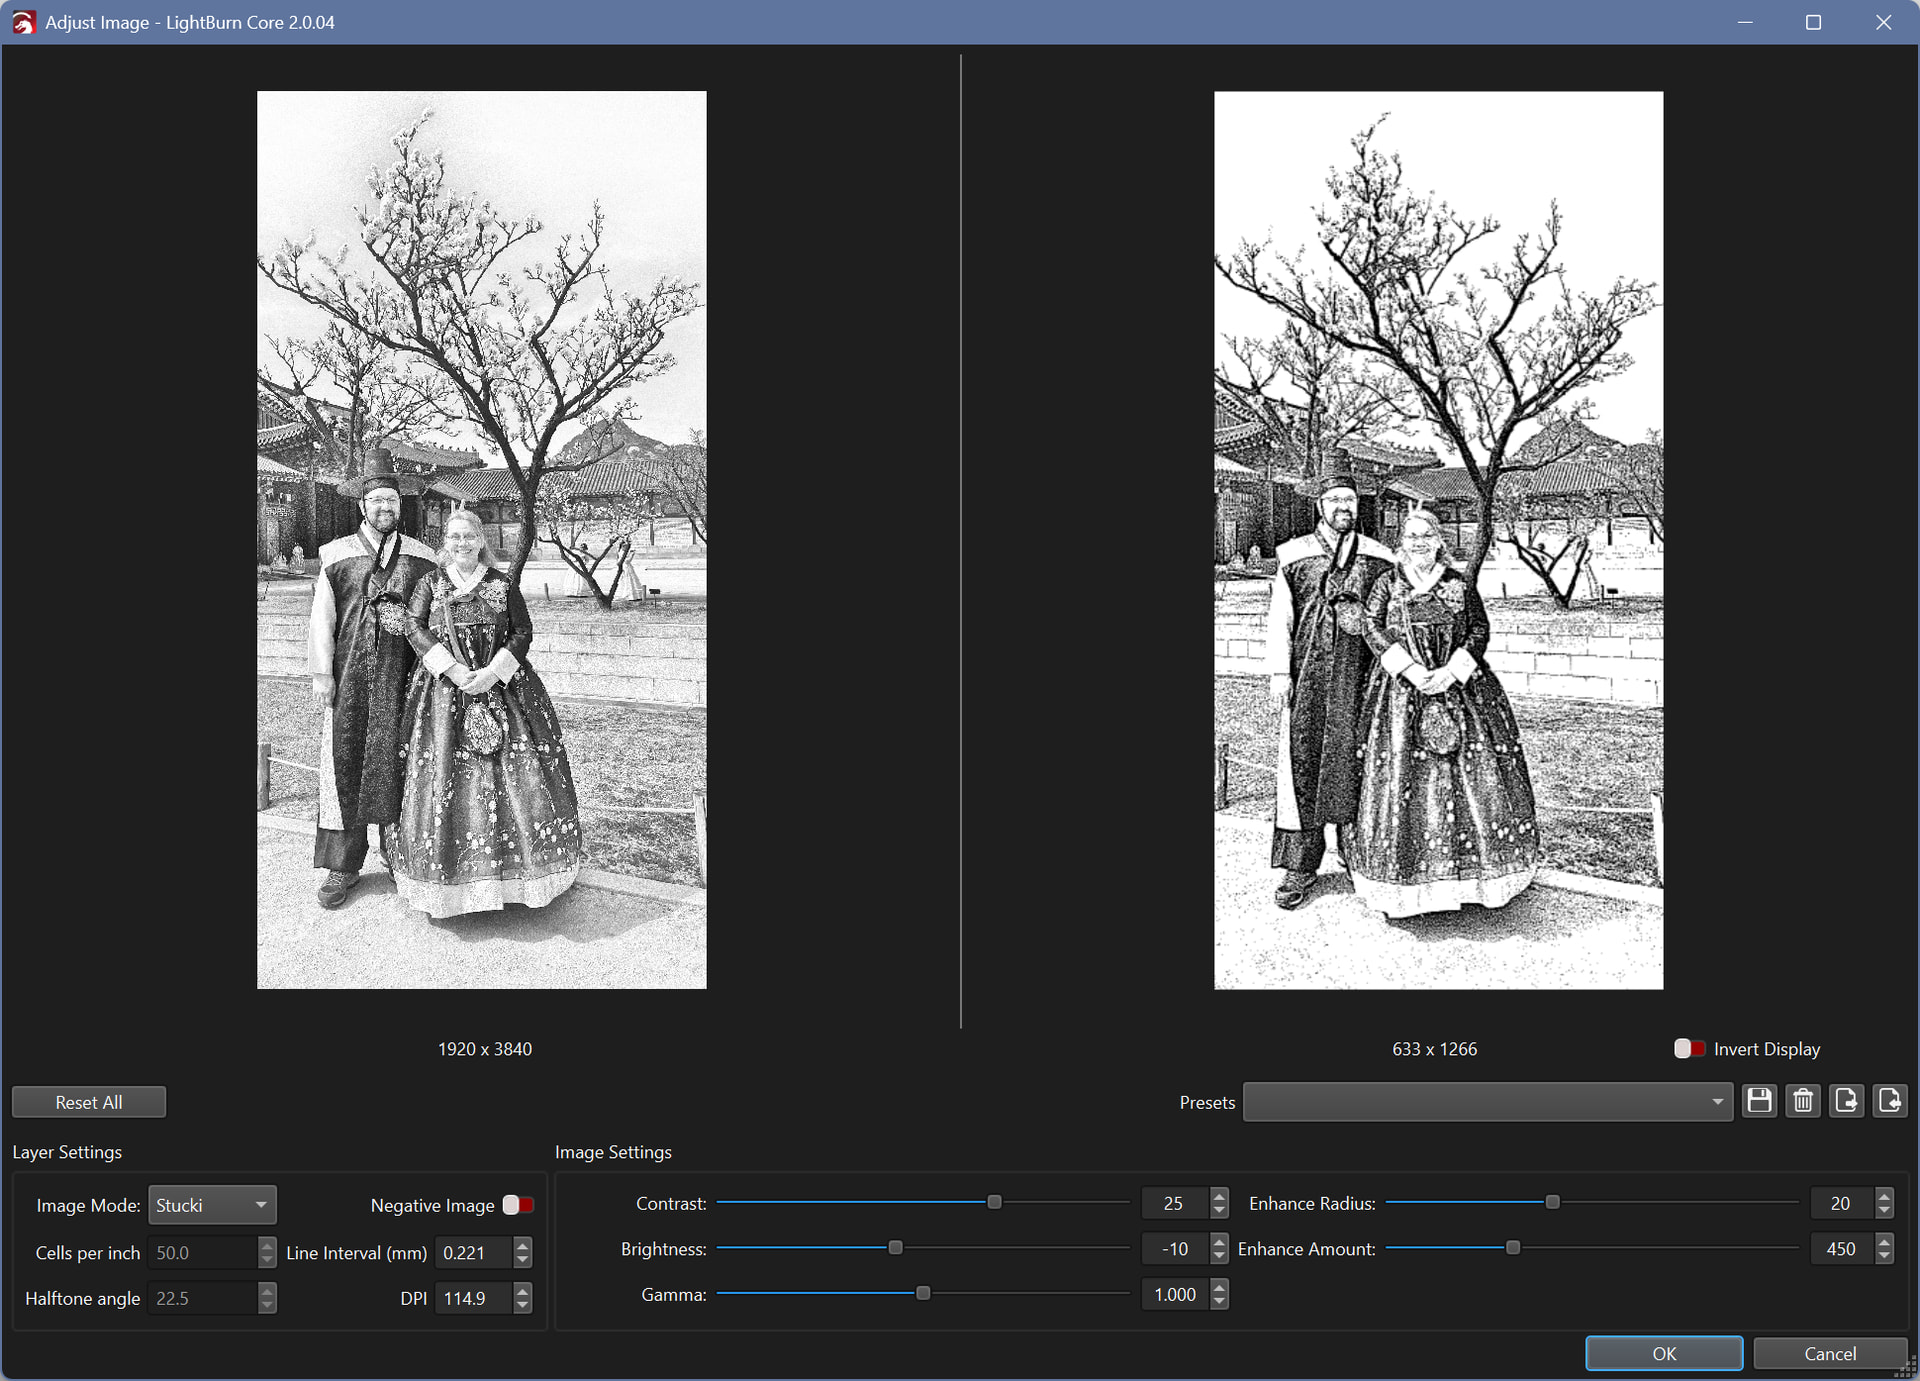
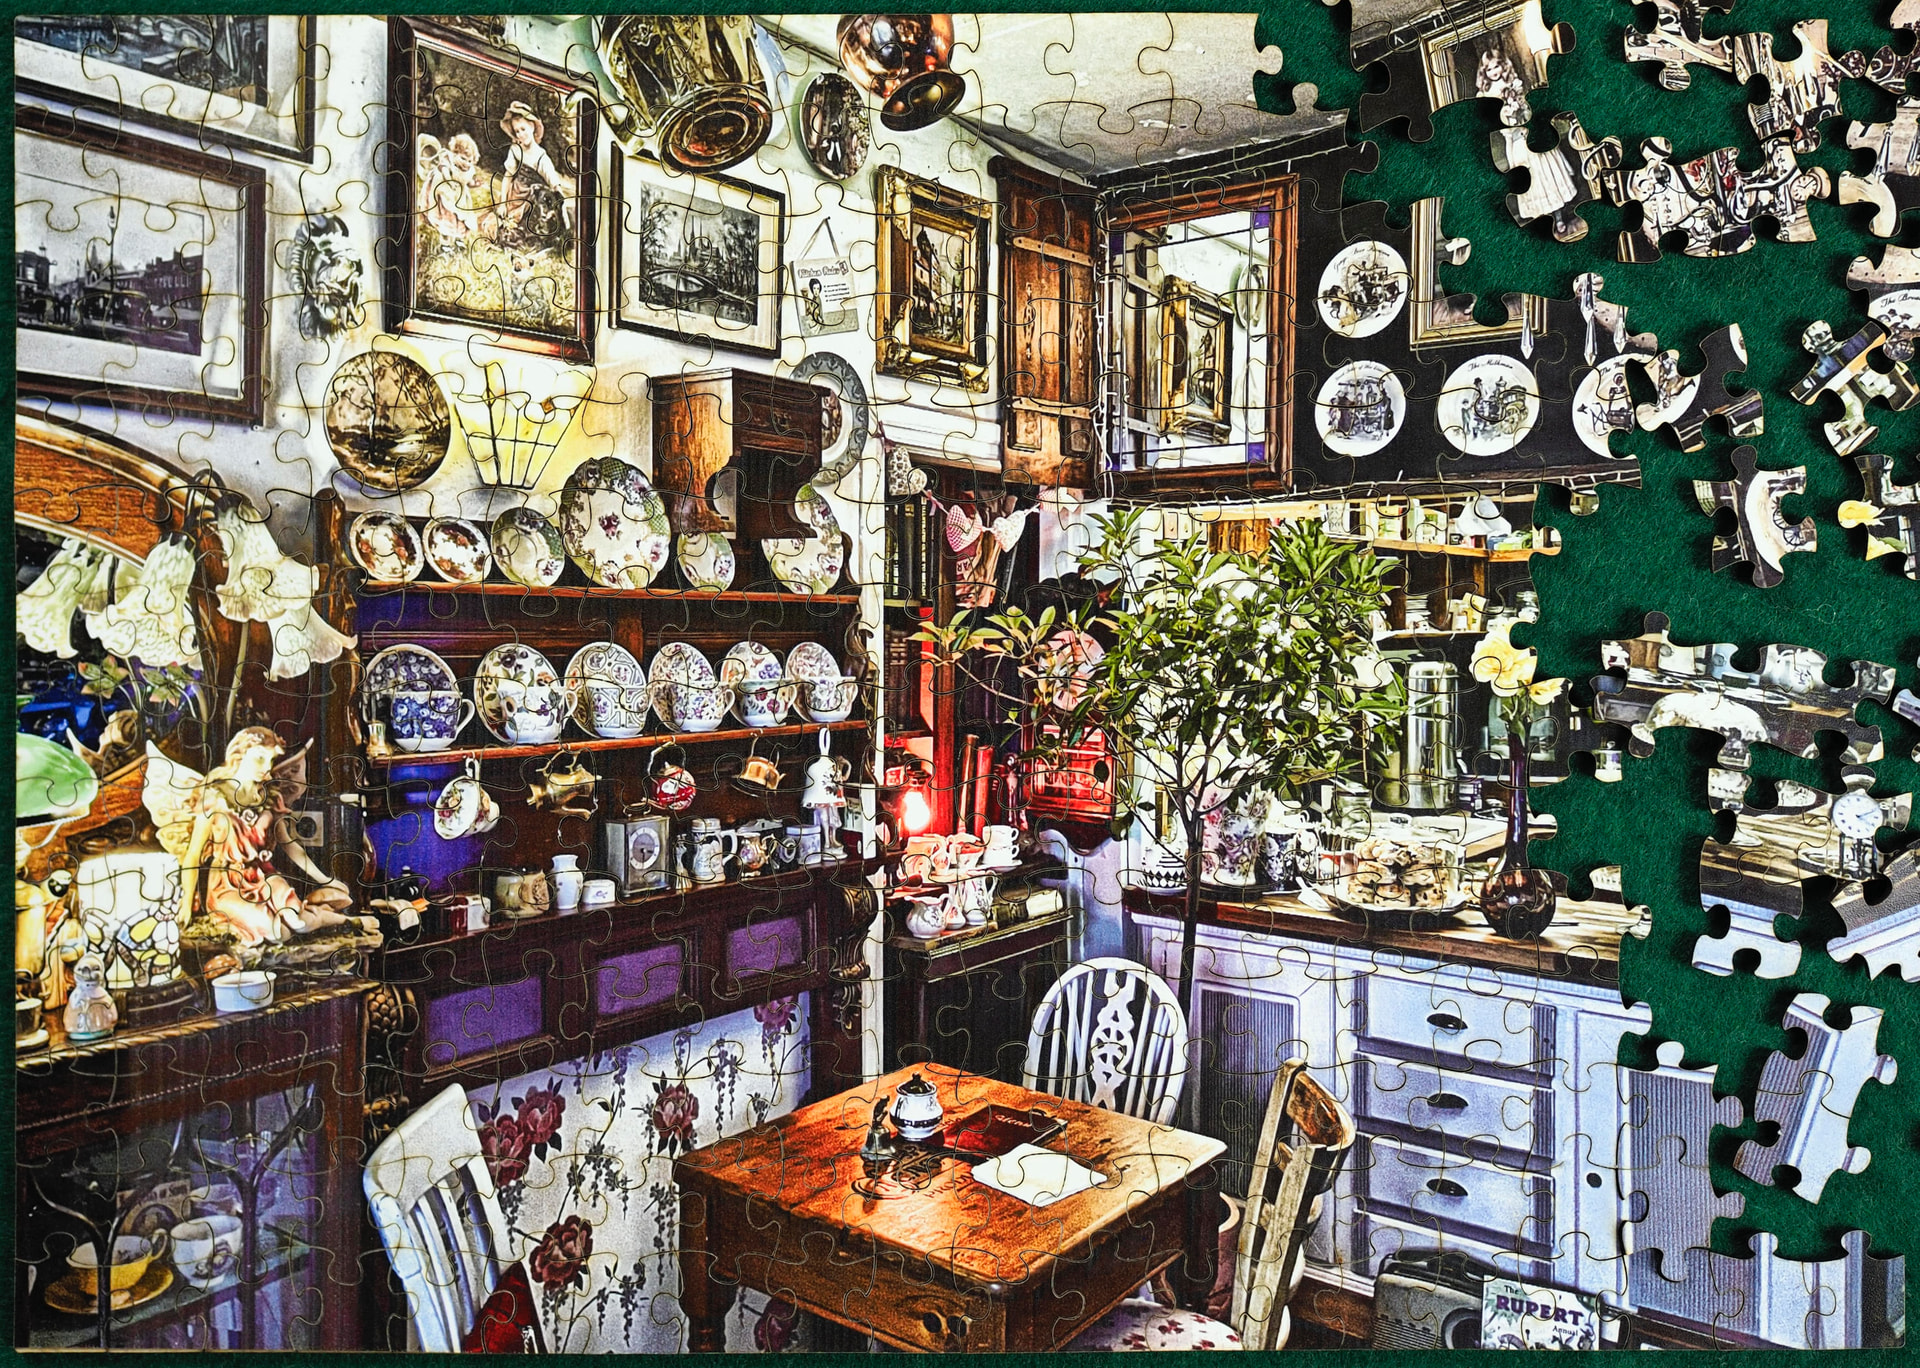
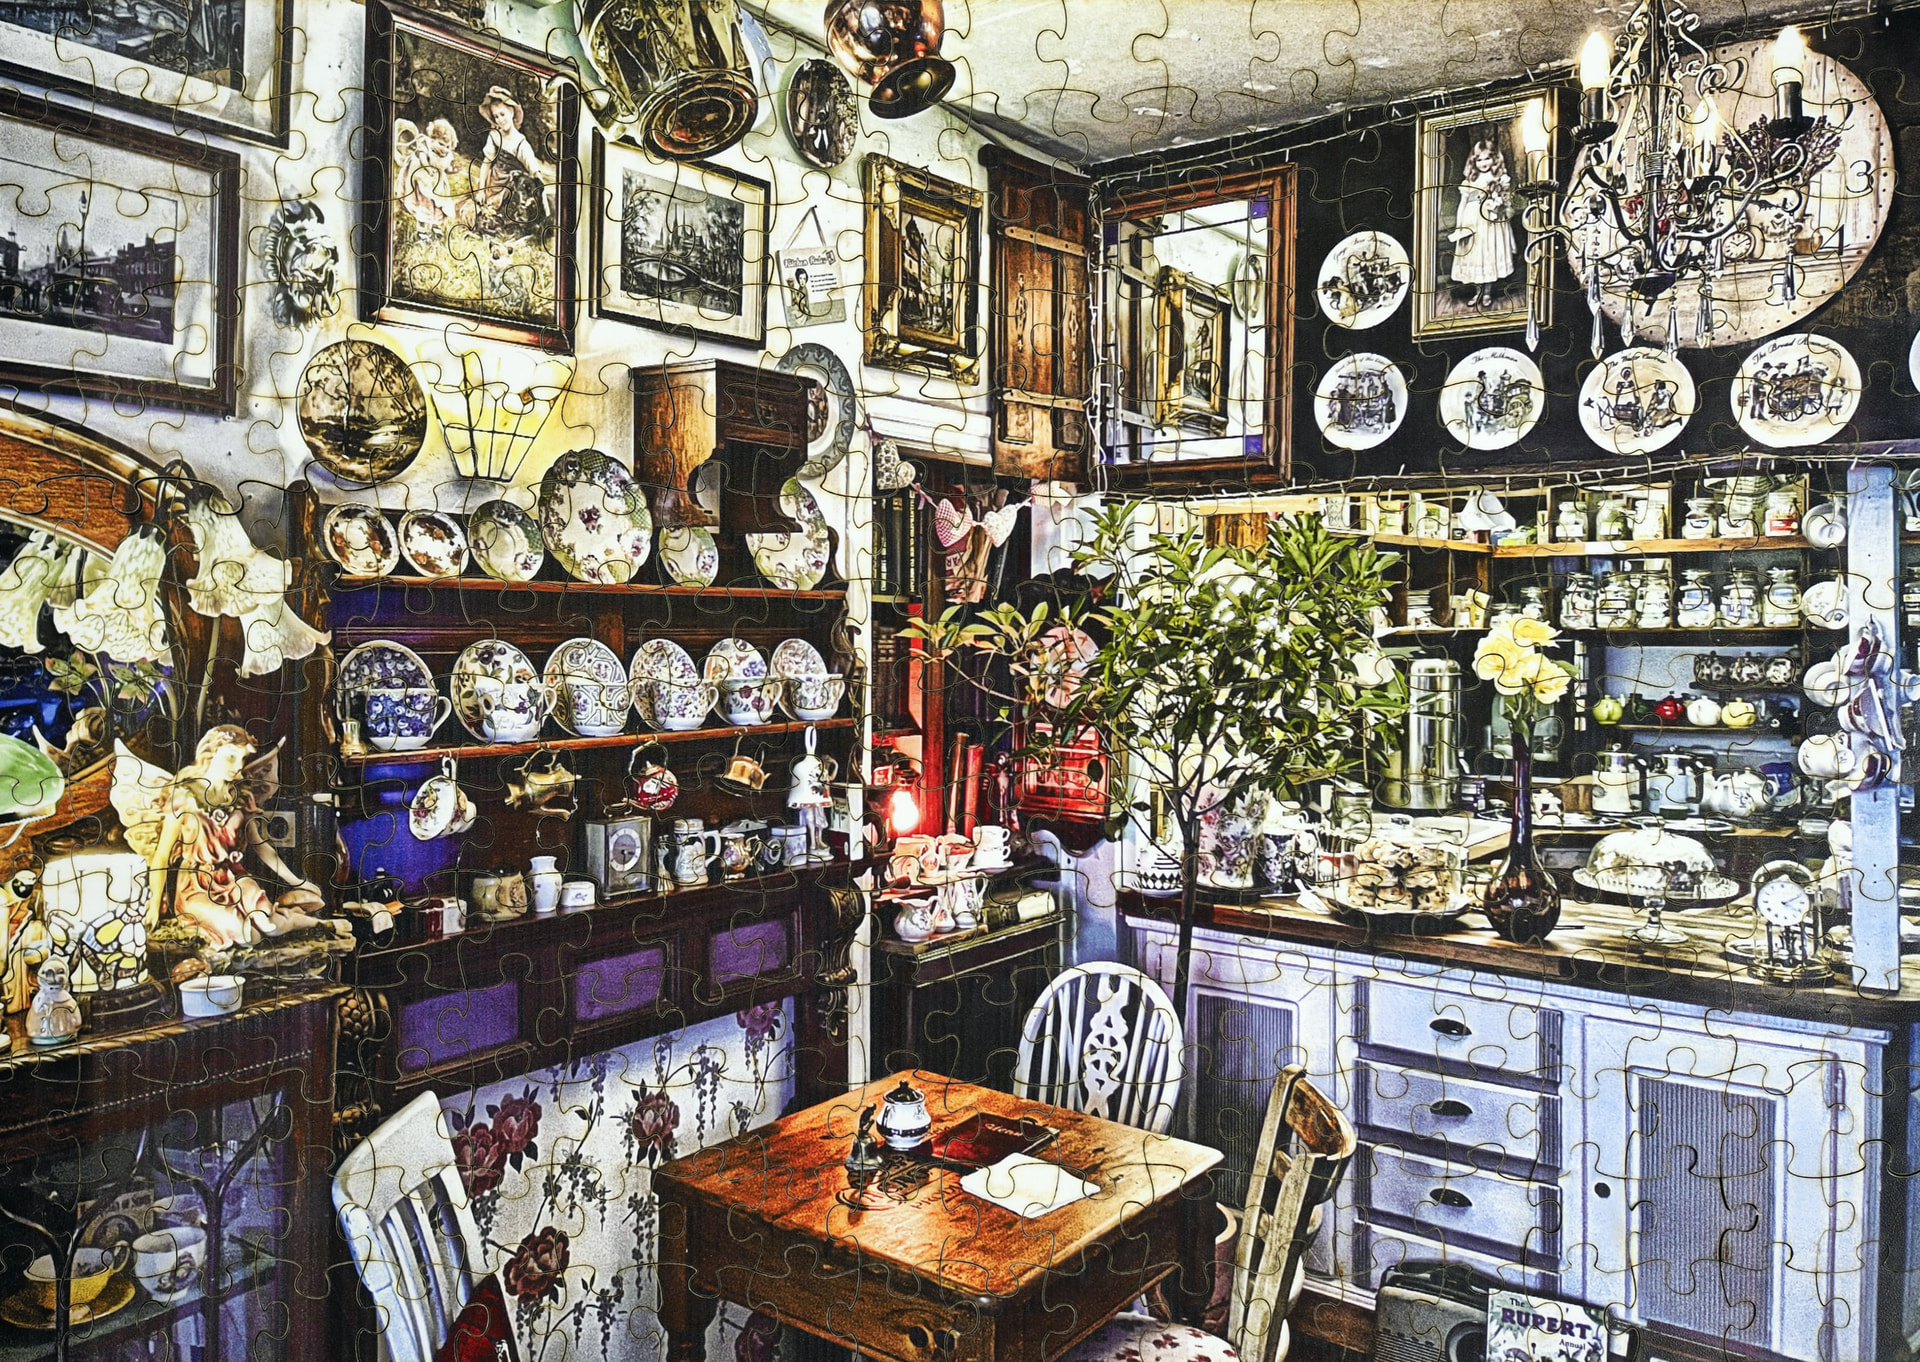
The problem is that while my test piece (the topmost of the four in the image of the test pieces) looks good enough to me, the overall result looks washed out and dominated by the cut lines, image not really discernible. The picture in the jigsaw version was engraved with the same settings as the topmost test piece.
The LightBurn project is in excess of 7 MB, and even after aggressive compression it remains just slightly over 5 MB. I will make the project available at an external URL upon request, but for now, I will paste the image adjustment settings and state:
I am engraving the image in two layers, one at the angle of 0 degrees and the other at 90 degrees,
both at 19,000 mm/min, 80% power (out of 20W optical),
0.22 lines per inch (because of the fact that I am scanning the image twice),
manual air assist on at full,
and the image is not masked during engraving.
After engraving, I have applied low-adhesion faint yellow masking tape on the image and cut it at 800 mm/min, 100%, 2 passes, and then removed the tape.
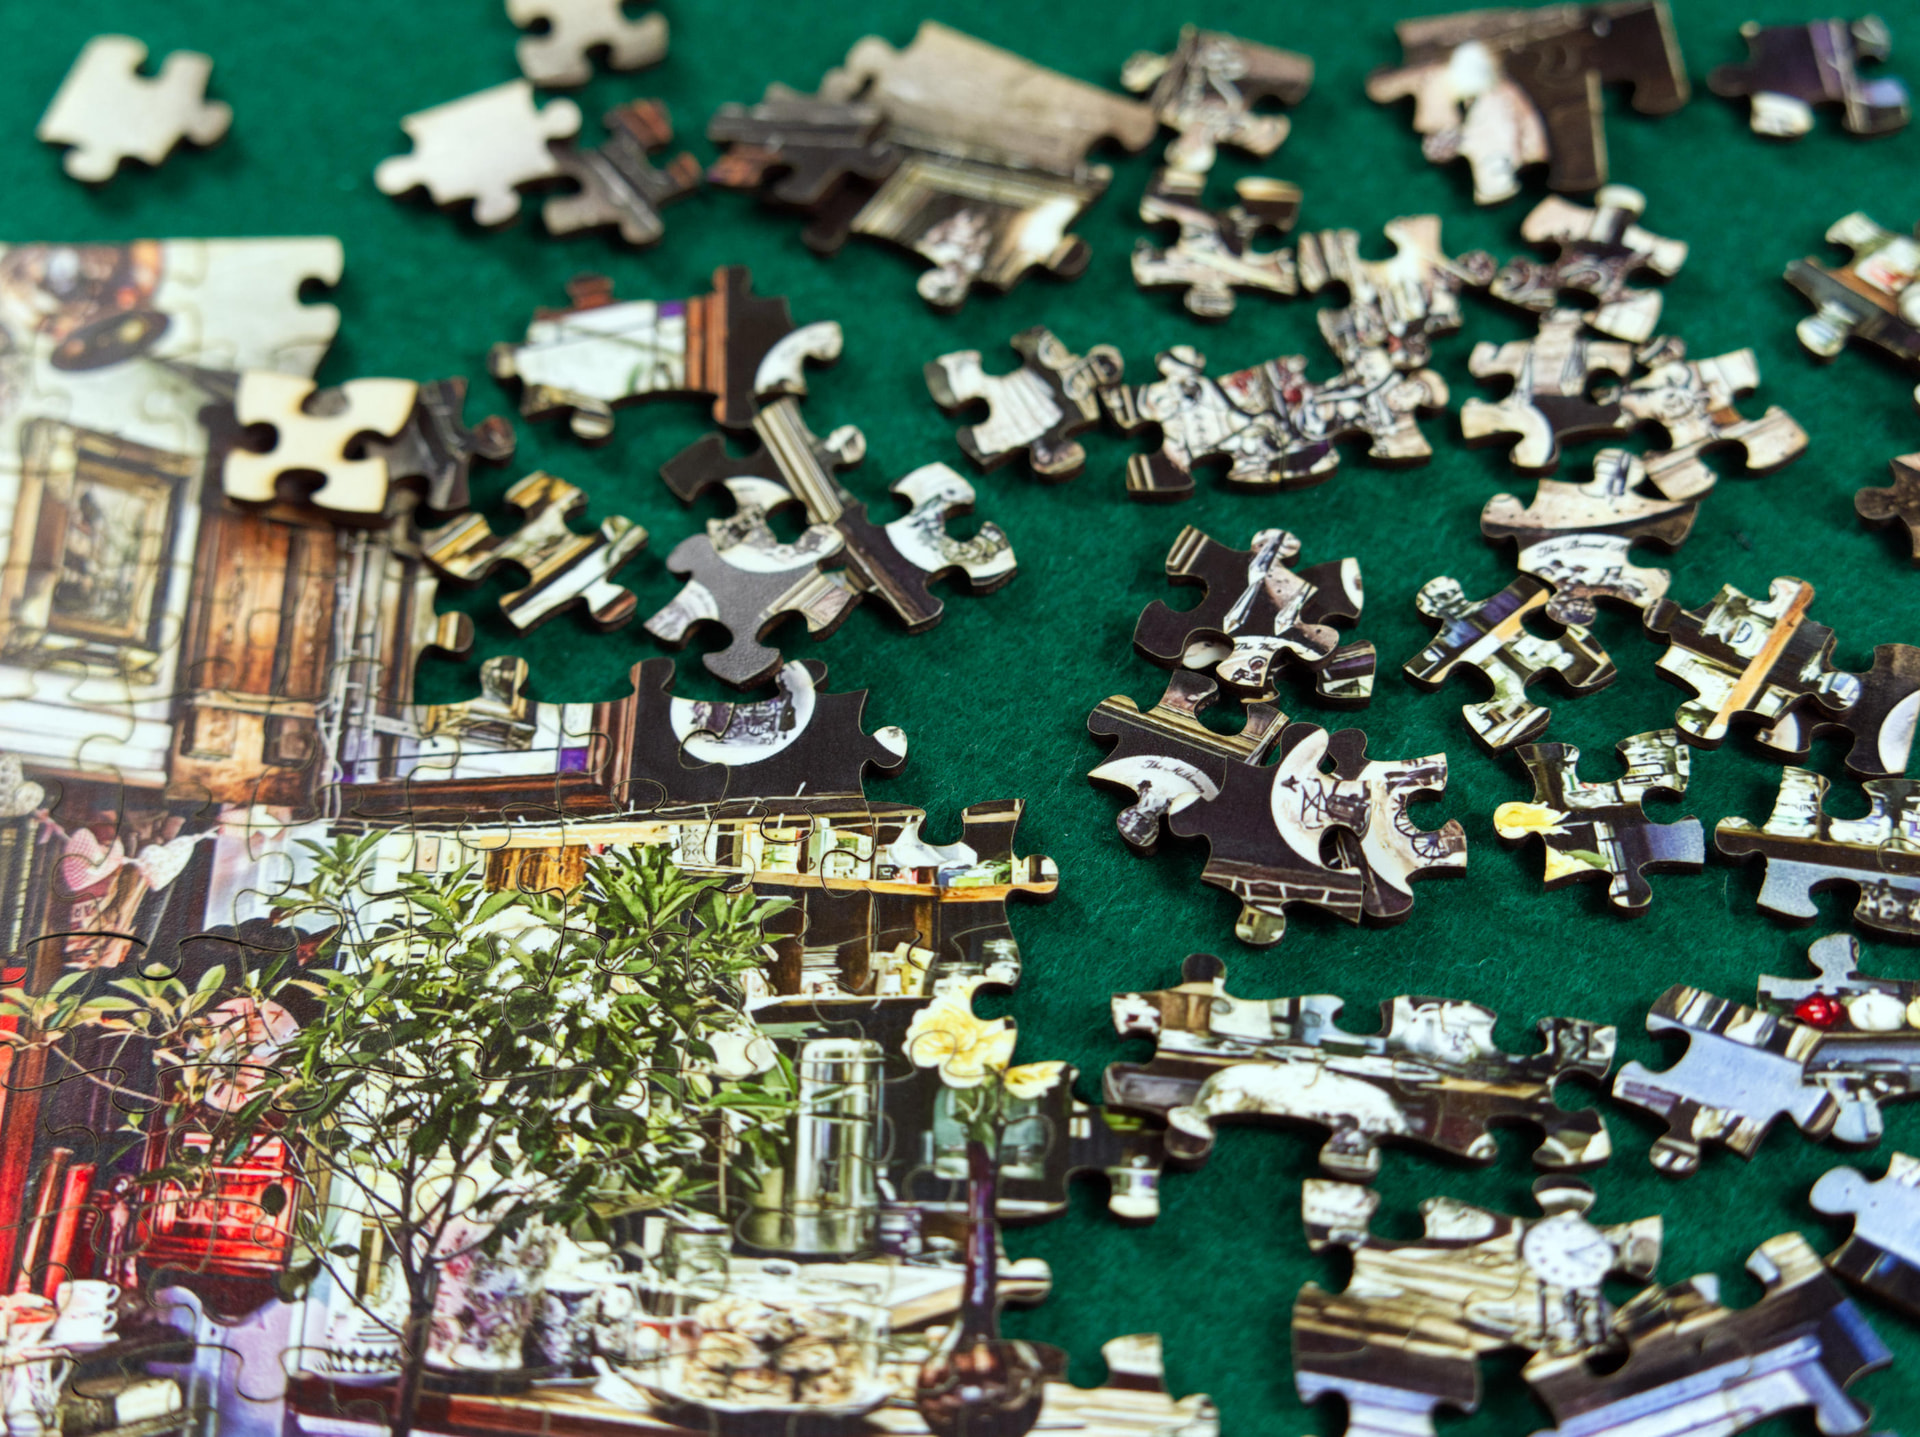
The sample images are with and without flash.
I notice some coloured spots, such as in the 5th piece in the tow row, to the top-right of the connector tab, appearing during the cut. These are not from the engraving.
What, pray tell, am I doing wrong or expecting wrong? Does one of you jigsaw masters have an idea?
Are you engraving on plywood? If so, use basswood or something similar that is smoother to engrave and easier to cut. Also, try increasing the cutting speed and add passes to avoid excessive burning. The reason black cut marks stand out is simply because they are solid black while the image is “grayscale”, you will never be able to reverse the difference in contrast. Making the pieces larger reduces the amount of them and makes the cuts less distracting.
Also, cut from behind (flip the sheet upside down rather than front - that reduces the burn marks). If you want to use tape, use it on the cutting side, underneath it doesn’t do anything.
The way I make puzzles is I glue a photo print on the sheet, lacquer both sides and flip it over and cut the pieces from backside. It’s bit more labour intensive but the end result justifies the work.
Thank you. The tape on the backside was put there after the cut and engraving just to keep the puzzle together. I naturally have the tape on the front side when cutting.
Do you have insights on how to increase the contrast or if I am expecting too much? The plywood is black walnut veneered 4 mm plywood from Kitronik.
As for the lacquering and the glueing: seeing as your results look awesome, I would love to know what glue you use, what kind of paper you use and what specifically you lacquer and with what.
Increase power/ slow down the speed, but you run into the problem that your image loses any definition and turns to black&white mush. Run tests with different settings until you are satisfied all the while keeping in mind how the pieces cut lines will affect it.
That’s your biggest problem. The veneer isn’t good for engraving, and it is so thin that you will cut through it very easily. Use basswood sheets and stain to give it colour after you have done the engraving. Then flip it around and cut from the back.
For the images, again, you need to test with different speeds and power % until it’s right.
Canon Pro Luster (LU-101), 3M Photo Mount glue (after gluing, you have to put the print&sheet into press for minimum of 12 hours - if you have no dedicated press, pile books or anything heavy evenly over the sheet) and once done, Perma’s Perma Seal UV protective spray. All that done, align the sheet on the laser bed image downwards and cut.
Finland? You can order from Amazon UK, I’m sure Amazon DE sells them as well. I believe Creality EU ships to Finland as well: https://eu.crealityfalcon.com
Yeah, the name suggests Finland, but the country is Czech Republic. I’m currently getting hits on basswood plywood instead of basswood sheets. The available offers are 300×300×5 mm basswood plywood from Creality and 30×30×3 mm Creatorally basswood plywood sheets, although the latter is ALSO advertised as A4. Go figure. Not the first time Kaufland lists completely unreasonable items on the website.
Basswood plywood is what you need. Pure basswood would be blocks of the tree. Amazon has various sizes of sheets available, I don’t know how big a puzzle you are trying to make, but all you need to do is to cut the excess off the sheet once you have layered your pieces. You can either cut the excess before or after you have cut pieces, I find it easier to cut the pieces sheet before I cut the sheet pieces. This allows you to use magnets to hold the sheet flat on the bed. The laser cut is so thin that the pieces won’t move around in either case.
Nah, the layers are thicker than veneer. The poplar core has to be there for the rigidity. On 3mm thickness you basically have 1mm basswood, 1mm poplar and 1mm basswood layer rather than about 0.1mm veneer on top of the sheet.
300mm x 300mm and 300mm x 400mm are very common sizes, possibly the most common. Good thing for you is, you can cut 2 puzzles from one sheet.
Oh, almost forgot, do sand the sheet with fine grit sandpaper before you engrave. Although they are smooth, it’s always a good idea to sand the surface to make it as smooth as possible.
DAMN! If forgot to mention one more thing: remember to turn air-assist on when you cut! If you don’t have one, use anything that blows air to the surface and buy dedicated one as soon as possible. It reduces the burn and speeds up the cutting speed. You can also use it on a low setting when engraving, but don’t overdo it.
With the mystical sizing I mean that the photo illustrates a non-square sheet, the tech specs don’t mention the size, and only one of the photos specifies the size as 300×300×3. Typical Chinese marketing material where you don’t know if you bought a plywood sheet or a camel until you get it delivered at your door.