I had occasion recently to laser a couple of tiles for a house-warming gift…
They turned out so well I decided to do a few more of the series I’d downloaded…
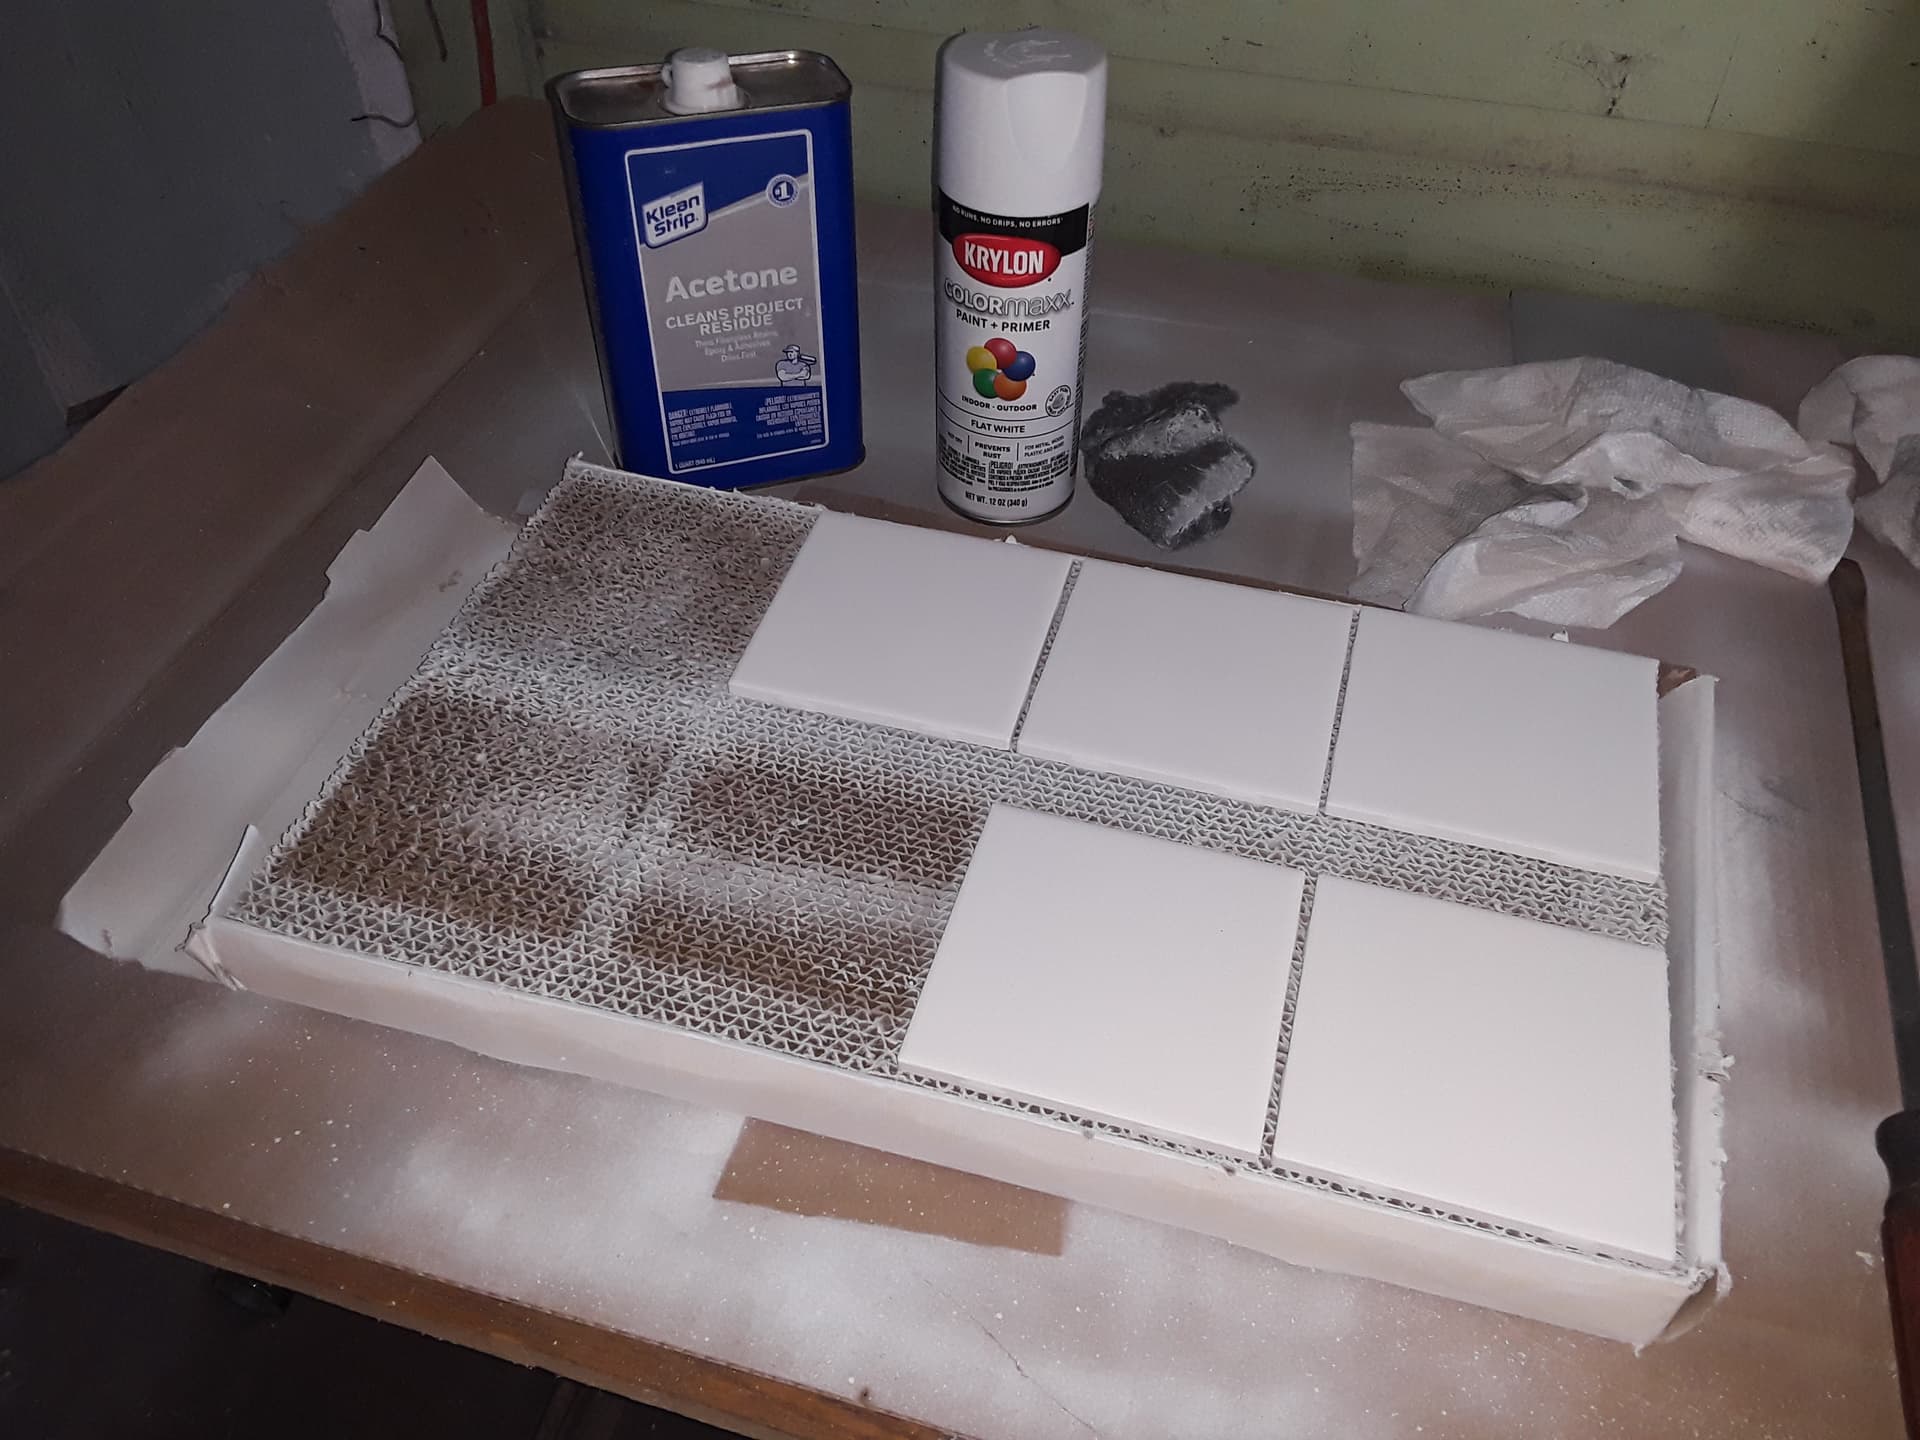
I used the Norton White Tile (NWT) Method… which leaves a permanent fused-in image that can’t be scraped or scratched off. It’s’ the TiO2 in the flat white paint (Krylon ColorMaxx Paint+Primer works well) and the laser that do the “magic”. The NWT process is simple and uses tile, paint, and acetone (or thinner). Please be aware there are folks pushing other lasered tile methods which are not NWT and do not leave a permanent fused image (just engraved paint, clear-coated over). Just saying…
I first clean the tiles with acetone and then spray tiles with a light coat of paint (allow to dry for at least a couple of hours)…
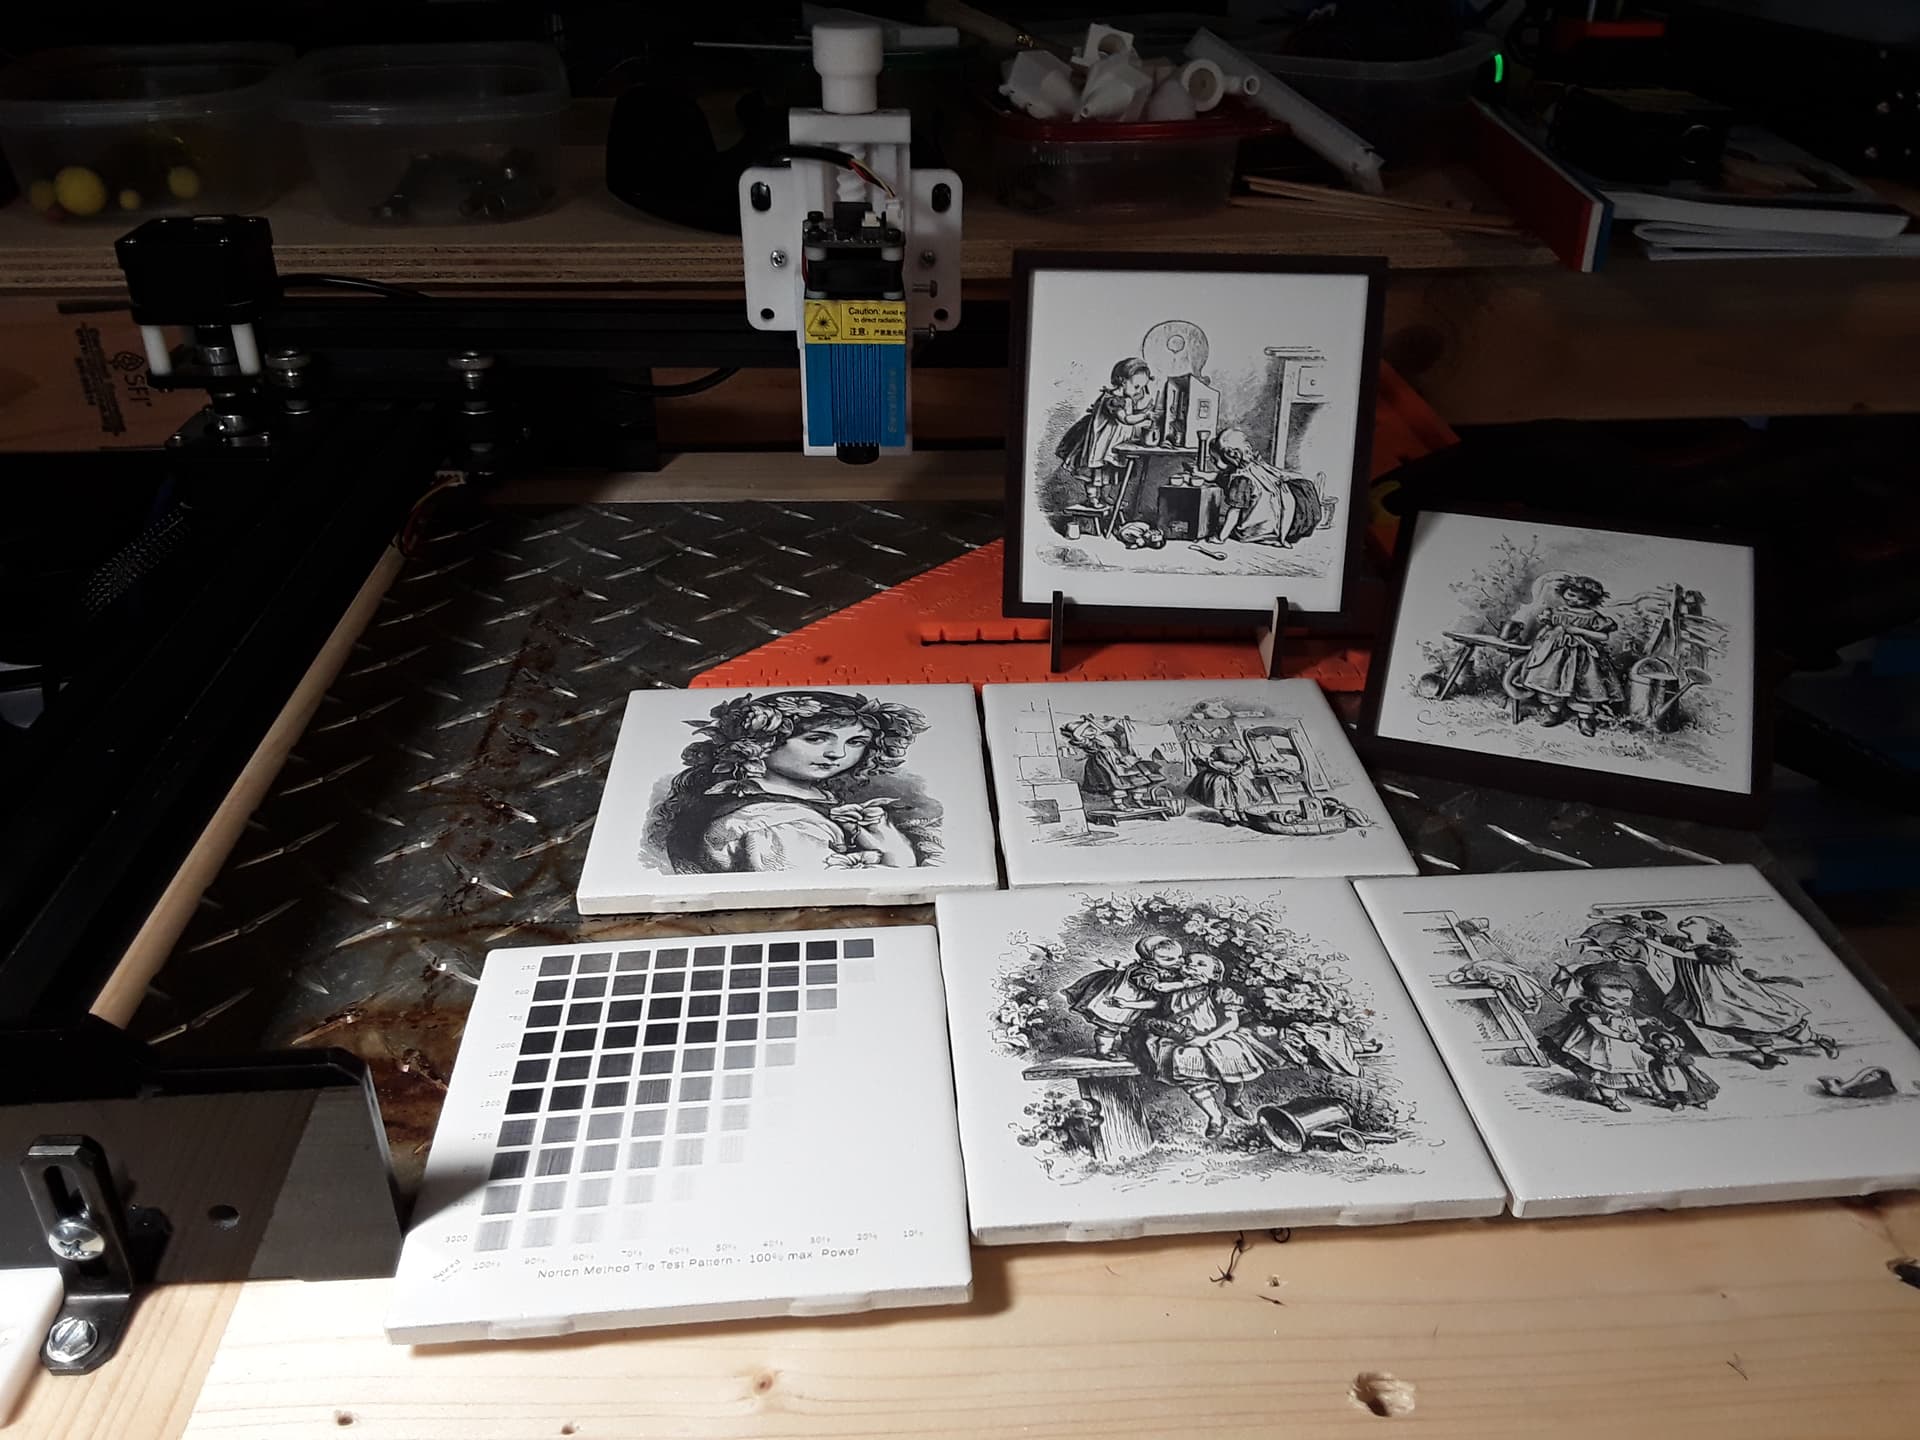
and then laser the image onto the tile. Here I’m using a little VigoTec cantilevered laser engraver with an Eleksmaker 2.3W laser and my printed Z-adjuster… running at 1500 mm/min and 90% power (determined from the test tile in the 2nd photo). All “photo processing” was done within Lightburn… 339 dpi and Jarvis dither…

and then clean off all paint/residue with acetone. Finally, I just wash the tiles, as you would a dinner plate, and allow to dry. Get the recipe about right and you’re left with these…
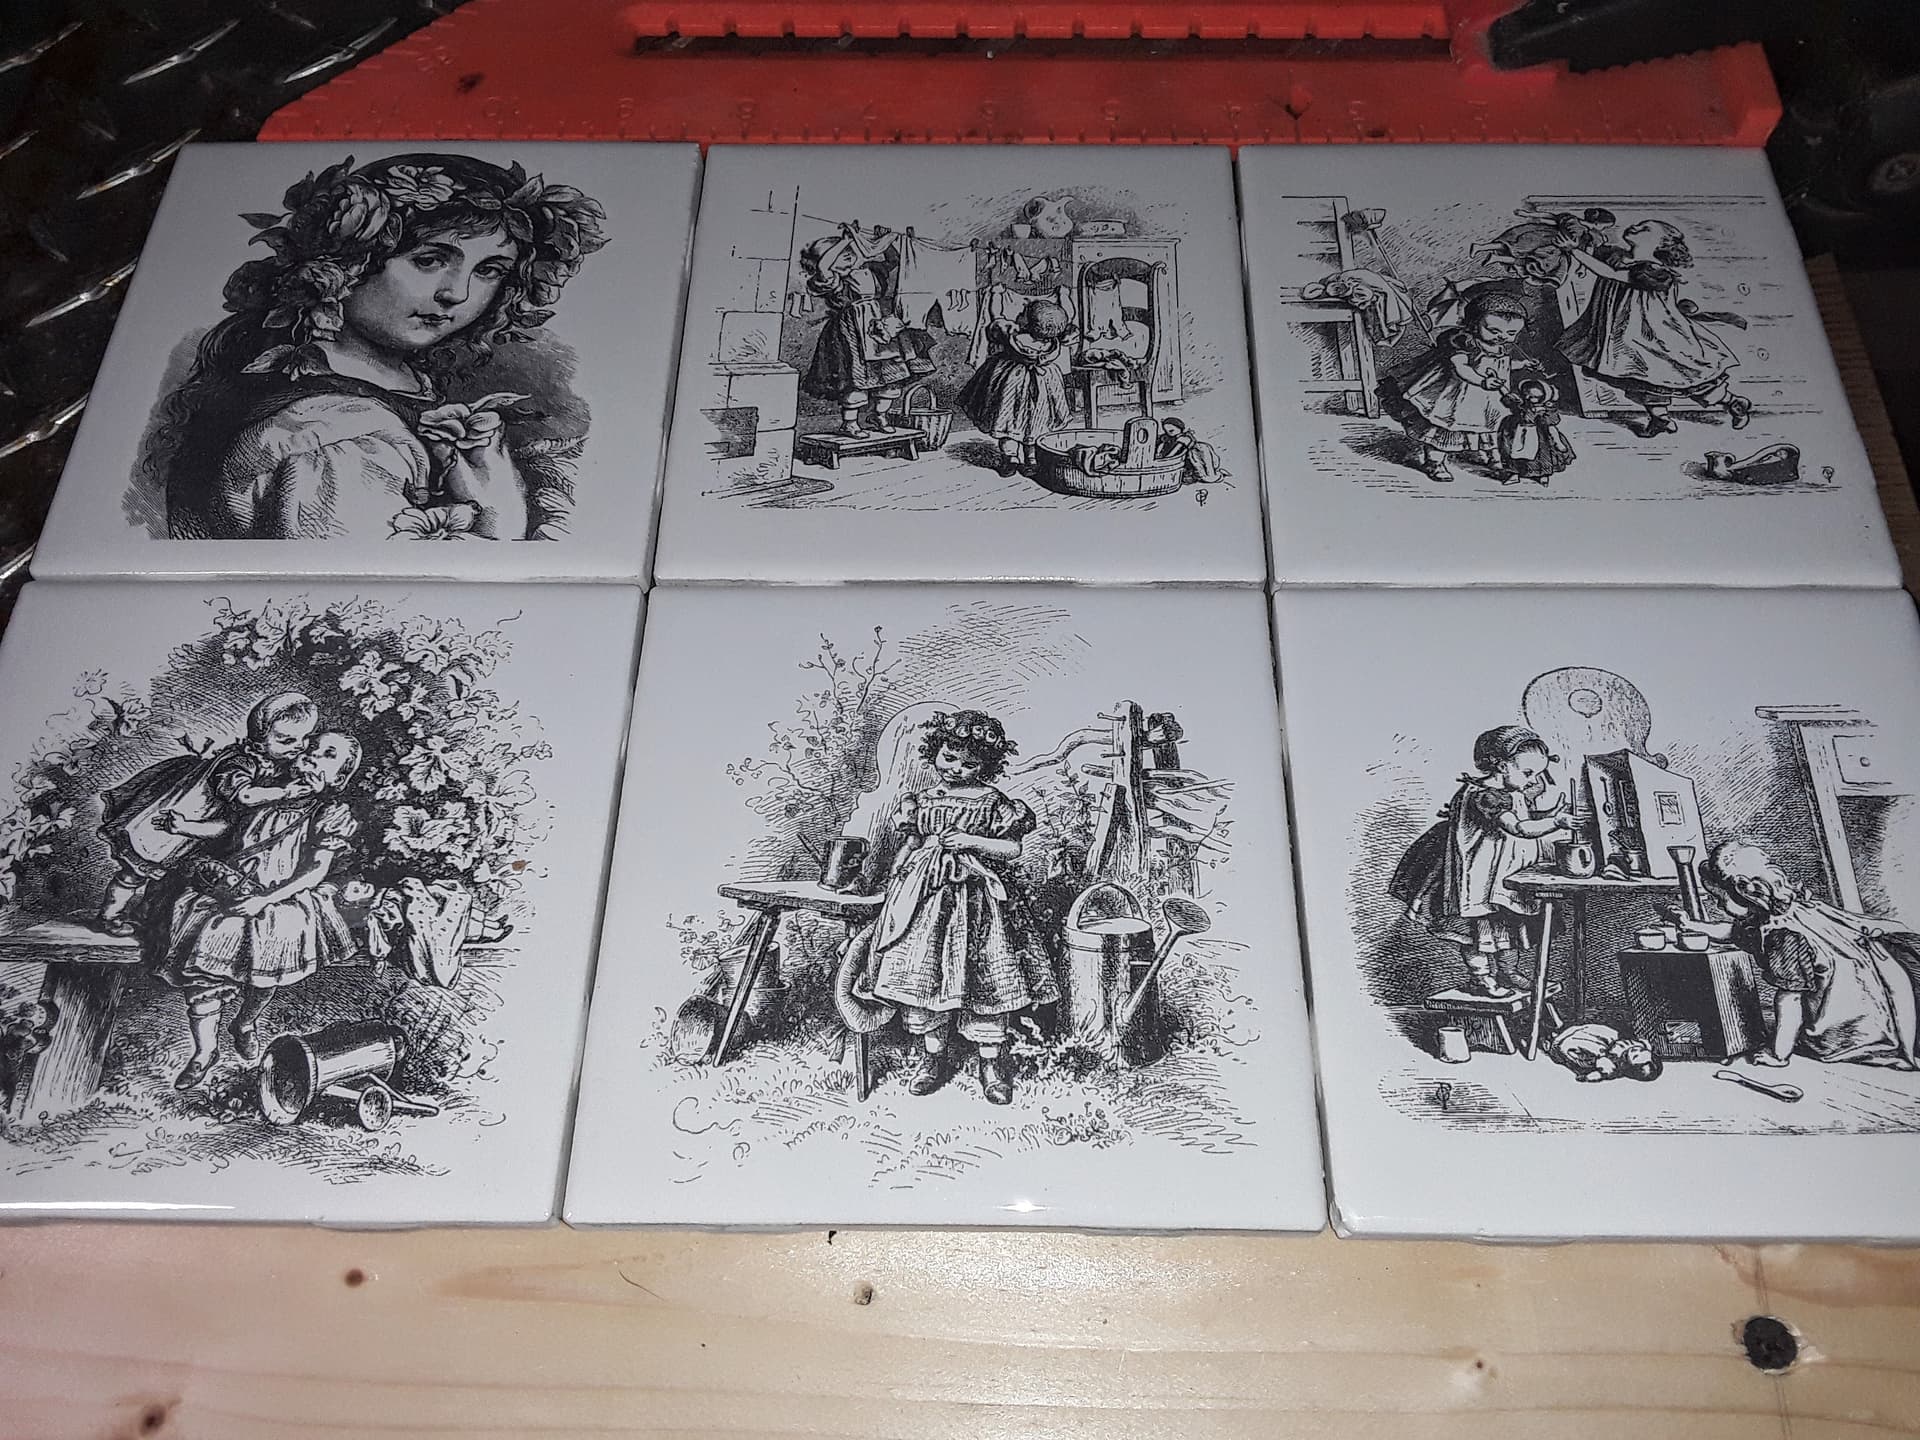
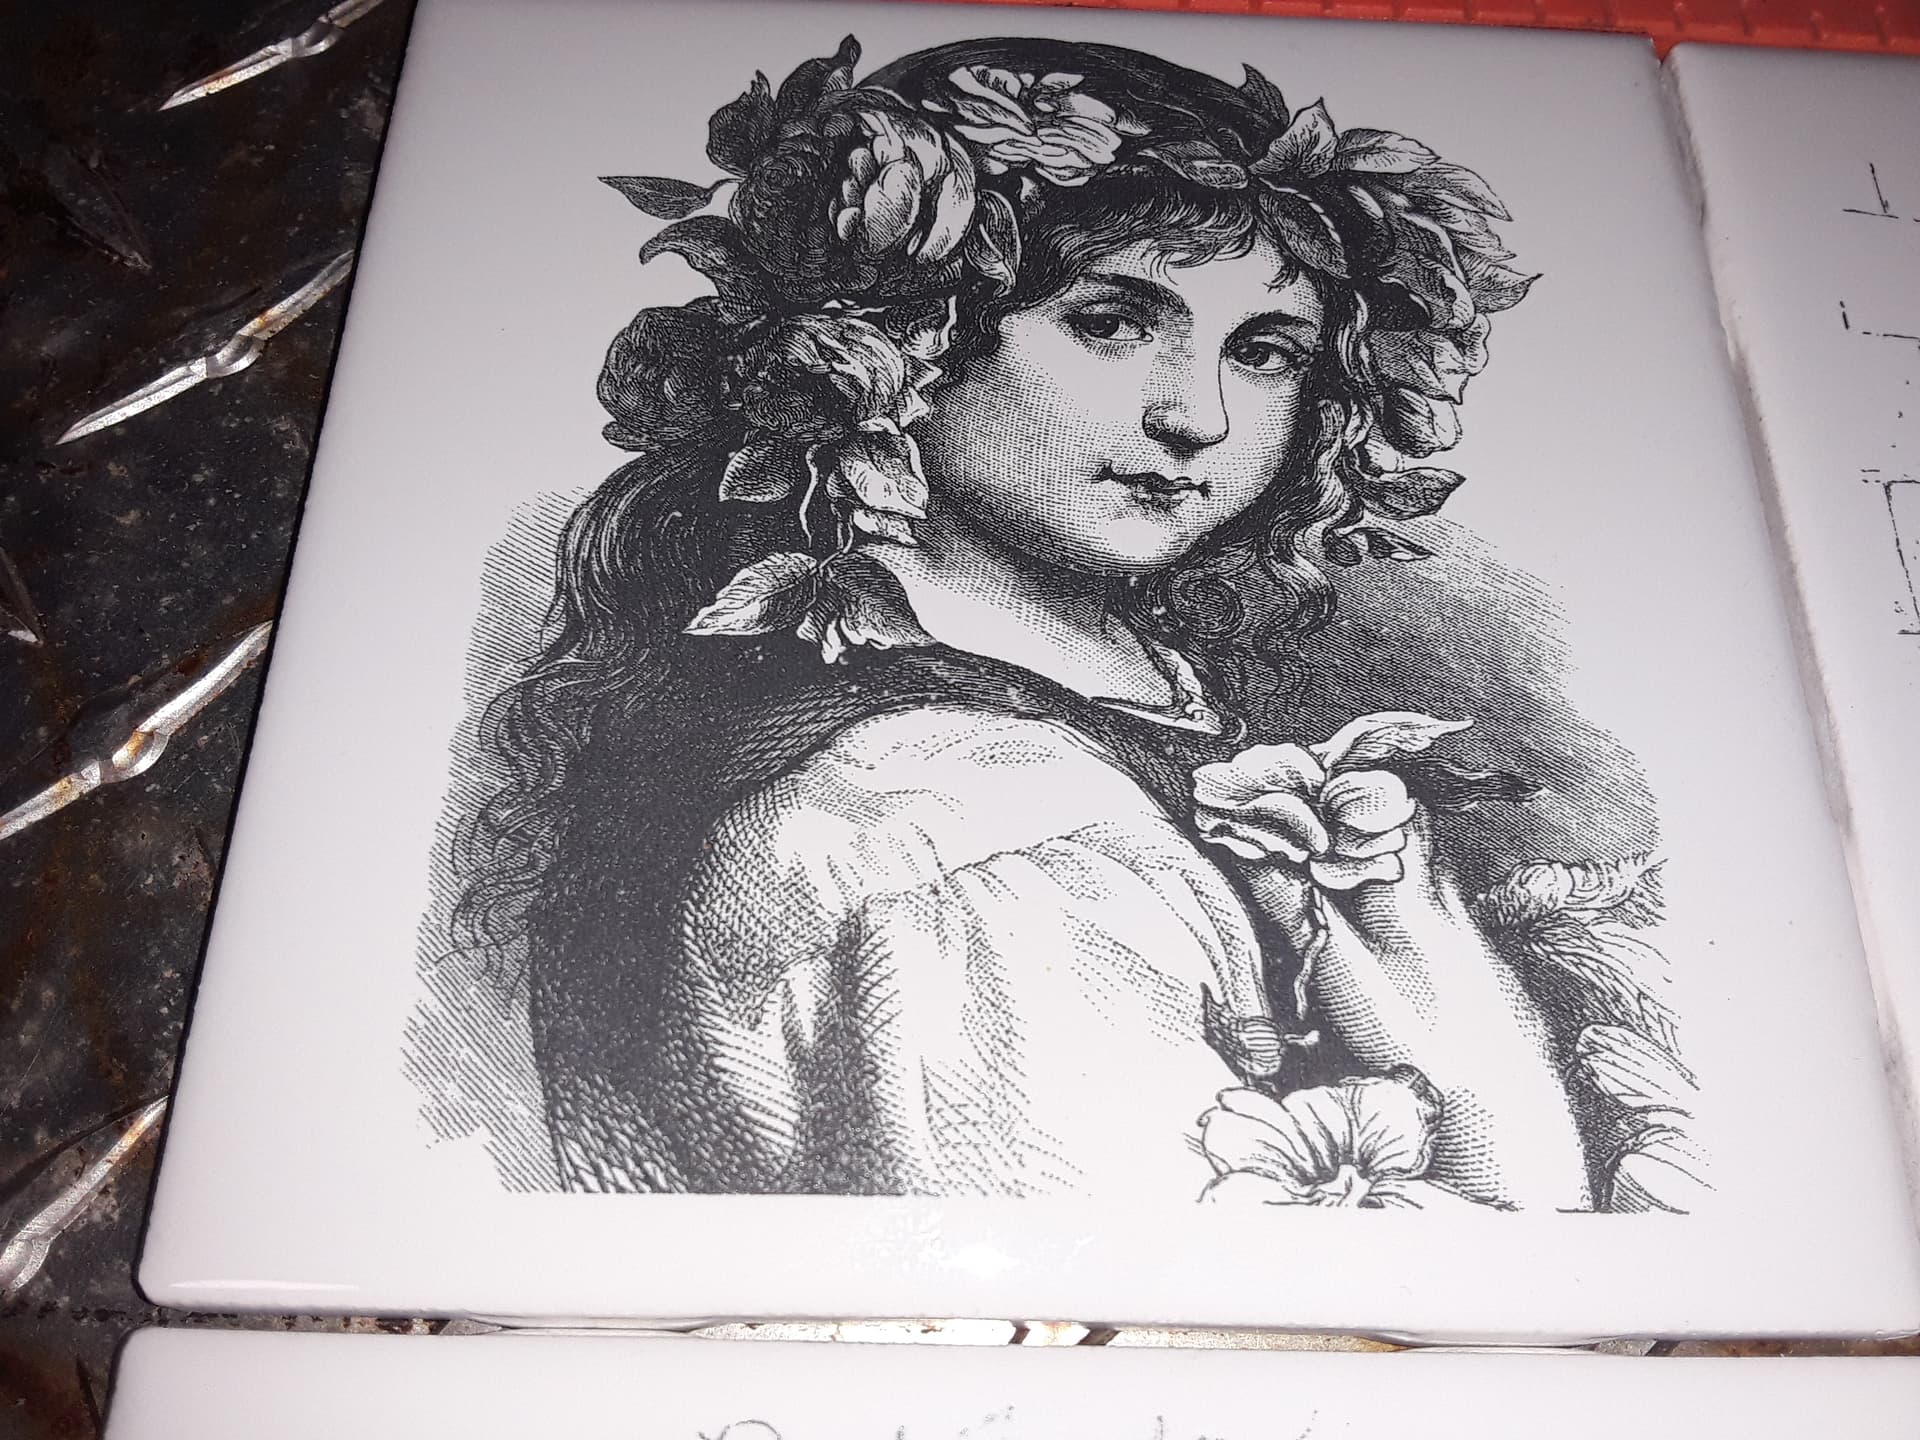
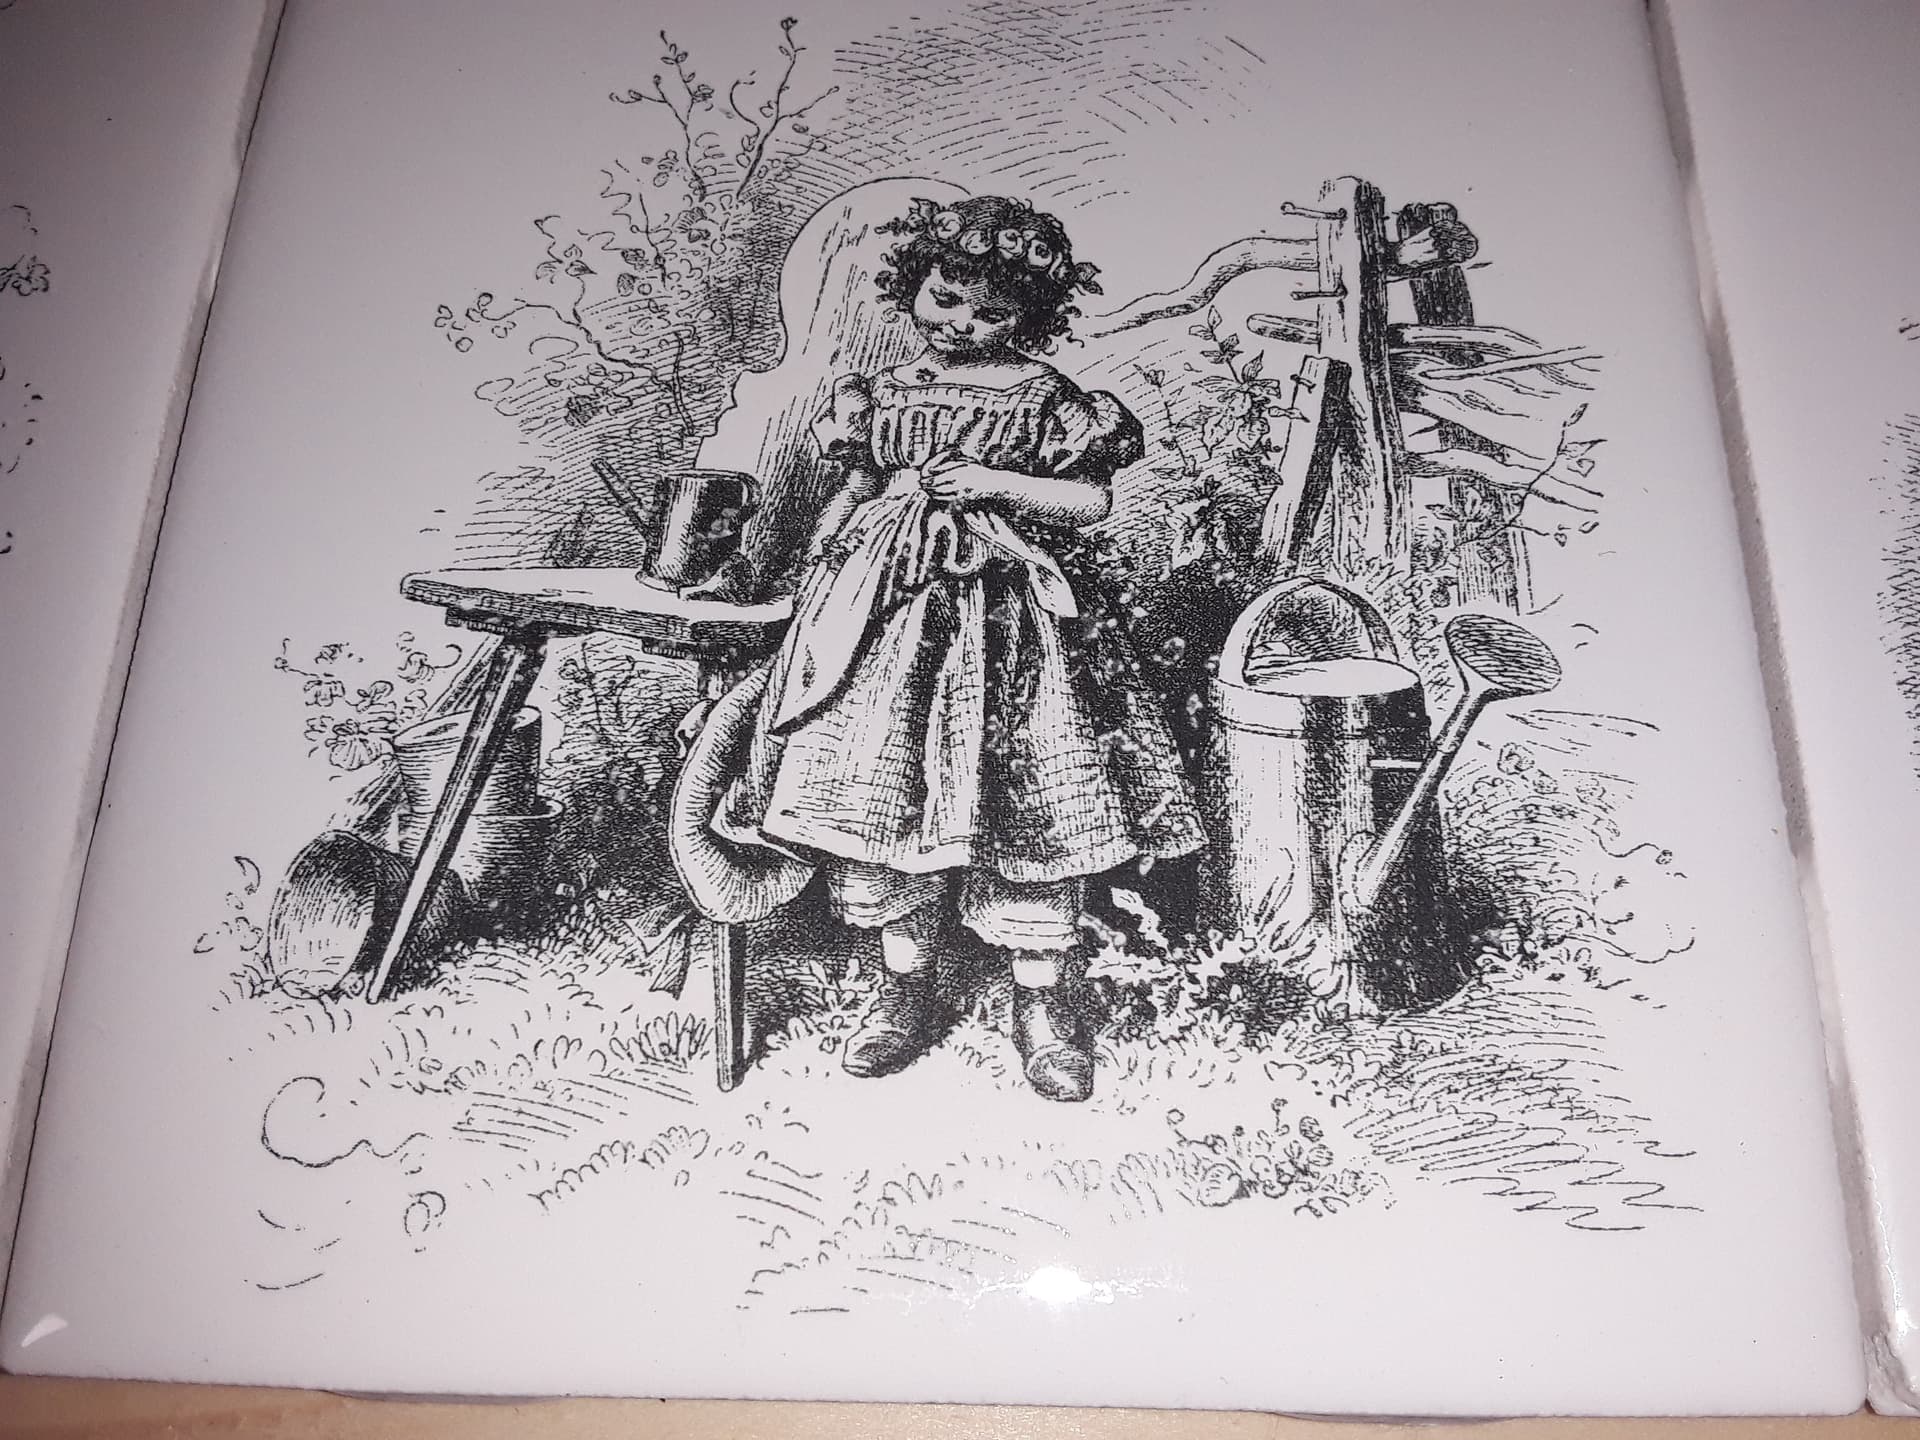
or maybe these…
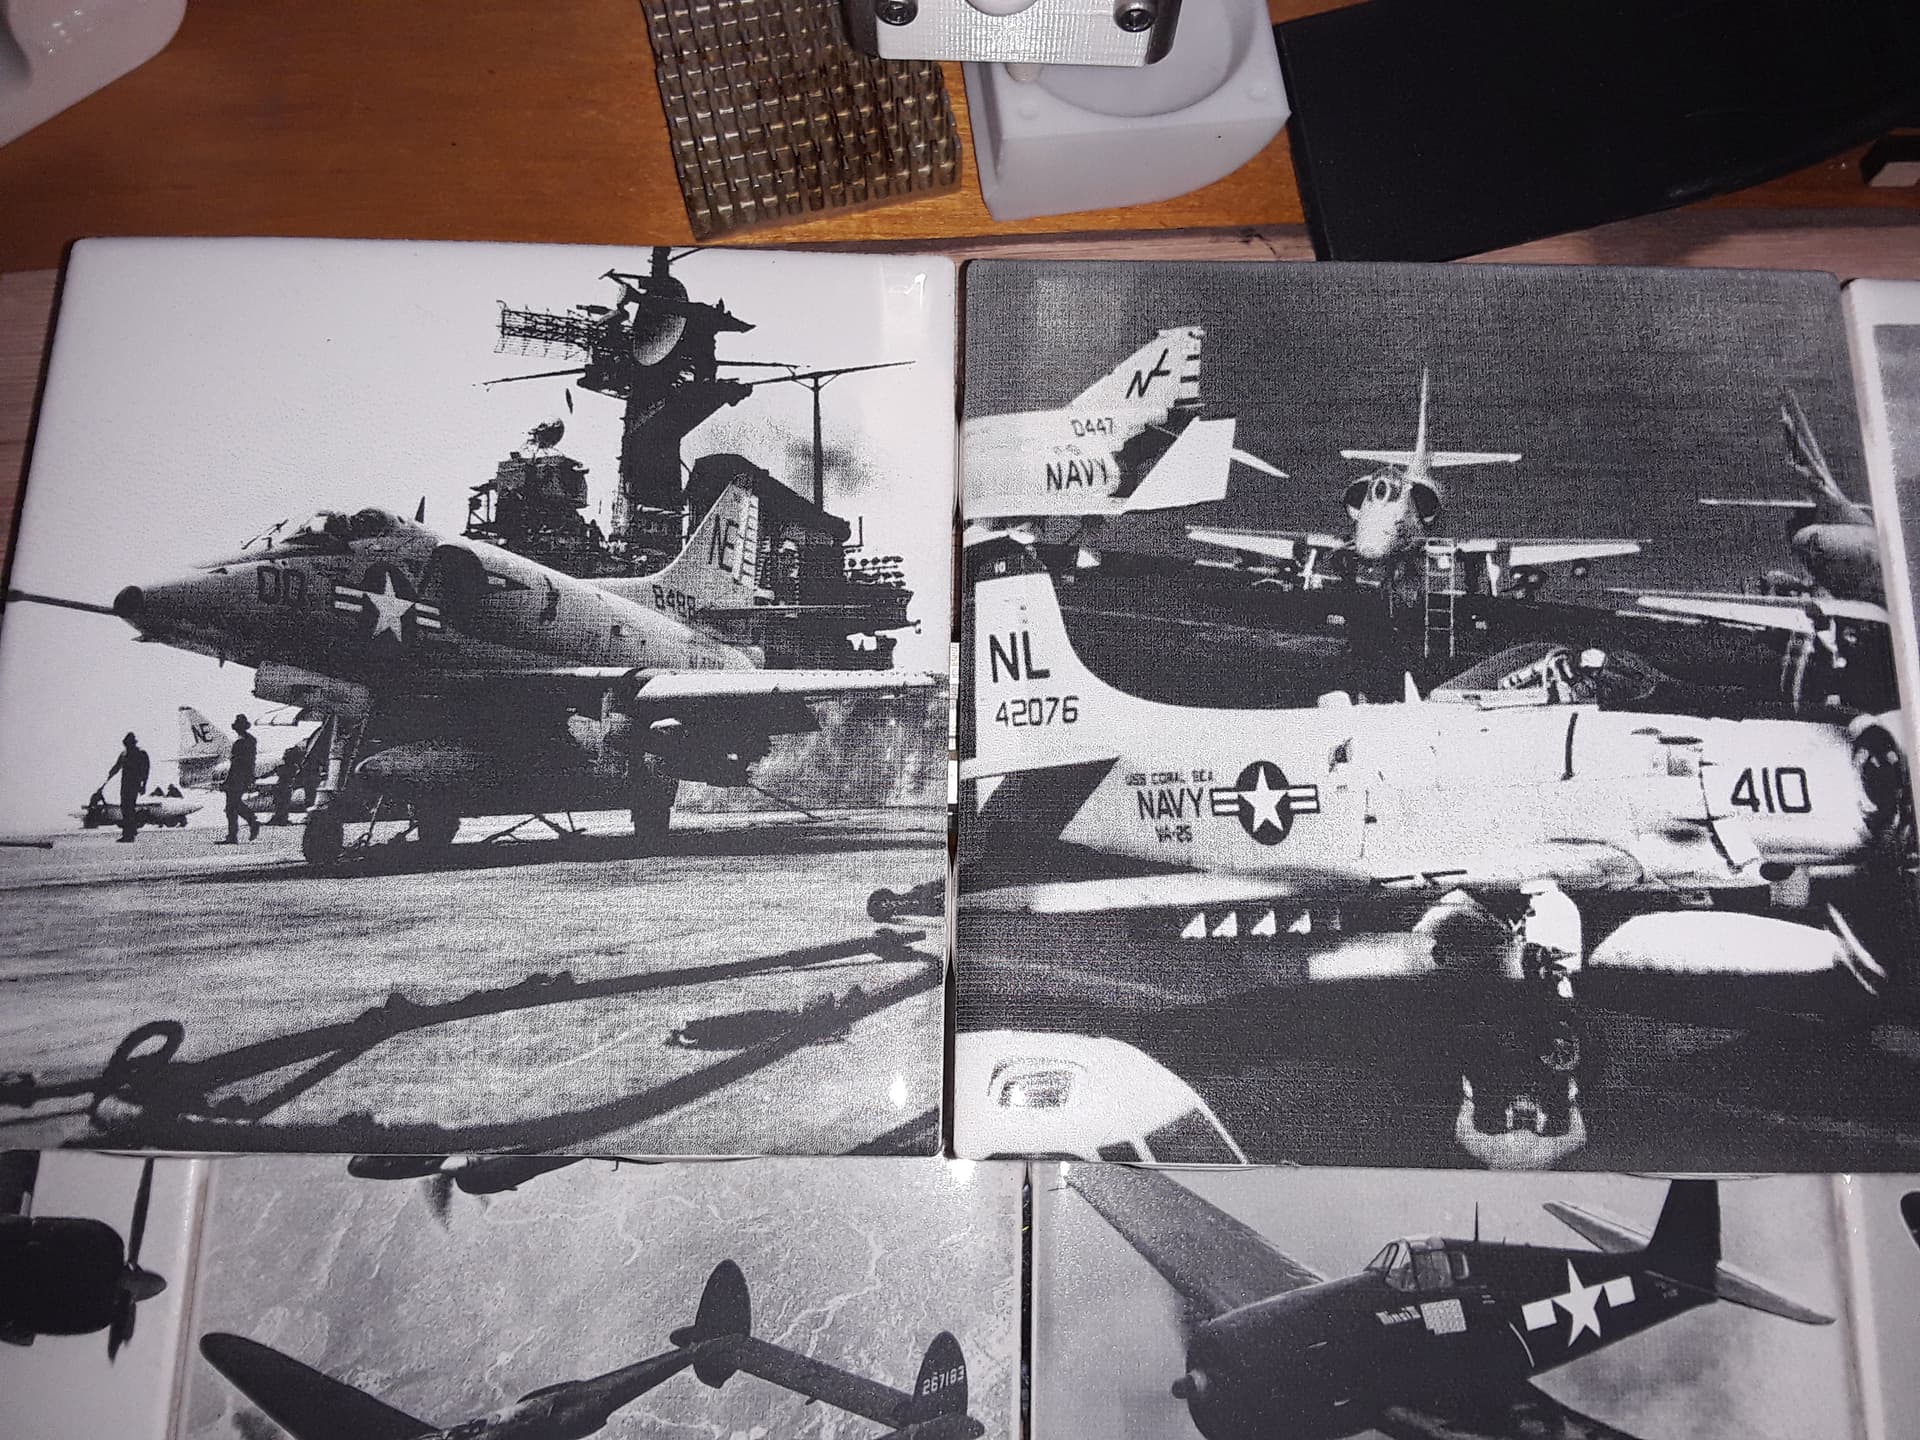
or these…
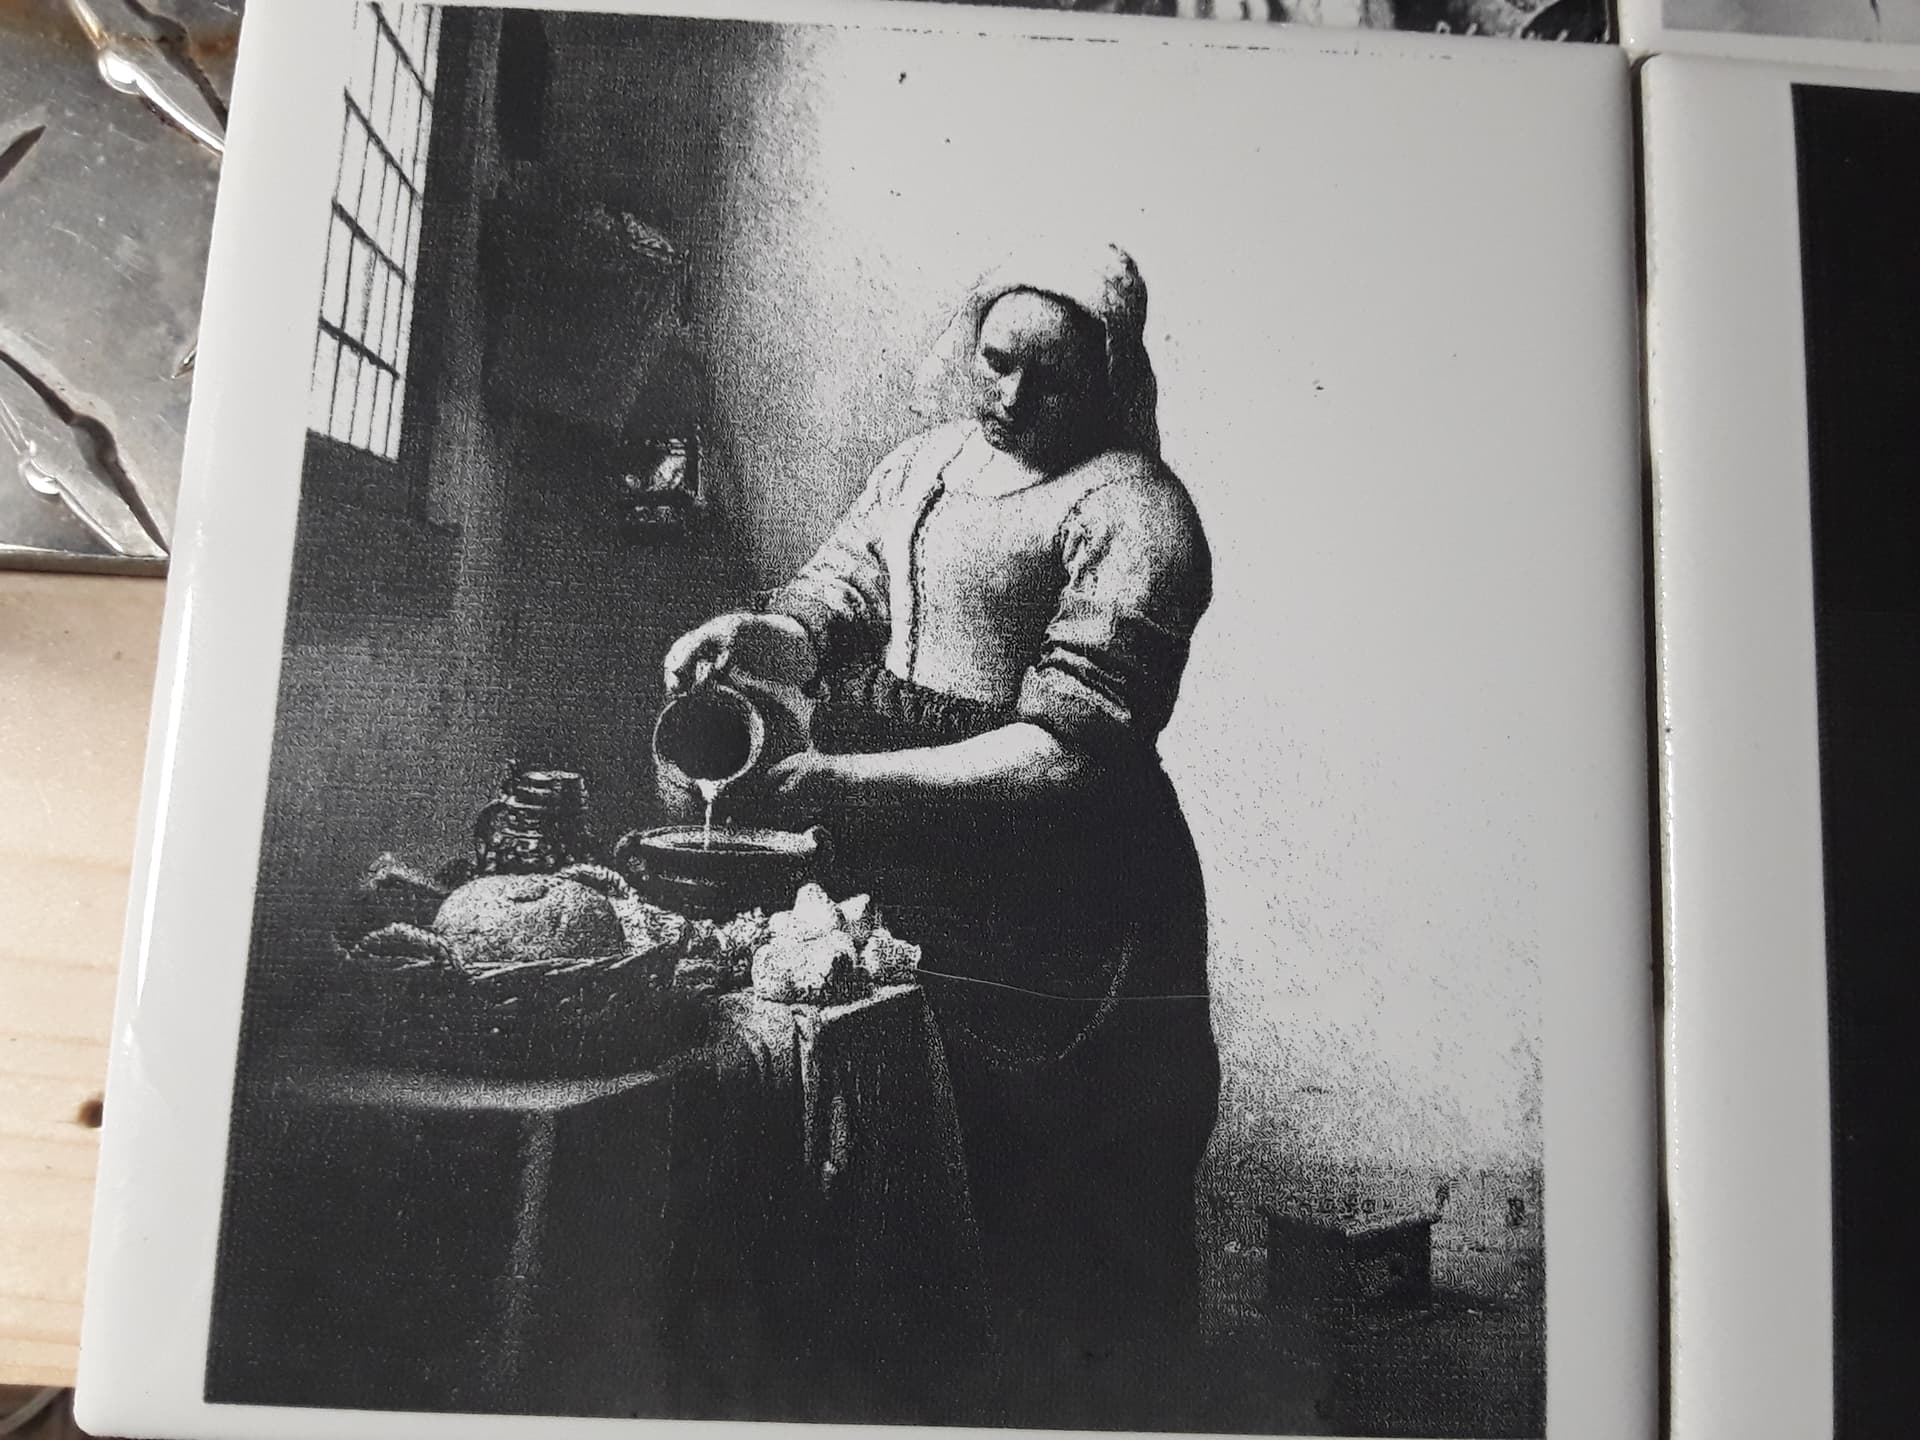

or possibly these…
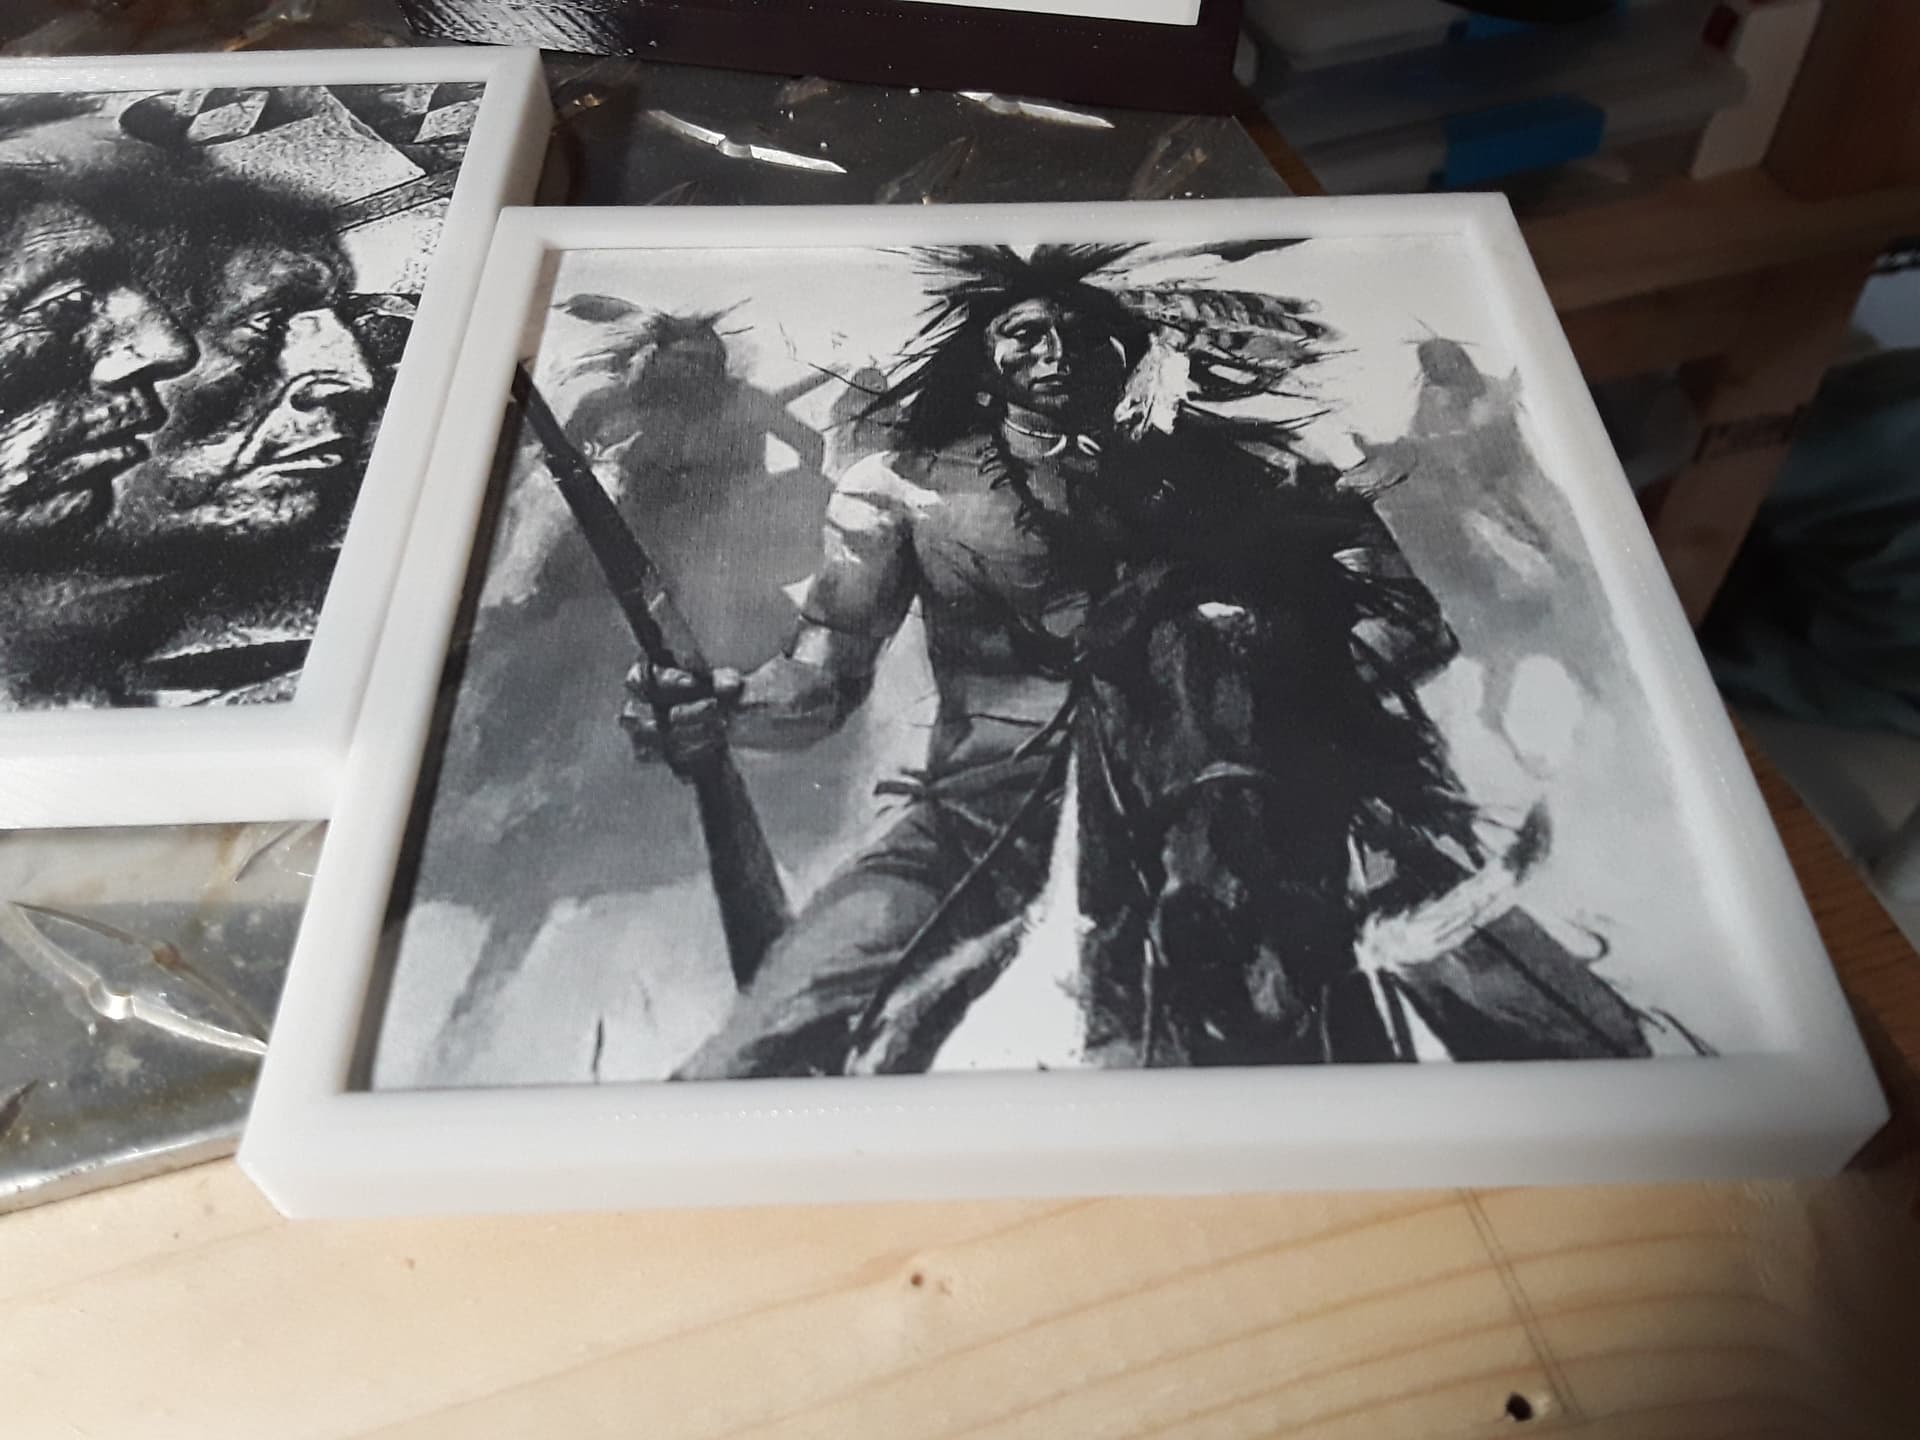
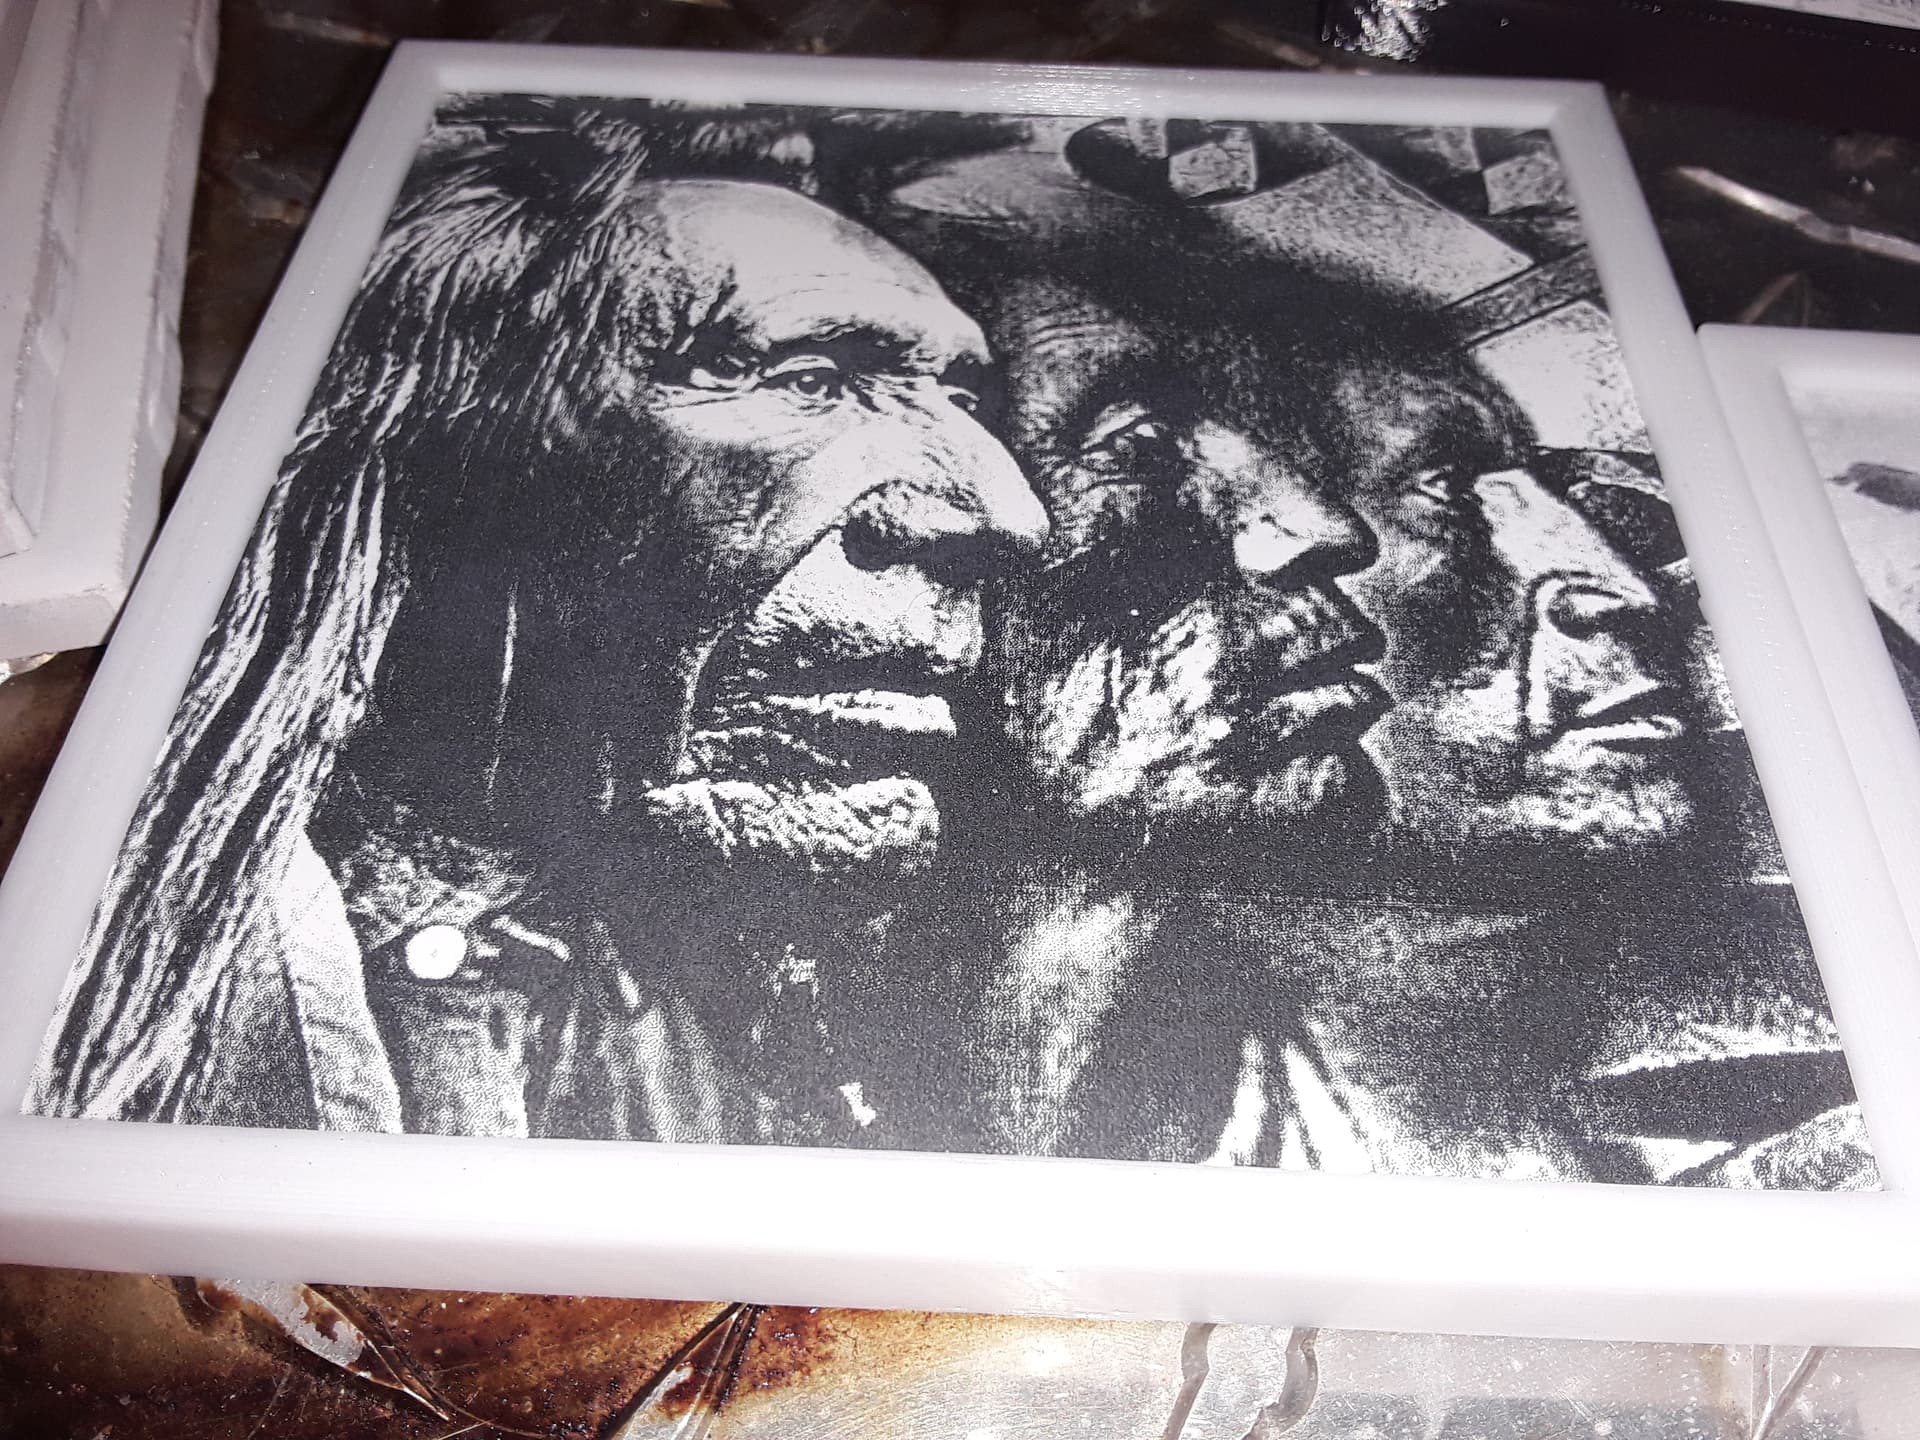
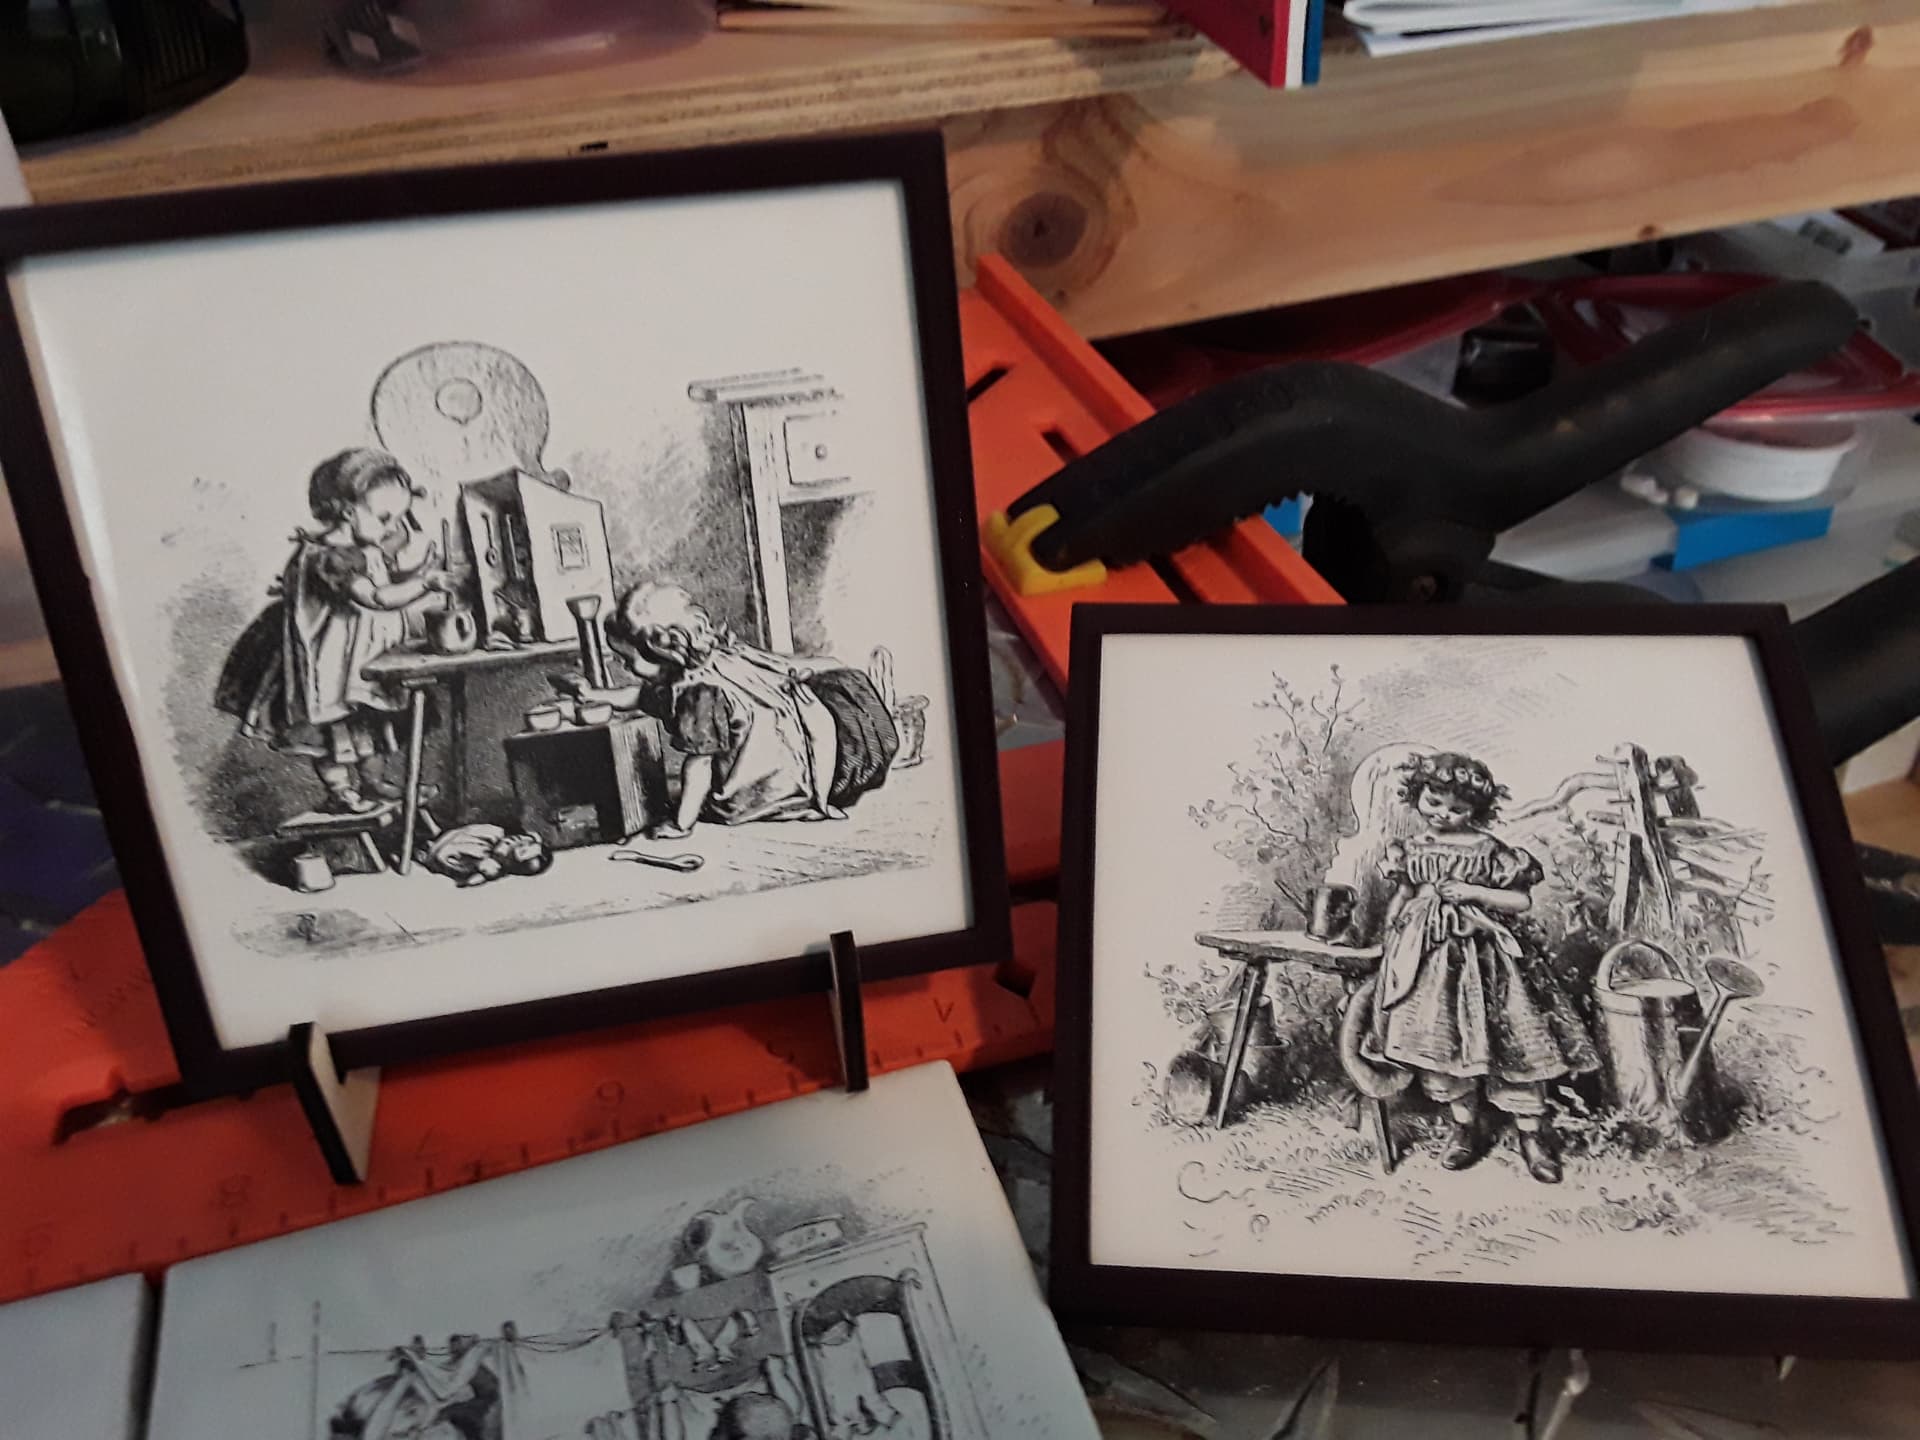
Get your 3d-printer involved making frames… and possibly laser-cut a photo stand to display your work. It’s a pretty easy process and great fun for pretty decent results IMHO… ![]()
– David