I am using a Boss HP 3655. 150 watt. I am trying to engrave a picture onto a 1.4 inch Dia pendant. I use Brilliance Black Metal marking spray with two coats on the pendants. I,m not sure if this is a lightburn issue or Photoshop or Adobe Ill.
I download my picture into Photoshop eliminate the background , make the picture lighter and contrast better. Then save as JPG. Then open Lightburn and open the altered photo into Lightburn.
Then download to the laser machine and position the pendant, then run the file.
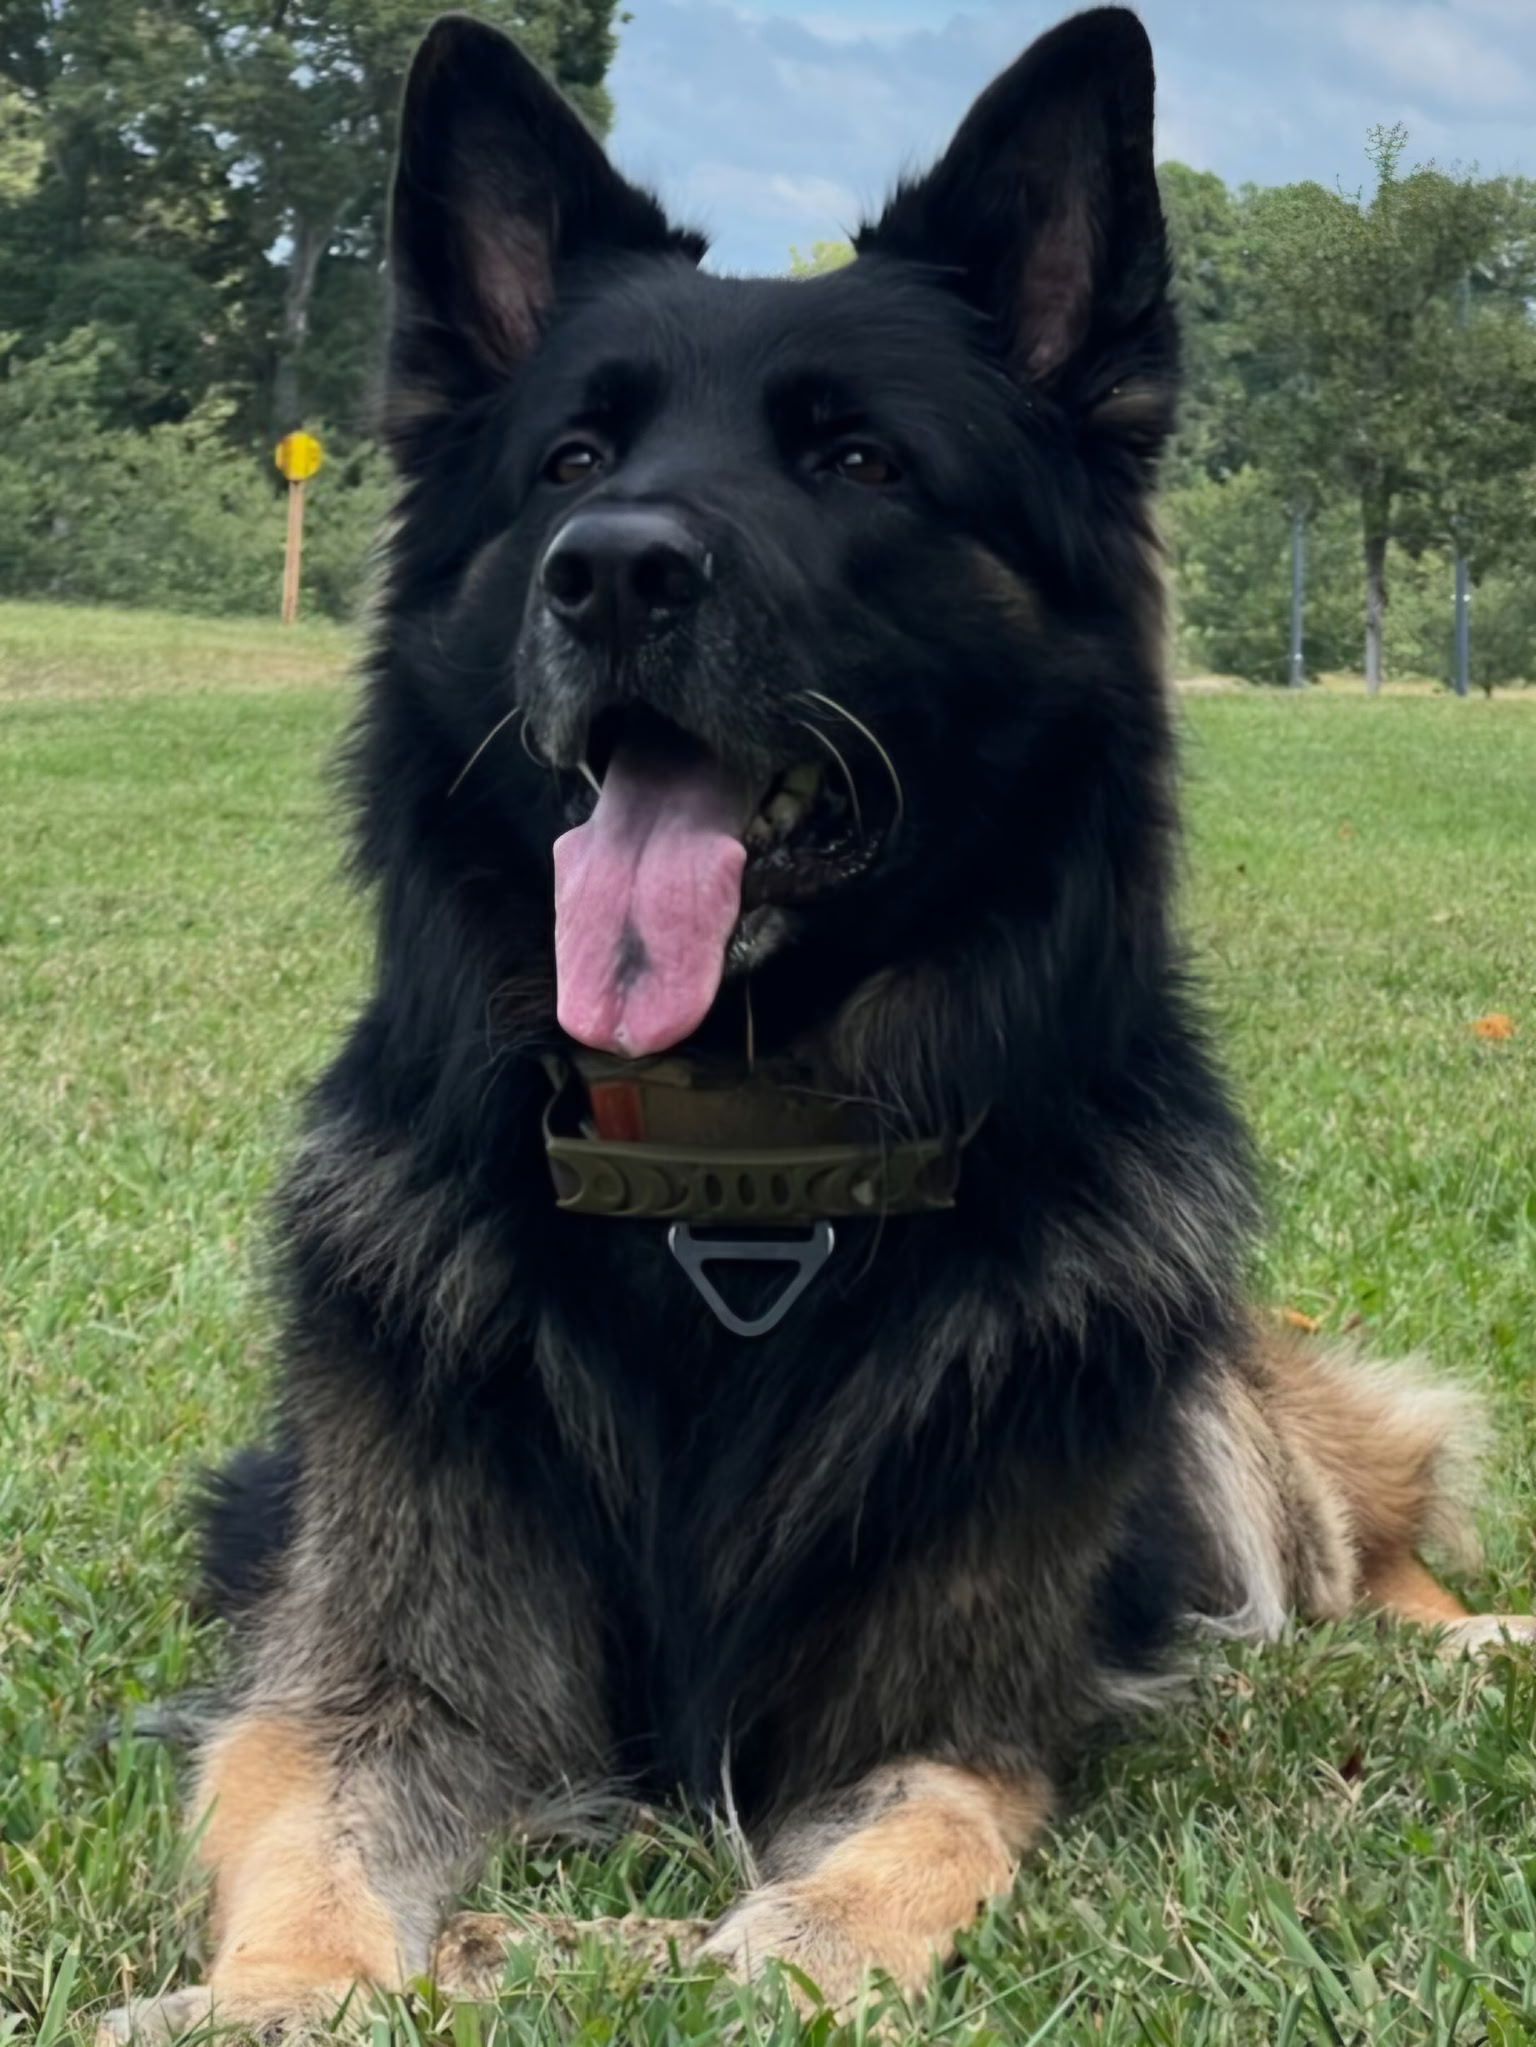
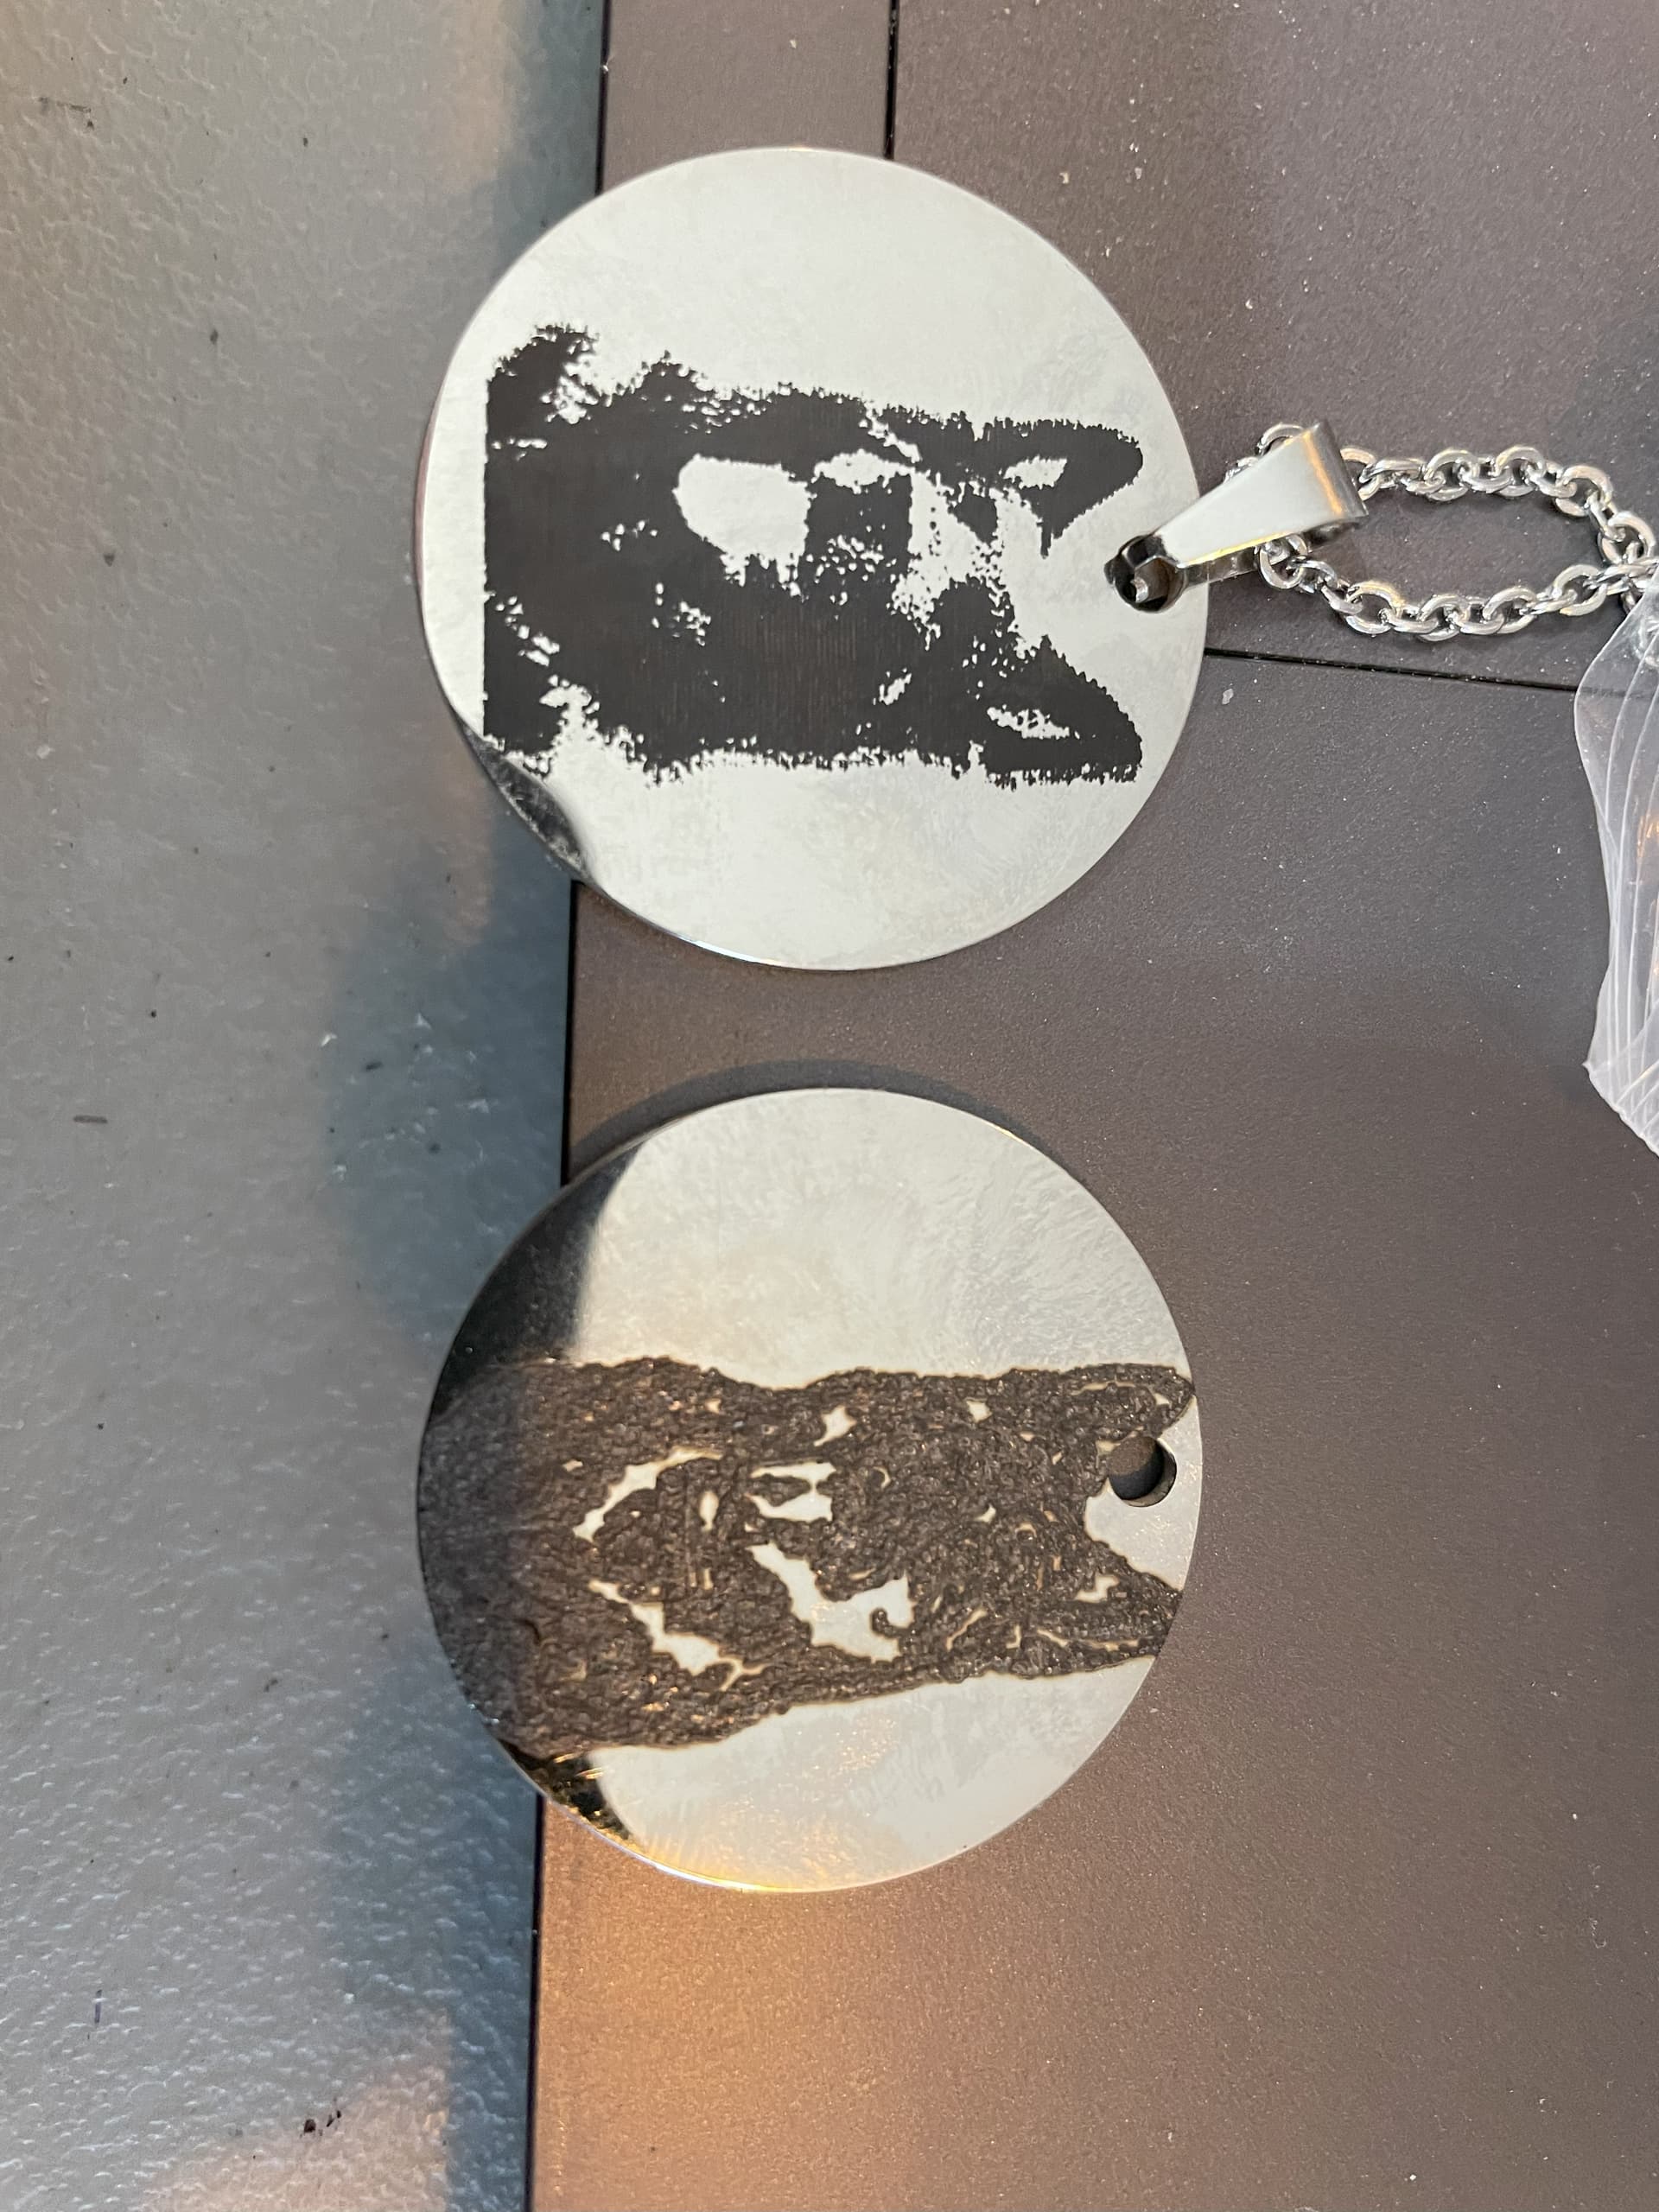
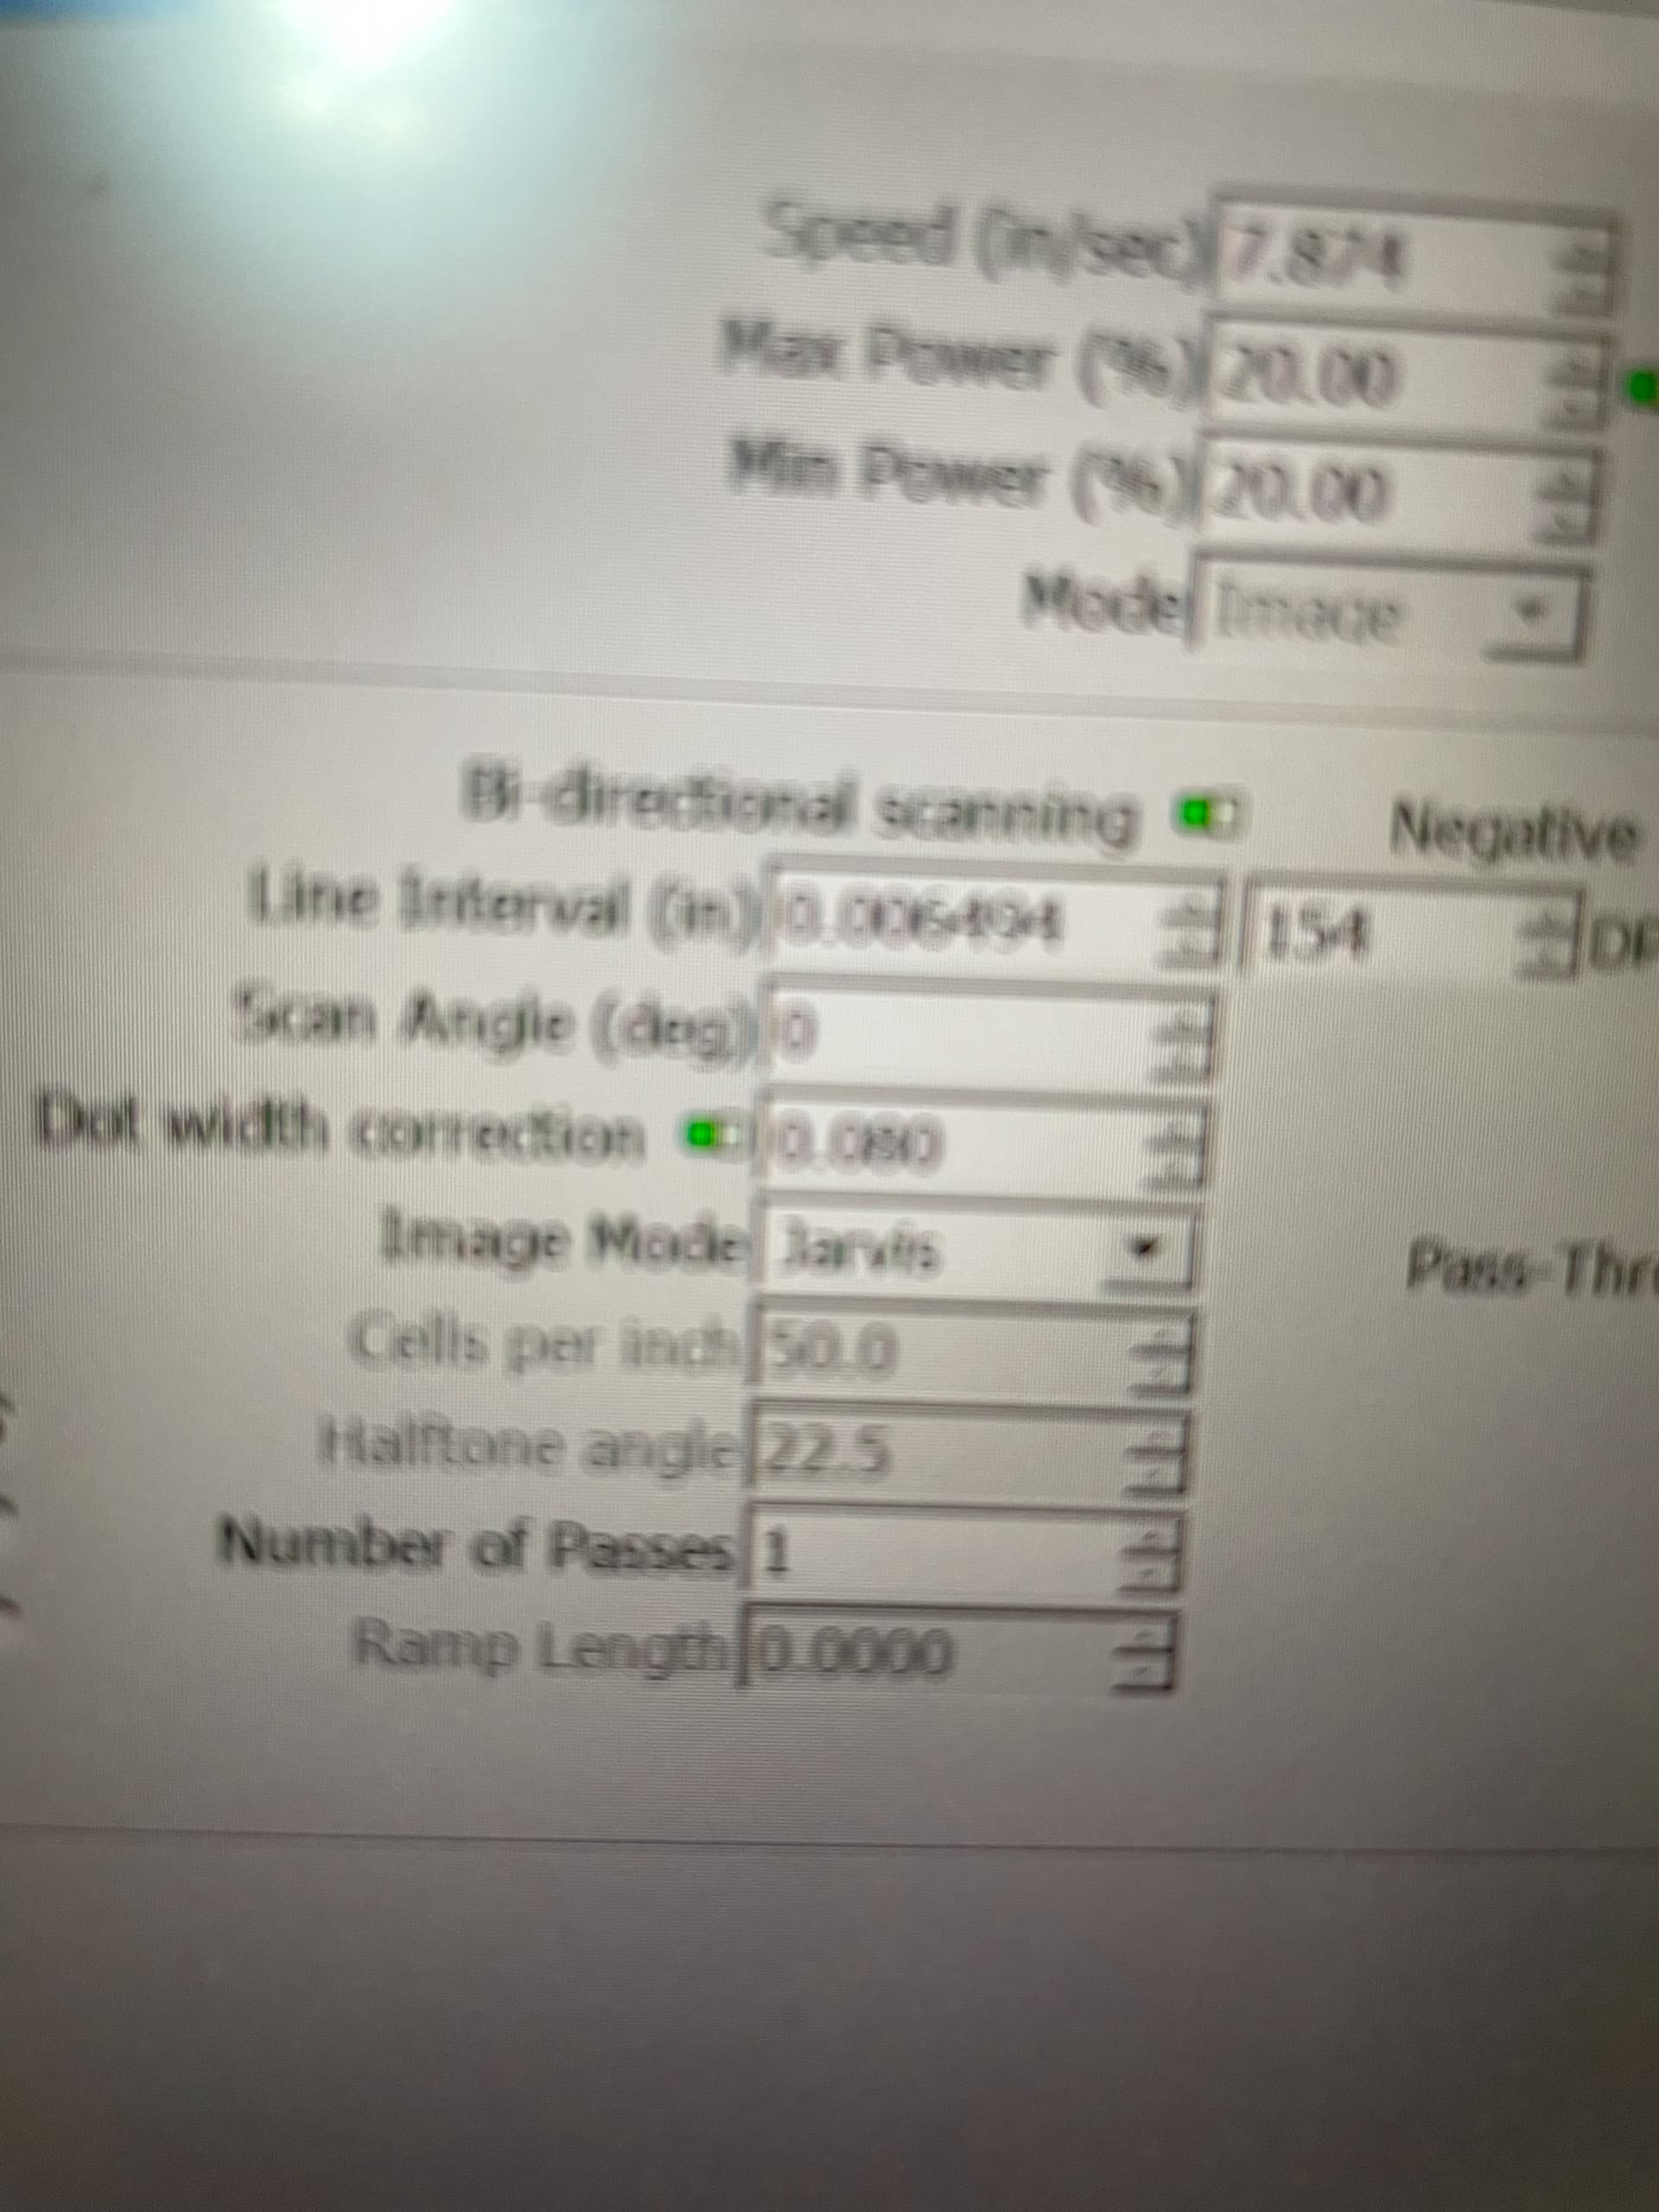
Each time the end result is way too dark the two pictures i downloaded for your review are the best. I have used speeds from 7.5 to 20 and power from 10 to 30 and al combinations of the above. I am using Jarvis as the image setting. The picture on the left is a jpg from Photoshop and the picture on the right is my latest attempt using Adobe illistrator and making it a vector, svg. Can anyone offer suggestions on how to create a clearer and brighter picture. One problem i know is that the dogs face is all deep black*
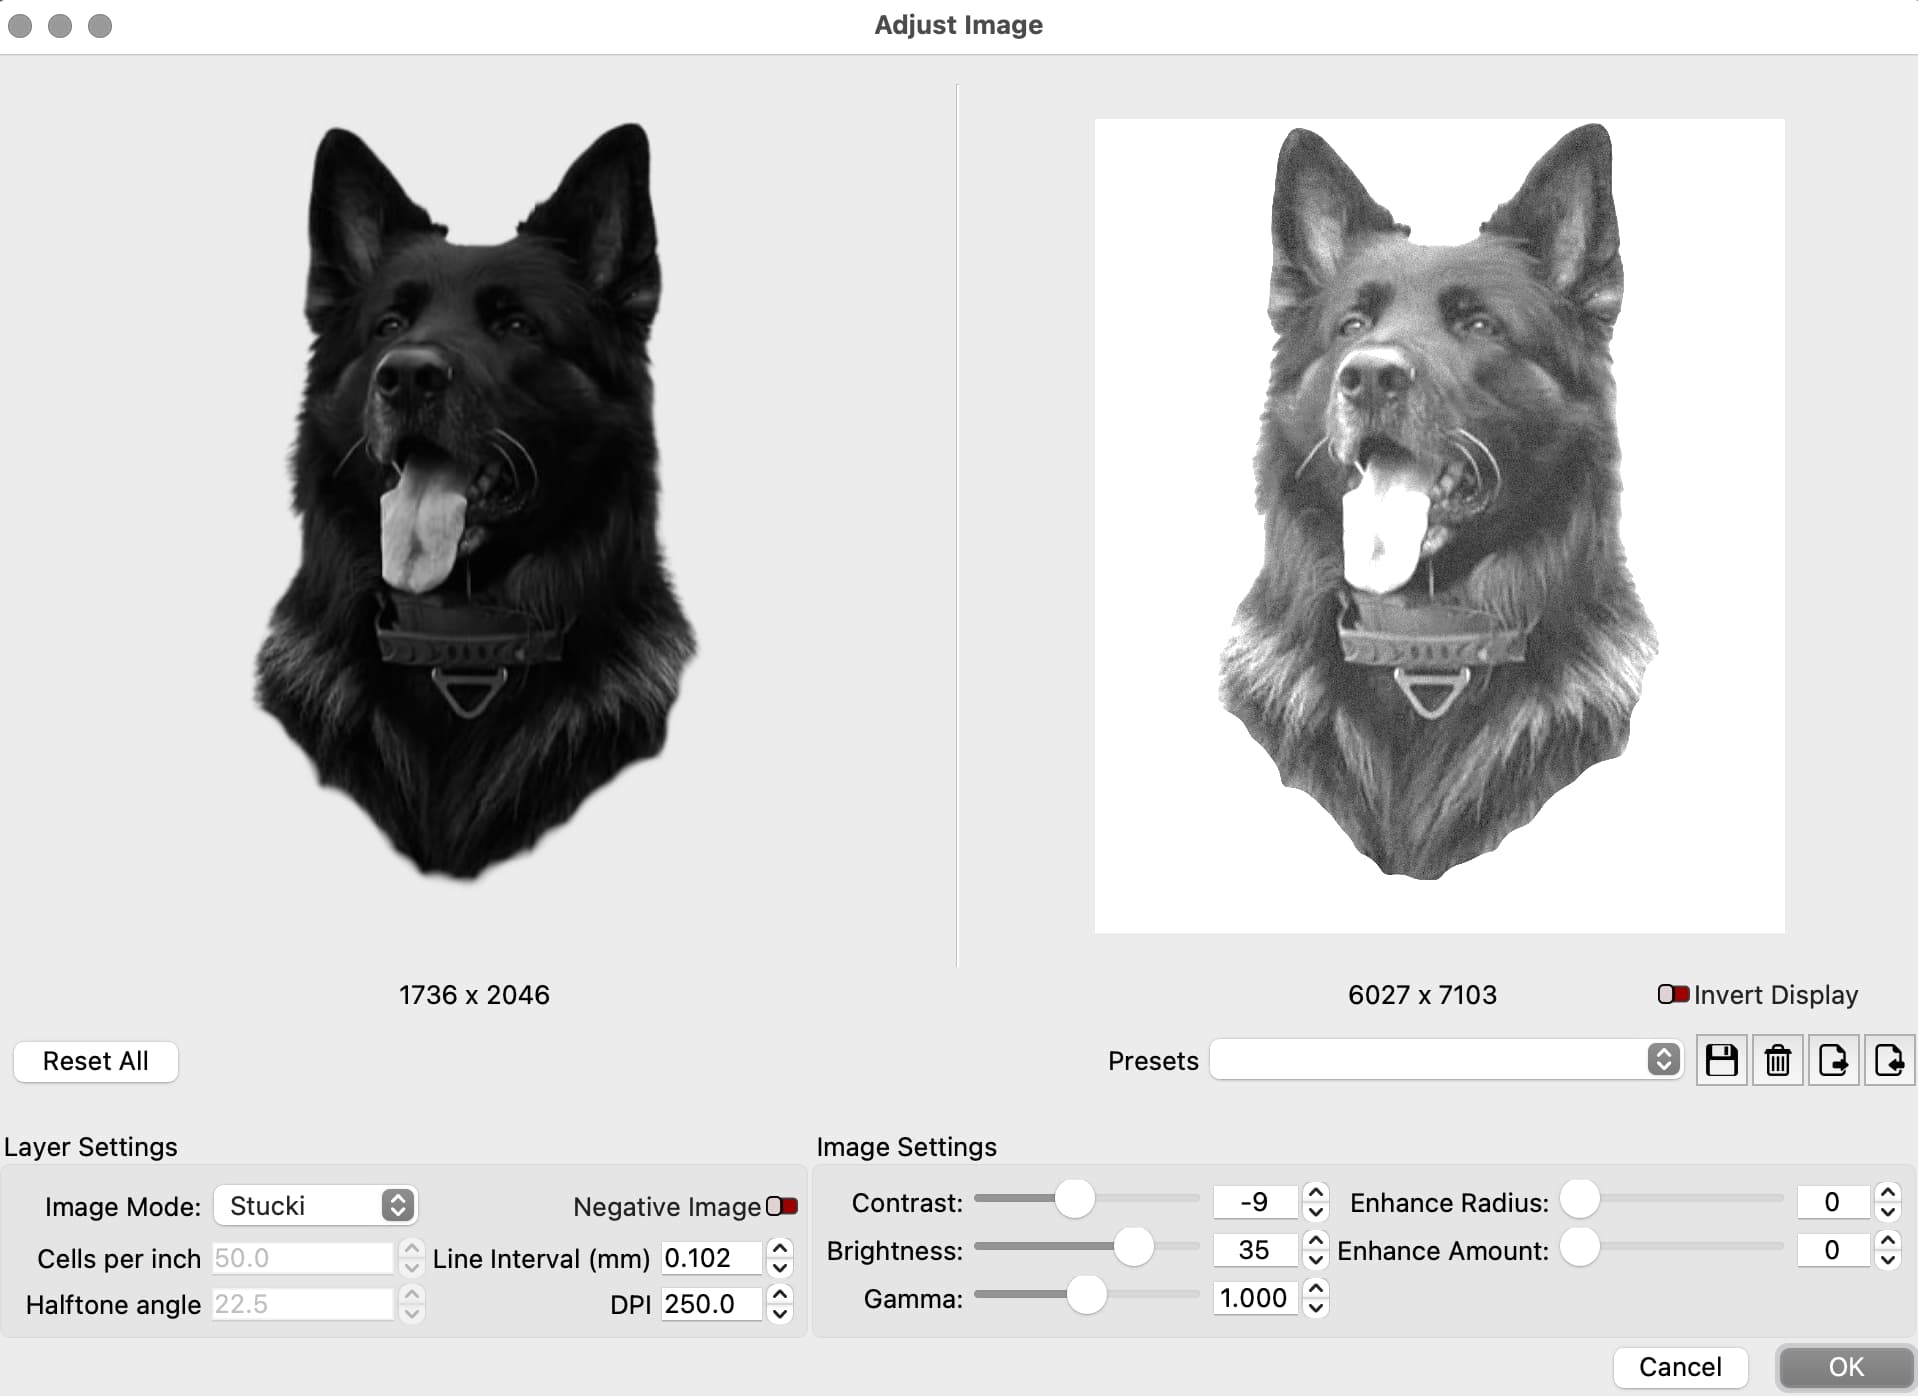
It does take a lot of trial and error to get pictures to engrave satisfactorily. Just based on what , I see I would go into light burn, adjust image, and mess around with brightness, contrast and gamma. Run some tests on inexpensive material before trying it on your stainless. what works on wood will need to be adjusted for stainless. just get started with an image you’re happy with them, Try it on stainless remember. you don’t have to do the full-size image when you’re testing and makes it go faster and saves material. One other thing to get right is your interval. You can do tests to dial it in.
Personally I would remove the feet, as they kind of get lost in the grass. You can use the adjust image tool to lighten the image up. I don’t think turning the image into a vector is necessary.
I’ve read through the documentation a few times and I find no mention where they recommend more than one coat of Brilliance applied before lasing.
I use LBT100 a similar product. They also provide speeds/power for initial settings on how to bind it to different products.
Found the supposed link to the settings at Brilliance, but it resulted in a 404 error.
I believe part of the issue is you have the coating too thick. LBT100 advised to keep it as thin as possible. When you get it too thick, you loose detail and it takes more power to perform the operation.
Another issue we all fight with is an image with too much contrast, such as yours. I have some images, similar to yours and they are very difficult to put on something, if it’s engraved or using something like LBT100.
I think both the technique and the photo need some work to get what you want.
Thanks for all the reply’s Ive tried or am trying each suggestion. So far i,v had a little better results. One coat on the Brilliance has helped. It seems I picked one of the harder materials to engrave especially being engraved on such a small item. Will keep trying to perfect.