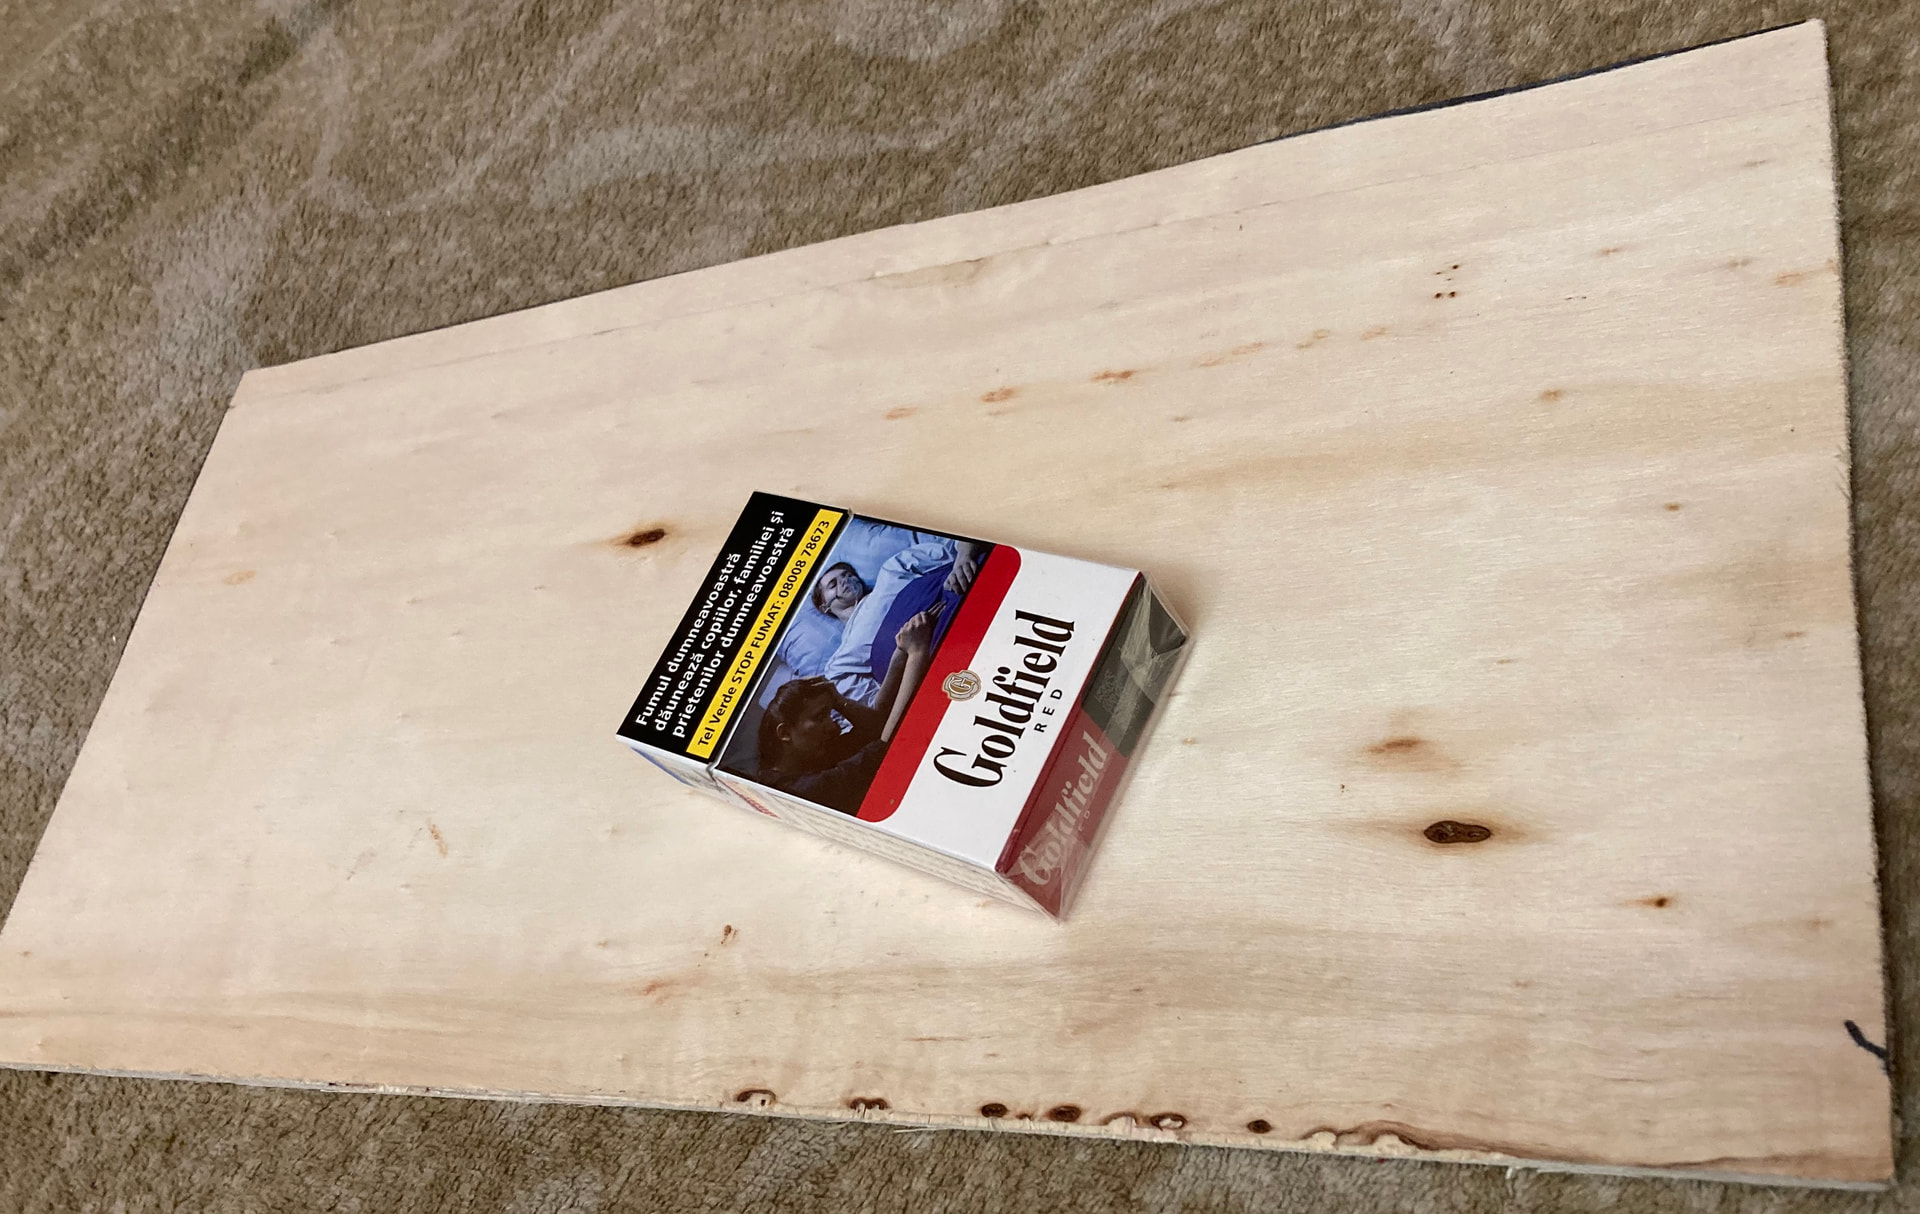
I have a Sculpfun 5W engraver and I have problems engraving plywood 2mm coasters from China. Important limiting factor is that plywood’s outer layers are only 0.5mm thick and easy to penetrate. My problem is that -when engraving pictures- dark areas go very deep in material, while grey shades are barely visible.
In the picture, above is a scrap test plywood for adjusting the settings. These are in the range 6000mm/min, power 65-70%, spacing 0.055 (spot size 0..06). Below left is the target coaster after 2-3 passes. Dark areas are already recessed, penetrating outer wood while the rest is barely visible. I have tried to enhance plywood behavior by using borax and minor adjustments to picture and parameters. I have obtained the result in the lower right. While the result is almost acceptable (again after 3 passes), the black goes quite deep while the rest still doesn’t have enough definition.
When trying to enhance image parameters in Lightburn, the image becomes too dark and looks like contrast is too high an black burns deeper (bottom left new picture) :
I think this example is the best. Birch plywood is the most difficult material to engrave, it is due to the nature of the material. The fibers in the wood burn differently, depending on which direction they are oriented. For normal engraving I have the best results with a 45 degree crosshatch. But as I said at the beginning, your example looks better as I expected for plywood.
If these are just plywood and not Baltic Birch plywood that may be your issue. I use 3 mm Baltic Birch Plywood all the time and have not had any issues like this. I would try another supplier so you know you are getting true Baltic Birch Plywood. Try this supplier. I have had excellent results with their products and very reasonable prices. Plus if you go to 3mm instead of 2mm the top layer will be a little thicker and that should eliminate your issue
I would suggest you do some light sanding to have a smoother clean surface and use the worst quality ones for practice and the better pieces, you could try Tracing the image (or zoom in and use ‘Pencil’ to create lines/shapes) around…for example the shirt colars or any less defined areas..set these on their own layer and make the setting that work well.
Your efforts are pretty good considering the material and it looks like some ply pieces are better than others.
If you have the time and interest you could try some clear varnish “As they are coasters you could try some heat resistant spray varnish” which will change the colour a bit, but will look good.
Also, sometimes a result that is not photo-perfect but still very recognisable is just as good.
Thank you for your advices, some of which I consider very valuable and intend to apply! Do you consider defining a minimum power for engraving could have a positive impact in my case?
Upper “coaster” is a piece of low quality plywood used for industrial packing - 4 mm thick. I use the bad tiles as supports and for speed/power tests, while the better are for real life setting tests in “pre-production”. With this plywood I have obtained very consistent and predictable results; that’s why my disappointment was even higher with final coasters.
I have bought some Albasia furniture plywood sold at about 20$ /1200x2400x4mm sheet but I haven’t tested it yet; it has to be cut to size. But certainly I will try to find better settings for Aliexpress/Temu coasters of which I have already bought few with plans in mind… I think their thickness is rather suited for supplier’s cutting process (and for cut-parts purposes).
Soon you will not be confused by the array of buttons, your brain will separate out the relative on screen areas and tool choices. Then your attention will not see the non relevant choices and you will make selections by muscle memory and then you will begin to make mental models/decisions on power and speed, image mode etc in your sleep…so to speak!
Make good use of this phase of learning by not rushing toward your ultimate creation, but learn well where you are now because at some moment soon the penny will drop and all will feel understood and you will move on to the next tool/method application due to the need to incorporate a new design idea…As you investigate and apply the new skill you will have trouble remembering the previous one if not well practiced.
Your line spacing (LPI/DPI..watch lightburn videos) can be further apart and you will put less heat energy into a small area and create less burn. This also can save time and give very interesting results. I found this very counter intuitive in terms of acheiving detail at the beginning, but it is so.
Speed can be lowered and power also lowered to match, this will give a higher degree of accuracy with less stress on the machine with not much time lost.
You have some nice results so far and as suggested..material quality and prep and settings experiments will bring improved results.
Thank you very much for your advices! I will try to take it slow, and according best practices suggested by more experienced colleagues. I have to add that some of above engravings are post-processed by fine sanding which improves final contrast. In addition, when using borax solution, I also apply a layer of acrylic wood primer to close wood pores. This also reduces wood charring and enhances contrast.
Good luck, and please show us your successes! You have started your laser journey on the hardest part. Image processing and engraving is very subjective.
Hopefully I’m on the way of deciphering this riddle. Was a painful trip (time and material and bunch of wrong conclusions) but I hope it will become less painful, and with benefits:
Upper engraving is done on a sodium bicarbonate solution treated plywood while lower one is treated with borax. As I remember, both engraving settings ar very close if not identical. It has to be noticed that the linearity between light/dark shades of source image and engraving shade definition is much better for sodium bicarbonate than for borax. I have also tried engraving the same picture in series of passes (borax solution), starting from 40% power and incrementing. The conclusion was the same and seems to indicate that for a bright wood, treated with borax which leaves behind tiny transparent/reflexive crystals, laser beam requires a certain threshold energy to impress the wood. This might indicate that a slightly stained surface would lower this threshold. As borax solution is an aqueous one, I will try to use inkjet refill droplets added in it to make it a bit darker.
As a side conclusion, bicarbonate vs borax trials seen on Youtube might be biased -unintentionally. First, the effect of bicarbonate seems to be highly dependant on the wood type (natural wood colour -yes, bicarbonate has a yellowing effect on white/light woods).
Second, trials are done with identical parameters for both treatments; which might not be the right optimal setting.
Kind regards, Mihai
Interesting results so far. You may also consider the protective coat (on a coaster) and how it will further effect the final appearance.
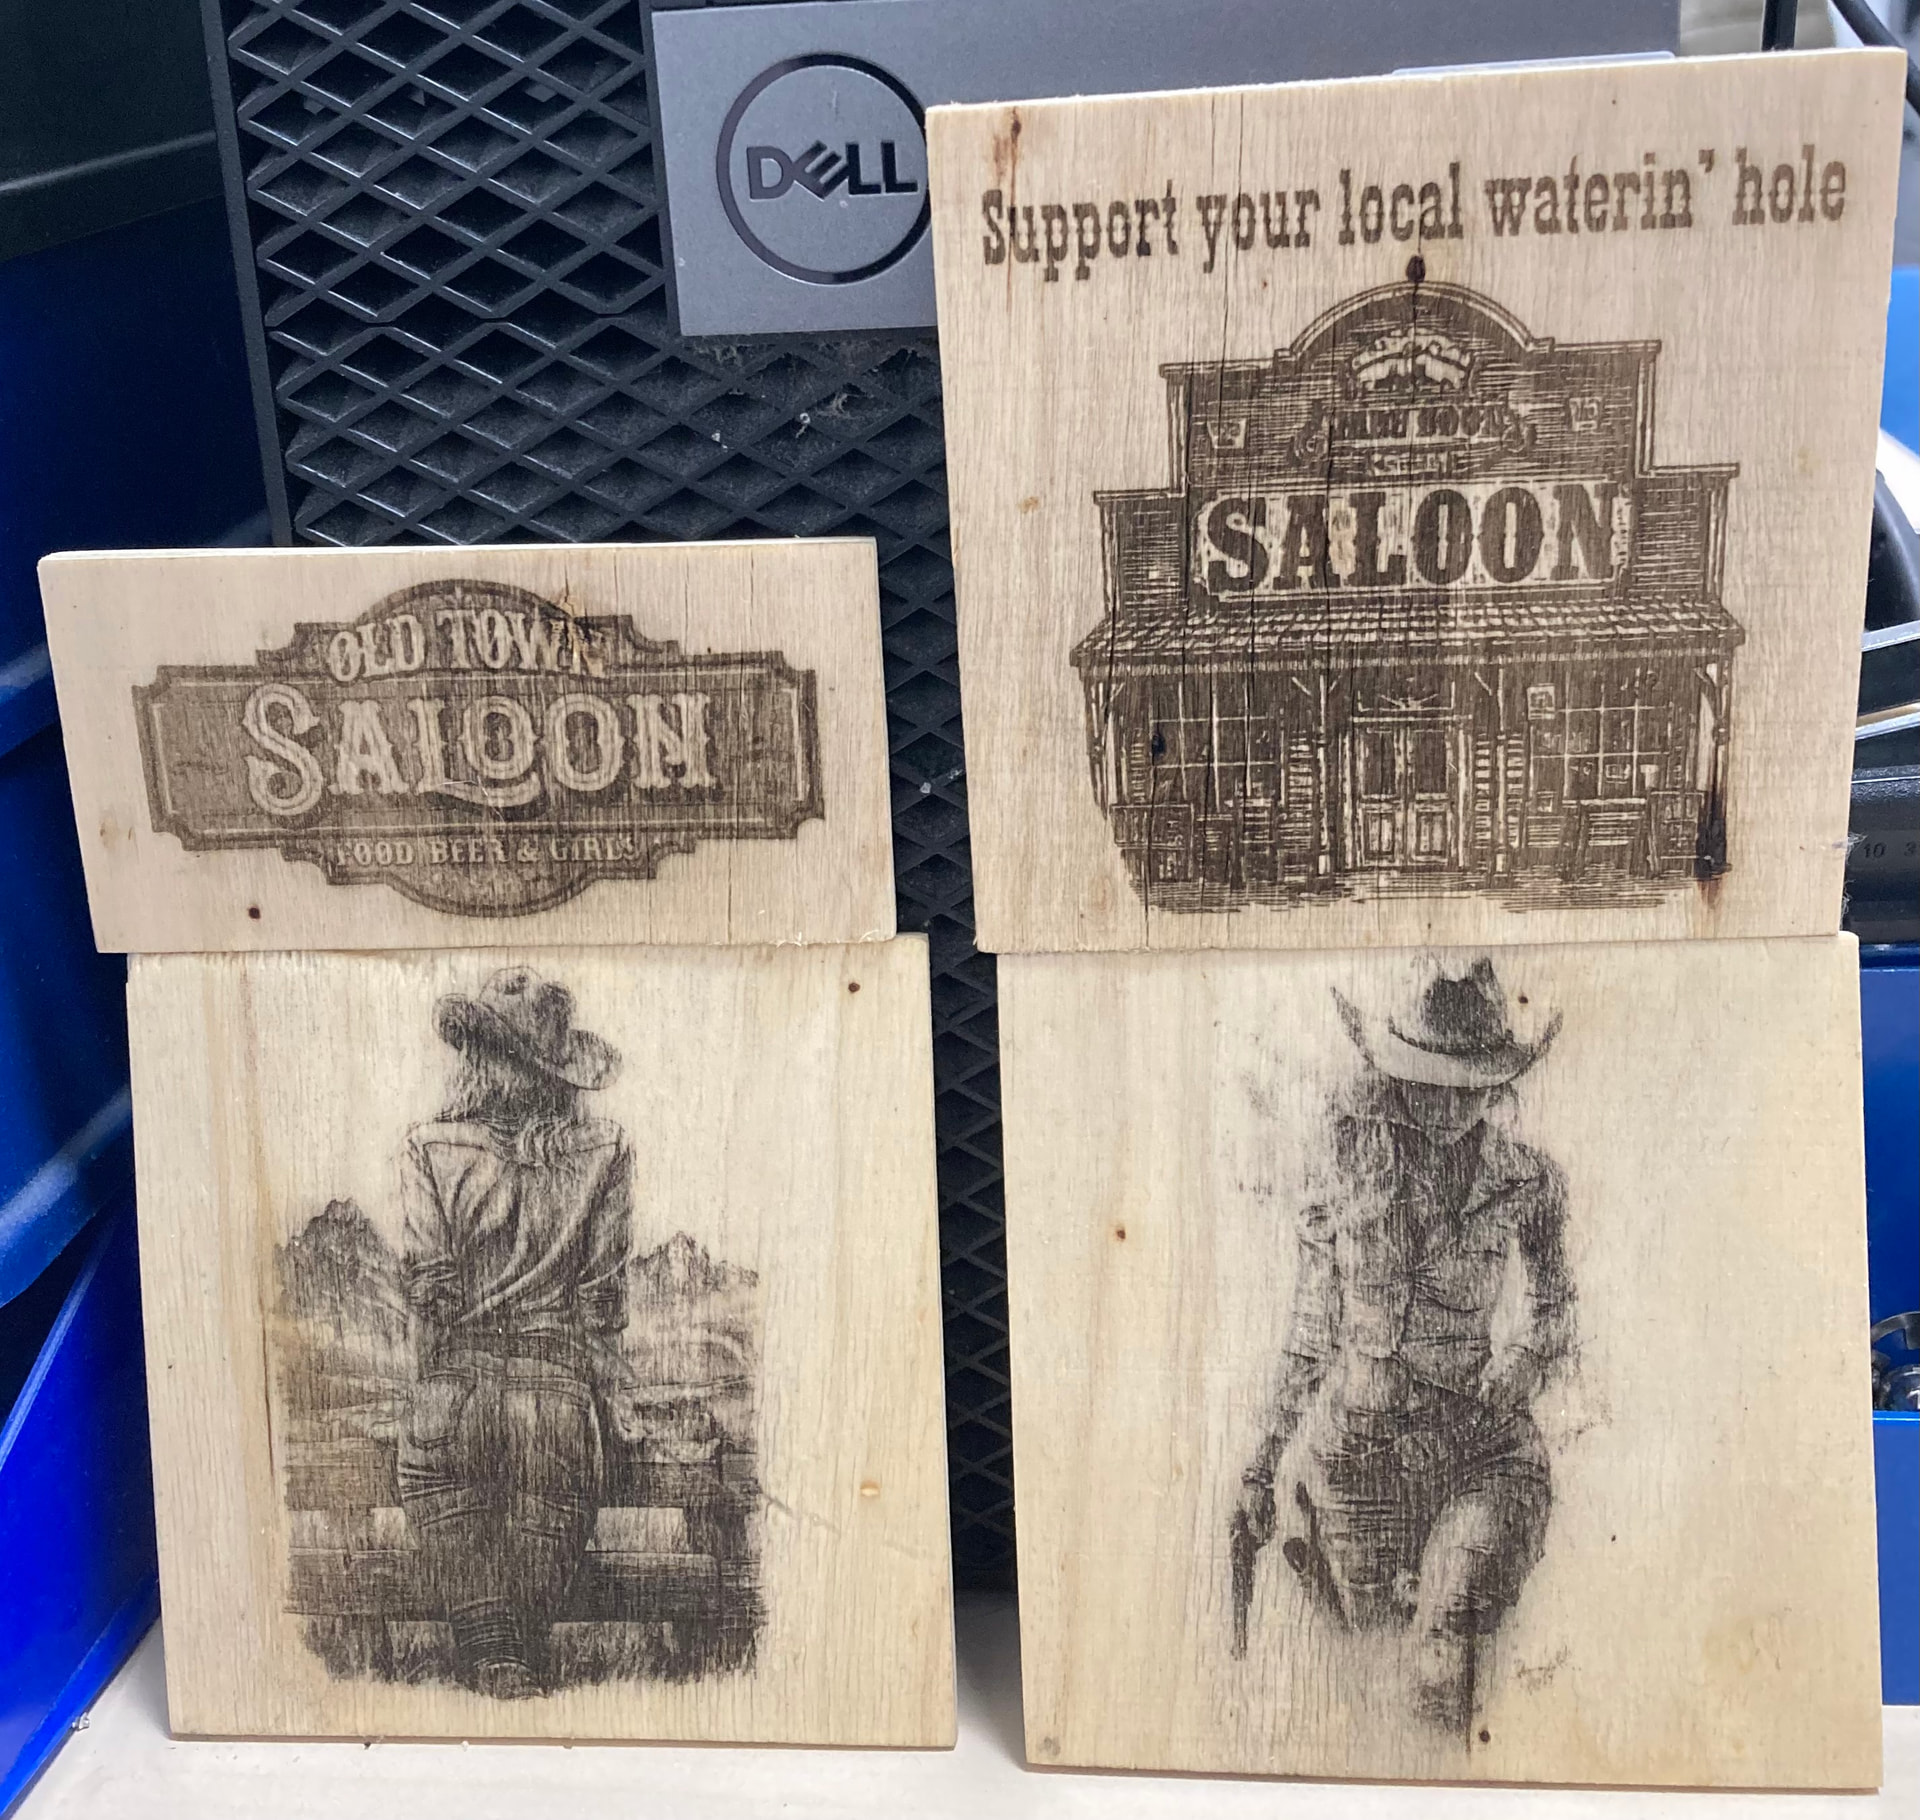
It looks like the vintage look of the cowgirl and the saloon would work OK in terms of overall preparation and job time, the officer in uniform would benefit from a touch up using software to darken the over bright areas..if required, and the last images by getting the grain/surface even smoother.