I am using an Ortur Aufero Laser 2 and an Ortur YRR 2.0 Rotary.
I cannot get rid of the fine lines in my final image.
I have tried everything that I could think of and what I could find online.
The rotary has been set up properly and calibrated.
I have tried with rotary enabled and not enabled.
Different speeds, and power. Different mm per inch.
I have even raised the laser up in an effort to make the line less fine.
I have cleaned the lens.
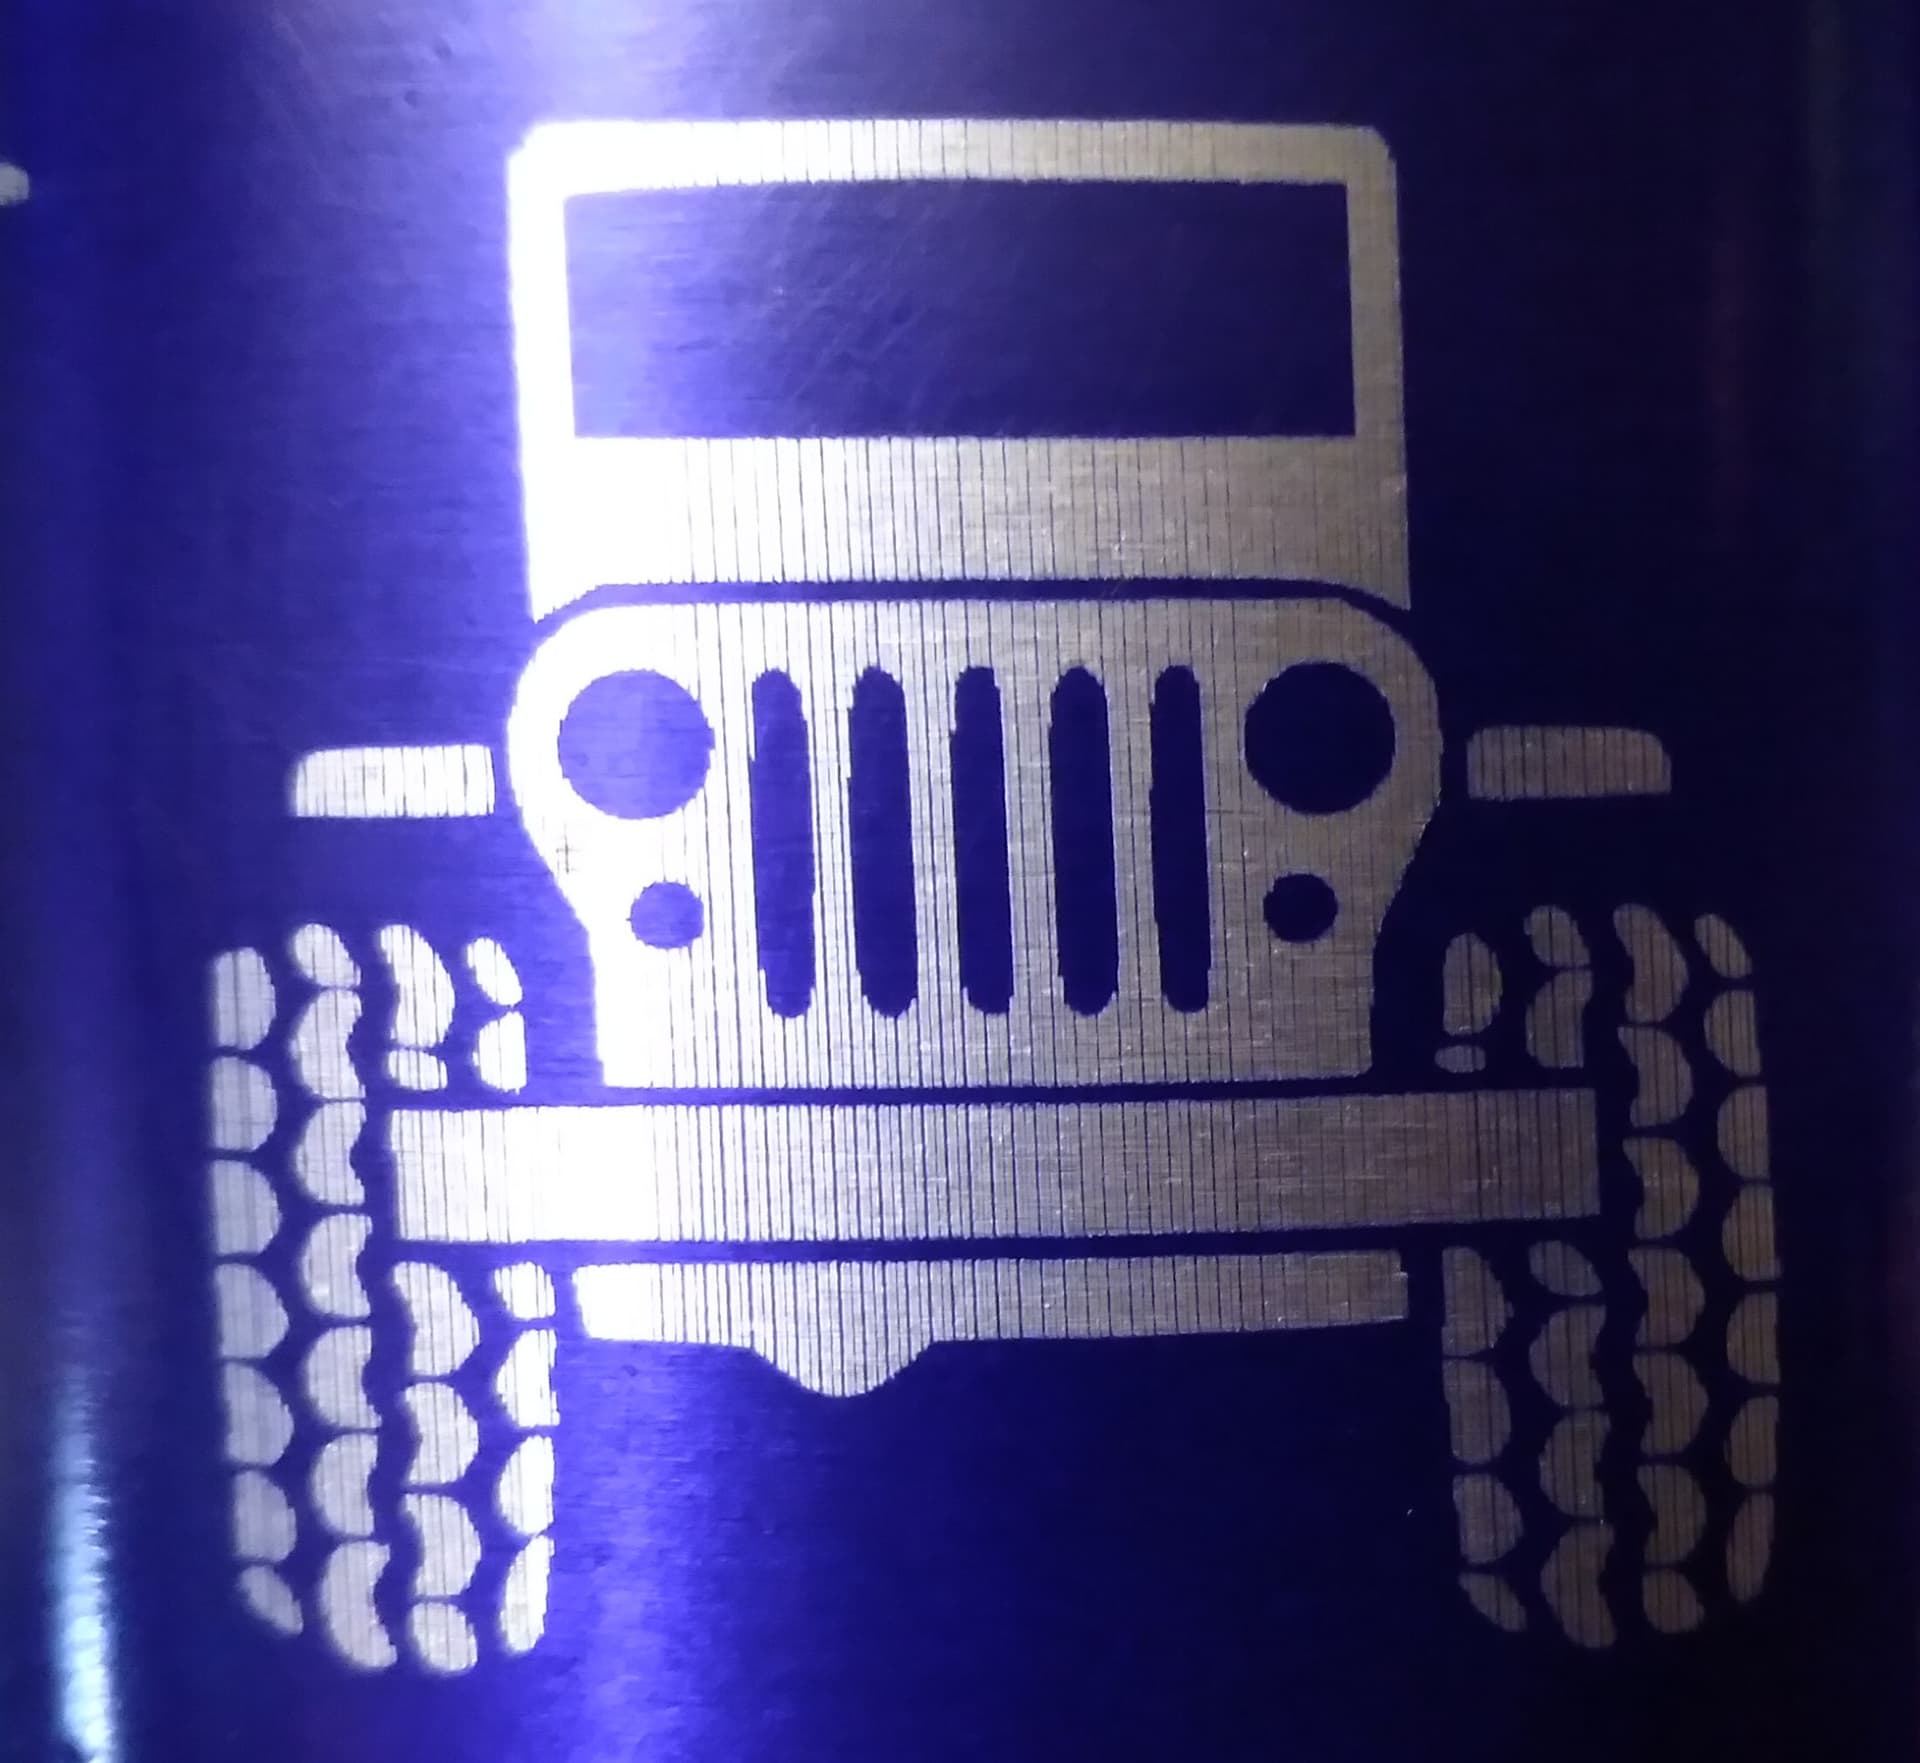
I have tried different graphics, and even just made a solid square in LB, always the same results.
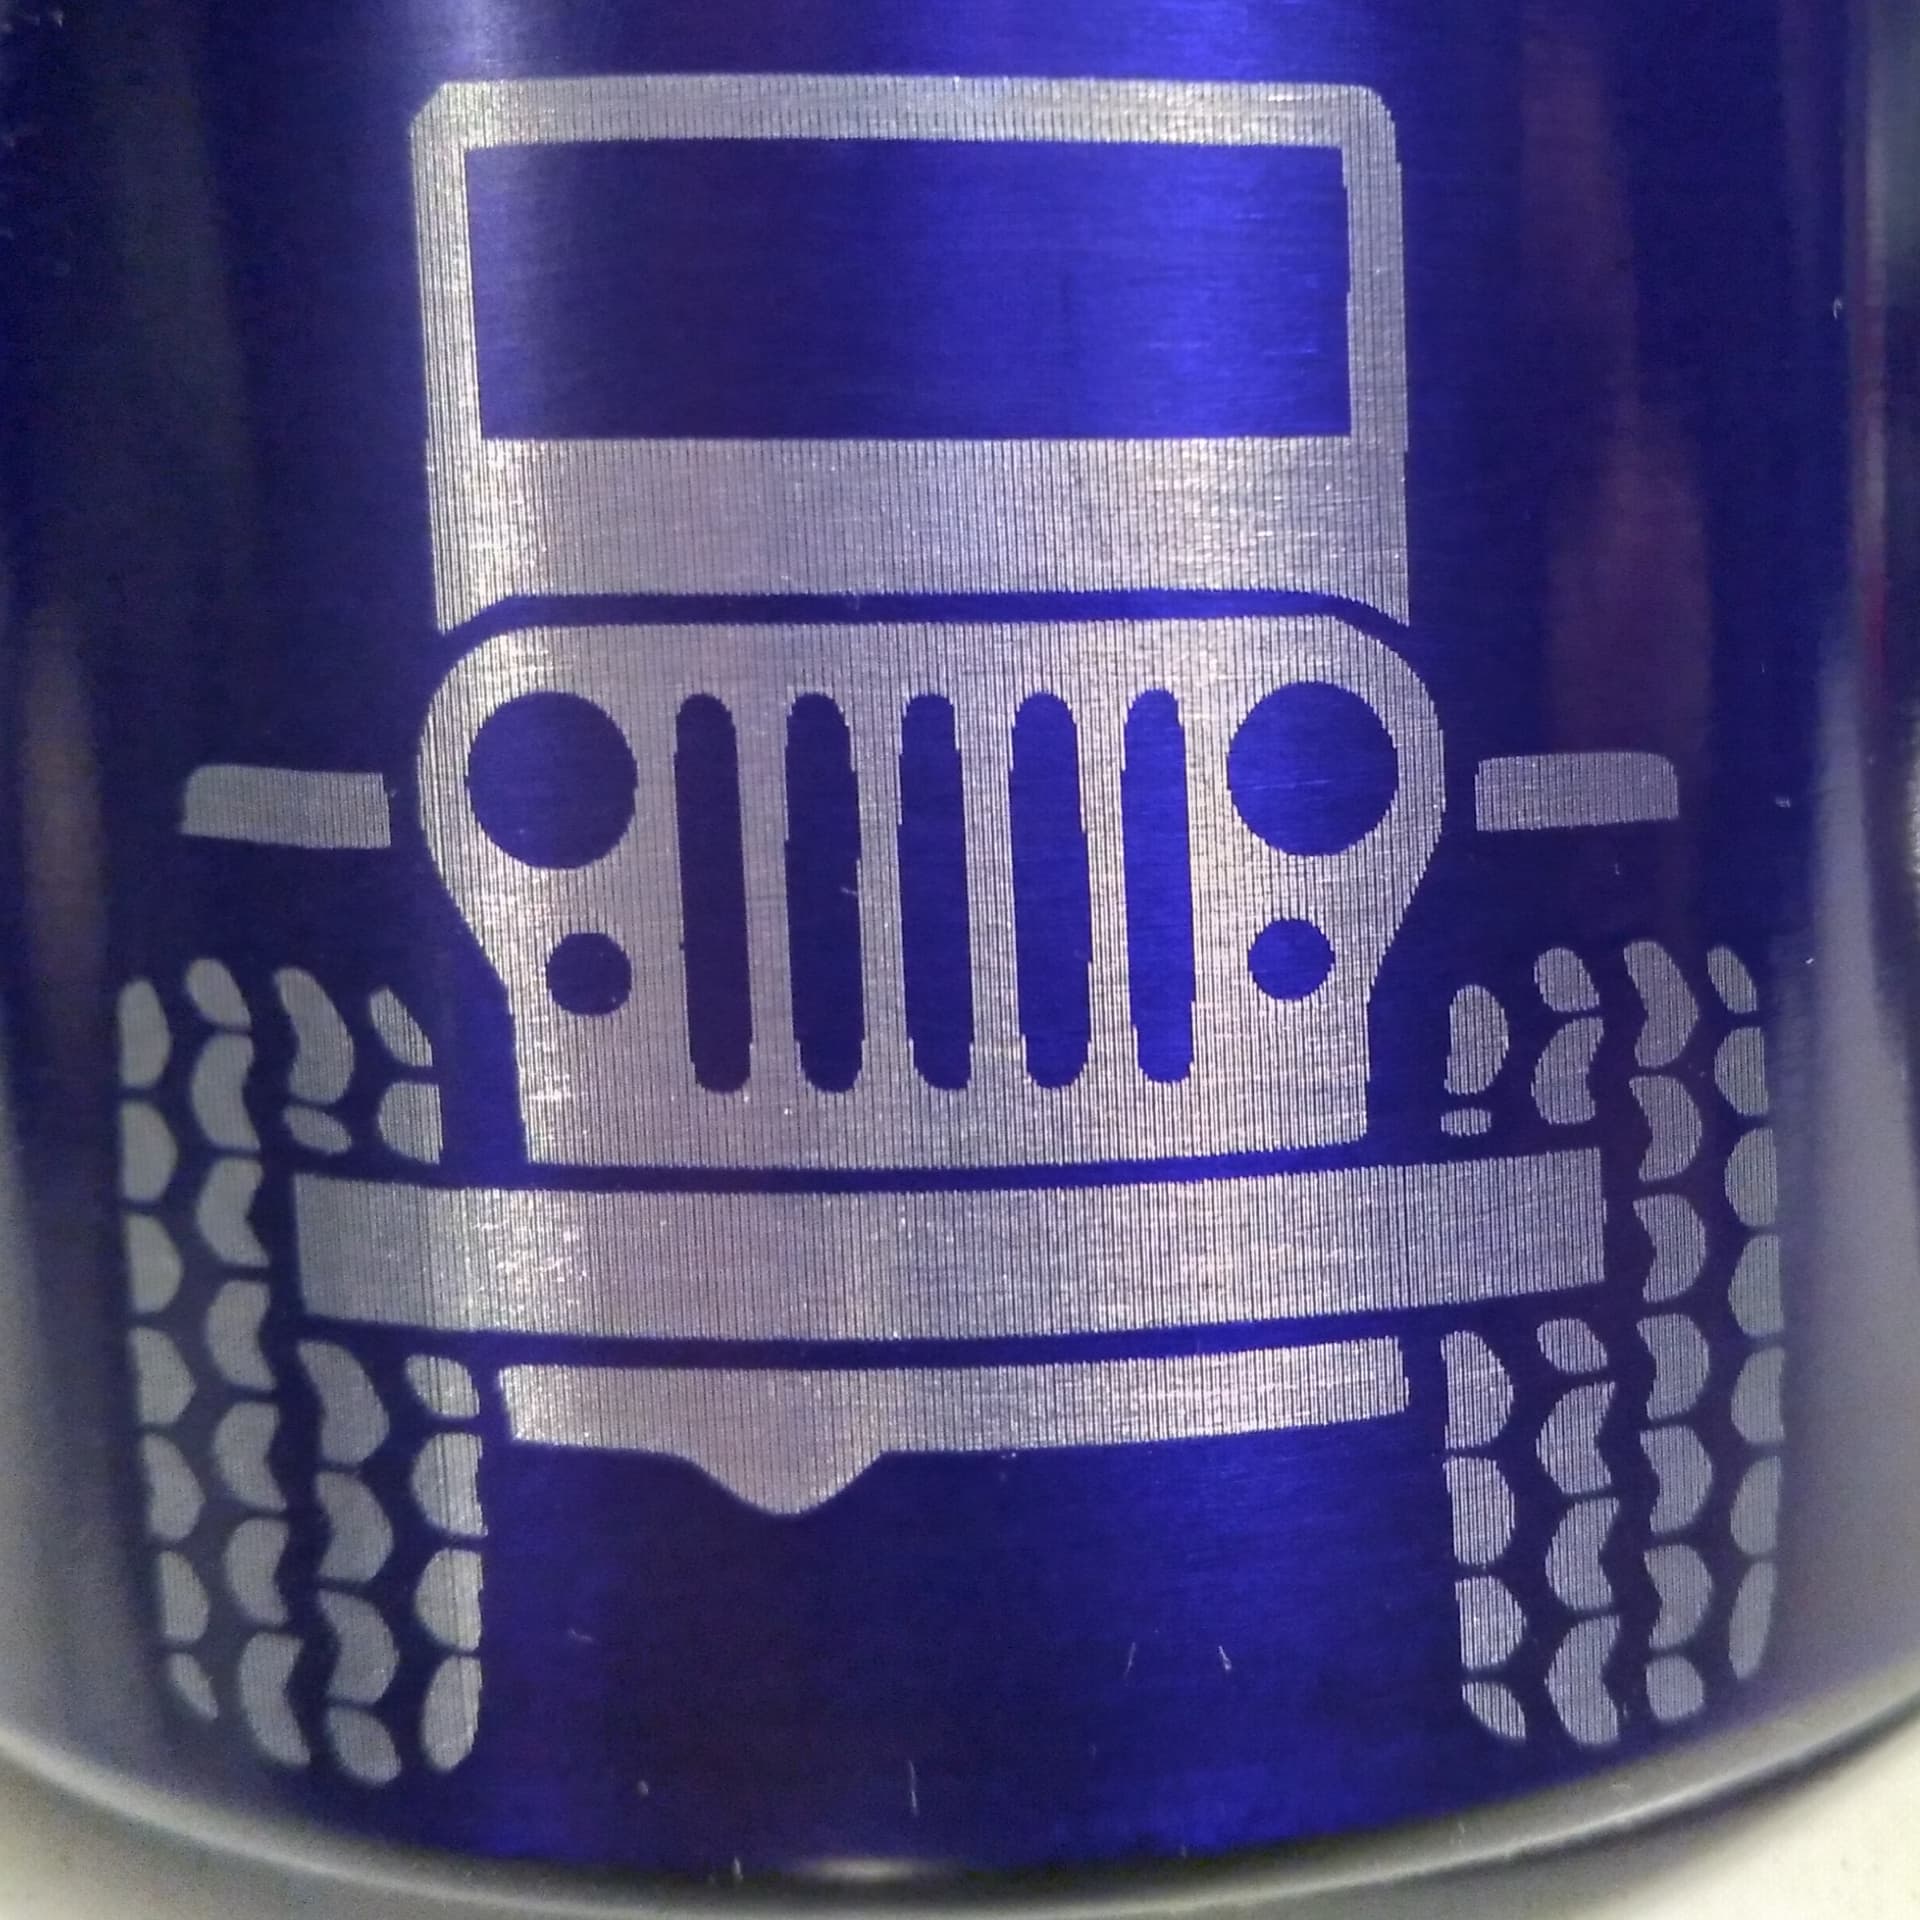
In one attempt it burned fairly clean for about 1/3 of the width, then back to the lines, which didn’t make any sense to me.
I am engraving painted aluminum water bottles, which are very lightweight, so I tried them full of water, same results. Any advise is appreciated. Thanks
The Rotary is an Ortur YRR 2.0. This is actually the 2nd Rotary with the same results. I bought one off off Amazon (No Name) and I thought that may have been the issue, so I bought the Ortur.
As far as DPI, I am just looking for a clean burn without the lines. I am not sure where to adjust the DPI in LB. Thanks for your help.
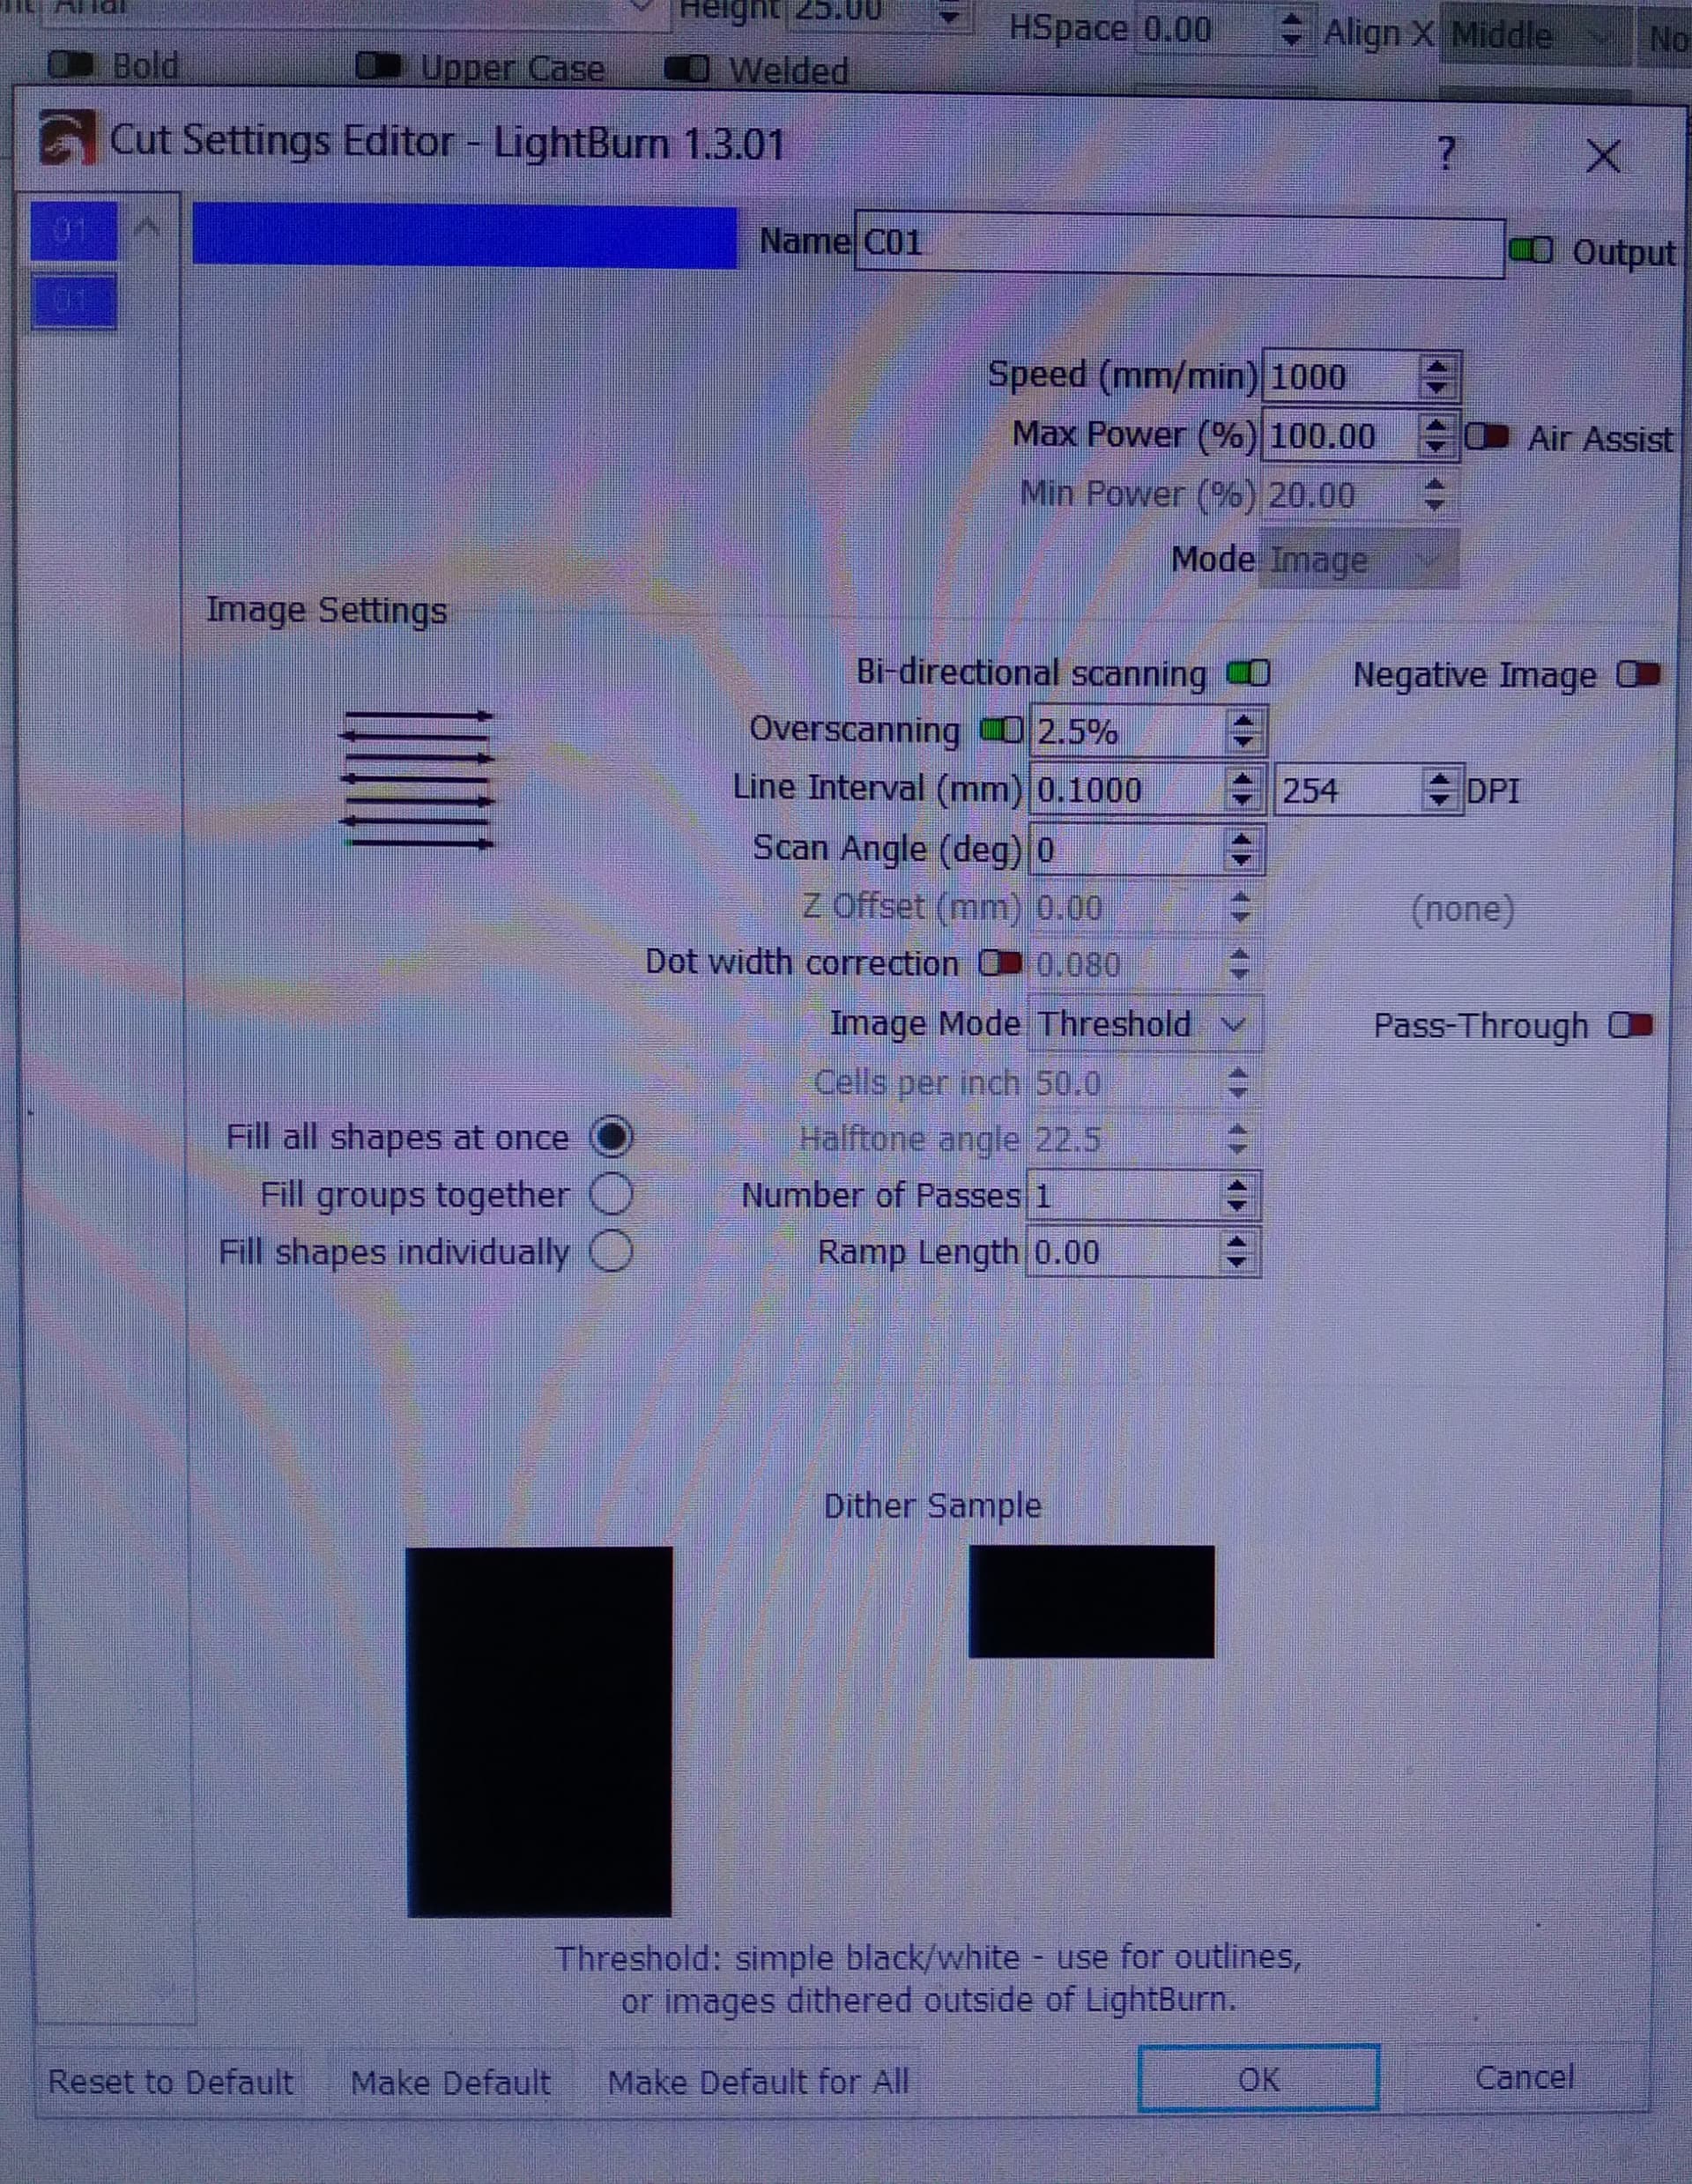
Could not find the DPI because I was in fill mode…The interval was .010mm and I moved that down as far as .050 with no difference.
I switched to Image mode and tried one at 404 DPI with Image Mode set on Dither. Bidirectional Scanning.
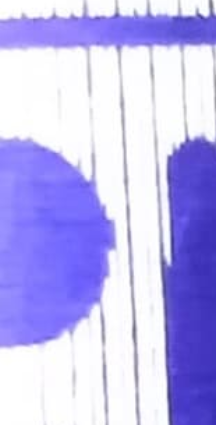
Here is the result… Some improvement, but not as clean as I would like.
I do not think it is an issue with slipping, I don’t think that the lines would be uniform.
I have engraved the Jeep image from 20mm wide to 80mm wide with the same results. The rollers in the Ortur have a very nice grip as well.
I’m having a similar issue and it doesn’t seem to matter what the DPI is. I tried running at 600 DPI and there were still lines. I tried a different design, tried changing the burn angle to 30 degrees, I tried cross hatch, I tried offset fill, flood fill and there are still verticals lines. Have you found a solution at all?
They are also inconsistent in the thickness… That being said, when it’s a smaller thickness you end up with a more distinct and apparent line, since the coating is still there…
Some of these mugs are just dipped, there is no thickness control on them. That can make things more problematic…
It appears to me the line are a continuation of the blue coating that may have gotten hot …
This is all we have to go on, the effect on the material… What do you think? Do you know the dpi you used when you did this?
A lot of us do this… Usually we do it with the X axes aligned with the Y axes of the cup, as you’re going to set it upright when you use, read it…
This means the X axes are doing most of the work and the Y axes, just slightly moves before each scan… Cross hatch may cause more issues… I don’t think it’s needed…
Interval and DPI are directly related You’ll notice in LB if you change one, the other changes accordingly. If you choose .1mm interval, you’ll get 254 DPI. 1 Inch = 25.4mm. It’s just a conversion that’s done for you in LB.
That said, an interval of .01 is likely far too small of a value for most hobby diode laser. You should be closer to 318 DPI (.08mm interval).
You’ll need to set your interval to a value that matches what your laser can produce. If you don’t you’ll end up with errant gaps like you see here.
Here’s an article that helped me understand this relationship between DPI, Interval and how your laser scanning should be configured.
Very helpful information, thank you.
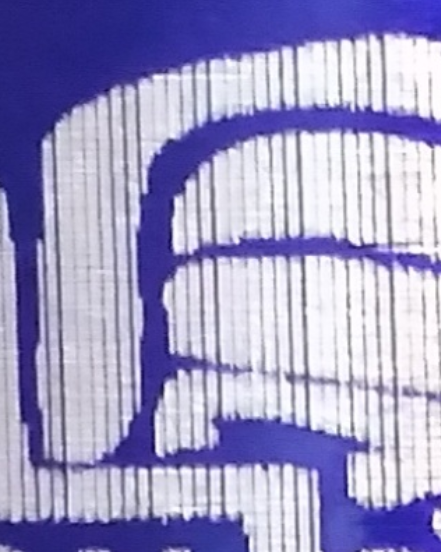
I changed the DPI to 254 in PhotoShop and then engraved with the settings shown
the results are better but still has the lines. As good as it gets with my machine?
I tried different dpi settings for .08 and .09 as well, but the 254 at .10 was the best I could get.
I am using a png image, I tried trace and fill, as well as image modes, pretty much the same results either way.
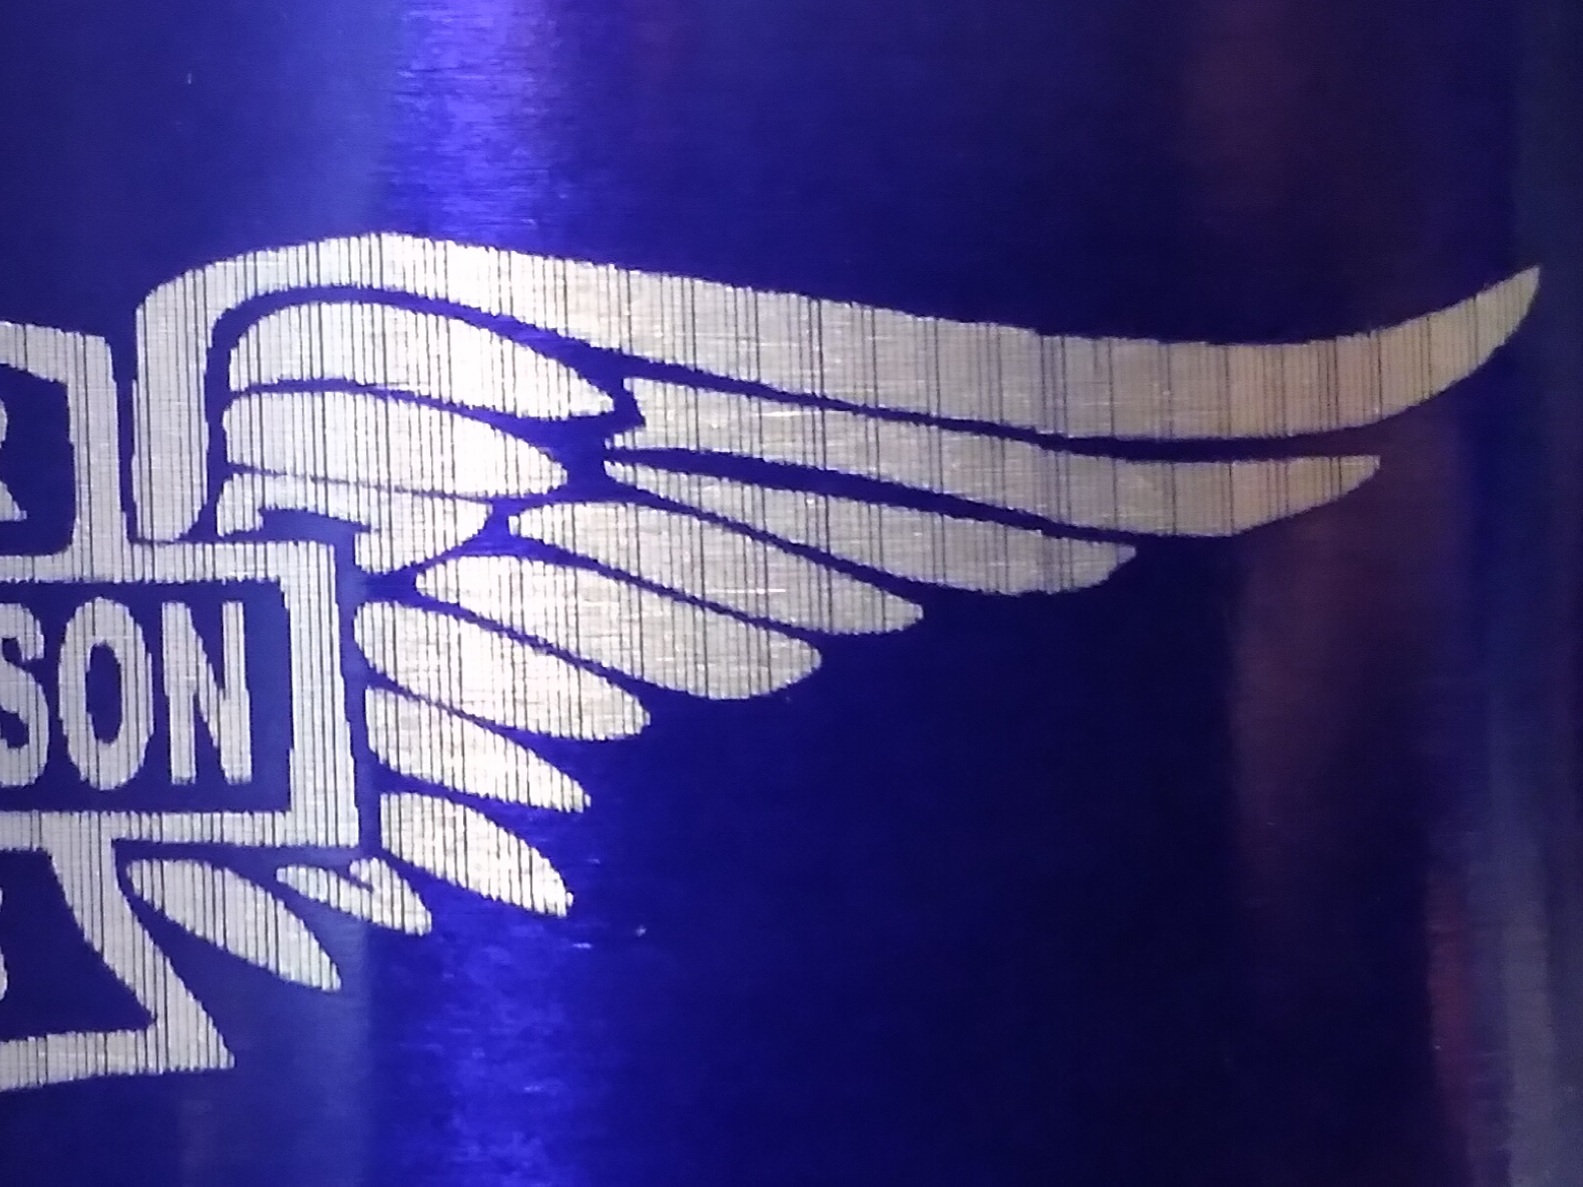
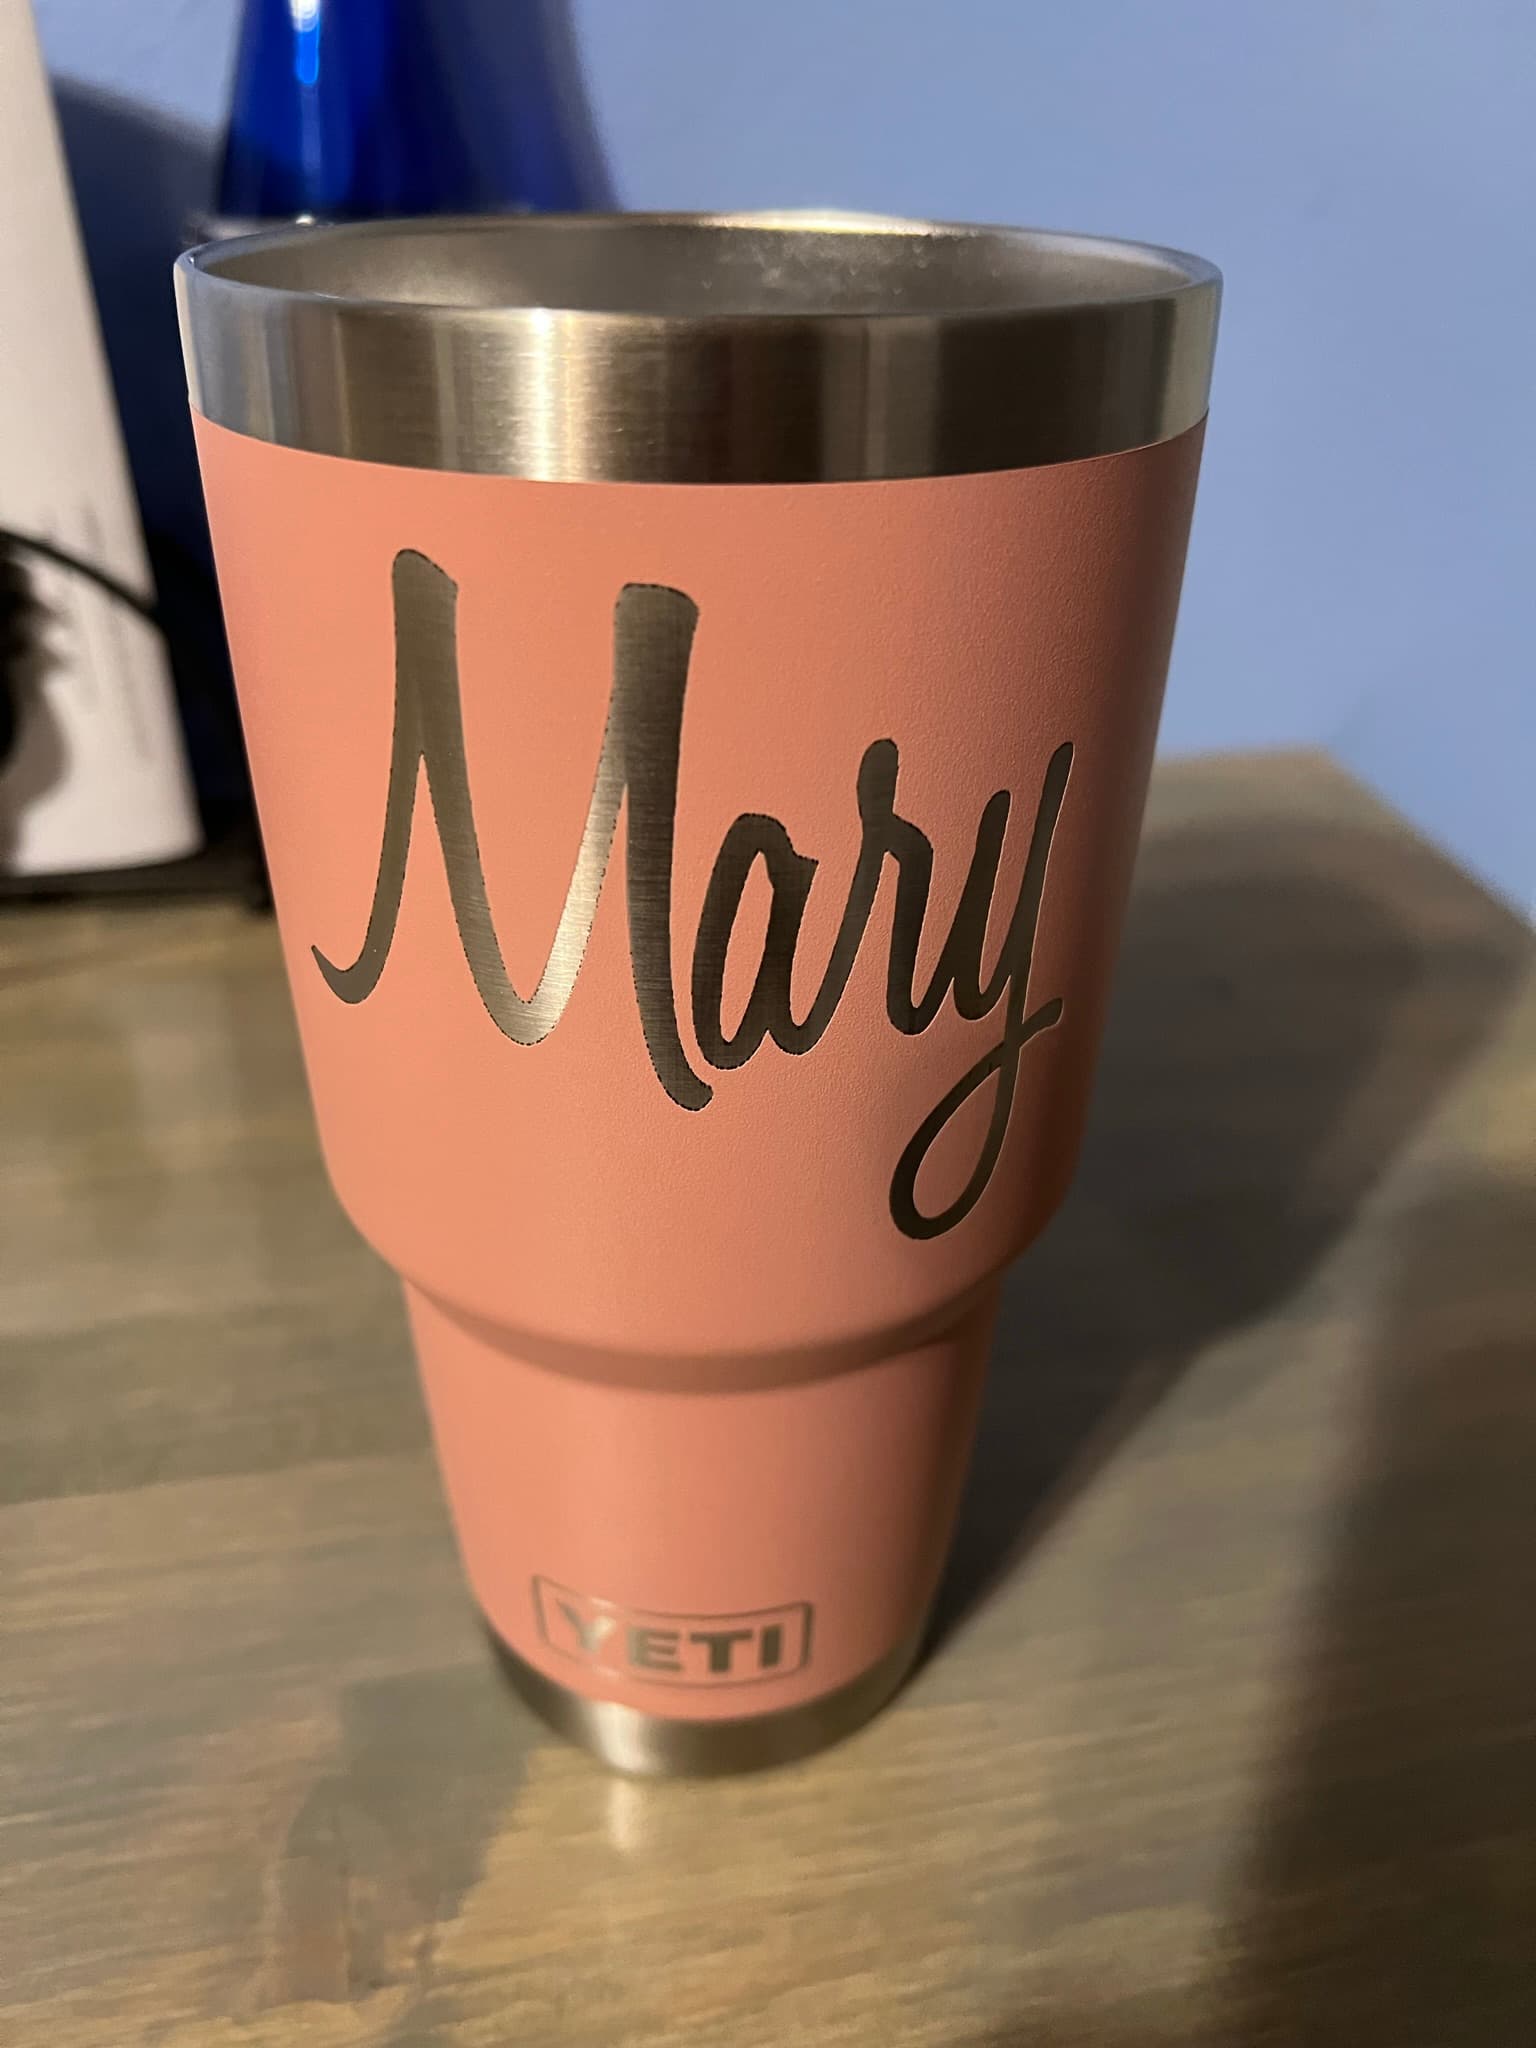
You’ve made good progress. The lines are consistently spaced and much better than what you shared in the first photo.
Might be. Remember there are physical/mechanical limitations with any machine. The size of the laser beam, the stepper motors. They all come into play.
You’ve clearly done a fair amount of testing. I’d say your interval/DPI is spot on. If I’m understanding your post, lower values do not improve the image. Higher values will put the lines farther apart. Think about running the interval test built into Lightburn. That will help you get to your correct value for each material you intend to engrave.
Well done.
If this solves the issue, please don’t forget to mark the problem solved.
It’s worth double checking the roller diameter and steps per rotation settings in the Rotary Setup window. If those values are incorrect, it could cause gaps like this.
What kind of laser are you using? I had this issue early on and found it was two settings on my particular machine. 1. I had to drop my power back. 2. I had to fix the steps per rotation on my rotary setup. For a standard polar cup, I’ve been using the following: 25% power (80W CO2 laser) - 0.10 line interval. 300 mm/s. Rotary is 2200 steps per rotation on the standard 22oz polar camels. I find it changes slightly with each type of cup.
I was having the same issue at first and I found through a lot of trying I needed to run fast and less power. The dark color can be run really fast but light colors need to be stepped down by degrees of lightness. Blues, teals and other shades of blue/green need the most power down in speed if you use a blue laser. I cant say much for the CO2 lasers. I am running a blue 20watt laser and I am running my blacks and darkest at 18000mm/min and power at 65 to 70%. If that helps. My goal is to just remove the paint not engrave like the photos shown above. I also, as a side note, run them as images and the mode as threshold. I find that running svg in line/fill really like to dig into the metal.
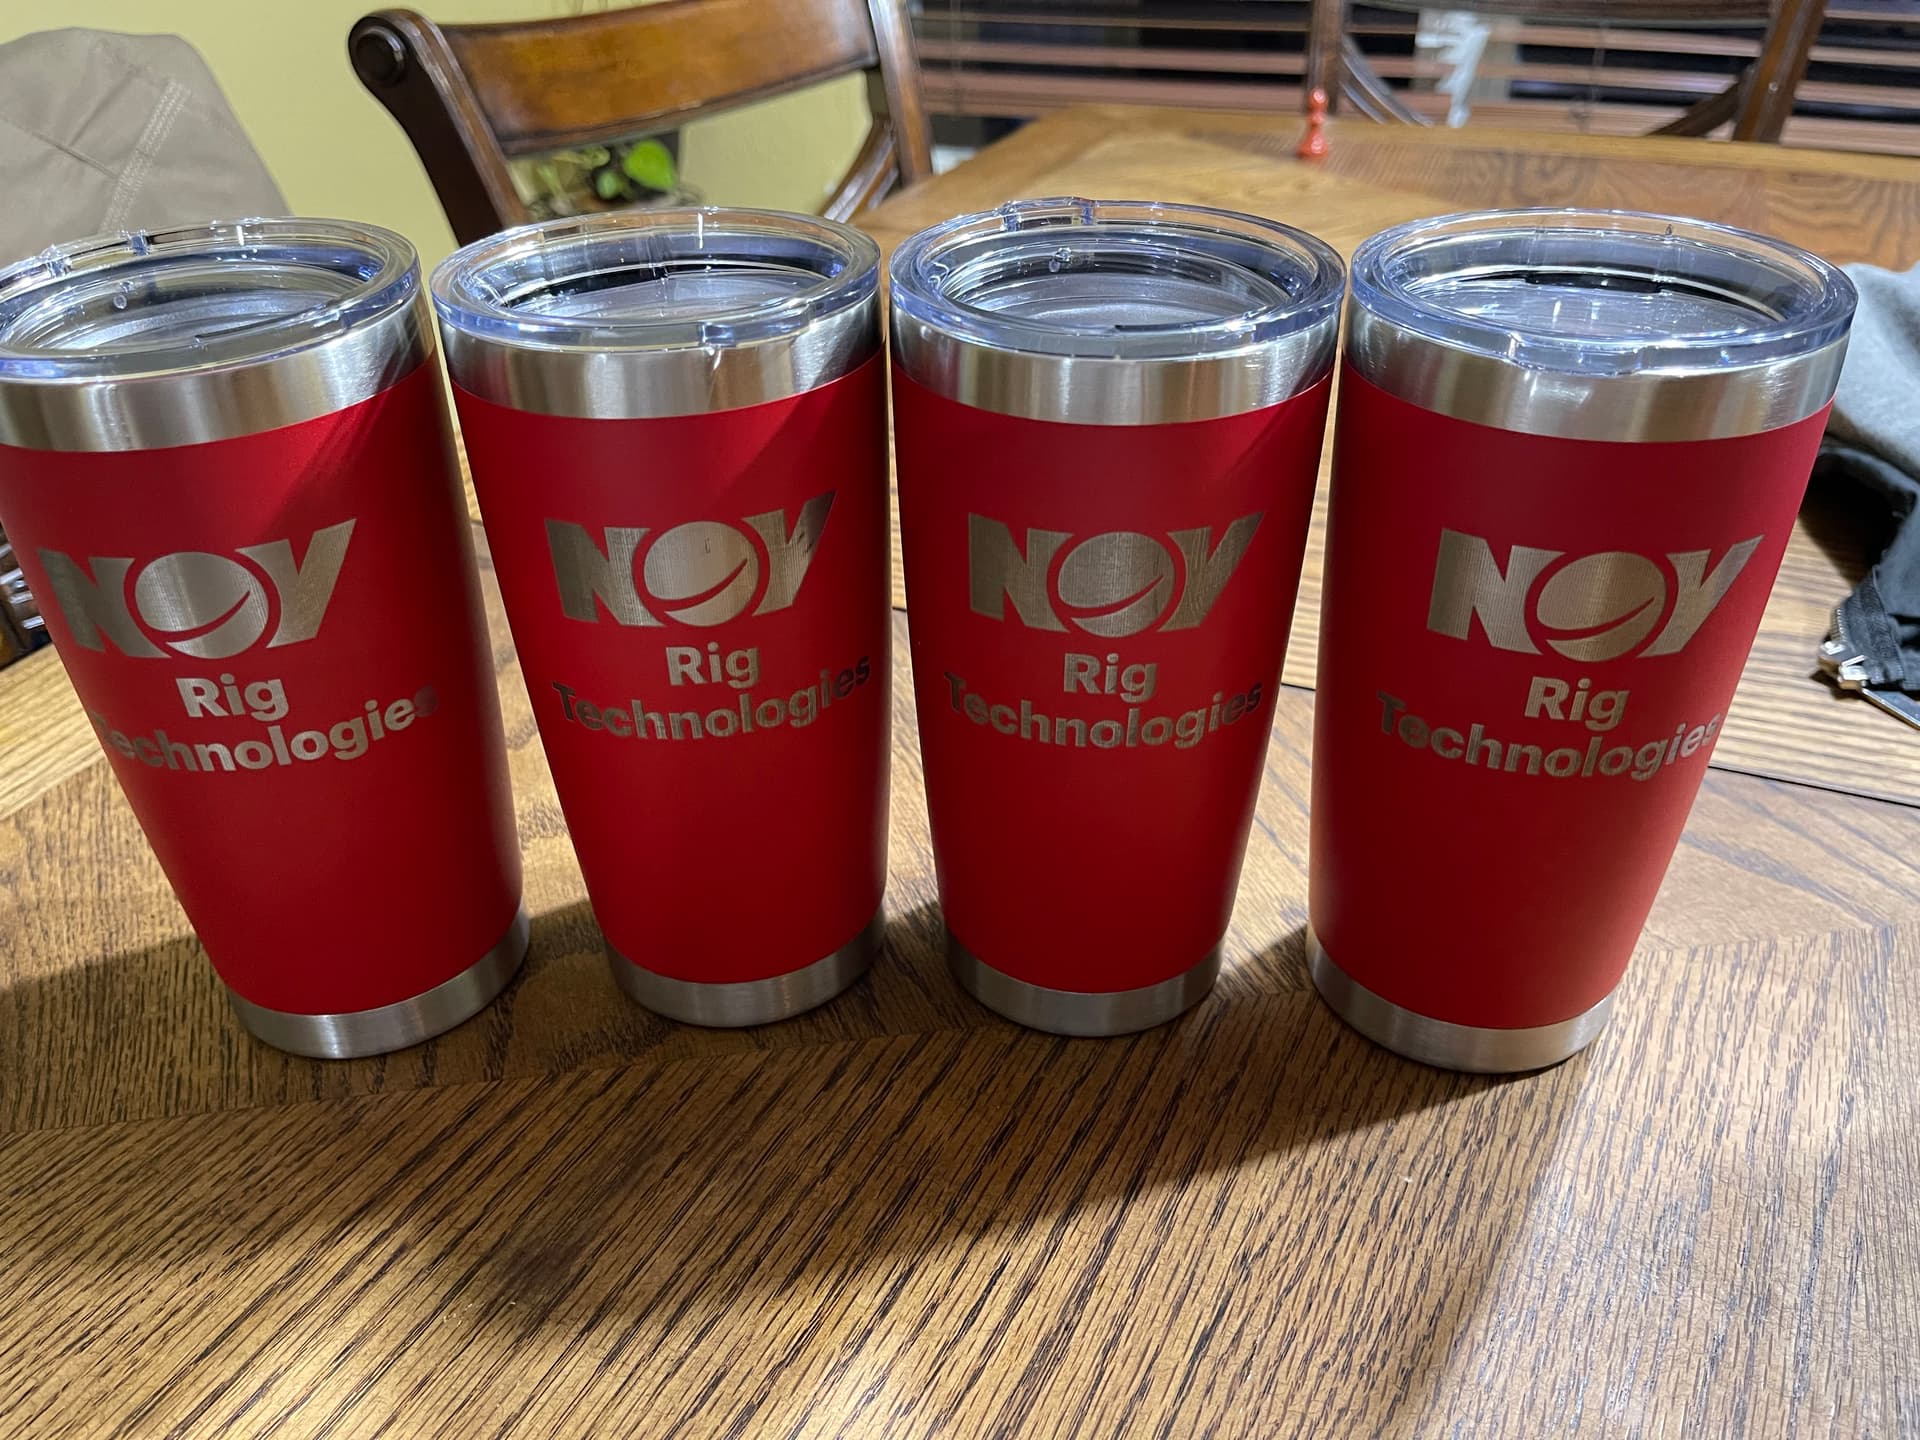
For the CO2, I found it definitely comes out less clean with high power. I did the below cups @ 70% power @ 500mm/s on a CO2 80W… You can see the lines clearly that you’re talking about.