Hello, this is my first post here despite reading for a while.
I’ve been using Lightburn about 4 months and love it. We have a Boss LS-1420 with 65W tube for context.
I’m about to do an acrylic engraving using standoffs to attach to a piece of wood. Can someone give me a tutorial on how to equally space the holes for the standoffs from the edges/corners of a given rectangle?
For sake of discussion, assuming the holes need to be 5mm cut through the acrylic. I can obviously make the 4 needed circles in the design… But kinda got lost when trying to ensure each 5mm circle is the same exact distance from the rectangle shape that is the outline cut of the plaque.
Thanks! I’ve got other questions for later but this is the most pressing one.
Sorry Mr./Ms./Mrs. Claw, but I am not “seeing” what you are wanting to accomplish. Can you try to describe the final finished outcome again and maybe include an image to illustrate?
LightBurn provides positioning tools, array tools to generate multiple copies of a shape with many positioning options, alignment tools and so on. For most things, LightBurn provides a couple of ways to accomplish a given task. I ask for more details to help me refine the best-suggested approach.
Ok picture this. You draw a rectangle in LB. You want to add 4 circles, of 5mm diameter, one in each corner of the rectangle. How do you do it quickly and easily to ensure the 4 circles are each the same exact distance from the corners of the rectangle?
The end state is one hole per corner of the rectangle, evenly spaced.
There’s probably a lot of ways to do that.
I would make the circles and then “snap” them to the corners of the square. Then I would use the “XPos” & “YPos” boxes to move the circles the required distances in from the corners.
Or set up a grid and snap things to the grid.
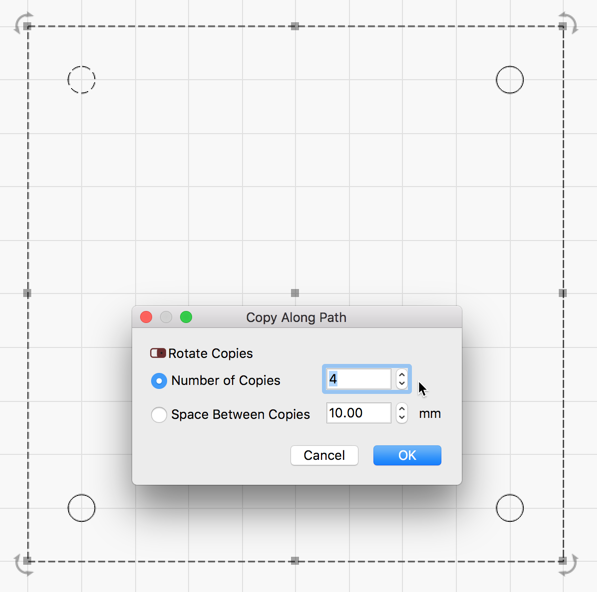
Select the circle, then the rectangle and choose ‘Tools’→’Copy Along Path’. Roll the number of copies to four and notice that the copies and placed in the four corners of the rectangle.
Aw sheeeeeet! It sure is! I’ll have to try that out and verify but I think that’s exactly it.
Now, say you ran one of those and said to yourself “self, it would be a lot cooler if those circles/holes were 16.5mm further in from the edge!” How would you do that? Select each circle and move it with xpos/ypos the same number of mm on each axis?
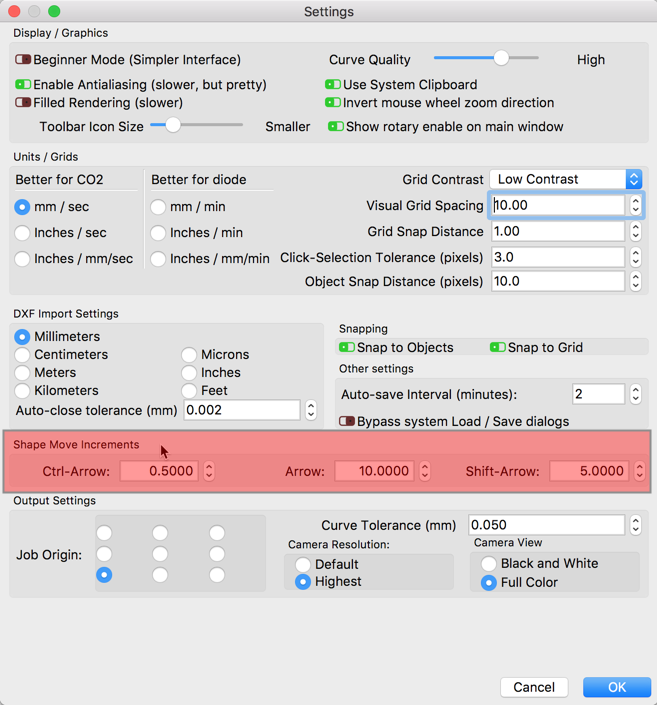
That is one way. As mentioned, LightBurn provides several ways to accomplish things as there might be differing workflow processes by user or task. You can position objects the xpos/ypos dialog, or use the arrow key navigation to nudge an object an exact distance based on the settings on the ‘Settings’ page to offer another way to get what you want.
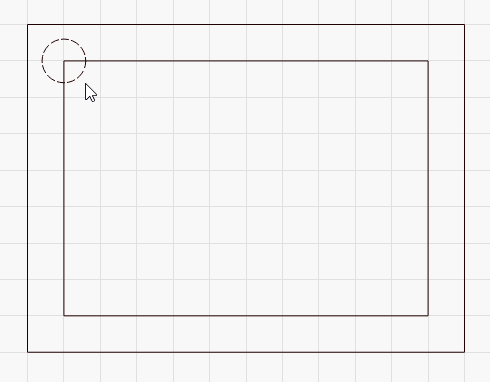
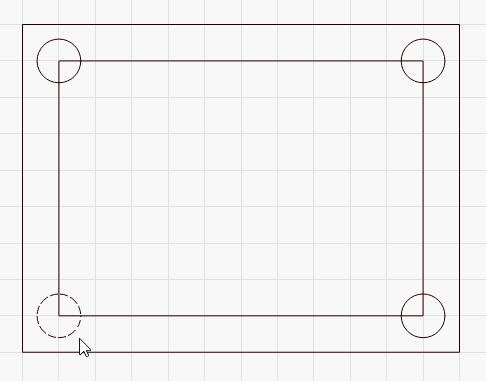
You could also make a smaller rectangle, centered inside the first one, and then use the corners of the second rectangle as the starting points for the four circles you need, holding the Ctrl key to drag them outward from the center. Like this: