edit:
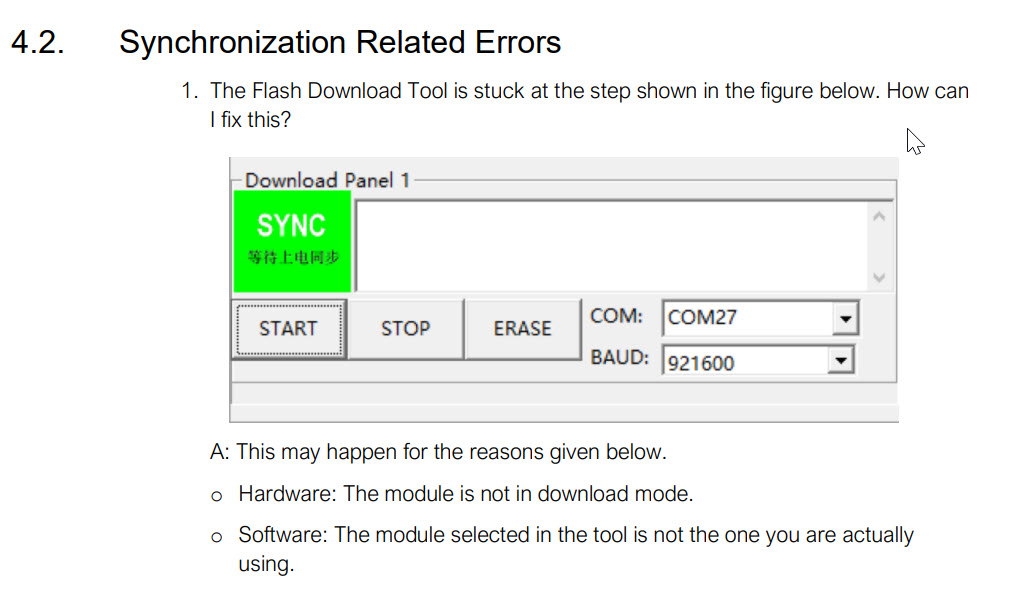
Did you press the Start button next to the green Synch indicator?
It doesn’t appear to be pushing data.
I can’t tell if it flashed the controller or if it’s waiting to start the flash.
Did it scroll a pile of data before all the black screen filled with white dots?
It looks like it’s connected.
The Start button should work and you should see lots go by.
I would have thought from the directions on github that it would have disconnected automatically after the flash operation was done.
I’ve downloaded the tool and I’m looking for an ESP32 based device to connect to.
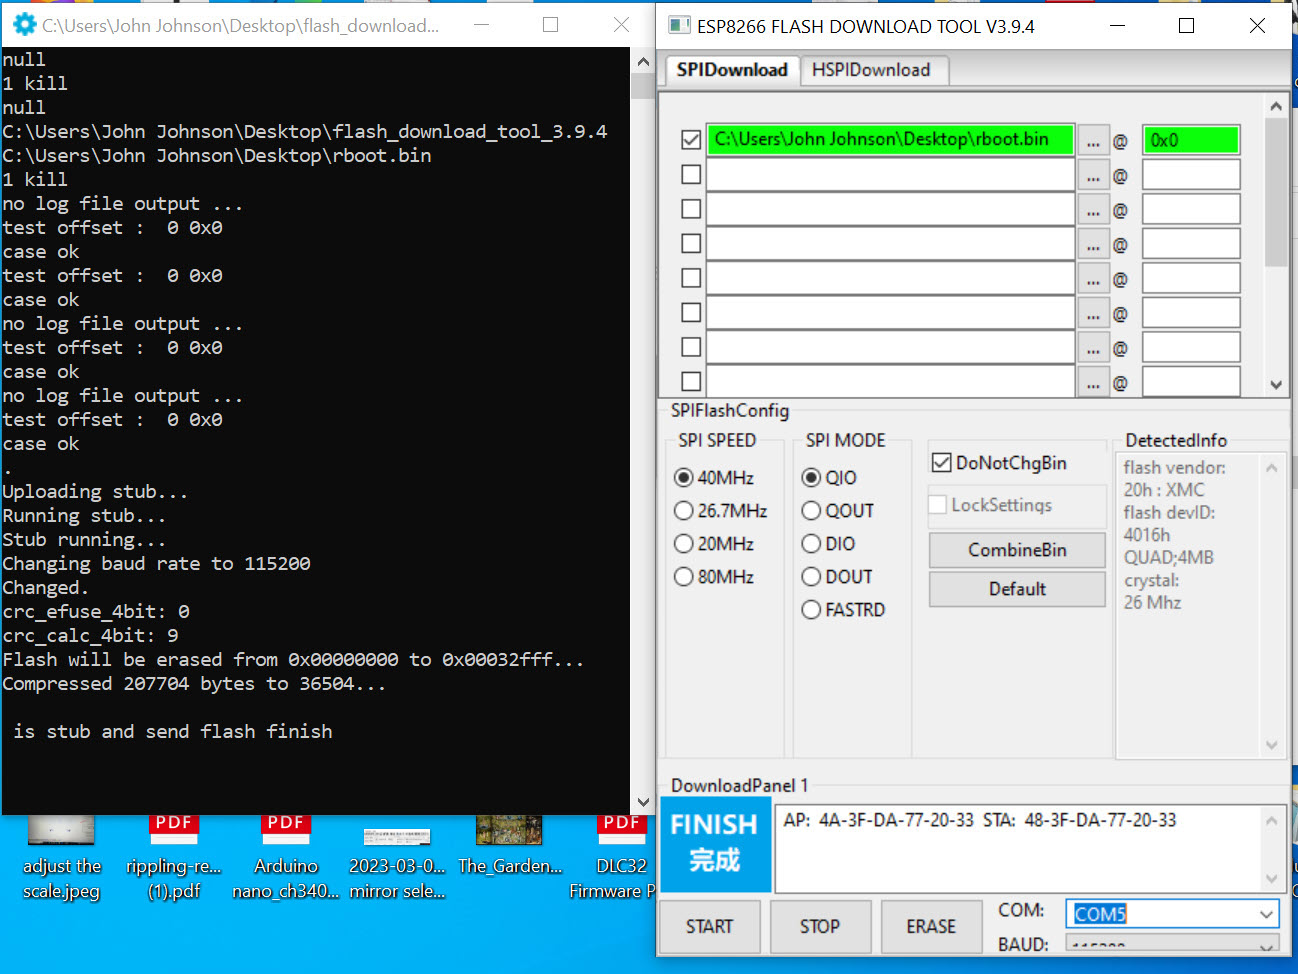
I flashed it a second time for good measure and it went into the Synching mode for less than 2 seconds. The on board LED blinked a few times and it was done in less than 10 seconds.
I’m hoping that some other software grabbed your controller and the flash tool has been staring at your mouse for an hour…
The .py files are source code written in Python. If you’d like to use them we’ll likely have to generate a binary to flash to the microcontroller. I’m not sure if these can run MicroPython code as an option. I’ll double check this because I’m not fully certain.
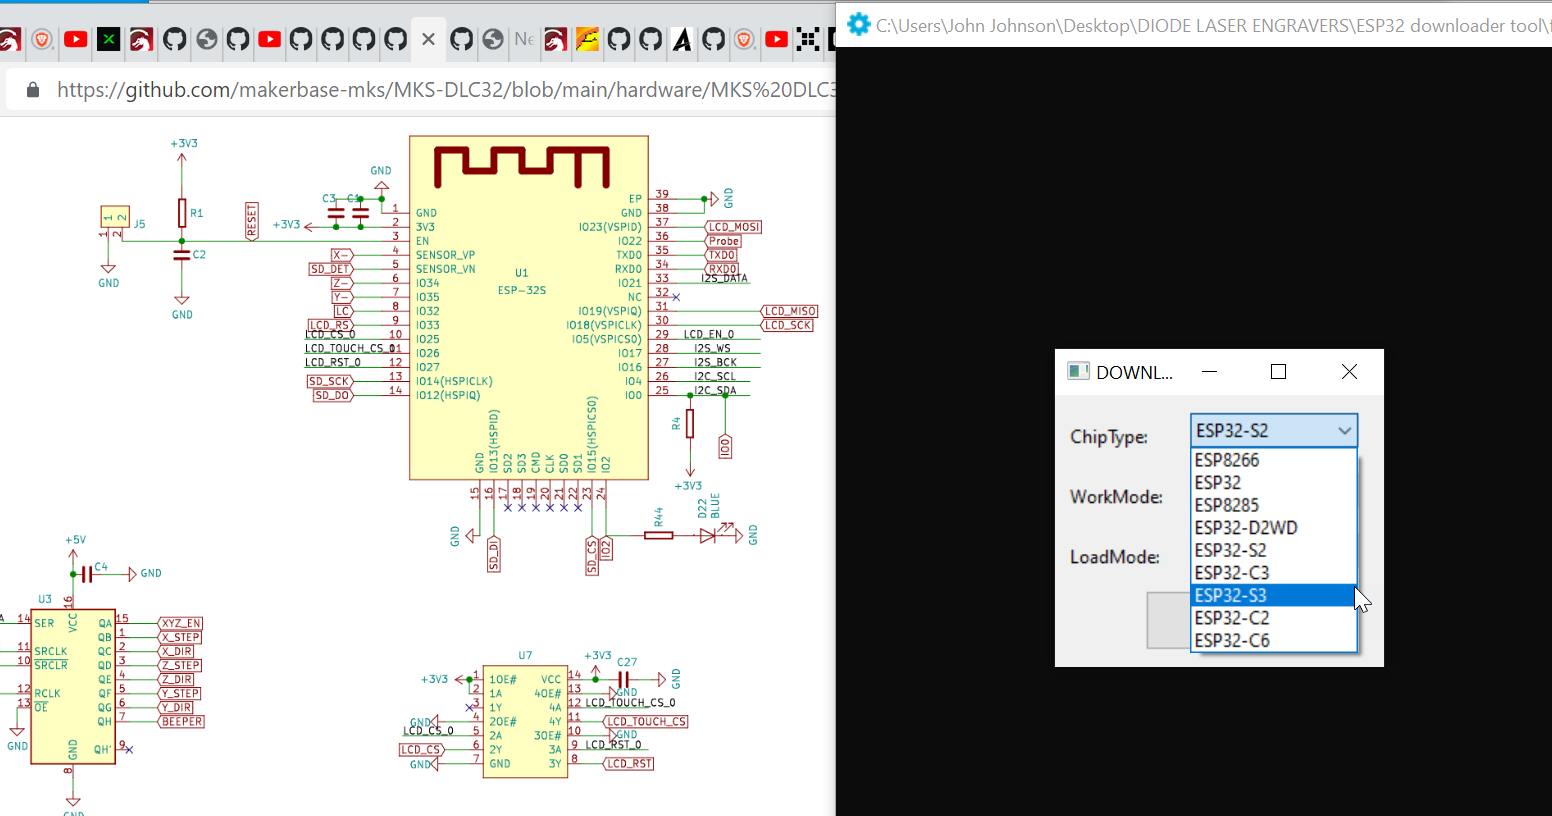
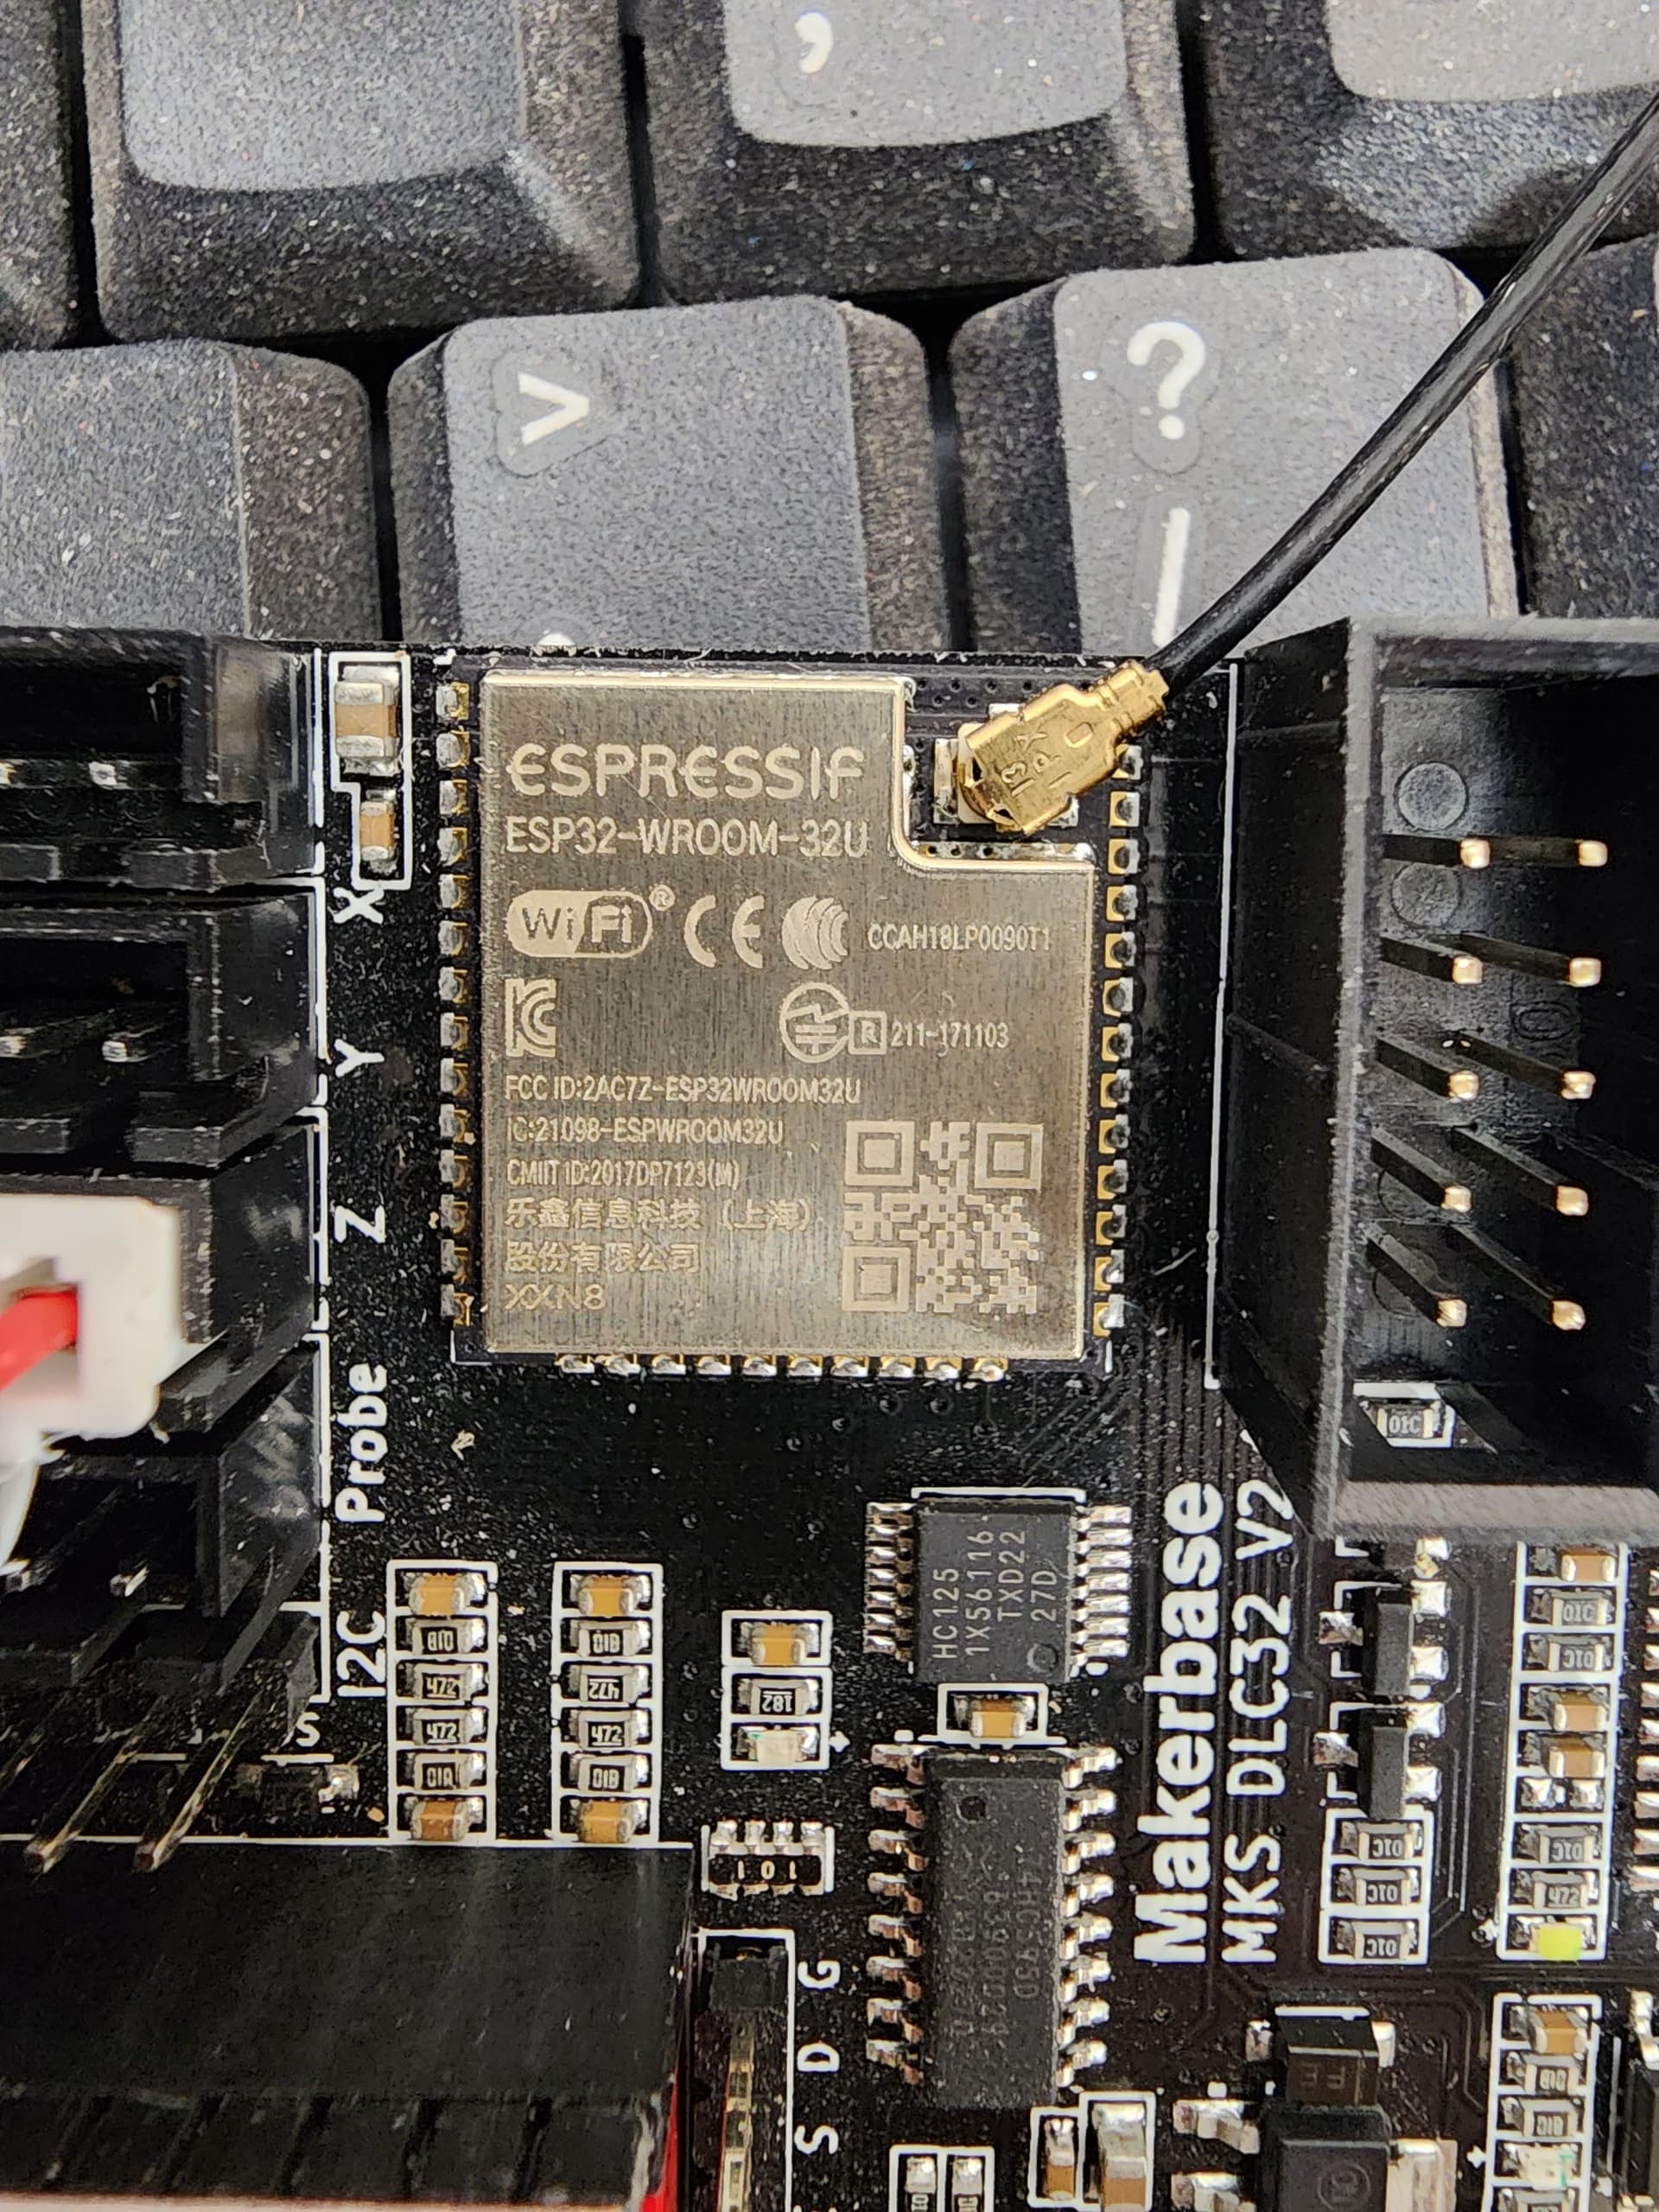
This is great. I can’t guarantee that the answer is ESP32 with no S but I would test with that first and if it doesn’t take, test the ESP32-S3 because it’s supposed to be backward compatible to the S1.
The Datasheet says that it uses the ESP32-D0WDQ6 chip… So I’d assume it’s not a D2WD - but after an hour of pouring over the literature I’m going in circles trying to confirm.
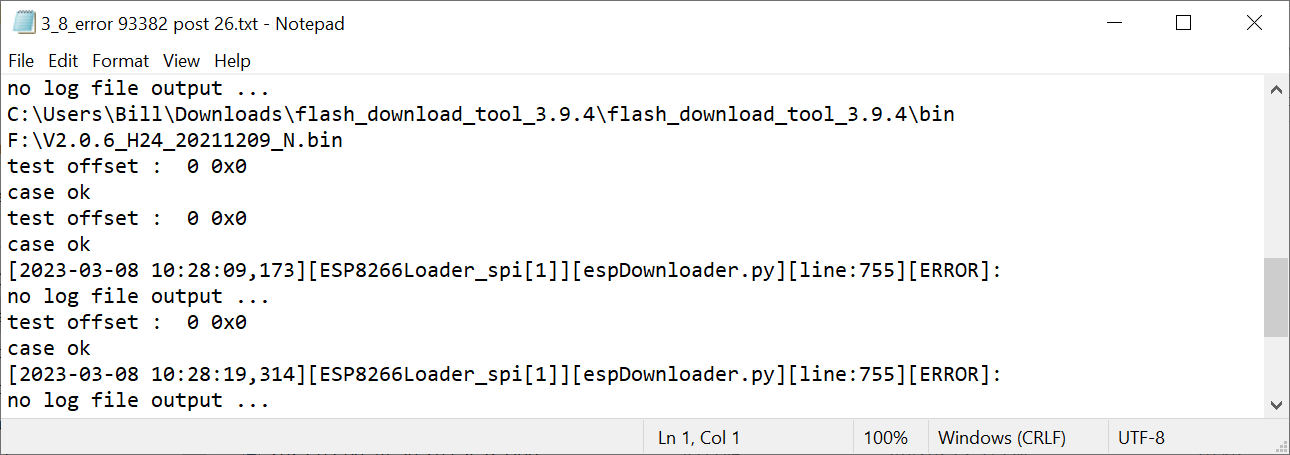
If the .bin file works and you get a finished message, stop there, close the Downloader Tool and start LightBurn. Please, attempt to connect to the controller in LightBurn. It should connect outside the engraver. It may need power other than the USB cable - it can depend on the cable. If you download to it, it should connect to LightBurn with the Download tool closed.
When LightBurn connects, as part of the start-up or welcome message in the Console window, the controller should appear as the engraver would. The build option OPT:V… for the variable spindle (laser) should be shown when LightBurn Connects.
When the controller is not connected to the rest of the engraver, Homing Errors can be expected because the limit switch state doesn’t change within the allotted number of steps counted out by the controller.
Once it’s connected and after the homing error (if it happens) please request the Machine Settings report $$ from the Console window in LightBurn.
Please copy and paste the Welcome Message and the Machine Settings report into a reply here.
We can compare these settings to what you shared previously and set them back if need be. The variable spindle option is Key to getting the laser working and I get the sense that you’re really close.
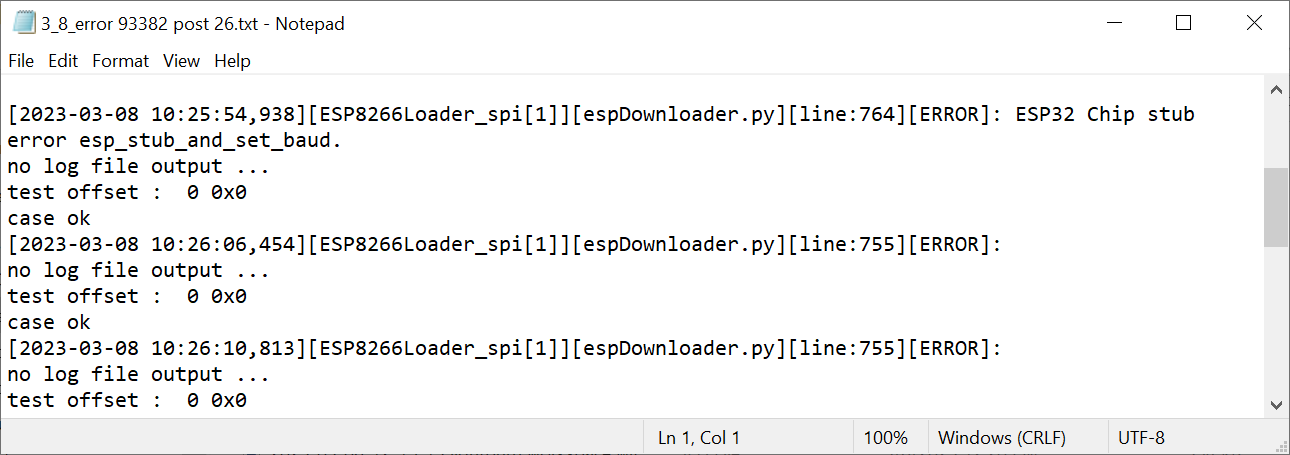
The only other thing that I would test is 80 kHz instead of 40 kHz. I did find mention of 80 kHz in the data sheet but it directly conflicted with the manufacturers instructions at GitHub. Plus, it appeared to me that you flashed a binary for an ESP 8266 into your makerbase controller.
When connected with just the USB cable, do the power and receive-data lights come on.
I’m going to get one of these on order so I can test this.