Experiences with color marking

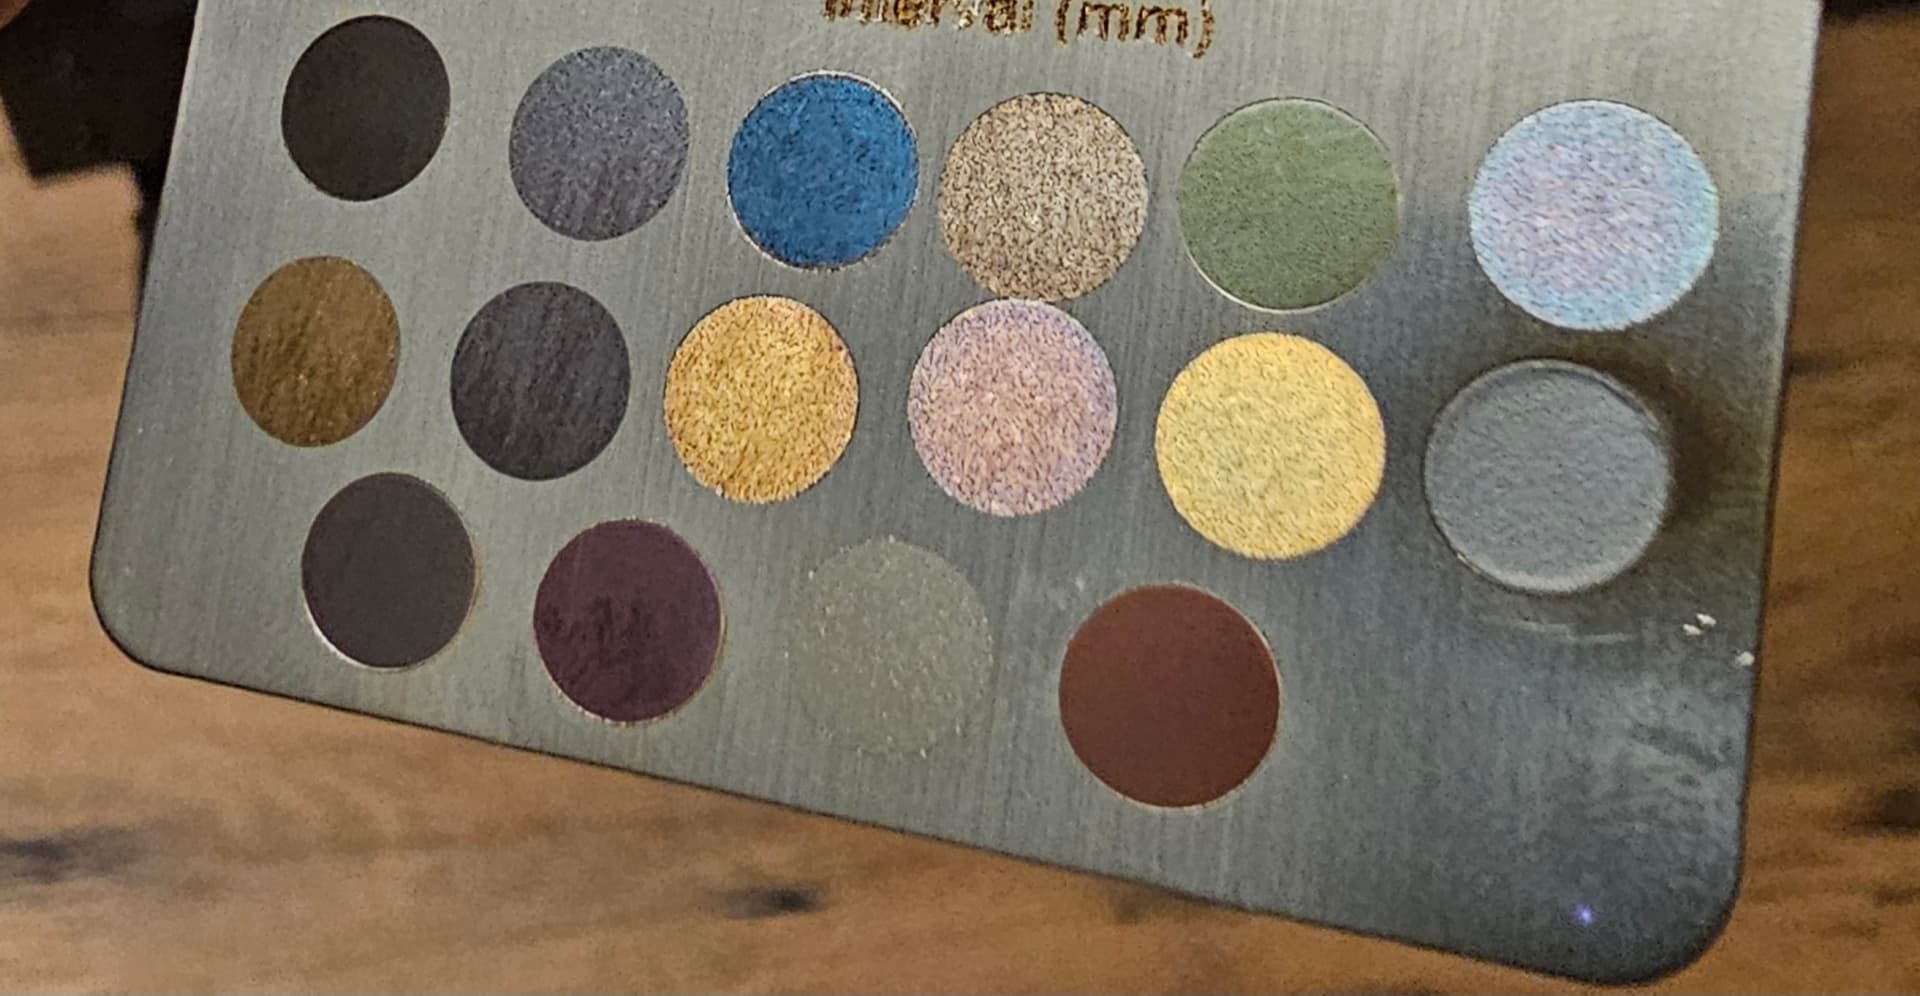
I am using a 60w jpt mopa source laser from Haotian laser. So far i have been having decent success with replicating colors. Blues, gold, “white”, black, and green are fairly easy to replicate. I am having difficulties finding a high quality red, but I’m getting there. I mainly use my 210x210 lens for color marking.

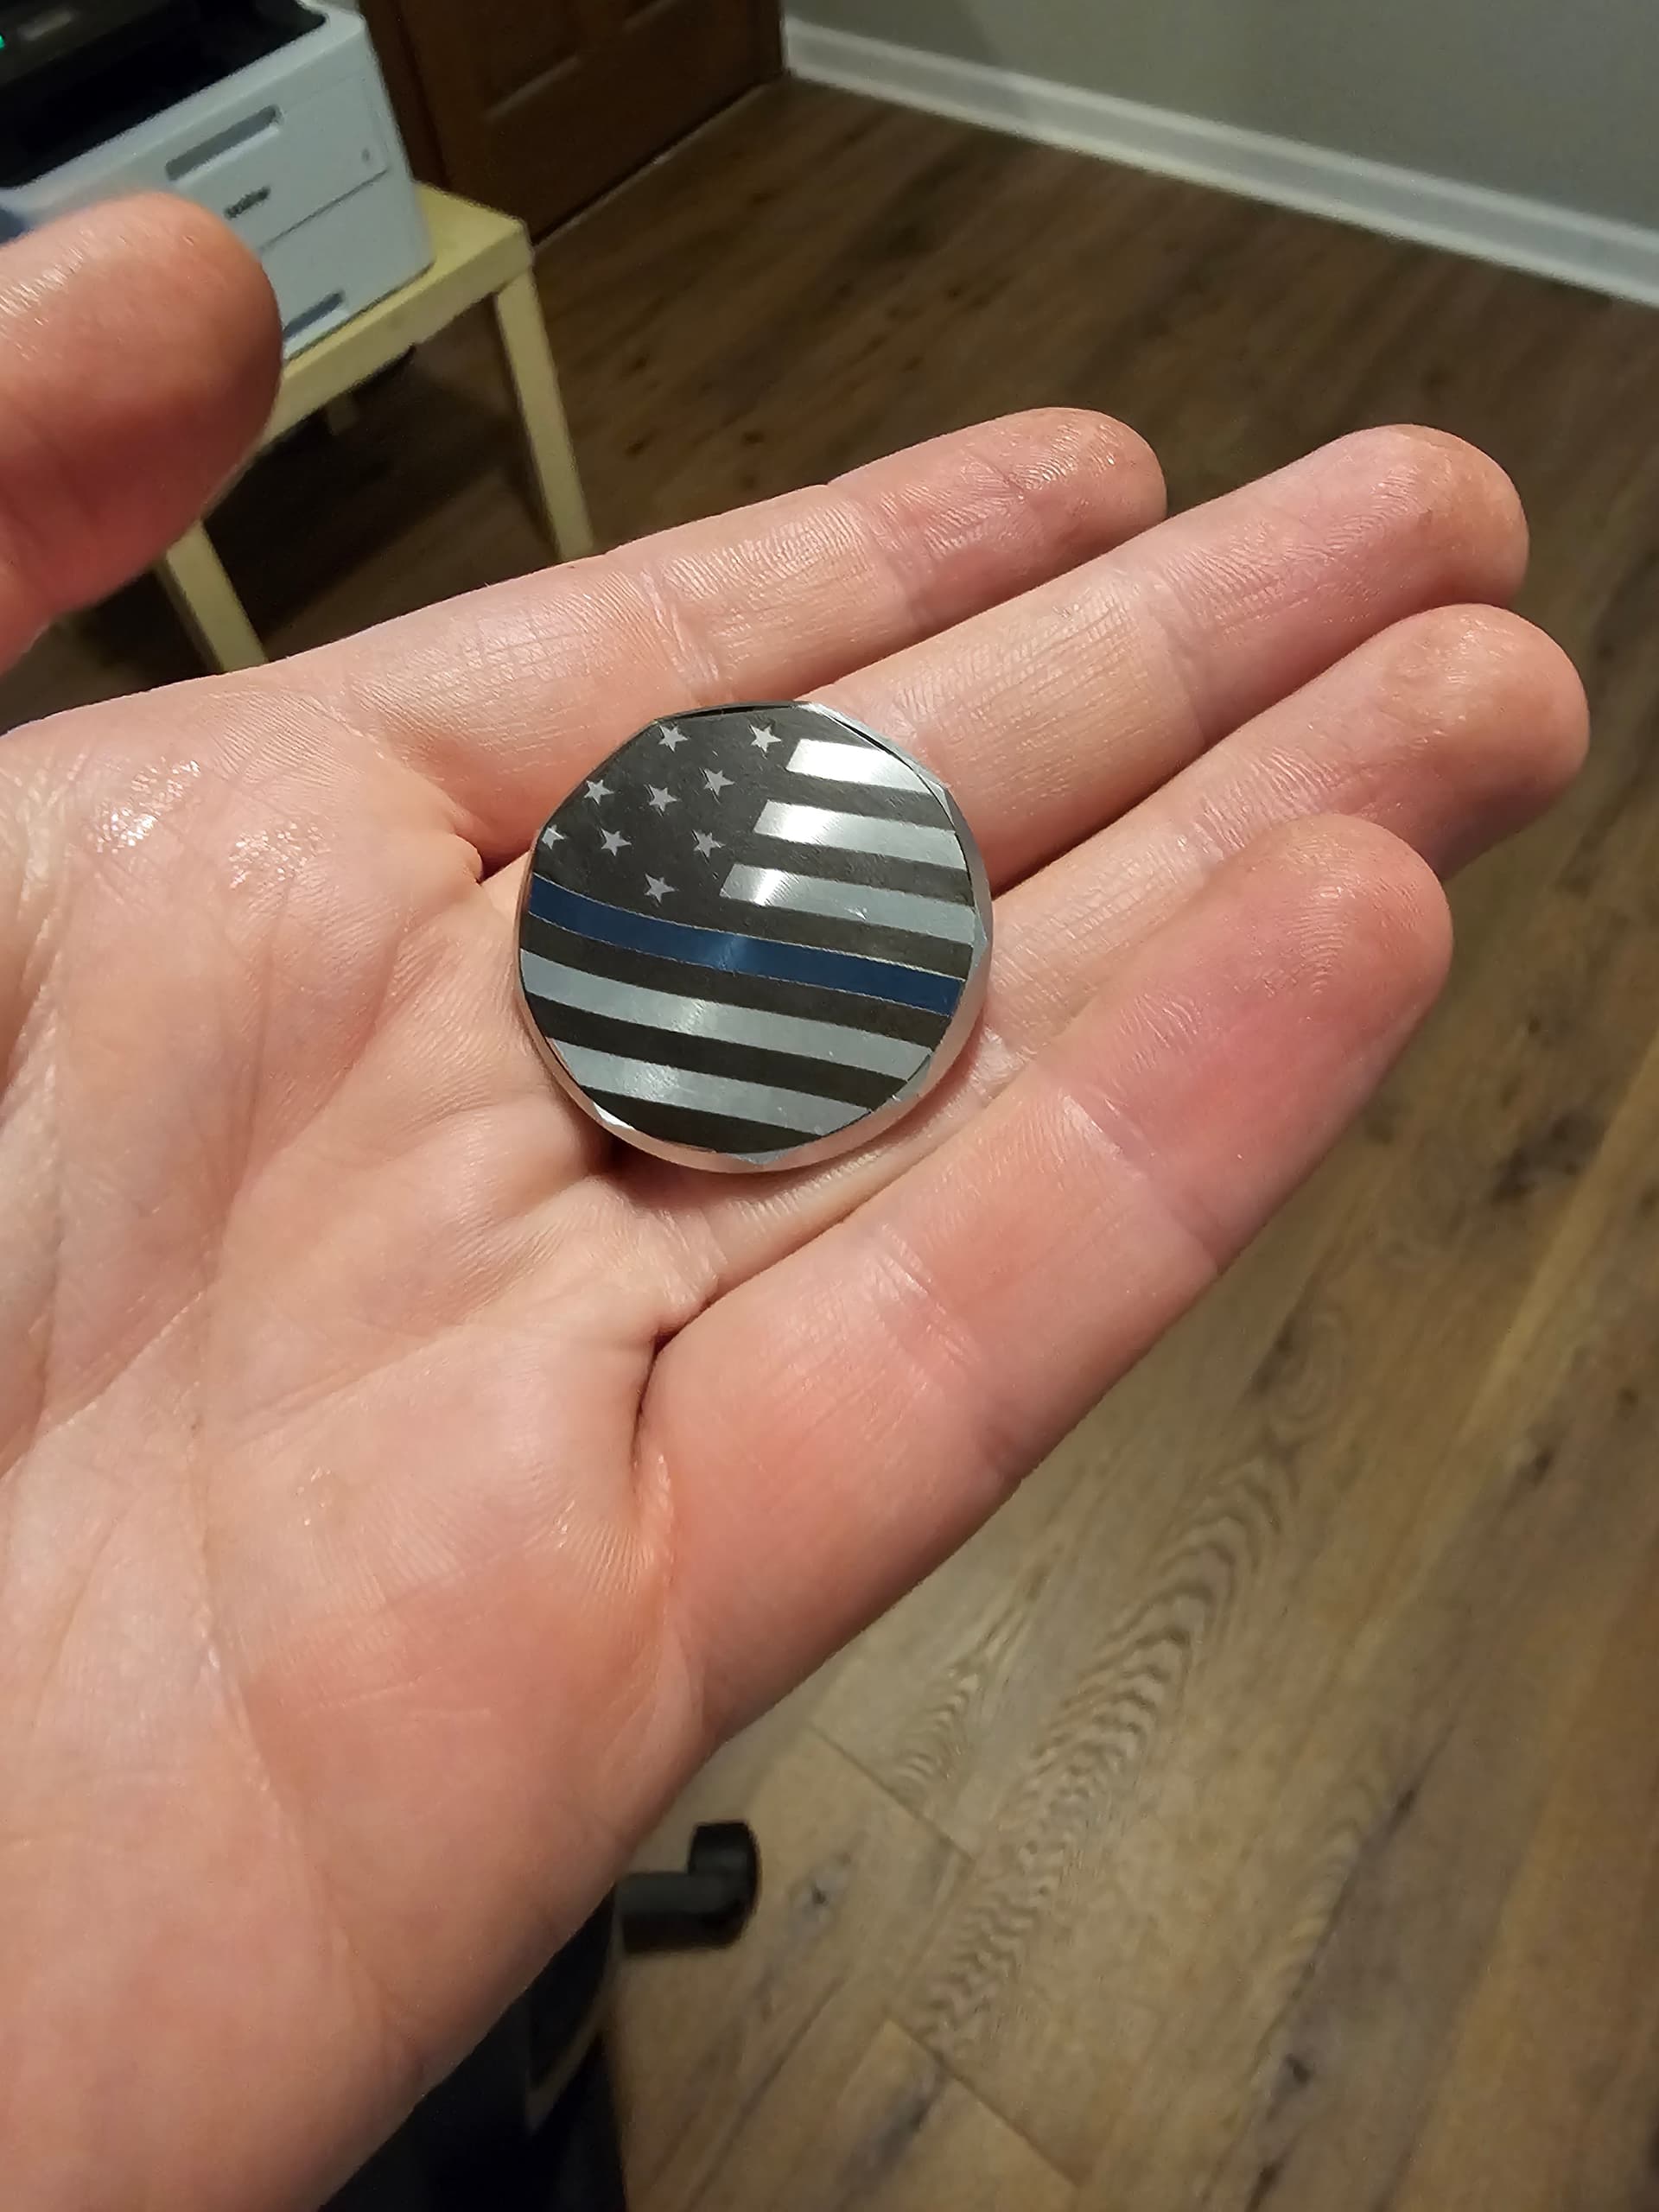
Would others like to share their colored projects? I have been doing some thin (whatever color) line flag coins on Swissbui stainless coin blanks lately that have been very popular at work.

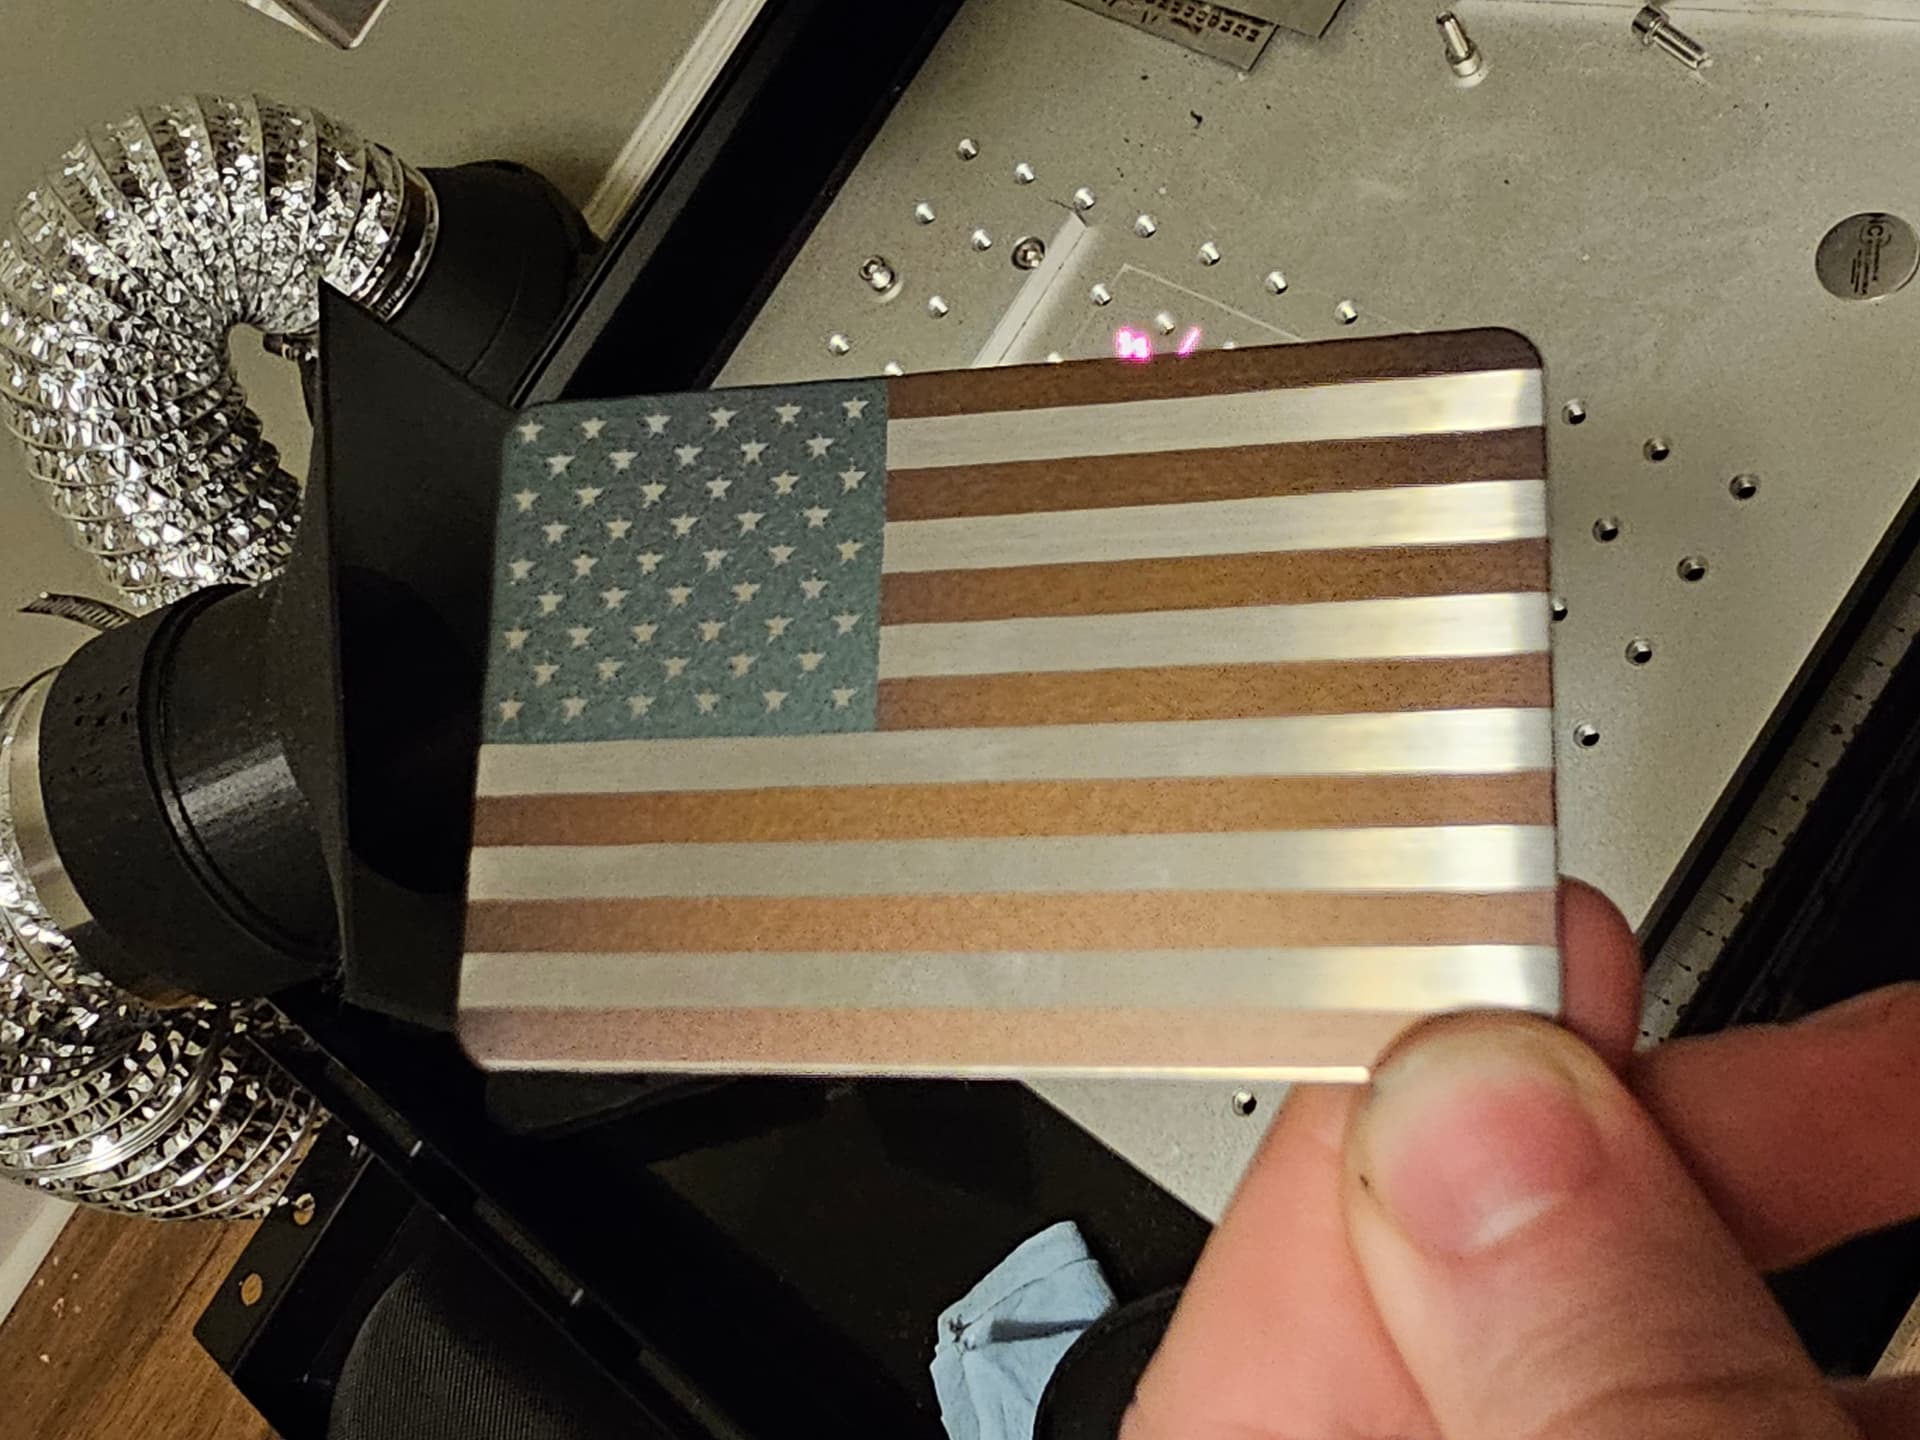
I am curious about long term durability. Will this annealing color change persist indefinitely? I’ve been keeping this flag themed steel business card wet to see if it would rust or corrode and so far so good, it hasn’t had any issues and is about a month old.

I’m mostly happy with the colors I’m getting (although I feel a better red is out there… any reds from small material grids i have tried seem to end up brown when scaled up). I do see some consistent issues with colors sometimes bleeding into small structures- in both pictures you can see some intrusions of the surrounding colors into the stars. Additionally, some very small structures may not “fill” with a color. I’m not sure of the cause, but many colors show a line on their test grids and that seems to show it isnt appropriate for filling small areas. I will try and get a picture of that later.


5 Likes

What causes the color is the oxidation/anneal that occurs with the lasers produced heat.

I’m not a metallurgist, some call it an oxidized layer, while others claim it’s a result of annealing.

Whatever the cause the mechanism of color is know. I’ll used oxidized, for simplicity…

When you heat the metal, it forms a oxidized layer. This layer will let certain frequencies of visible light go through and bounce off the UN-oxidized metal below. What doesn’t get passed through is reflected.

When this happens, the light reflected from both layers add/subtract for each other producing what our eyes perceive that color.


These layers are formed by heat and can be removed by heating it back up which will return the original surface. This is great in theory, but in reality it’s difficult to heat and maintain the proper temperature to return it to it’s original condition.

Even with an engraved item, the metal can be ground off enough to remove the engraving.

These are about the only ways I know of to remove this type of engraving. So in effect it’s permanent.


About 10% of stainless is chromium, this oxidizes so fast it’s measured in nano seconds. That’s why you can’t really scratch the a stainless steel object and/or have it corrode. The chromium prevents any type of what we call rust, because the exposed chromium has already been totally oxidized.

With variations of heat, the oxidized layer has different components causing the different colors.


As items get small it’s difficult to get the right heat to a very small area. Maybe that’s why you are loosing detail in small areas. Metals also make it more difficult as they have a tendency to conduct heat away from the target area. Ever tried copper? … not as easy to lase, one of the best heat conductors and usually a bit more costly.

The values for a thin dog tag will probably not work on the same material with a different thickness.

I’m not all knowing and have only had my fiber for a year. It has surprised me in a number of ways.

I hope I answered some of your questions…


We all learn here, so any input you have is more than welcome…

:smile_cat:

Yes, it being controlled heating and annealing / oxidation is known. It is definitely very touchy. While most of the parts I care to mark are relatively thin (cards and coins) so far it seems one can mitigate any issues on an overly small part by cooling it down to prevent warping or overheating, and keep results fairly consistent. Ive used a very shallow dish with water on extremely thin stock to mitigate the warpage temporarily.

Here is so far the “color pallette” ive landed on, sans some of the black markings. That said the colors dont show up on camera that well and are a good deal better under harsher light.

That said, ive happened upon a passable red. With a 210mm lens and 60w laser, 800mm/s at 27% power, 300 freq, and 60 ns q pulse at 0.003 looks like a pretty good contender. I’d like to find a complementary less shiny red, but this is a lot better than the orangey red I had been using.

To eliminate variables i have only experimented in 304 stainless, or at least what is claimed to be. Stainless parts are quite expensive but so far my results have been generally uniform over various Chinese part suppliers.

1 Like

That’s why I don’t use titanium …

:smile_cat:

1 Like

Indeed. I marked a few homemade titanium silencers by blasting them at high power shortly after i got my laser. I don’t personally have a need or use case to get decorative with a metal as pricy as titanium.

Hello Echd, I came across your post with the colors using a 210mm lens and 60w laser. I also have a 60w with a 210mm lens. Could you assist me by telling me the settings you got for the colors in your post? I have checked out a lot of websites but, none of the settings seem to work. Your colors are pretty bright. It would be greatly appreciated. Thank you

Sure. Here is my color library that I normally use.

To be honest though my experience has been that machines vary pretty heavily as do lenses so I would be surprised if it worked out as well for you. All you can really do is fiddle around with material tests and go from there, with the knowledge too that sometimes you can’t reliably duplicate what shows up in the tests on larger parts.

I normally do a “white” pass first. If you make your white layer a fraction larger than your color layer it also seems to help the colors pop a bit more by contrast.

STAINLESSCOLORS.clb (13.5 KB)

Hi Echd, thank you for sharing with me your research. Greatly appreciated. Can’t wait to try this out. But, before I do, you mentioned something called a white pass. I have never heard of this. What would the settings be for a white pass before colorizing the stainless steel. I am also assuming these settings would be under the same equipment of 60w mopa with 210mm lens. Again, thank you for your help.

By a “white pass” i just mean with a white color layer under whatever I’m going to try and color. There should be a “white” color in the library. I mormally just make an outline a few thousandths smaller than the area i want colored and then just make that white inside. White is the fastest color to lase anyway.

Perhaps “white” is a bit of a misnomer. It will give stainless a brighter, rather white-ish appearance.

Got it! I thought you were speaking of a clean pass but, this helps a lot. Thank you so much.

1 Like