I’m experiencing extra burn spots or excessive burning at certain points while engraving text in Line mode using my NEJE Master 2S Plus with an A40640 laser module. The issue appears as small dots or burn marks at the corners or along the edges of letters.
Laser Details:
Model: NEJE Master 2S Plus
Laser Module: A40640
LightBurn Settings:
Mode: Line
Speed: 3500 mm/min
Power: 60%
Overscanning: Disabled
Problem Description:
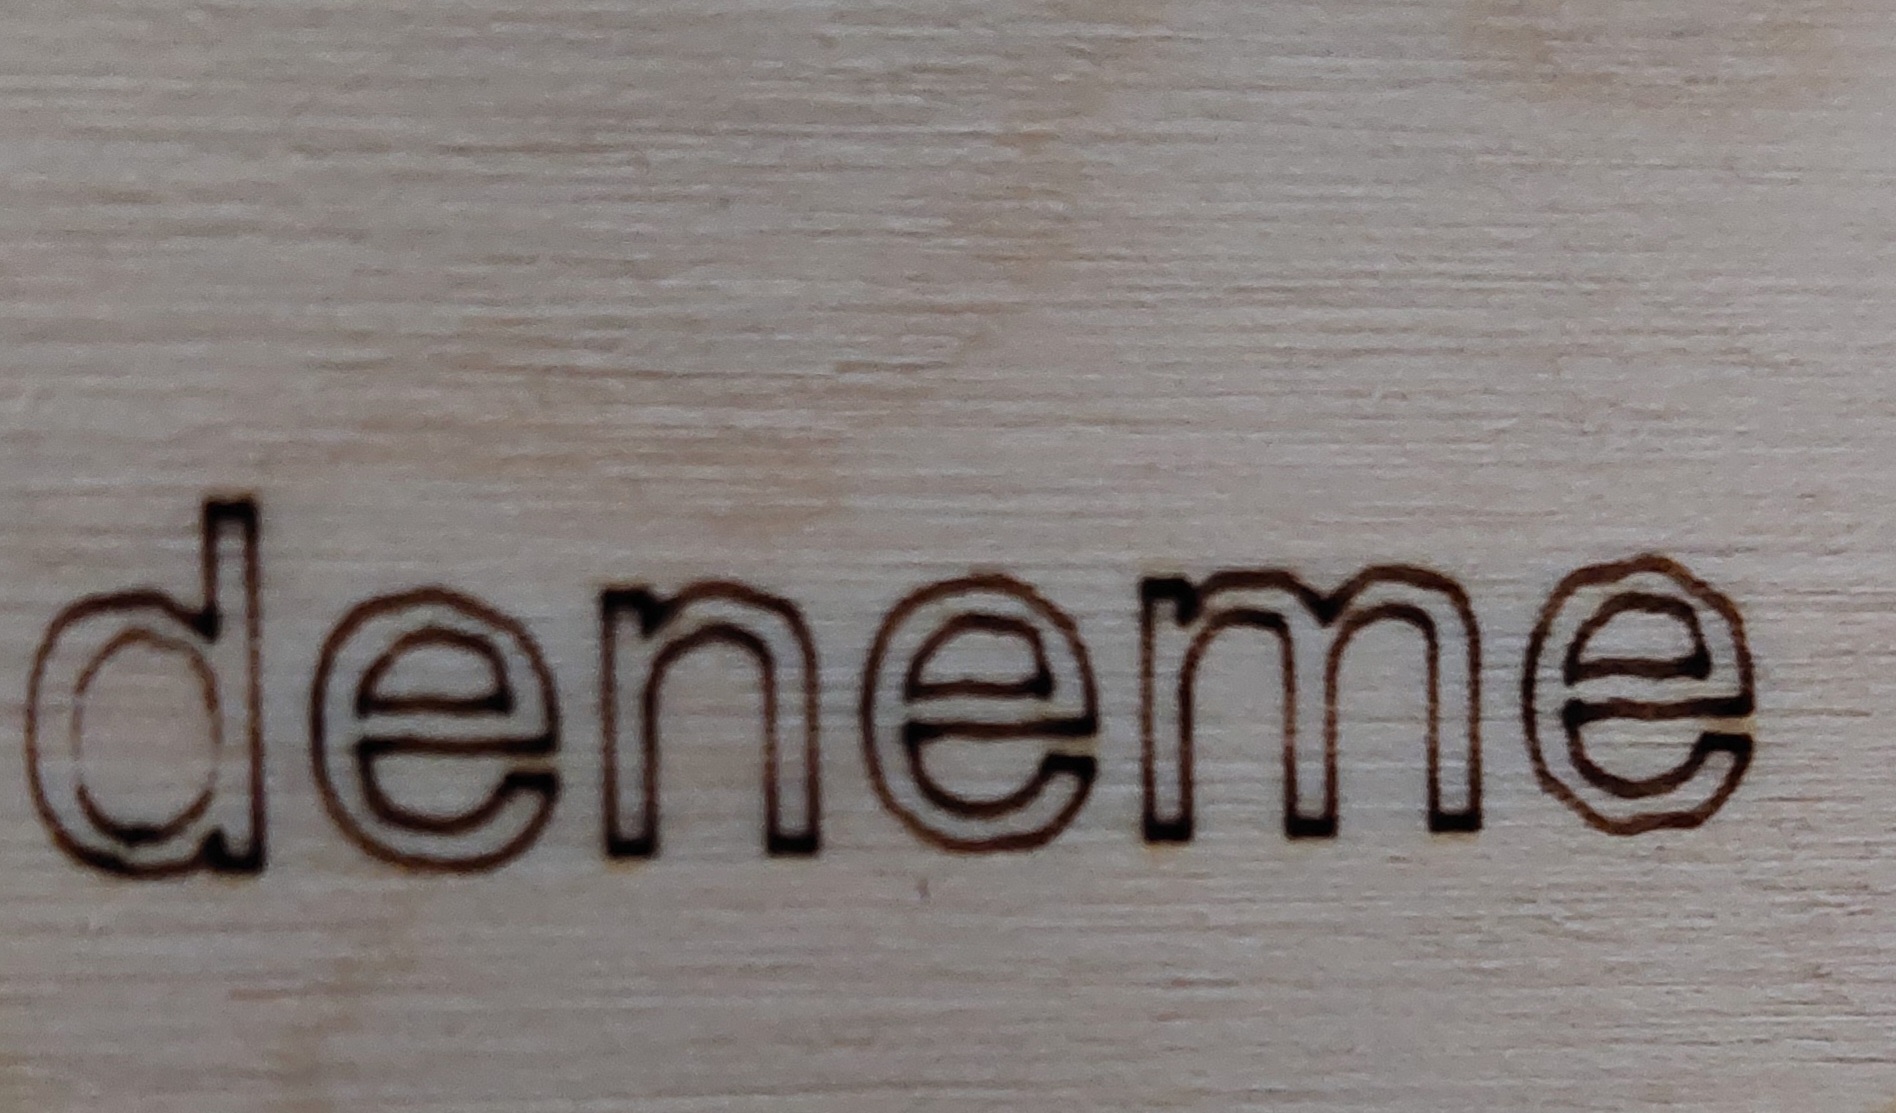
While engraving text, extra burn spots appear at the corners or edges of some letters.
This is more noticeable on sharp corners (e.g., the letter “T” or “L”).
It seems like the laser pauses too long or releases excessive power at certain points.
note: Can someone provide the optimal machine settings and device settings for this setup to avoid axis issues and achieve better accuracy in LightBurn? I’d also appreciate a sample .lbset or .lbdev file if available.
Unless that’s a peculiar font, the uneven edges show the machine has mechanical backlash due to looseness, mainly in the Y axis, but also some in the X axis. You should fix that first to simplify the rest of the diagnosis.
Start with a known-good test pattern to isolate the mechanical problems:
Scale it to fit the platform and run it as fast as it will go in Line mode with optimizations turned off and power set to mark a sheet of cardboard. Any difference between the shapes in the LightBurn workspace and the actual results on the cardboard will indicate there’s more backlash to track down.
This tuneup guide was written for Sculpfun lasers, but you’ll recognize most of the mechanical parts and places to check:
Upload good photos of the result so we can look over your shoulder.
Overscanning has no effect on layers set to Line, because it applies only to the back-and-forth motion on Fill layers.
Mechanical backlash contributes to that problem, because the laser head stops when the direction reverses and resume moving only after the motor turns enough to take up the backlash.
There may be other causes, but fixing backlash comes first.
Follow @ednisley’s suggestions on the mechanics. You have some fundamental issues going on there.
On top of that in terms of the overburn I suspect there may be one of two things going on:
You’ve enabled Constant Power Mode in cut setting. If so, disable and retry.
You’re not configured to the correct device type. Push Devices button in Laser window, then click once on the name of your laser. Does the device type show as “GRBL”, and not any variant? If not, edit device and switch to GRBL.
This is the first time in my life that I’ve asked a question on a forum, and even before trying out the suggestions, just receiving answers made me incredibly happy.
@ednisley : Thank you so much for the valuable information. I’m stabilizing my machine to reduce wobbling.
@berainlb : I turned off Constant Power Mode, and my dot-burning issue is officially resolved! Thank you so, so, so much! I’m attaching a test I did with Constant Power Mode both on and off for comparison.
I have only one problem left: I can’t use the entire work area that I see in the software with my laser. For example, when I draw an object near the edges, the laser head moves there but makes a grinding noise (like a drill sound), as if it’s trying to move further but can’t because it has reached its limits.
As far as I know, my laser is a Neje Master 2S Plus, and the work area should be 255 x 420 mm, which is what I’ve set up. However, I can’t seem to get it right. I’ve tried several configurations I found online, but I keep running into different issues. I’m afraid of damaging the machine.
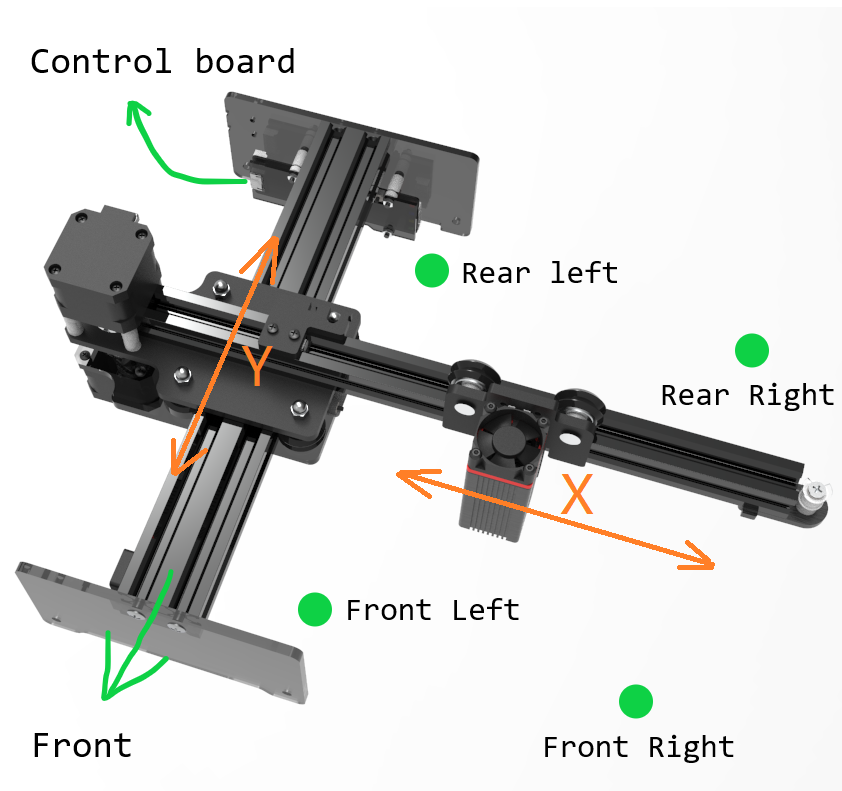
I’m attaching a photo of my laser in the home position, as well as my Device Settings and Machine Settings. Also, because of the edge issues, I’ve been working only in the center, but in some configurations, the laser head crashes into the top after finishing the job.
From memory I believe that machine homes top-left but should set the home position as 0,420 such that origin is still at bottom-left.
Are you ever moving the laser head by hand? If so, you should stop doing that as controller will lose position of the laser. Only use the jogging controls in Move window to move the laser head after it’s homed.
Also, I suggest you use Absolute Coords in Laser window until you’re very familiar with the function of your laser. That makes it such that the position in LightBurn’s workspace is where on your laser bed that it will burn.
If you are already doing both of those things then please do the following:
Run these commands in Console and return the full output:
$H
$I
$$
$#
?
Take a full screenshot of LightBurn with your design loaded and ready to burn.